How to use Visual Studio Code to deploy applications to SQL Server Big Data Clusters
Applies to: ![]() SQL Server 2019 (15.x)
SQL Server 2019 (15.x)
This article describes how to deploy applications to a SQL Server big data cluster. We'll use Microsoft Visual Studio Code and the App Deploy extension.
Important
The Microsoft SQL Server 2019 Big Data Clusters add-on will be retired. Support for SQL Server 2019 Big Data Clusters will end on February 28, 2025. All existing users of SQL Server 2019 with Software Assurance will be fully supported on the platform and the software will continue to be maintained through SQL Server cumulative updates until that time. For more information, see the announcement blog post and Big data options on the Microsoft SQL Server platform.
Prerequisites
Capabilities
The App Deploy extension supports the following tasks in Visual Studio Code:
- Authenticates with SQL Server big data cluster.
- Retrieves an application template from GitHub repository for deployment of supported runtimes.
- Manages application templates currently open in the user's workspace.
- Deploys an application through a specification in YAML format.
- Manages deployed apps within SQL Server big data cluster.
- Displays all apps that you have deployed in the side bar with additional information.
- Generates a run spec to consume the app or delete the app from the cluster.
- Consumes deployed apps through a run specification YAML.
The following sections walk through installation of App Deploy. They also provide an overview on how it works.
How to install the App Deploy extension in Visual Studio Code
In Visual Studio Code, install the App Deploy extension:
To install App Deploy as part of Visual Studio Code download the extension from GitHub.
Launch Visual Studio Code and navigate to the Extensions sidebar.
Click the
…context menu on the top of the side bar and selectInstall from vsix.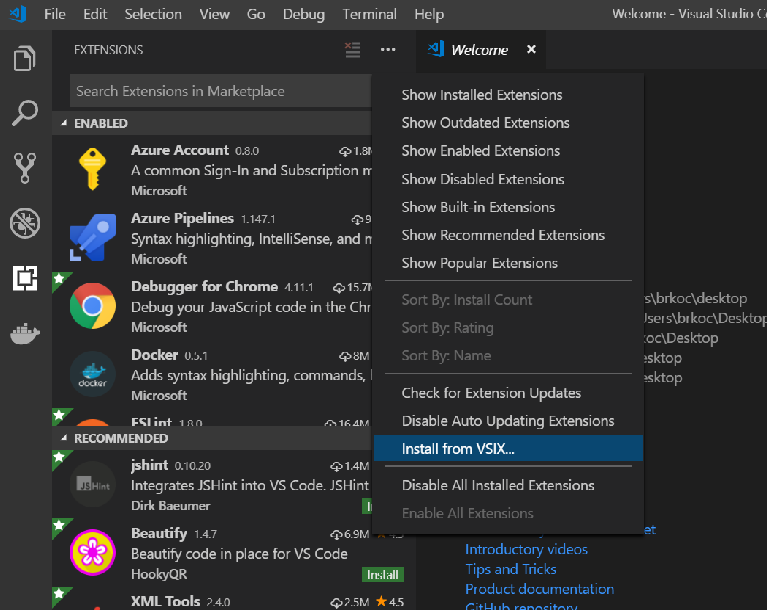
Find the
sqlservbdc-app-deploy.vsixfile you downloaded and choose it to install.
After App Deploy successfully installs, it prompts you to reload Visual Studio Code. You should now see the SQL Server BDC App Explorer in the Visual Studio Code sidebar.
Load App Explorer
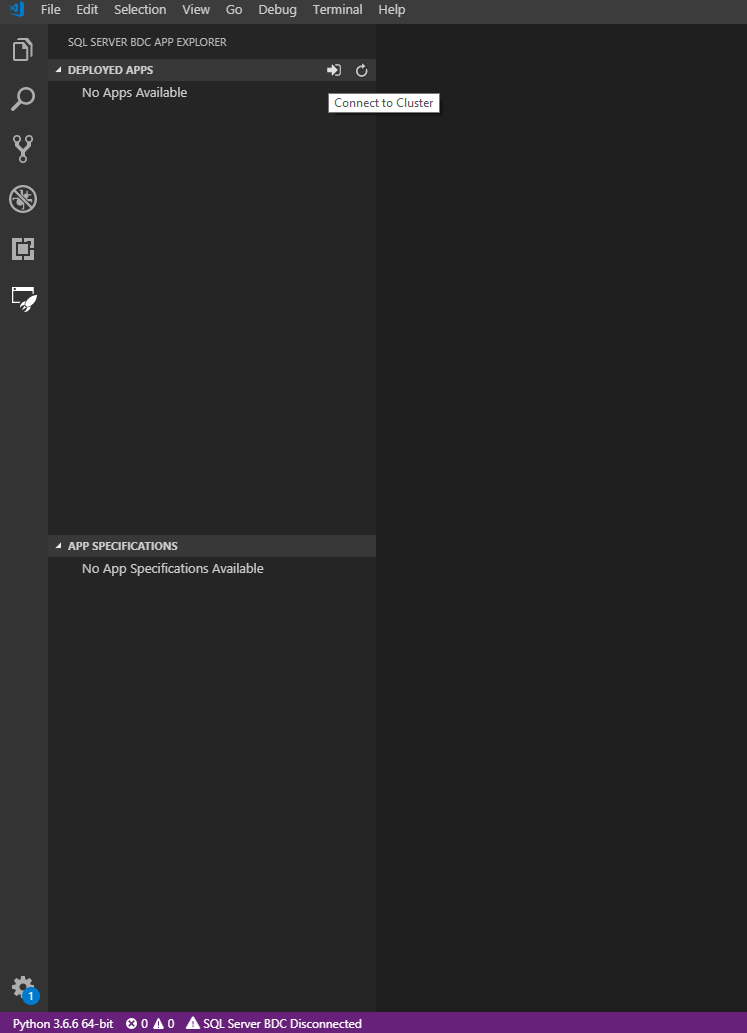
Select the Extensions icon in the sidebar. A side panel loads and displays App Explorer.
Connect to the cluster endpoint
You can use any of the following methods to connect to the cluster endpoint:
- Click on the status bar at the bottom that says
SQL Server BDC Disconnected. - Or click on the
Connect to Clusterbutton at the top with the arrow pointing into a doorway.
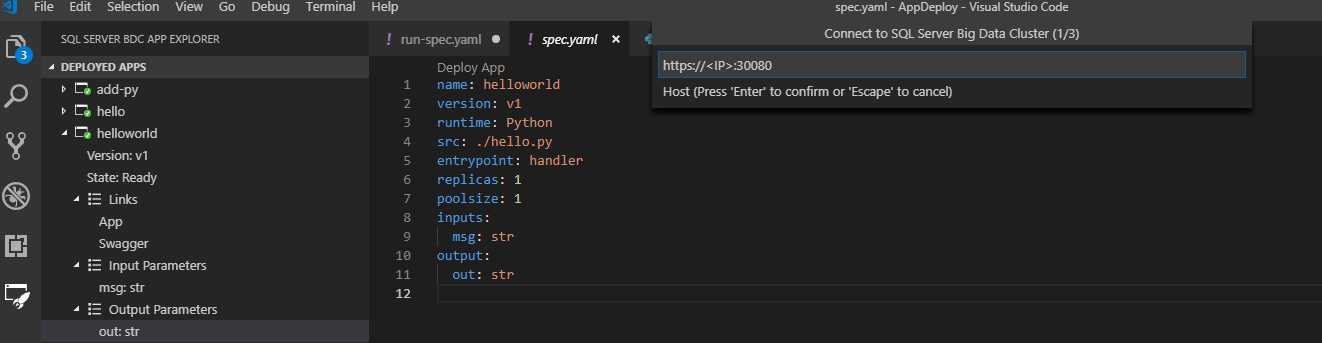
Visual Studio Code prompts you for the appropriate endpoint, username, and password.
Connect to the endpoint Cluster Management Service with port 30080.
You can also find this endpoint from the command line with the following command:
azdata bdc endpoint list
Another way to retrieve this information is to navigate to the server in Azure Data Studio and right-click Manage. The endpoints for services are listed.
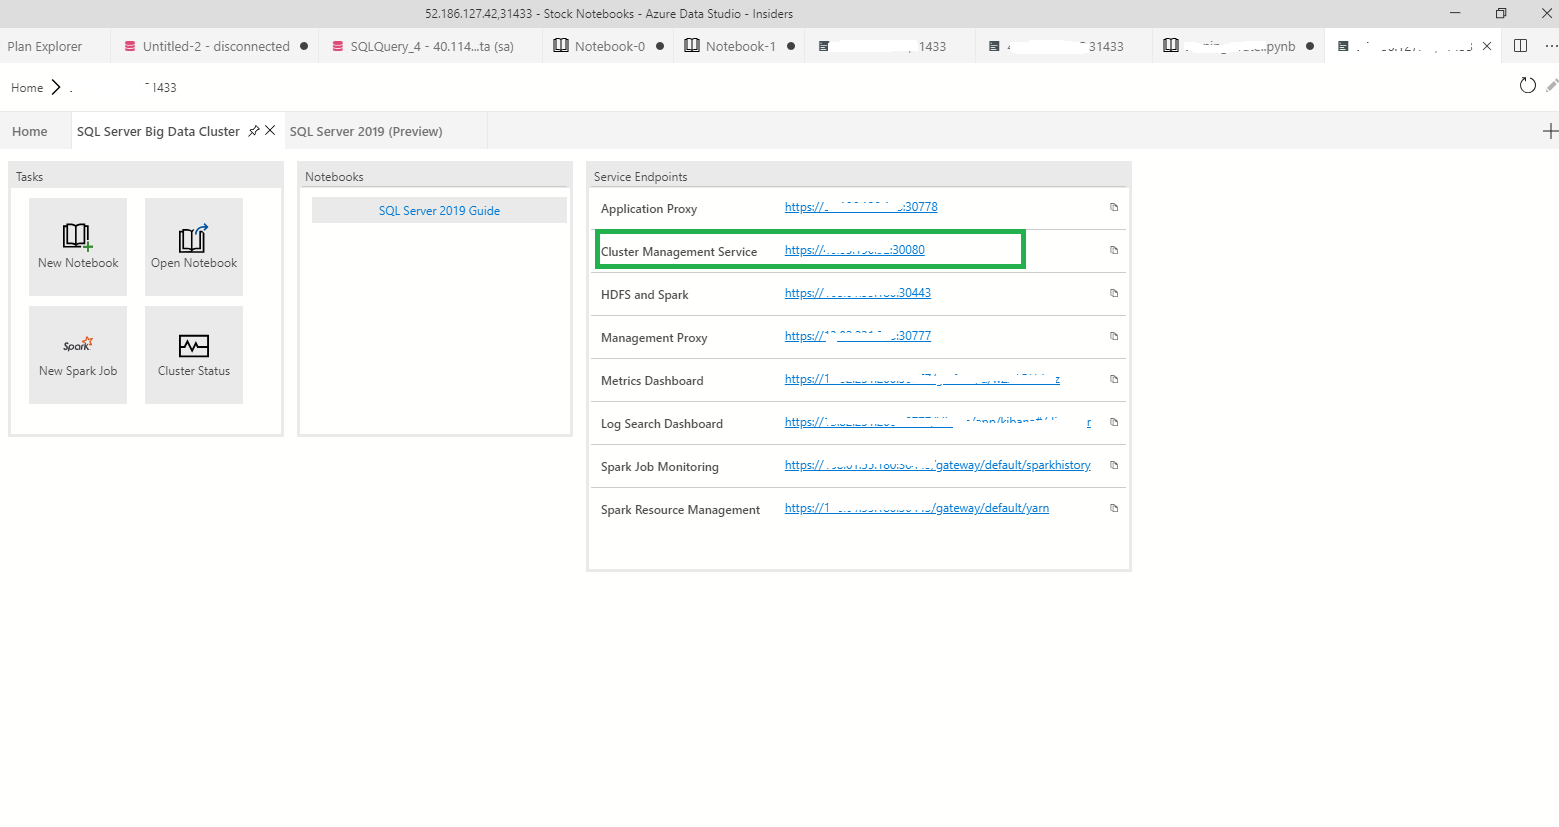
Find the endpoint you want to use, then connect to the cluster.
Upon successful connection, Visual Studio Code notifies you that you're connected to the cluster. Deployed apps are displayed in the sidebar and your endpoint and username are saved to ./sqldbc as part of your user profile. No password or tokens are ever saved. With subsequent log ins, the prompt pre-fills with your saved host and username, but always requires you to input a password. If you wish to connect to a different cluster endpoint, select New Connection. The connection is automatically closed when you exit Visual Studio Code and when you open a different workspace. You will then need to reconnect.
Create an App Template
In Visual Studio Code, open a workspace in the location where you want to save your app artifacts.
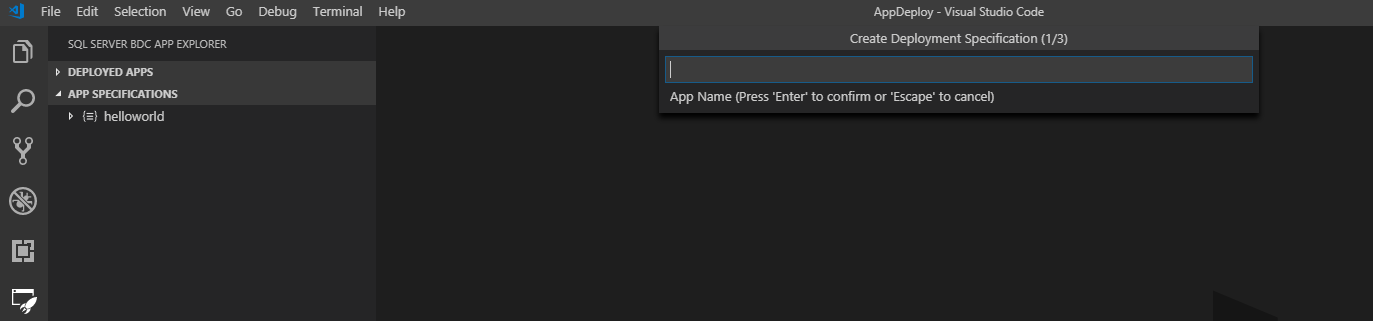
To deploy a new app from a template, select the New App Template button on the App Specifications pane. A prompt asks you where on your local machine you want to save the name, runtime and the new app. The name and version that you provide should be a DNS-1035 label and must consist of lower-case, alphanumeric characters, or '-'. They need to also start with an alphabetic character and end with an alphanumeric character.
Preferably place the extension in your current Visual Studio Code workspace. This gives you the full functionality of the extension.
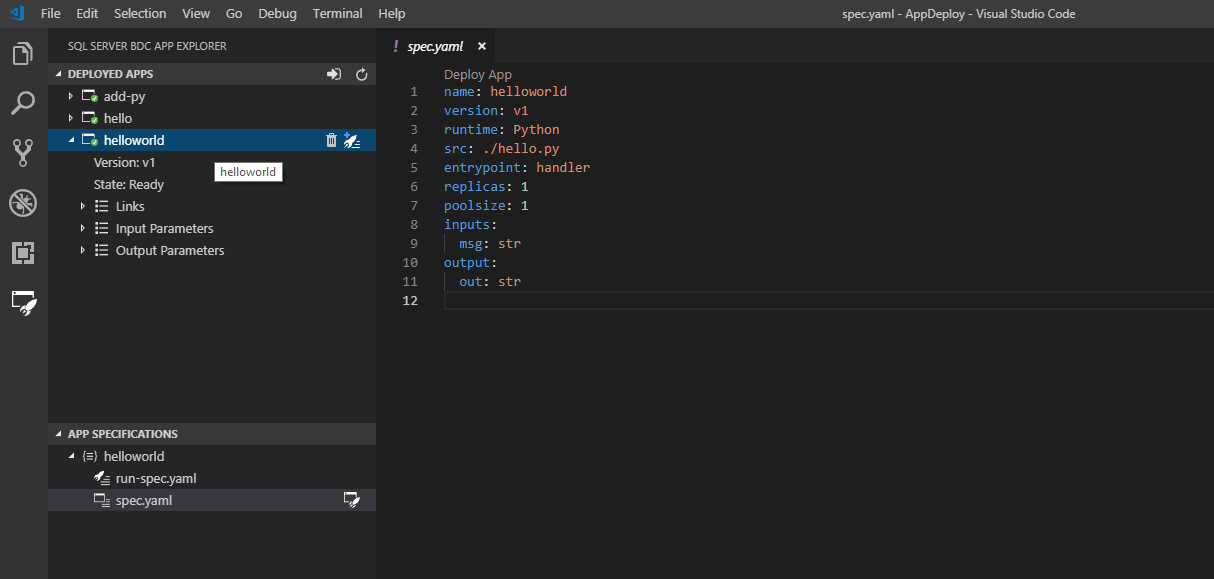
Once complete, a new app template is scaffolded for you in the location you specify, and the deployment spec.yaml opens in your workspace. If the directory you select is in your workspace, it'll be listed in the App Specifications pane:
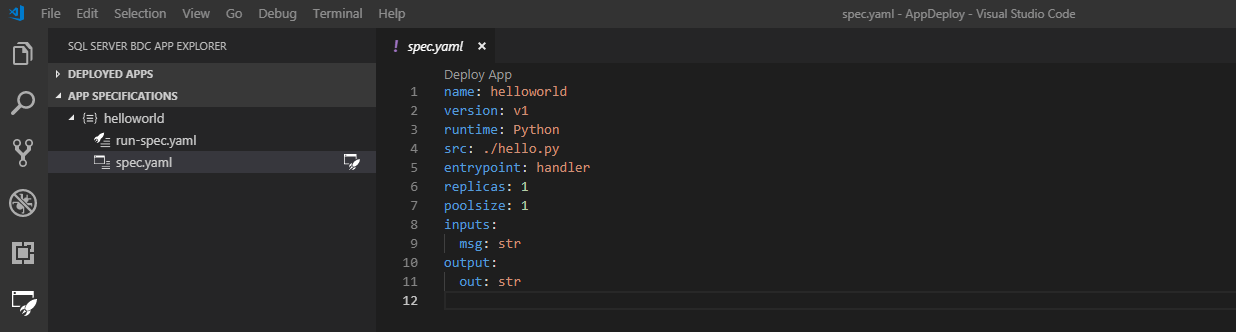
The new template is a simple helloworld app that is laid out in the App Specifications pane as follows:
- spec.yaml
- Tells the cluster how to deploy your app
- run-spec.yaml
- Tells the cluster how you'd like to call your app
The app source code is in the Workspace folder.
- Source file name
- This is your source code file as specified by
srcinspec.yaml - It has one function called
handlerthat is considered theentrypointof the app as shown inspec.yaml. It takes in a string input calledmsgand returns a string output calledout. These are specified ininputsandoutputsof thespec.yaml.
- This is your source code file as specified by
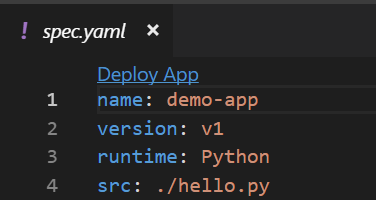
To use spec.yaml to deploy an app rather than a scaffolded template, select the New Deploy Spec button, which is next to the New App Template button. Now repeat the same process. You will only receive the spec.yaml, which you are free to modify.
Deploy your app
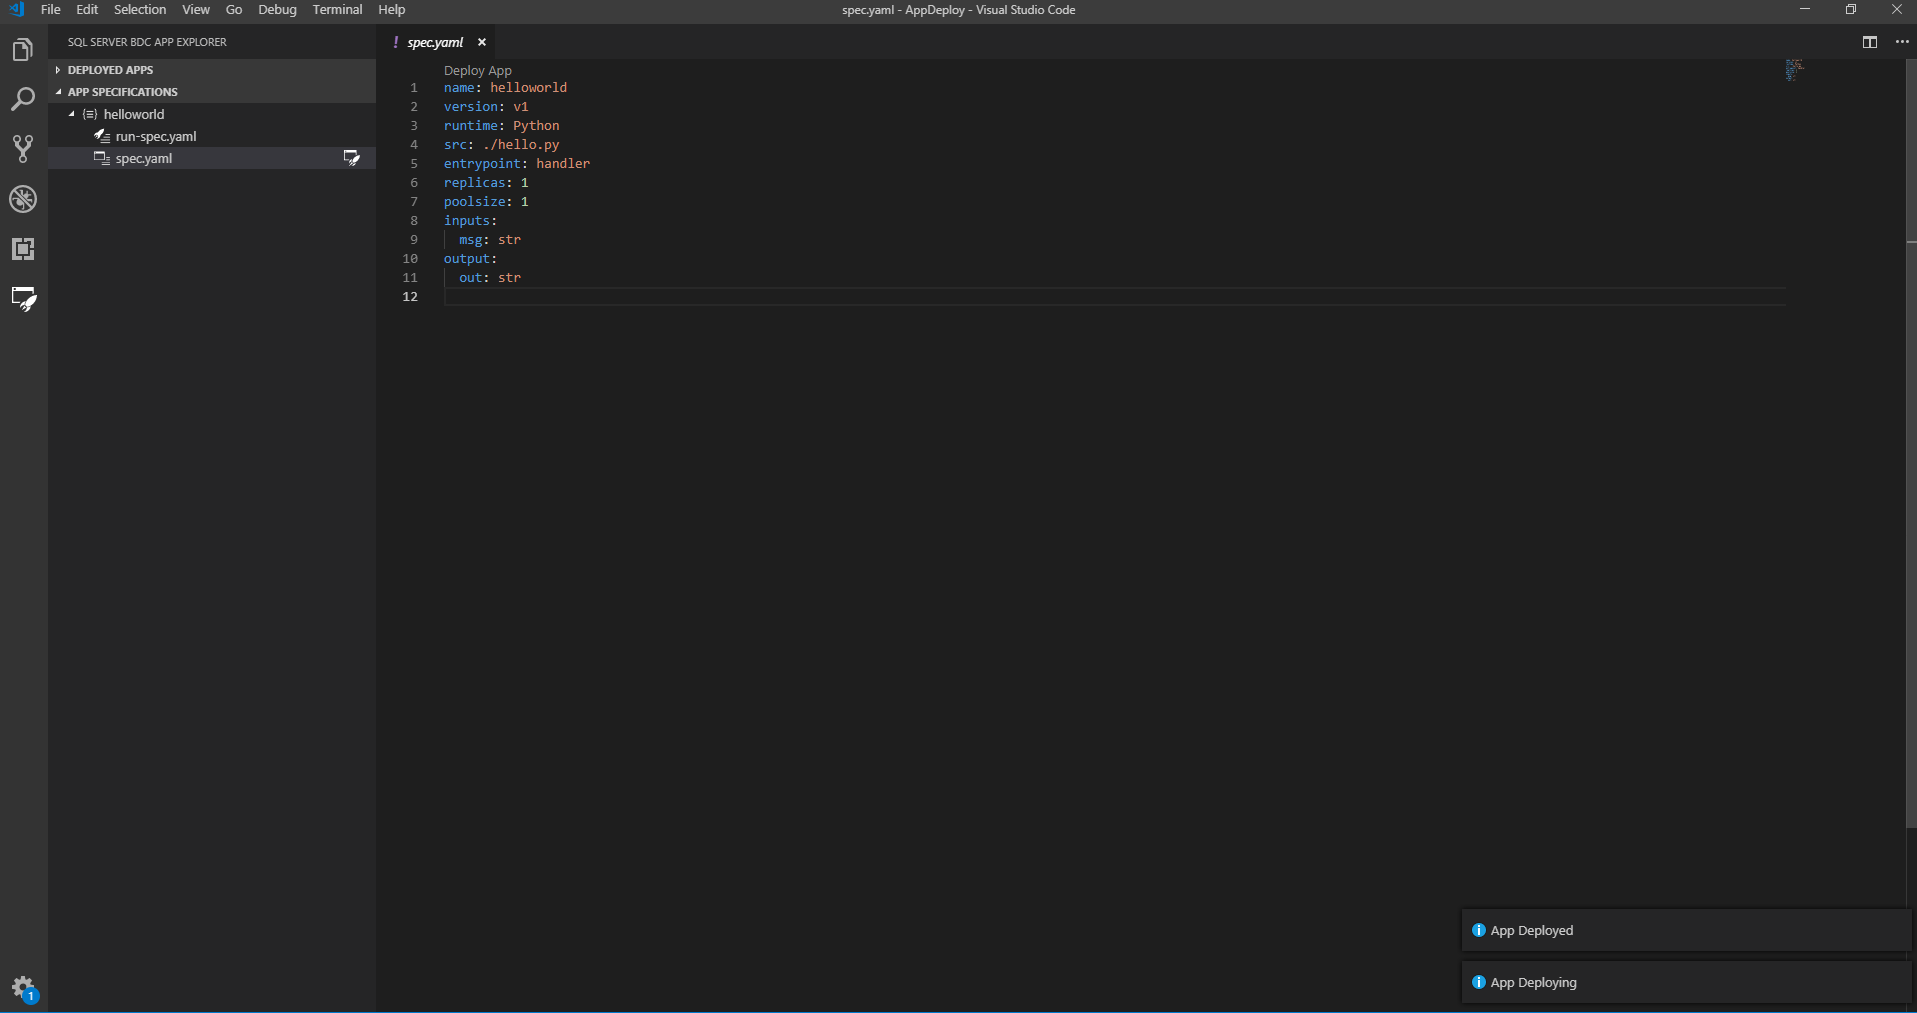
You can deploy your app instantly through the CodeLens Deploy App in the spec.yaml or select the Lightning folder button next to the spec.yaml file, in the App specifications menu. The extension will zip all of the files in the directory where your spec.yaml is located. It'll then deploy your app to the cluster.
Note
The spec.yaml must be at the root level of your app source code directory. Also ensure that all of your app files are in the same directory as your spec.yaml.

The app status in the sidebar notifies you when it is ready to be used:

From the side pane, you can see the following:
You can view all of the apps you have deployed with the following links:
- state
- version
- input parameters
- output parameters
- links
- swagger
- details
If you click links, you will see that you can access the swagger.json of your deployed app. This enables you to write clients to call your app:
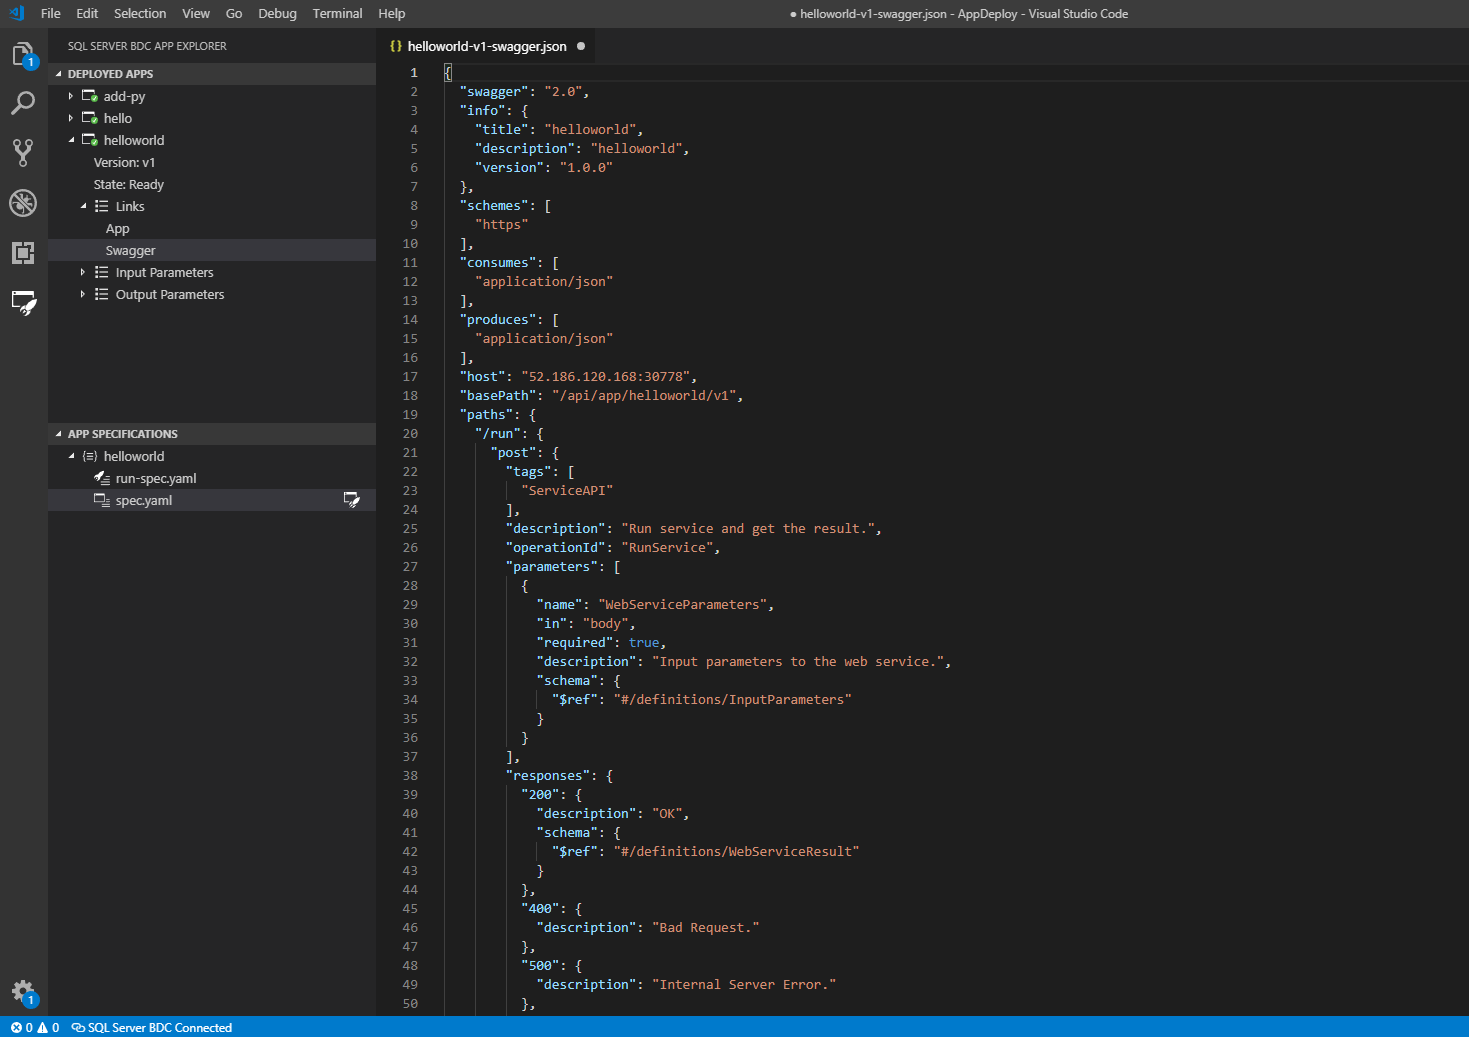
For more information, view Consume applications on big data clusters.
Run your app
Once your app is ready, call it with run-spec.yaml. This file is provided as part of the app-template:
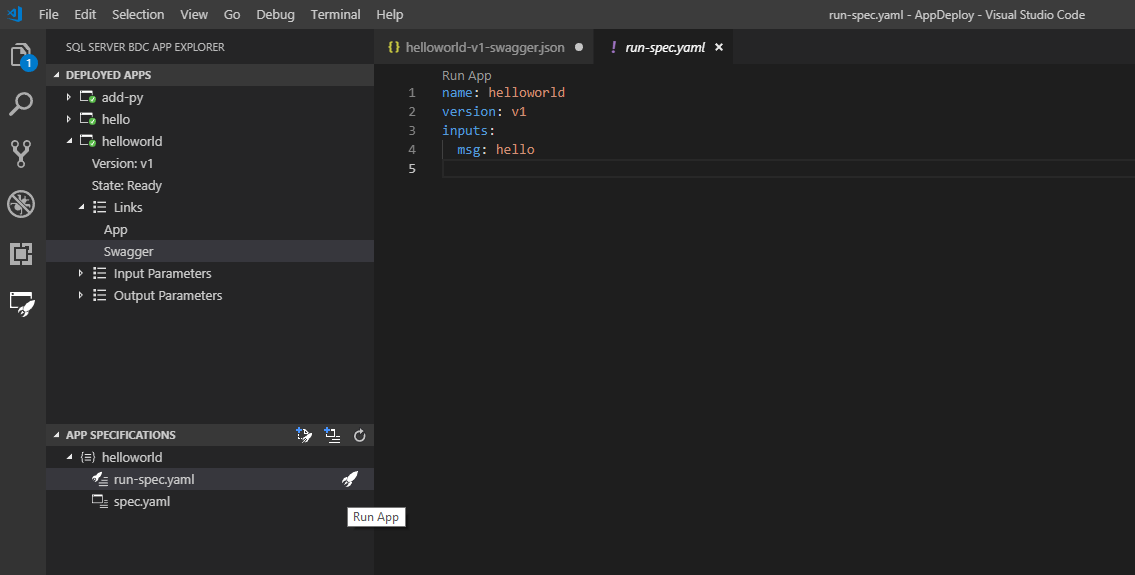
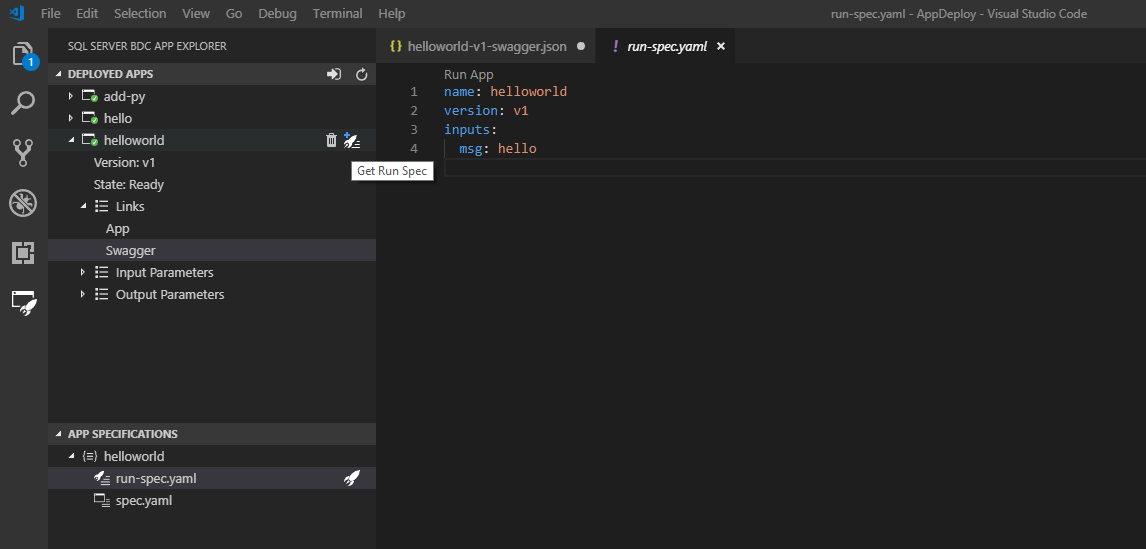
Specify a string to replace hello. Then run your app again through the CodeLens link or the Lightning button in the side bar. If you don't see the run-spec option, generate one from the deployed app in the cluster:
Once you have edited your run-spec, run it. Visual Studio Code returns feedback when the app finishes running:
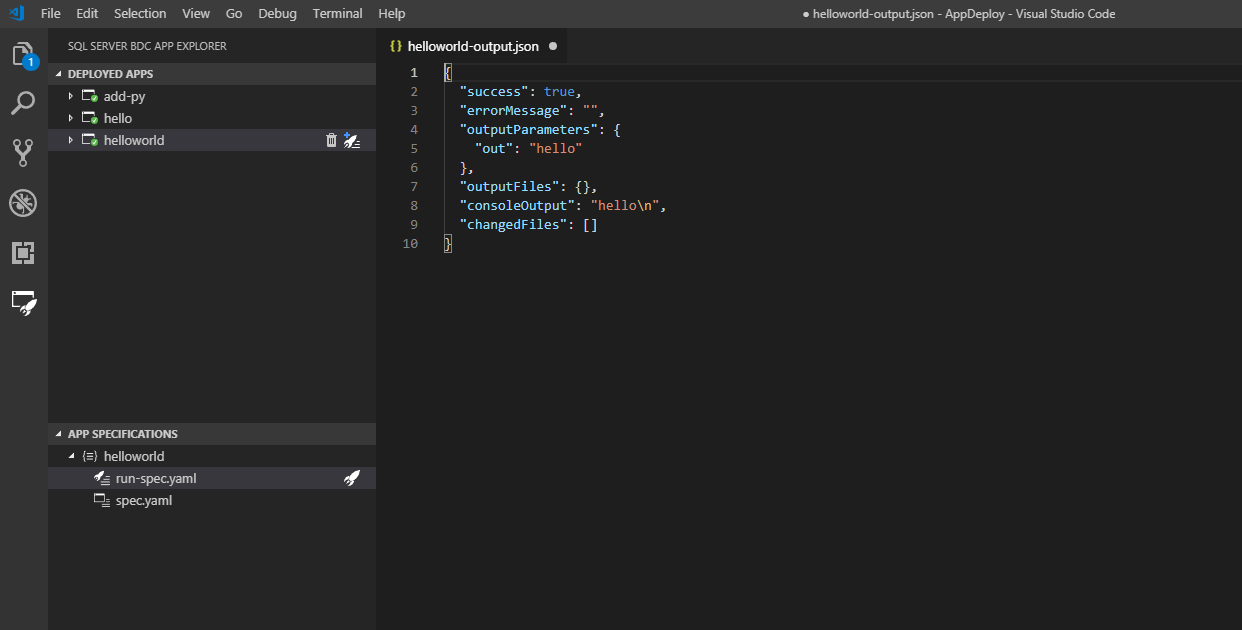
In the previous screenshot, you'll see the output is given in a temporary .json file in your workspace. If you would like to keep this output, you can save it. Otherwise, it is deleted upon closing. If your app has no output to print to a file, you'll only get the Successful App Run status notification. If you don't have a successful run, you receive an error message that will help you determine what is wrong.
When running an app, there are a variety of ways to pass parameters:
You can specify all inputs required through a .json, that is:
inputs: ./example.json
Specify the parameter type in line when a deployed app is called and input parameters are not primitives. So, with arrays, vectors, dataframes, complex JSONs, etc.:
- Vector
inputs:x: [1, 2, 3]
- Matrix
inputs:x: [[A,B,C],[1,2,3]]
- Object
inputs:x: {A: 1, B: 2, C: 3}
Or pass a string to a .txt, .json, or .csv file in the format that your app requires. In this instance, file parsing is based on Node.js Path library, where a file path is defined as a string that contains a / or \ character.
If a required input parameter is not provided, an error message is displayed. It provides the incorrect file path if a string file path was given, or it states that the parameter was invalid. The app creator needs to ensure they understand the parameters that they define.
To delete an app, go to the app in the Deployed Apps side pane and select the trash can icon.
Next steps
Explore how to integrate apps deployed on SQL Server Big Data Clusters in your own applications at Consume applications on big data clusters for more information. You can also refer to the additional samples at App Deploy Samples to try with the extension.
For more information about SQL Server Big Data Clusters, see Introducing SQL Server 2019 Big Data Clusters.
Our goal is to make this extension useful for you and we appreciate your feedback. Please send them to SQL Server team.
Opinia
Dostępne już wkrótce: W 2024 r. będziemy stopniowo wycofywać zgłoszenia z serwisu GitHub jako mechanizm przesyłania opinii na temat zawartości i zastępować go nowym systemem opinii. Aby uzyskać więcej informacji, sprawdź: https://aka.ms/ContentUserFeedback.
Prześlij i wyświetl opinię dla