Como atualizar o modelo LUIS com as APIs REST
Importante
O LUIS será desativado em 1º de outubro de 2025 e, a partir de 1º de abril de 2023, você não poderá criar novos recursos do LUIS. É recomendável migrar seus aplicativos LUIS para a compreensão da linguagem coloquial a fim de usufruir do suporte contínuo ao produto e dos recursos multilíngues.
Neste artigo, você adicionará enunciados de exemplo ao aplicativo Pizza e treinará o aplicativo. Exemplos de enunciados consistem em texto de conversa do usuário mapeado para uma intenção. Ao mostrar exemplos de enunciados para intenções, você ensina o LUIS quais tipos de textos fornecidos pelo usuário pertencem a qual intenção.
Documentação de referência | Amostra
Pré-requisitos
Exemplo de arquivo JSON de enunciados
Os enunciados de exemplo seguem um formato específico.
O campo text contém o texto do enunciado de exemplo. O campo intentName precisa corresponder ao nome de uma intenção existente no aplicativo do LUIS. O campo entityLabels é obrigatório. Se você não quiser rotular as entidades, forneça uma matriz vazia.
Se a matriz entityLabels não estiver vazia, startCharIndex e endCharIndex precisarão marcar a entidade referenciada no campo entityName. O índice começa no zero. Se você começar ou terminar o rótulo em um espaço no texto, a chamada à API para adicionar os enunciados falhará.
[
  {
    "text": "order a pizza",
    "intentName": "ModifyOrder",
    "entityLabels": [
      {
        "entityName": "Order",
        "startCharIndex": 6,
        "endCharIndex": 12
      }
    ]
  },
  {
    "text": "order a large pepperoni pizza",
    "intentName": "ModifyOrder",
    "entityLabels": [
      {
        "entityName": "Order",
        "startCharIndex": 6,
        "endCharIndex": 28
      },
      {
        "entityName": "FullPizzaWithModifiers",
        "startCharIndex": 6,
        "endCharIndex": 28
      },
      {
        "entityName": "PizzaType",
        "startCharIndex": 14,
        "endCharIndex": 28
      },
      {
        "entityName": "Size",
        "startCharIndex": 8,
        "endCharIndex": 12
      }
    ]
  },
  {
    "text": "I want two large pepperoni pizzas on thin crust",
    "intentName": "ModifyOrder",
    "entityLabels": [
      {
        "entityName": "Order",
        "startCharIndex": 7,
        "endCharIndex": 46
      },
      {
        "entityName": "FullPizzaWithModifiers",
        "startCharIndex": 7,
        "endCharIndex": 46
      },
      {
        "entityName": "PizzaType",
        "startCharIndex": 17,
        "endCharIndex": 32
      },
      {
        "entityName": "Size",
        "startCharIndex": 11,
        "endCharIndex": 15
      },
      {
        "entityName": "Quantity",
        "startCharIndex": 7,
        "endCharIndex": 9
      },
      {
        "entityName": "Crust",
        "startCharIndex": 37,
        "endCharIndex": 46
      }
    ]
  }
]
Criar aplicativo Pizza
Criar o aplicativo Pizza.
- Selecione pizza-app-for-luis-v6.json para abrir a página do GitHub para o arquivo
pizza-app-for-luis.json. - Clique com o botão direito do mouse (ou toque e segure por alguns segundos) o botão Bruto e selecione Salvar link como para salvar o
pizza-app-for-luis.jsonem seu computador. - Entre no portal do LUIS.
- Selecione Meus Aplicativos.
- Na página Meus aplicativos, selecione + Novo aplicativo de conversa.
- Selecione Importar como JSON.
- Na caixa de diálogo Importar novo aplicativo, selecione o botão Escolher arquivo.
- Selecione o arquivo
pizza-app-for-luis.jsonque você baixou e, em seguida, selecionepizza-app-for-luis.json. - No campo Nome da caixa de diálogo Importar novo aplicativo, insira um nome para o aplicativo Pizza e, em seguida, selecione o botão Concluído.
O aplicativo será importado.
Se você vir uma caixa de diálogo que diz Como criar um aplicativo LUIS eficaz, feche-a.
Treinar e publicar o aplicativo Pizza
Você deve ver a página Intenções com uma lista de intenções no aplicativo Pizza.
No lado superior direito do site do LUIS, selecione o botão Treinar.

O treinamento é concluído quando o botão Treinar fica desabilitado.
Para receber uma previsão do LUIS em um chatbot ou em outro aplicativo cliente, publique o aplicativo no ponto de extremidade de previsão.
Selecione Publicar no painel de navegação superior direito.

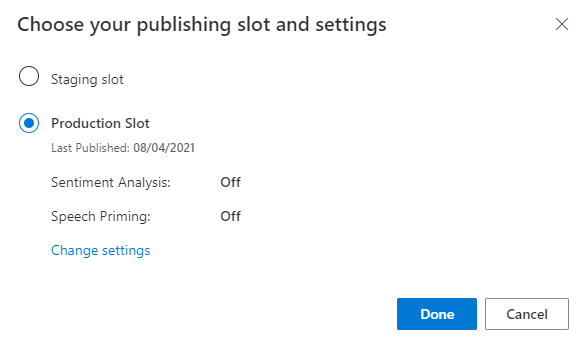
Selecione o slot de Produção e Concluído.
Selecione Acessar as URLs do ponto de extremidade na notificação para ir à página Recursos do Azure. Você só poderá ver as URLs se tiver um recurso de previsão associado ao aplicativo. Encontre também a página Recursos do Azure clicando em Gerenciar.

Adicionar um recurso de criação ao aplicativo Pizza
- Selecione GERENCIAR.
- Selecione Recursos do Azure.
- Selecione Recurso de Criação.
- Selecione Alterar recurso de criação.
Se você tiver um recurso de criação, insira o Nome do Locatário, Nome da Assinatura e nome do recurso LUIS do recurso de criação.
Se você não tiver um recurso de criação:
- Selecione Criar recurso.
- Insira um Nome do Locatário, Nome do Recurso, Nome da Assinatura e Nome do Grupo de Recursos do Azure.
Agora, o aplicativo Pizza está pronto para o uso.
Registrar os valores de acesso para seu aplicativo Pizza
Para usar o novo aplicativo Pizza, você precisará da ID do aplicativo, da chave de criação e do ponto de extremidade de criação desse aplicativo. Para obter previsões, você precisará do ponto de extremidade de previsão e da chave de previsão separados.
Para encontrar esses valores:
- Na página Intenções, selecione GERENCIAR.
- Na página Configurações de aplicativo, registre a ID do aplicativo.
- Selecione Recursos do Azure.
- Selecione Recurso de Criação.
- Nas guias Recurso de Criação e Recursos de Previsão, registre a Chave Primária. Esse valor é a sua chave de criação.
- Registre a URL do ponto de extremidade. Esse valor é o seu ponto de extremidade de criação.
Alterar o modelo de maneira programática
Crie um novo aplicativo de console destinado à linguagem C#, com o nome de projeto e pasta igual a
csharp-model-with-rest.dotnet new console -lang C# -n csharp-model-with-restMude para o diretório
csharp-model-with-restque você criou e instale as dependências necessárias com esses comandos:cd csharp-model-with-rest dotnet add package System.Net.Http dotnet add package JsonFormatterPlusSubstitua Program.cs pelo código a seguir:
//
// This quickstart shows how to add utterances to a LUIS model using the REST APIs.
//

using System;
using System.IO;
using System.Net.Http;
using System.Text;
using System.Threading.Tasks;
using System.Collections.Generic;
using System.Linq;

// 3rd party NuGet packages
using JsonFormatterPlus;

namespace AddUtterances
{
    class Program
    {
        //////////
        // Values to modify.

        // YOUR-APP-ID: The App ID GUID found on the www.luis.ai Application Settings page.
        static string appID = "PASTE_YOUR_LUIS_APP_ID_HERE";

        // YOUR-AUTHORING-KEY: Your LUIS authoring key, 32 character value.
        static string authoringKey = "PASTE_YOUR_LUIS_AUTHORING_SUBSCRIPTION_KEY_HERE";

        // YOUR-AUTHORING-ENDPOINT: Replace this endpoint with your authoring key endpoint.
        // For example, "https://your-resource-name.cognitiveservices.azure.com/"
        static string authoringEndpoint = "PASTE_YOUR_LUIS_AUTHORING_ENDPOINT_HERE";

        // NOTE: Replace this your version number.
        static string appVersion = "0.1";
        //////////

        static string host = String.Format("{0}luis/authoring/v3.0-preview/apps/{1}/versions/{2}/", authoringEndpoint, appID, appVersion);

        // GET request with authentication
        async static Task<HttpResponseMessage> SendGet(string uri)
        {
            using (var client = new HttpClient())
            using (var request = new HttpRequestMessage())
            {
                request.Method = HttpMethod.Get;
                request.RequestUri = new Uri(uri);
                request.Headers.Add("Ocp-Apim-Subscription-Key", authoringKey);
                return await client.SendAsync(request);
            }
        }

        // POST request with authentication
        async static Task<HttpResponseMessage> SendPost(string uri, string requestBody)
        {
            using (var client = new HttpClient())
            using (var request = new HttpRequestMessage())
            {
                request.Method = HttpMethod.Post;
                request.RequestUri = new Uri(uri);

                if (!String.IsNullOrEmpty(requestBody))
                {
                    request.Content = new StringContent(requestBody, Encoding.UTF8, "text/json");
                }

                request.Headers.Add("Ocp-Apim-Subscription-Key", authoringKey);
                return await client.SendAsync(request);
            }
        }

        // Add utterances as string with POST request
        async static Task AddUtterances(string utterances)
        {
            string uri = host + "examples";

            var response = await SendPost(uri, utterances);
            var result = await response.Content.ReadAsStringAsync();
            Console.WriteLine("Added utterances.");
            Console.WriteLine(JsonFormatter.Format(result));
        }

        // Train app after adding utterances
        async static Task Train()
        {
            string uri = host  + "train";

            var response = await SendPost(uri, null);
            var result = await response.Content.ReadAsStringAsync();
            Console.WriteLine("Sent training request.");
            Console.WriteLine(JsonFormatter.Format(result));
        }

        // Check status of training
        async static Task Status()
        {
            var response = await SendGet(host  + "train");
            var result = await response.Content.ReadAsStringAsync();
            Console.WriteLine("Requested training status.");
            Console.WriteLine(JsonFormatter.Format(result));
        }

        // Add utterances, train, check status
        static void Main(string[] args)
        {
            string utterances = @"
            [
                {
                    'text': 'order a pizza',
                    'intentName': 'ModifyOrder',
                    'entityLabels': [
                        {
                            'entityName': 'Order',
                            'startCharIndex': 6,
                            'endCharIndex': 12
                        }
                    ]
                },
                {
                    'text': 'order a large pepperoni pizza',
                    'intentName': 'ModifyOrder',
                    'entityLabels': [
                        {
                            'entityName': 'Order',
                            'startCharIndex': 6,
                            'endCharIndex': 28
                        },
                        {
                            'entityName': 'FullPizzaWithModifiers',
                            'startCharIndex': 6,
                            'endCharIndex': 28
                        },
                        {
                            'entityName': 'PizzaType',
                            'startCharIndex': 14,
                            'endCharIndex': 28
                        },
                        {
                            'entityName': 'Size',
                            'startCharIndex': 8,
                            'endCharIndex': 12
                        }
                    ]
                },
                {
                    'text': 'I want two large pepperoni pizzas on thin crust',
                    'intentName': 'ModifyOrder',
                    'entityLabels': [
                        {
                            'entityName': 'Order',
                            'startCharIndex': 7,
                            'endCharIndex': 46
                        },
                        {
                            'entityName': 'FullPizzaWithModifiers',
                            'startCharIndex': 7,
                            'endCharIndex': 46
                        },
                        {
                            'entityName': 'PizzaType',
                            'startCharIndex': 17,
                            'endCharIndex': 32
                        },
                        {
                            'entityName': 'Size',
                            'startCharIndex': 11,
                            'endCharIndex': 15
                        },
                        {
                            'entityName': 'Quantity',
                            'startCharIndex': 7,
                            'endCharIndex': 9
                        },
                        {
                            'entityName': 'Crust',
                            'startCharIndex': 37,
                            'endCharIndex': 46
                        }
                    ]
                }
            ]
            ";

            AddUtterances(utterances).Wait();
            Train().Wait();
            Status().Wait();
        }
    }
}
Substitua os valores que começam com
YOUR-por seus valores.Informações Finalidade YOUR-APP-IDSua ID do aplicativo LUIS. YOUR-AUTHORING-KEYSua chave de criação de 32 caracteres. YOUR-AUTHORING-ENDPOINTSeu ponto de extremidade da URL de criação. Por exemplo, https://replace-with-your-resource-name.api.cognitive.microsoft.com/. Você definiu o nome do recurso quando você criou o recurso.As chaves e os recursos atribuídos estão visíveis no portal do LUIS na seção Gerenciar, na página recursos do Azure. A ID do aplicativo está disponível na mesma seção Gerenciar, na página Configurações do Aplicativo.
Importante
Lembre-se de remover a chave do seu código quando terminar e nunca poste-a publicamente. Para produção, use uma maneira segura de armazenar e acessar suas credenciais, como o Azure Key Vault. Confira o artigo sobre segurança dos serviços de IA do Azure para obter mais informações.
Compile o aplicativo de console.
dotnet buildExecute o aplicativo de console.
dotnet runExamine a resposta de criação:
Added utterances.
[
    {
        "value": {
            "ExampleId": 1137150691,
            "UtteranceText": "order a pizza"
        },
        "hasError": false
    },
    {
        "value": {
            "ExampleId": 1137150692,
            "UtteranceText": "order a large pepperoni pizza"
        },
        "hasError": false
    },
    {
        "value": {
            "ExampleId": 1137150693,
            "UtteranceText": "i want two large pepperoni pizzas on thin crust"
        },
        "hasError": false
    }
]
Sent training request.
{
    "statusId": 9,
    "status": "Queued"
}
Requested training status.
[
    {
        "modelId": "edb46abf-0000-41ab-beb2-a41a0fe1630f",
        "details": {
            "statusId": 9,
            "status": "Queued",
            "exampleCount": 0
        }
    },
    {
        "modelId": "a5030be2-616c-4648-bf2f-380fa9417d37",
        "details": {
            "statusId": 9,
            "status": "Queued",
            "exampleCount": 0
        }
    },
    {
        "modelId": "3f2b1f31-a3c3-4fbd-8182-e9d9dbc120b9",
        "details": {
            "statusId": 9,
            "status": "Queued",
            "exampleCount": 0
        }
    },
    {
        "modelId": "e4b6704b-1636-474c-9459-fe9ccbeba51c",
        "details": {
            "statusId": 9,
            "status": "Queued",
            "exampleCount": 0
        }
    },
    {
        "modelId": "031d3777-2a00-4a7a-9323-9a3280a30000",
        "details": {
            "statusId": 9,
            "status": "Queued",
            "exampleCount": 0
        }
    },
    {
        "modelId": "9250e7a1-06eb-4413-9432-ae132ed32583",
        "details": {
            "statusId": 9,
            "status": "Queued",
            "exampleCount": 0
        }
    }
]
Limpar os recursos
Ao concluir este início rápido, exclua a pasta do projeto do sistema de arquivos.
Próximas etapas
Documentação de referência | Amostra
Pré-requisitos
- JDK SE (Java Development Kit, Edição Standard)
- Visual Studio Code ou seu IDE favorito
Exemplo de arquivo JSON de enunciados
Os enunciados de exemplo seguem um formato específico.
O campo text contém o texto do enunciado de exemplo. O campo intentName precisa corresponder ao nome de uma intenção existente no aplicativo do LUIS. O campo entityLabels é obrigatório. Se você não quiser rotular as entidades, forneça uma matriz vazia.
Se a matriz entityLabels não estiver vazia, startCharIndex e endCharIndex precisarão marcar a entidade referenciada no campo entityName. O índice começa no zero. Se você começar ou terminar o rótulo em um espaço no texto, a chamada à API para adicionar os enunciados falhará.
[
  {
    "text": "order a pizza",
    "intentName": "ModifyOrder",
    "entityLabels": [
      {
        "entityName": "Order",
        "startCharIndex": 6,
        "endCharIndex": 12
      }
    ]
  },
  {
    "text": "order a large pepperoni pizza",
    "intentName": "ModifyOrder",
    "entityLabels": [
      {
        "entityName": "Order",
        "startCharIndex": 6,
        "endCharIndex": 28
      },
      {
        "entityName": "FullPizzaWithModifiers",
        "startCharIndex": 6,
        "endCharIndex": 28
      },
      {
        "entityName": "PizzaType",
        "startCharIndex": 14,
        "endCharIndex": 28
      },
      {
        "entityName": "Size",
        "startCharIndex": 8,
        "endCharIndex": 12
      }
    ]
  },
  {
    "text": "I want two large pepperoni pizzas on thin crust",
    "intentName": "ModifyOrder",
    "entityLabels": [
      {
        "entityName": "Order",
        "startCharIndex": 7,
        "endCharIndex": 46
      },
      {
        "entityName": "FullPizzaWithModifiers",
        "startCharIndex": 7,
        "endCharIndex": 46
      },
      {
        "entityName": "PizzaType",
        "startCharIndex": 17,
        "endCharIndex": 32
      },
      {
        "entityName": "Size",
        "startCharIndex": 11,
        "endCharIndex": 15
      },
      {
        "entityName": "Quantity",
        "startCharIndex": 7,
        "endCharIndex": 9
      },
      {
        "entityName": "Crust",
        "startCharIndex": 37,
        "endCharIndex": 46
      }
    ]
  }
]
Alterar o modelo de maneira programática
Crie uma pasta para armazenar seu projeto Java, tal como
java-model-with-rest.Crie um subdiretório chamado
libe copie as seguintes bibliotecas Java no subdiretóriolib:Crie um arquivo chamado
Model.java. Adicione os códigos a seguir:// // This quickstart shows how to add utterances to a LUIS model using the REST APIs. // import java.io.*; import java.net.URI; import org.apache.http.HttpEntity; import org.apache.http.HttpResponse; import org.apache.http.client.HttpClient; import org.apache.http.client.methods.HttpGet; import org.apache.http.client.methods.HttpPost; import org.apache.http.client.utils.URIBuilder; import org.apache.http.entity.StringEntity; import org.apache.http.impl.client.HttpClients; import org.apache.http.util.EntityUtils; // To compile, execute this command at the console: // Windows: javac -cp ";lib/*" Model.java // macOs: javac -cp ":lib/*" Model.java // Linux: javac -cp ":lib/*" Model.java // To run, execute this command at the console: // Windows: java -cp ";lib/*" Model // macOs: java -cp ":lib/*" Model // Linux: java -cp ":lib/*" Model public class Model { public static void main(String[] args) { try { ////////// // Values to modify. // YOUR-APP-ID: The App ID GUID found on the www.luis.ai Application Settings page. String AppId = "PASTE_YOUR_LUIS_APP_ID_HERE"; // YOUR-AUTHORING-KEY: Your LUIS authoring key, 32 character value. String Key = "PASTE_YOUR_LUIS_AUTHORING_SUBSCRIPTION_KEY_HERE"; // YOUR-AUTHORING-ENDPOINT: Replace this with your authoring key endpoint. // For example, "https://your-resource-name.cognitiveservices.azure.com/" String Endpoint = "PASTE_YOUR_LUIS_AUTHORING_ENDPOINT_HERE"; // NOTE: Replace this your version number. The Pizza app uses a version number of "0.1". String Version = "0.1"; ////////// // The list of utterances to add, in JSON format. String Utterances = "[{'text': 'order a pizza', 'intentName': 'ModifyOrder', 'entityLabels': [{'entityName': 'Order', 'startCharIndex': 6, 'endCharIndex': 12}]}, {'text': 'order a large pepperoni pizza', 'intentName': 'ModifyOrder', 'entityLabels': [{'entityName': 'Order', 'startCharIndex': 6, 'endCharIndex': 28}, {'entityName': 'FullPizzaWithModifiers', 'startCharIndex': 6, 'endCharIndex': 28}, {'entityName': 'PizzaType', 'startCharIndex': 14, 'endCharIndex': 28}, {'entityName': 'Size', 'startCharIndex': 8, 'endCharIndex': 12}]}, {'text': 'I want two large pepperoni pizzas on thin crust', 'intentName': 'ModifyOrder', 'entityLabels': [{'entityName': 'Order', 'startCharIndex': 7, 'endCharIndex': 46}, {'entityName': 'FullPizzaWithModifiers', 'startCharIndex': 7, 'endCharIndex': 46}, {'entityName': 'PizzaType', 'startCharIndex': 17, 'endCharIndex': 32}, {'entityName': 'Size', 'startCharIndex': 11, 'endCharIndex': 15}, {'entityName': 'Quantity', 'startCharIndex': 7, 'endCharIndex': 9}, {'entityName': 'Crust', 'startCharIndex': 37, 'endCharIndex': 46}]}]"; // Create the URLs for uploading example utterances and for training. URIBuilder addUtteranceURL = new URIBuilder(Endpoint + "luis/authoring/v3.0-preview/apps/" + AppId + "/versions/" + Version + "/examples"); URIBuilder trainURL = new URIBuilder(Endpoint + "luis/authoring/v3.0-preview/apps/" + AppId + "/versions/" + Version + "/train"); URI addUtterancesURI = addUtteranceURL.build(); URI trainURI = trainURL.build(); // Add the utterances. // Create the request. HttpClient addUtterancesClient = HttpClients.createDefault(); HttpPost addUtterancesRequest = new HttpPost(addUtterancesURI); // Add the headers. addUtterancesRequest.setHeader("Ocp-Apim-Subscription-Key",Key); addUtterancesRequest.setHeader("Content-type","application/json"); // Add the body. StringEntity stringEntity = new StringEntity(Utterances); addUtterancesRequest.setEntity(stringEntity); // Execute the request and obtain the response. HttpResponse addUtterancesResponse = addUtterancesClient.execute(addUtterancesRequest); HttpEntity addUtterancesEntity = addUtterancesResponse.getEntity(); // Print the response on the console. if (addUtterancesEntity != null) { System.out.println(EntityUtils.toString(addUtterancesEntity)); } // Train the model. // Create the request. HttpClient trainClient = HttpClients.createDefault(); HttpPost trainRequest = new HttpPost(trainURI); // Add the headers. trainRequest.setHeader("Ocp-Apim-Subscription-Key",Key); trainRequest.setHeader("Content-type","application/json"); // Execute the request and obtain the response. HttpResponse trainResponse = trainClient.execute(trainRequest); HttpEntity trainEntity = trainResponse.getEntity(); // Print the response on the console. if (trainEntity != null) { System.out.println(EntityUtils.toString(trainEntity)); } // Get the training status. // Create the request. HttpClient trainStatusClient = HttpClients.createDefault(); HttpGet trainStatusRequest = new HttpGet(trainURI); // Add the headers. trainStatusRequest.setHeader("Ocp-Apim-Subscription-Key",Key); trainStatusRequest.setHeader("Content-type","application/json"); // Execute the request and obtain the response. HttpResponse trainStatusResponse = trainStatusClient.execute(trainStatusRequest); HttpEntity trainStatusEntity = trainStatusResponse.getEntity(); // Print the response on the console. if (trainStatusEntity != null) { System.out.println(EntityUtils.toString(trainStatusEntity)); } } // Display errors if they occur. catch (Exception e) { System.out.println(e.getMessage()); } } }Substitua os valores que começam com
YOUR-por seus valores.Informações Finalidade YOUR-APP-IDSua ID do aplicativo LUIS. YOUR-AUTHORING-KEYSua chave de criação de 32 caracteres. YOUR-AUTHORING-ENDPOINTSeu ponto de extremidade da URL de criação. Por exemplo, https://replace-with-your-resource-name.api.cognitive.microsoft.com/. Você definiu o nome do recurso quando você criou o recurso.As chaves e os recursos atribuídos estão visíveis no portal do LUIS na seção Gerenciar, na página recursos do Azure. A ID do aplicativo está disponível na mesma seção Gerenciar, na página Configurações do Aplicativo.
Importante
Lembre-se de remover a chave do seu código quando terminar e nunca poste-a publicamente. Para produção, use uma maneira segura de armazenar e acessar suas credenciais, como o Azure Key Vault. Confira o artigo sobre segurança dos serviços de IA do Azure para obter mais informações.
Com um prompt de comando no mesmo diretório em que você criou o arquivo
Model.java, insira o seguinte comando para compilar o arquivo Java:- Se você estiver usando o Windows, use este comando:
javac -cp ";lib/*" Model.java - Se você estiver usando o macOS ou o Linux, use este comando:
javac -cp ":lib/*" Model.java
- Se você estiver usando o Windows, use este comando:
Execute o aplicativo Java da linha de comando inserindo o seguinte texto no prompt de comando:
- Se você estiver usando o Windows, use este comando:
java -cp ";lib/*" Model - Se você estiver usando o macOS ou o Linux, use este comando:
java -cp ":lib/*" Model
- Se você estiver usando o Windows, use este comando:
Examine a resposta de criação:
[{"value":{"ExampleId":1137150691,"UtteranceText":"order a pizza"},"hasError":false},{"value":{"ExampleId":1137150692,"UtteranceText":"order a large pepperoni pizza"},"hasError":false},{"value":{"ExampleId":1137150693,"UtteranceText":"i want two large pepperoni pizzas on thin crust"},"hasError":false}]
{"statusId":9,"status":"Queued"}
[{"modelId":"edb46abf-0000-41ab-beb2-a41a0fe1630f","details":{"statusId":9,"status":"Queued","exampleCount":0}},{"modelId":"a5030be2-616c-4648-bf2f-380fa9417d37","details":{"statusId":9,"status":"Queued","exampleCount":0}},{"modelId":"3f2b1f31-a3c3-4fbd-8182-e9d9dbc120b9","details":{"statusId":9,"status":"Queued","exampleCount":0}},{"modelId":"e4b6704b-1636-474c-9459-fe9ccbeba51c","details":{"statusId":9,"status":"Queued","exampleCount":0}},{"modelId":"031d3777-2a00-4a7a-9323-9a3280a30000","details":{"statusId":9,"status":"Queued","exampleCount":0}},{"modelId":"9250e7a1-06eb-4413-9432-ae132ed32583","details":{"statusId":3,"status":"InProgress","exampleCount":0,"progressSubstatus":"CollectingData"}}]
Esta é a saída formatada para facilitar a leitura:
[
  {
    "value": {
      "ExampleId": 1137150691,
      "UtteranceText": "order a pizza"
    },
    "hasError": false
  },
  {
    "value": {
      "ExampleId": 1137150692,
      "UtteranceText": "order a large pepperoni pizza"
    },
    "hasError": false
  },
  {
    "value": {
      "ExampleId": 1137150693,
      "UtteranceText": "i want two large pepperoni pizzas on thin crust"
    },
    "hasError": false
  }
]
{
  "statusId": 9,
  "status": "Queued"
}
[
  {
    "modelId": "edb46abf-0000-41ab-beb2-a41a0fe1630f",
    "details": {
      "statusId": 9,
      "status": "Queued",
      "exampleCount": 0
    }
  },
  {
    "modelId": "a5030be2-616c-4648-bf2f-380fa9417d37",
    "details": {
      "statusId": 9,
      "status": "Queued",
      "exampleCount": 0
    }
  },
  {
    "modelId": "3f2b1f31-a3c3-4fbd-8182-e9d9dbc120b9",
    "details": {
      "statusId": 9,
      "status": "Queued",
      "exampleCount": 0
    }
  },
  {
    "modelId": "e4b6704b-1636-474c-9459-fe9ccbeba51c",
    "details": {
      "statusId": 9,
      "status": "Queued",
      "exampleCount": 0
    }
  },
  {
    "modelId": "031d3777-2a00-4a7a-9323-9a3280a30000",
    "details": {
      "statusId": 9,
      "status": "Queued",
      "exampleCount": 0
    }
  },
  {
    "modelId": "9250e7a1-06eb-4413-9432-ae132ed32583",
    "details": {
      "statusId": 3,
      "status": "InProgress",
      "exampleCount": 0,
      "progressSubstatus": "CollectingData"
    }
  }
]
Limpar os recursos
Ao concluir este início rápido, exclua a pasta do projeto do sistema de arquivos.
Próximas etapas
Documentação de referência | Amostra
Pré-requisitos
- Linguagem de programação Go
- Visual Studio Code
Exemplo de arquivo JSON de enunciados
Os enunciados de exemplo seguem um formato específico.
O campo text contém o texto do enunciado de exemplo. O campo intentName precisa corresponder ao nome de uma intenção existente no aplicativo do LUIS. O campo entityLabels é obrigatório. Se você não quiser rotular as entidades, forneça uma matriz vazia.
Se a matriz entityLabels não estiver vazia, startCharIndex e endCharIndex precisarão marcar a entidade referenciada no campo entityName. O índice começa no zero. Se você começar ou terminar o rótulo em um espaço no texto, a chamada à API para adicionar os enunciados falhará.
[
  {
    "text": "order a pizza",
    "intentName": "ModifyOrder",
    "entityLabels": [
      {
        "entityName": "Order",
        "startCharIndex": 6,
        "endCharIndex": 12
      }
    ]
  },
  {
    "text": "order a large pepperoni pizza",
    "intentName": "ModifyOrder",
    "entityLabels": [
      {
        "entityName": "Order",
        "startCharIndex": 6,
        "endCharIndex": 28
      },
      {
        "entityName": "FullPizzaWithModifiers",
        "startCharIndex": 6,
        "endCharIndex": 28
      },
      {
        "entityName": "PizzaType",
        "startCharIndex": 14,
        "endCharIndex": 28
      },
      {
        "entityName": "Size",
        "startCharIndex": 8,
        "endCharIndex": 12
      }
    ]
  },
  {
    "text": "I want two large pepperoni pizzas on thin crust",
    "intentName": "ModifyOrder",
    "entityLabels": [
      {
        "entityName": "Order",
        "startCharIndex": 7,
        "endCharIndex": 46
      },
      {
        "entityName": "FullPizzaWithModifiers",
        "startCharIndex": 7,
        "endCharIndex": 46
      },
      {
        "entityName": "PizzaType",
        "startCharIndex": 17,
        "endCharIndex": 32
      },
      {
        "entityName": "Size",
        "startCharIndex": 11,
        "endCharIndex": 15
      },
      {
        "entityName": "Quantity",
        "startCharIndex": 7,
        "endCharIndex": 9
      },
      {
        "entityName": "Crust",
        "startCharIndex": 37,
        "endCharIndex": 46
      }
    ]
  }
]
Criar aplicativo Pizza
Criar o aplicativo Pizza.
- Selecione pizza-app-for-luis-v6.json para abrir a página do GitHub para o arquivo
pizza-app-for-luis.json. - Clique com o botão direito do mouse (ou toque e segure por alguns segundos) o botão Bruto e selecione Salvar link como para salvar o
pizza-app-for-luis.jsonem seu computador. - Entre no portal do LUIS.
- Selecione Meus Aplicativos.
- Na página Meus aplicativos, selecione + Novo aplicativo de conversa.
- Selecione Importar como JSON.
- Na caixa de diálogo Importar novo aplicativo, selecione o botão Escolher arquivo.
- Selecione o arquivo
pizza-app-for-luis.jsonque você baixou e, em seguida, selecionepizza-app-for-luis.json. - No campo Nome da caixa de diálogo Importar novo aplicativo, insira um nome para o aplicativo Pizza e, em seguida, selecione o botão Concluído.
O aplicativo será importado.
Se você vir uma caixa de diálogo que diz Como criar um aplicativo LUIS eficaz, feche-a.
Treinar e publicar o aplicativo Pizza
Você deve ver a página Intenções com uma lista de intenções no aplicativo Pizza.
No lado superior direito do site do LUIS, selecione o botão Treinar.
O treinamento é concluído quando o botão Treinar fica desabilitado.
Para receber uma previsão do LUIS em um chatbot ou em outro aplicativo cliente, publique o aplicativo no ponto de extremidade de previsão.
Selecione Publicar no painel de navegação superior direito.
Selecione o slot de Produção e Concluído.
Selecione Acessar as URLs do ponto de extremidade na notificação para ir à página Recursos do Azure. Você só poderá ver as URLs se tiver um recurso de previsão associado ao aplicativo. Encontre também a página Recursos do Azure clicando em Gerenciar.
Adicionar um recurso de criação ao aplicativo Pizza
- Selecione GERENCIAR.
- Selecione Recursos do Azure.
- Selecione Recurso de Criação.
- Selecione Alterar recurso de criação.
Se você tiver um recurso de criação, insira o Nome do Locatário, Nome da Assinatura e nome do recurso LUIS do recurso de criação.
Se você não tiver um recurso de criação:
- Selecione Criar recurso.
- Insira um Nome do Locatário, Nome do Recurso, Nome da Assinatura e Nome do Grupo de Recursos do Azure.
Agora, o aplicativo Pizza está pronto para o uso.
Registrar os valores de acesso para seu aplicativo Pizza
Para usar o novo aplicativo Pizza, você precisará da ID do aplicativo, da chave de criação e do ponto de extremidade de criação desse aplicativo. Para obter previsões, você precisará do ponto de extremidade de previsão e da chave de previsão separados.
Para encontrar esses valores:
- Na página Intenções, selecione GERENCIAR.
- Na página Configurações de aplicativo, registre a ID do aplicativo.
- Selecione Recursos do Azure.
- Selecione Recurso de Criação.
- Nas guias Recurso de Criação e Recursos de Previsão, registre a Chave Primária. Esse valor é a sua chave de criação.
- Registre a URL do ponto de extremidade. Esse valor é o seu ponto de extremidade de criação.
Alterar o modelo de maneira programática
Crie um arquivo chamado
predict.go. Adicione os códigos a seguir:// // This quickstart shows how to add utterances to a LUIS model using the REST APIs. // // dependencies package main import ( "fmt" "net/http" "io/ioutil" "log" "strings" ) // main function func main() { ////////// // Values to modify. // YOUR-APP-ID: The App ID GUID found on the www.luis.ai Application Settings page. var appID = "PASTE_YOUR_LUIS_APP_ID_HERE" // YOUR-AUTHORING-KEY: Your LUIS authoring key, 32 character value. var authoringKey = "PASTE_YOUR_LUIS_AUTHORING_SUBSCRIPTION_KEY_HERE" // YOUR-AUTHORING-ENDPOINT: Replace this with your authoring key endpoint. // For example, "https://your-resource-name.cognitiveservices.azure.com/" var endpoint = "PASTE_YOUR_LUIS_AUTHORING_ENDPOINT_HERE" // NOTE: Replace this your version number. The Pizza app uses a version number of "0.1". var version = "0.1" ////////// var exampleUtterances = "[{'text': 'order a pizza', 'intentName': 'ModifyOrder', 'entityLabels': [{'entityName': 'Order', 'startCharIndex': 6, 'endCharIndex': 12}]}, {'text': 'order a large pepperoni pizza', 'intentName': 'ModifyOrder', 'entityLabels': [{'entityName': 'Order', 'startCharIndex': 6, 'endCharIndex': 28}, {'entityName': 'FullPizzaWithModifiers', 'startCharIndex': 6, 'endCharIndex': 28}, {'entityName': 'PizzaType', 'startCharIndex': 14, 'endCharIndex': 28}, {'entityName': 'Size', 'startCharIndex': 8, 'endCharIndex': 12}]}, {'text': 'I want two large pepperoni pizzas on thin crust', 'intentName': 'ModifyOrder', 'entityLabels': [{'entityName': 'Order', 'startCharIndex': 7, 'endCharIndex': 46}, {'entityName': 'FullPizzaWithModifiers', 'startCharIndex': 7, 'endCharIndex': 46}, {'entityName': 'PizzaType', 'startCharIndex': 17, 'endCharIndex': 32}, {'entityName': 'Size', 'startCharIndex': 11, 'endCharIndex': 15}, {'entityName': 'Quantity', 'startCharIndex': 7, 'endCharIndex': 9}, {'entityName': 'Crust', 'startCharIndex': 37, 'endCharIndex': 46}]}]" fmt.Println("add example utterances requested") addUtterance(authoringKey, appID, version, exampleUtterances, endpoint) fmt.Println("training selected") requestTraining(authoringKey, appID, version, endpoint) fmt.Println("training status selected") getTrainingStatus(authoringKey, appID, version, endpoint) } // Send the list of utterances to the model. func addUtterance(authoringKey string, appID string, version string, labeledExampleUtterances string, endpoint string){ var authoringUrl = fmt.Sprintf("%sluis/authoring/v3.0-preview/apps/%s/versions/%s/examples", endpoint, appID, version) httpRequest("POST", authoringUrl, authoringKey, labeledExampleUtterances) } // Request training. func requestTraining(authoringKey string, appID string, version string, endpoint string){ trainApp("POST", authoringKey, appID, version, endpoint) } func trainApp(httpVerb string, authoringKey string, appID string, version string, endpoint string){ var authoringUrl = fmt.Sprintf("%sluis/authoring/v3.0-preview/apps/%s/versions/%s/train", endpoint, appID, version) httpRequest(httpVerb,authoringUrl, authoringKey, "") } func getTrainingStatus(authoringKey string, appID string, version string, endpoint string){ trainApp("GET", authoringKey, appID, version, endpoint) } // generic HTTP request // includes setting header with authoring key func httpRequest(httpVerb string, url string, authoringKey string, body string){ client := &http.Client{} request, err := http.NewRequest(httpVerb, url, strings.NewReader(body)) request.Header.Add("Ocp-Apim-Subscription-Key", authoringKey) fmt.Println("body") fmt.Println(body) response, err := client.Do(request) if err != nil { log.Fatal(err) } else { defer response.Body.Close() contents, err := ioutil.ReadAll(response.Body) if err != nil { log.Fatal(err) } fmt.Println(" ", response.StatusCode) fmt.Println(string(contents)) } }Substitua os valores que começam com
YOUR-por seus valores.Informações Finalidade YOUR-APP-IDSua ID do aplicativo LUIS. YOUR-AUTHORING-KEYSua chave de criação de 32 caracteres. YOUR-AUTHORING-ENDPOINTSeu ponto de extremidade da URL de criação. Por exemplo, https://replace-with-your-resource-name.api.cognitive.microsoft.com/. Você definiu o nome do recurso quando você criou o recurso.As chaves e os recursos atribuídos estão visíveis no portal do LUIS na seção Gerenciar, na página recursos do Azure. A ID do aplicativo está disponível na mesma seção Gerenciar, na página Configurações do Aplicativo.
Importante
Lembre-se de remover a chave do seu código quando terminar e nunca poste-a publicamente. Para produção, use uma maneira segura de armazenar e acessar suas credenciais, como o Azure Key Vault. Confira o artigo sobre segurança dos serviços de IA do Azure para obter mais informações.
Com um prompt de comando no mesmo diretório em que você criou o arquivo, insira o seguinte comando para compilar o arquivo Go:
go build model.goExecute o aplicativo GO da linha de comando inserindo o texto a seguir no prompt de comando:
go run model.goExamine a resposta de criação:
add example utterances requested
body
[{'text': 'order a pizza', 'intentName': 'ModifyOrder', 'entityLabels': [{'entityName': 'Order', 'startCharIndex': 6, 'endCharIndex': 12}]}, {'text': 'order a large pepperoni pizza', 'intentName': 'ModifyOrder', 'entityLabels': [{'entityName': 'Order', 'startCharIndex': 6, 'endCharIndex': 28}, {'entityName': 'FullPizzaWithModifiers', 'startCharIndex': 6, 'endCharIndex': 28}, {'entityName': 'PizzaType', 'startCharIndex': 14, 'endCharIndex': 28}, {'entityName': 'Size', 'startCharIndex': 8, 'endCharIndex': 12}]}, {'text': 'I want two large pepperoni pizzas on thin crust', 'intentName': 'ModifyOrder', 'entityLabels': [{'entityName': 'Order', 'startCharIndex': 7, 'endCharIndex': 46}, {'entityName': 'FullPizzaWithModifiers', 'startCharIndex': 7, 'endCharIndex': 46}, {'entityName': 'PizzaType', 'startCharIndex': 17, 'endCharIndex': 32}, {'entityName': 'Size', 'startCharIndex': 11, 'endCharIndex': 15}, {'entityName': 'Quantity', 'startCharIndex': 7, 'endCharIndex': 9}, {'entityName': 'Crust', 'startCharIndex': 37, 'endCharIndex': 46}]}]
    201
[{"value":{"ExampleId":1137150691,"UtteranceText":"order a pizza"},"hasError":false},{"value":{"ExampleId":1137150692,"UtteranceText":"order a large pepperoni pizza"},"hasError":false},{"value":{"ExampleId":1137150693,"UtteranceText":"i want two large pepperoni pizzas on thin crust"},"hasError":false}]
training selected
body

    202
{"statusId":9,"status":"Queued"}
training status selected
body

    200
[{"modelId":"edb46abf-0000-41ab-beb2-a41a0fe1630f","details":{"statusId":9,"status":"Queued","exampleCount":0}},{"modelId":"a5030be2-616c-4648-bf2f-380fa9417d37","details":{"statusId":9,"status":"Queued","exampleCount":0}},{"modelId":"3f2b1f31-a3c3-4fbd-8182-e9d9dbc120b9","details":{"statusId":9,"status":"Queued","exampleCount":0}},{"modelId":"e4b6704b-1636-474c-9459-fe9ccbeba51c","details":{"statusId":9,"status":"Queued","exampleCount":0}},{"modelId":"031d3777-2a00-4a7a-9323-9a3280a30000","details":{"statusId":9,"status":"Queued","exampleCount":0}},{"modelId":"9250e7a1-06eb-4413-9432-ae132ed32583","details":{"statusId":9,"status":"Queued","exampleCount":0}}]
Esta é a saída formatada para facilitar a leitura:
add example utterances requested
body
[
  {
    'text': 'order a pizza',
    'intentName': 'ModifyOrder',
    'entityLabels': [
      {
        'entityName': 'Order',
        'startCharIndex': 6,
        'endCharIndex': 12
      }
    ]
  },
  {
    'text': 'order a large pepperoni pizza',
    'intentName': 'ModifyOrder',
    'entityLabels': [
      {
        'entityName': 'Order',
        'startCharIndex': 6,
        'endCharIndex': 28
      },
      {
        'entityName': 'FullPizzaWithModifiers',
        'startCharIndex': 6,
        'endCharIndex': 28
      },
      {
        'entityName': 'PizzaType',
        'startCharIndex': 14,
        'endCharIndex': 28
      },
      {
        'entityName': 'Size',
        'startCharIndex': 8,
        'endCharIndex': 12
      }
    ]
  },
  {
    'text': 'I want two large pepperoni pizzas on thin crust',
    'intentName': 'ModifyOrder',
    'entityLabels': [
      {
        'entityName': 'Order',
        'startCharIndex': 7,
        'endCharIndex': 46
      },
      {
        'entityName': 'FullPizzaWithModifiers',
        'startCharIndex': 7,
        'endCharIndex': 46
      },
      {
        'entityName': 'PizzaType',
        'startCharIndex': 17,
        'endCharIndex': 32
      },
      {
        'entityName': 'Size',
        'startCharIndex': 11,
        'endCharIndex': 15
      },
      {
        'entityName': 'Quantity',
        'startCharIndex': 7,
        'endCharIndex': 9
      },
      {
        'entityName': 'Crust',
        'startCharIndex': 37,
        'endCharIndex': 46
      }
    ]
  }
]

    201
[
  {
    "value": {
      "ExampleId": 1137150691,
      "UtteranceText": "order a pizza"
    },
    "hasError": false
  },
  {
    "value": {
      "ExampleId": 1137150692,
      "UtteranceText": "order a large pepperoni pizza"
    },
    "hasError": false
  },
  {
    "value": {
      "ExampleId": 1137150693,
      "UtteranceText": "i want two large pepperoni pizzas on thin crust"
    },
    "hasError": false
  }
]
training selected
body

    202
{
  "statusId": 9,
  "status": "Queued"
}
training status selected
body

    200
[
  {
    "modelId": "edb46abf-0000-41ab-beb2-a41a0fe1630f",
    "details": {
      "statusId": 9,
      "status": "Queued",
      "exampleCount": 0
    }
  },
  {
    "modelId": "a5030be2-616c-4648-bf2f-380fa9417d37",
    "details": {
      "statusId": 9,
      "status": "Queued",
      "exampleCount": 0
    }
  },
  {
    "modelId": "3f2b1f31-a3c3-4fbd-8182-e9d9dbc120b9",
    "details": {
      "statusId": 9,
      "status": "Queued",
      "exampleCount": 0
    }
  },
  {
    "modelId": "e4b6704b-1636-474c-9459-fe9ccbeba51c",
    "details": {
      "statusId": 9,
      "status": "Queued",
      "exampleCount": 0
    }
  },
  {
    "modelId": "031d3777-2a00-4a7a-9323-9a3280a30000",
    "details": {
      "statusId": 9,
      "status": "Queued",
      "exampleCount": 0
    }
  },
  {
    "modelId": "9250e7a1-06eb-4413-9432-ae132ed32583",
    "details": {
      "statusId": 9,
      "status": "Queued",
      "exampleCount": 0
    }
  }
]
Limpar os recursos
Ao concluir este guia de início rápido, exclua o arquivo do sistema de arquivos.
Próximas etapas
Documentação de referência | Amostra
Pré-requisitos
- Linguagem de programação Node.js
- Visual Studio Code
Exemplo de arquivo JSON de enunciados
Os enunciados de exemplo seguem um formato específico.
O campo text contém o texto do enunciado de exemplo. O campo intentName precisa corresponder ao nome de uma intenção existente no aplicativo do LUIS. O campo entityLabels é obrigatório. Se você não quiser rotular as entidades, forneça uma matriz vazia.
Se a matriz entityLabels não estiver vazia, startCharIndex e endCharIndex precisarão marcar a entidade referenciada no campo entityName. O índice começa no zero. Se você começar ou terminar o rótulo em um espaço no texto, a chamada à API para adicionar os enunciados falhará.
[
  {
    "text": "order a pizza",
    "intentName": "ModifyOrder",
    "entityLabels": [
      {
        "entityName": "Order",
        "startCharIndex": 6,
        "endCharIndex": 12
      }
    ]
  },
  {
    "text": "order a large pepperoni pizza",
    "intentName": "ModifyOrder",
    "entityLabels": [
      {
        "entityName": "Order",
        "startCharIndex": 6,
        "endCharIndex": 28
      },
      {
        "entityName": "FullPizzaWithModifiers",
        "startCharIndex": 6,
        "endCharIndex": 28
      },
      {
        "entityName": "PizzaType",
        "startCharIndex": 14,
        "endCharIndex": 28
      },
      {
        "entityName": "Size",
        "startCharIndex": 8,
        "endCharIndex": 12
      }
    ]
  },
  {
    "text": "I want two large pepperoni pizzas on thin crust",
    "intentName": "ModifyOrder",
    "entityLabels": [
      {
        "entityName": "Order",
        "startCharIndex": 7,
        "endCharIndex": 46
      },
      {
        "entityName": "FullPizzaWithModifiers",
        "startCharIndex": 7,
        "endCharIndex": 46
      },
      {
        "entityName": "PizzaType",
        "startCharIndex": 17,
        "endCharIndex": 32
      },
      {
        "entityName": "Size",
        "startCharIndex": 11,
        "endCharIndex": 15
      },
      {
        "entityName": "Quantity",
        "startCharIndex": 7,
        "endCharIndex": 9
      },
      {
        "entityName": "Crust",
        "startCharIndex": 37,
        "endCharIndex": 46
      }
    ]
  }
]
Criar o projeto do Node.js
Crie uma pasta para armazenar seu projeto Node.js, tal como
node-model-with-rest.Abra um novo prompt de comando, navegue até a pasta que você criou e execute o seguinte comando:
npm initPressione Enter em cada prompt para aceitar as configurações padrão.
Instale o módulo solicitação-promessa inserindo o seguinte comando:
npm install --save request
npm install --save request-promise
npm install --save querystring
Alterar o modelo de maneira programática
Crie um arquivo chamado
model.js. Adicione os códigos a seguir:// // This quickstart shows how to add utterances to a LUIS model using the REST APIs. // var request = require('request-promise'); ////////// // Values to modify. // YOUR-APP-ID: The App ID GUID found on the www.luis.ai Application Settings page. const LUIS_appId = "PASTE_YOUR_LUIS_APP_ID_HERE"; // YOUR-AUTHORING-KEY: Your LUIS authoring key, 32 character value. const LUIS_authoringKey = "PASTE_YOUR_LUIS_AUTHORING_SUBSCRIPTION_KEY_HERE"; // YOUR-AUTHORING-ENDPOINT: Replace this with your authoring key endpoint. // For example, "https://your-resource-name.cognitiveservices.azure.com/" const LUIS_endpoint = "PASTE_YOUR_LUIS_AUTHORING_ENDPOINT_HERE"; // NOTE: Replace this your version number. The Pizza app uses a version number of "0.1". const LUIS_versionId = "0.1"; ////////// const addUtterancesURI = `${LUIS_endpoint}luis/authoring/v3.0-preview/apps/${LUIS_appId}/versions/${LUIS_versionId}/examples`; const addTrainURI = `${LUIS_endpoint}luis/authoring/v3.0-preview/apps/${LUIS_appId}/versions/${LUIS_versionId}/train`; const utterances = [ { 'text': 'order a pizza', 'intentName': 'ModifyOrder', 'entityLabels': [ { 'entityName': 'Order', 'startCharIndex': 6, 'endCharIndex': 12 } ] }, { 'text': 'order a large pepperoni pizza', 'intentName': 'ModifyOrder', 'entityLabels': [ { 'entityName': 'Order', 'startCharIndex': 6, 'endCharIndex': 28 }, { 'entityName': 'FullPizzaWithModifiers', 'startCharIndex': 6, 'endCharIndex': 28 }, { 'entityName': 'PizzaType', 'startCharIndex': 14, 'endCharIndex': 28 }, { 'entityName': 'Size', 'startCharIndex': 8, 'endCharIndex': 12 } ] }, { 'text': 'I want two large pepperoni pizzas on thin crust', 'intentName': 'ModifyOrder', 'entityLabels': [ { 'entityName': 'Order', 'startCharIndex': 7, 'endCharIndex': 46 }, { 'entityName': 'FullPizzaWithModifiers', 'startCharIndex': 7, 'endCharIndex': 46 }, { 'entityName': 'PizzaType', 'startCharIndex': 17, 'endCharIndex': 32 }, { 'entityName': 'Size', 'startCharIndex': 11, 'endCharIndex': 15 }, { 'entityName': 'Quantity', 'startCharIndex': 7, 'endCharIndex': 9 }, { 'entityName': 'Crust', 'startCharIndex': 37, 'endCharIndex': 46 } ] } ]; // Main function. const main = async() =>{ await addUtterances(utterances); await train("POST"); await train("GET"); } // Adds the utterances to the model. const addUtterances = async (utterances) => { const options = { uri: addUtterancesURI, method: 'POST', headers: { 'Ocp-Apim-Subscription-Key': LUIS_authoringKey }, json: true, body: utterances }; const response = await request(options) console.log("addUtterance:\n" + JSON.stringify(response, null, 2)); } // With verb === "POST", sends a training request. // With verb === "GET", obtains the training status. const train = async (verb) => { const options = { uri: addTrainURI, method: verb, headers: { 'Ocp-Apim-Subscription-Key': LUIS_authoringKey }, json: true, body: null // The body can be empty for a training request }; const response = await request(options) console.log("train " + verb + ":\n" + JSON.stringify(response, null, 2)); } // MAIN main().then(() => console.log("done")).catch((err)=> console.log(err));Substitua os valores que começam com
YOUR-por seus valores.Informações Finalidade YOUR-APP-IDSua ID do aplicativo LUIS. YOUR-AUTHORING-KEYSua chave de criação de 32 caracteres. YOUR-AUTHORING-ENDPOINTSeu ponto de extremidade da URL de criação. Por exemplo, https://replace-with-your-resource-name.api.cognitive.microsoft.com/. Você definiu o nome do recurso quando você criou o recurso.As chaves e os recursos atribuídos estão visíveis no portal do LUIS na seção Gerenciar, na página recursos do Azure. A ID do aplicativo está disponível na mesma seção Gerenciar, na página Configurações do Aplicativo.
Importante
Lembre-se de remover a chave do seu código quando terminar e nunca poste-a publicamente. Para produção, use uma maneira segura de armazenar e acessar suas credenciais, como o Azure Key Vault. Confira o artigo sobre segurança dos serviços de IA do Azure para obter mais informações.
No prompt de comando, insira o seguinte comando para executar o projeto:
node model.jsExamine a resposta de criação:
addUtterance:
[
  {
    "value": {
      "ExampleId": 1137150691,
      "UtteranceText": "order a pizza"
    },
    "hasError": false
  },
  {
    "value": {
      "ExampleId": 1137150692,
      "UtteranceText": "order a large pepperoni pizza"
    },
    "hasError": false
  },
  {
    "value": {
      "ExampleId": 1137150693,
      "UtteranceText": "i want two large pepperoni pizzas on thin crust"
    },
    "hasError": false
  }
]
train POST:
{
  "statusId": 9,
  "status": "Queued"
}
train GET:
[
  {
    "modelId": "edb46abf-0000-41ab-beb2-a41a0fe1630f",
    "details": {
      "statusId": 9,
      "status": "Queued",
      "exampleCount": 0
    }
  },
  {
    "modelId": "a5030be2-616c-4648-bf2f-380fa9417d37",
    "details": {
      "statusId": 9,
      "status": "Queued",
      "exampleCount": 0
    }
  },
  {
    "modelId": "3f2b1f31-a3c3-4fbd-8182-e9d9dbc120b9",
    "details": {
      "statusId": 9,
      "status": "Queued",
      "exampleCount": 0
    }
  },
  {
    "modelId": "e4b6704b-1636-474c-9459-fe9ccbeba51c",
    "details": {
      "statusId": 9,
      "status": "Queued",
      "exampleCount": 0
    }
  },
  {
    "modelId": "031d3777-2a00-4a7a-9323-9a3280a30000",
    "details": {
      "statusId": 9,
      "status": "Queued",
      "exampleCount": 0
    }
  },
  {
    "modelId": "9250e7a1-06eb-4413-9432-ae132ed32583",
    "details": {
      "statusId": 9,
      "status": "Queued",
      "exampleCount": 0
    }
  }
]
done
Limpar os recursos
Ao concluir este início rápido, exclua a pasta do projeto do sistema de arquivos.
Próximas etapas
Documentação de referência | Amostra
Pré-requisitos
- Python 3.6 ou posterior.
- Visual Studio Code
Exemplo de arquivo JSON de enunciados
Os enunciados de exemplo seguem um formato específico.
O campo text contém o texto do enunciado de exemplo. O campo intentName precisa corresponder ao nome de uma intenção existente no aplicativo do LUIS. O campo entityLabels é obrigatório. Se você não quiser rotular as entidades, forneça uma matriz vazia.
Se a matriz entityLabels não estiver vazia, startCharIndex e endCharIndex precisarão marcar a entidade referenciada no campo entityName. O índice começa no zero. Se você começar ou terminar o rótulo em um espaço no texto, a chamada à API para adicionar os enunciados falhará.
[
  {
    "text": "order a pizza",
    "intentName": "ModifyOrder",
    "entityLabels": [
      {
        "entityName": "Order",
        "startCharIndex": 6,
        "endCharIndex": 12
      }
    ]
  },
  {
    "text": "order a large pepperoni pizza",
    "intentName": "ModifyOrder",
    "entityLabels": [
      {
        "entityName": "Order",
        "startCharIndex": 6,
        "endCharIndex": 28
      },
      {
        "entityName": "FullPizzaWithModifiers",
        "startCharIndex": 6,
        "endCharIndex": 28
      },
      {
        "entityName": "PizzaType",
        "startCharIndex": 14,
        "endCharIndex": 28
      },
      {
        "entityName": "Size",
        "startCharIndex": 8,
        "endCharIndex": 12
      }
    ]
  },
  {
    "text": "I want two large pepperoni pizzas on thin crust",
    "intentName": "ModifyOrder",
    "entityLabels": [
      {
        "entityName": "Order",
        "startCharIndex": 7,
        "endCharIndex": 46
      },
      {
        "entityName": "FullPizzaWithModifiers",
        "startCharIndex": 7,
        "endCharIndex": 46
      },
      {
        "entityName": "PizzaType",
        "startCharIndex": 17,
        "endCharIndex": 32
      },
      {
        "entityName": "Size",
        "startCharIndex": 11,
        "endCharIndex": 15
      },
      {
        "entityName": "Quantity",
        "startCharIndex": 7,
        "endCharIndex": 9
      },
      {
        "entityName": "Crust",
        "startCharIndex": 37,
        "endCharIndex": 46
      }
    ]
  }
]
Criar aplicativo Pizza
Criar o aplicativo Pizza.
- Selecione pizza-app-for-luis-v6.json para abrir a página do GitHub para o arquivo
pizza-app-for-luis.json. - Clique com o botão direito do mouse (ou toque e segure por alguns segundos) o botão Bruto e selecione Salvar link como para salvar o
pizza-app-for-luis.jsonem seu computador. - Entre no portal do LUIS.
- Selecione Meus Aplicativos.
- Na página Meus aplicativos, selecione + Novo aplicativo de conversa.
- Selecione Importar como JSON.
- Na caixa de diálogo Importar novo aplicativo, selecione o botão Escolher arquivo.
- Selecione o arquivo
pizza-app-for-luis.jsonque você baixou e, em seguida, selecionepizza-app-for-luis.json. - No campo Nome da caixa de diálogo Importar novo aplicativo, insira um nome para o aplicativo Pizza e, em seguida, selecione o botão Concluído.
O aplicativo será importado.
Se você vir uma caixa de diálogo que diz Como criar um aplicativo LUIS eficaz, feche-a.
Treinar e publicar o aplicativo Pizza
Você deve ver a página Intenções com uma lista de intenções no aplicativo Pizza.
No lado superior direito do site do LUIS, selecione o botão Treinar.
O treinamento é concluído quando o botão Treinar fica desabilitado.
Para receber uma previsão do LUIS em um chatbot ou em outro aplicativo cliente, publique o aplicativo no ponto de extremidade de previsão.
Selecione Publicar no painel de navegação superior direito.
Selecione o slot de Produção e Concluído.
Selecione Acessar as URLs do ponto de extremidade na notificação para ir à página Recursos do Azure. Você só poderá ver as URLs se tiver um recurso de previsão associado ao aplicativo. Encontre também a página Recursos do Azure clicando em Gerenciar.
Adicionar um recurso de criação ao aplicativo Pizza
- Selecione GERENCIAR.
- Selecione Recursos do Azure.
- Selecione Recurso de Criação.
- Selecione Alterar recurso de criação.
Se você tiver um recurso de criação, insira o Nome do Locatário, Nome da Assinatura e nome do recurso LUIS do recurso de criação.
Se você não tiver um recurso de criação:
- Selecione Criar recurso.
- Insira um Nome do Locatário, Nome do Recurso, Nome da Assinatura e Nome do Grupo de Recursos do Azure.
Agora, o aplicativo Pizza está pronto para o uso.
Registrar os valores de acesso para seu aplicativo Pizza
Para usar o novo aplicativo Pizza, você precisará da ID do aplicativo, da chave de criação e do ponto de extremidade de criação desse aplicativo. Para obter previsões, você precisará do ponto de extremidade de previsão e da chave de previsão separados.
Para encontrar esses valores:
- Na página Intenções, selecione GERENCIAR.
- Na página Configurações de aplicativo, registre a ID do aplicativo.
- Selecione Recursos do Azure.
- Selecione Recurso de Criação.
- Nas guias Recurso de Criação e Recursos de Previsão, registre a Chave Primária. Esse valor é a sua chave de criação.
- Registre a URL do ponto de extremidade. Esse valor é o seu ponto de extremidade de criação.
Alterar o modelo de maneira programática
Crie um arquivo chamado
model.py. Adicione os códigos a seguir:########### Python 3.6 ############# # # This quickstart shows how to add utterances to a LUIS model using the REST APIs. # import requests try: ########## # Values to modify. # YOUR-APP-ID: The App ID GUID found on the www.luis.ai Application Settings page. appId = "PASTE_YOUR_LUIS_APP_ID_HERE" # YOUR-AUTHORING-KEY: Your LUIS authoring key, 32 character value. authoring_key = "PASTE_YOUR_LUIS_AUTHORING_SUBSCRIPTION_KEY_HERE" # YOUR-AUTHORING-ENDPOINT: Replace this with your authoring key endpoint. # For example, "https://your-resource-name.cognitiveservices.azure.com/" authoring_endpoint = "PASTE_YOUR_LUIS_AUTHORING_ENDPOINT_HERE" # The version number of your LUIS app app_version = "0.1" ########## # The headers to use in this REST call. headers = {'Ocp-Apim-Subscription-Key': authoring_key} # The URL parameters to use in this REST call. params ={ #'timezoneOffset': '0', #'verbose': 'true', #'show-all-intents': 'true', #'spellCheck': 'false', #'staging': 'false' } # List of example utterances to send to the LUIS app. data = """[ { 'text': 'order a pizza', 'intentName': 'ModifyOrder', 'entityLabels': [ { 'entityName': 'Order', 'startCharIndex': 6, 'endCharIndex': 12 } ] }, { 'text': 'order a large pepperoni pizza', 'intentName': 'ModifyOrder', 'entityLabels': [ { 'entityName': 'Order', 'startCharIndex': 6, 'endCharIndex': 28 }, { 'entityName': 'FullPizzaWithModifiers', 'startCharIndex': 6, 'endCharIndex': 28 }, { 'entityName': 'PizzaType', 'startCharIndex': 14, 'endCharIndex': 28 }, { 'entityName': 'Size', 'startCharIndex': 8, 'endCharIndex': 12 } ] }, { 'text': 'I want two large pepperoni pizzas on thin crust', 'intentName': 'ModifyOrder', 'entityLabels': [ { 'entityName': 'Order', 'startCharIndex': 7, 'endCharIndex': 46 }, { 'entityName': 'FullPizzaWithModifiers', 'startCharIndex': 7, 'endCharIndex': 46 }, { 'entityName': 'PizzaType', 'startCharIndex': 17, 'endCharIndex': 32 }, { 'entityName': 'Size', 'startCharIndex': 11, 'endCharIndex': 15 }, { 'entityName': 'Quantity', 'startCharIndex': 7, 'endCharIndex': 9 }, { 'entityName': 'Crust', 'startCharIndex': 37, 'endCharIndex': 46 } ] } ] """ # Make the REST call to POST the list of example utterances. response = requests.post(f'{authoring_endpoint}luis/authoring/v3.0-preview/apps/{appId}/versions/{app_version}/examples', headers=headers, params=params, data=data) # Display the results on the console. print('Add the list of utterances:') print(response.json()) # Make the REST call to initiate a training session. response = requests.post(f'{authoring_endpoint}luis/authoring/v3.0-preview/apps/{appId}/versions/{app_version}/train', headers=headers, params=params, data=None) # Display the results on the console. print('Request training:') print(response.json()) # Make the REST call to request the status of training. response = requests.get(f'{authoring_endpoint}luis/authoring/v3.0-preview/apps/{appId}/versions/{app_version}/train', headers=headers, params=params, data=None) # Display the results on the console. print('Request training status:') print(response.json()) except Exception as e: # Display the error string. print(f'{e}')Substitua os valores que começam com
YOUR-por seus valores.Informações Finalidade YOUR-APP-IDSua ID do aplicativo LUIS. YOUR-AUTHORING-KEYSua chave de criação de 32 caracteres. YOUR-AUTHORING-ENDPOINTSeu ponto de extremidade da URL de criação. Por exemplo, https://replace-with-your-resource-name.api.cognitive.microsoft.com/. Você definiu o nome do recurso quando você criou o recurso.As chaves e os recursos atribuídos estão visíveis no portal do LUIS na seção Gerenciar, na página recursos do Azure. A ID do aplicativo está disponível na mesma seção Gerenciar, na página Configurações do Aplicativo.
Importante
Lembre-se de remover a chave do seu código quando terminar e nunca poste-a publicamente. Para produção, use uma maneira segura de armazenar e acessar suas credenciais, como o Azure Key Vault. Confira o artigo sobre segurança dos serviços de IA do Azure para obter mais informações.
Com um prompt de comando no mesmo diretório em que você criou o arquivo, insira o seguinte comando para executar o arquivo:
python model.pyExamine a resposta de criação:
Add the list of utterances:
[{'value': {'ExampleId': 1137150691, 'UtteranceText': 'order a pizza'}, 'hasError': False}, {'value': {'ExampleId': 1137150692, 'UtteranceText': 'order a large pepperoni pizza'}, 'hasError': False}, {'value': {'ExampleId': 1137150693, 'UtteranceText': 'i want two large pepperoni pizzas on thin crust'}, 'hasError': False}]
Request training:
{'statusId': 9, 'status': 'Queued'}
Request training status:
[{'modelId': 'edb46abf-0000-41ab-beb2-a41a0fe1630f', 'details': {'statusId': 3, 'status': 'InProgress', 'exampleCount': 0, 'progressSubstatus': 'CollectingData'}}, {'modelId': 'a5030be2-616c-4648-bf2f-380fa9417d37', 'details': {'statusId': 3, 'status': 'InProgress', 'exampleCount': 0, 'progressSubstatus': 'CollectingData'}}, {'modelId': '3f2b1f31-a3c3-4fbd-8182-e9d9dbc120b9', 'details': {'statusId': 3, 'status': 'InProgress', 'exampleCount': 0, 'progressSubstatus': 'CollectingData'}}, {'modelId': 'e4b6704b-1636-474c-9459-fe9ccbeba51c', 'details': {'statusId': 3, 'status': 'InProgress', 'exampleCount': 0, 'progressSubstatus': 'CollectingData'}}, {'modelId': '031d3777-2a00-4a7a-9323-9a3280a30000', 'details': {'statusId': 3, 'status': 'InProgress', 'exampleCount': 0, 'progressSubstatus': 'CollectingData'}}, {'modelId': '9250e7a1-06eb-4413-9432-ae132ed32583', 'details': {'statusId': 3, 'status': 'InProgress', 'exampleCount': 0, 'progressSubstatus': 'CollectingData'}}]
Esta é a saída formatada para facilitar a leitura:
Add the list of utterances:
[
  {
    'value': {
      'ExampleId': 1137150691,
      'UtteranceText': 'order a pizza'
    },
    'hasError': False
  },
  {
    'value': {
      'ExampleId': 1137150692,
      'UtteranceText': 'order a large pepperoni pizza'
    },
    'hasError': False
  },
  {
    'value': {
      'ExampleId': 1137150693,
      'UtteranceText': 'i want two large pepperoni pizzas on thin crust'
    },
    'hasError': False
  }
]

Request training:
{
  'statusId': 9,
  'status': 'Queued'
}

Request training status:
[
  {
    'modelId': 'edb46abf-0000-41ab-beb2-a41a0fe1630f',
    'details': {
      'statusId': 3,
      'status': 'InProgress',
      'exampleCount': 0,
      'progressSubstatus': 'CollectingData'
    }
  },
  {
    'modelId': 'a5030be2-616c-4648-bf2f-380fa9417d37',
    'details': {
      'statusId': 3,
      'status': 'InProgress',
      'exampleCount': 0,
      'progressSubstatus': 'CollectingData'
    }
  },
  {
    'modelId': '3f2b1f31-a3c3-4fbd-8182-e9d9dbc120b9',
    'details': {
      'statusId': 3,
      'status': 'InProgress',
      'exampleCount': 0,
      'progressSubstatus': 'CollectingData'
    }
  },
  {
    'modelId': 'e4b6704b-1636-474c-9459-fe9ccbeba51c',
    'details': {
      'statusId': 3,
      'status': 'InProgress',
      'exampleCount': 0,
      'progressSubstatus': 'CollectingData'
    }
  },
  {
    'modelId': '031d3777-2a00-4a7a-9323-9a3280a30000',
    'details': {
      'statusId': 3,
      'status': 'InProgress',
      'exampleCount': 0,
      'progressSubstatus': 'CollectingData'
    }
  },
  {
    'modelId': '9250e7a1-06eb-4413-9432-ae132ed32583',
    'details': {
      'statusId': 3,
      'status': 'InProgress',
      'exampleCount': 0,
      'progressSubstatus': 'CollectingData'
    }
  }
]
Limpar os recursos
Ao concluir este guia de início rápido, exclua o arquivo do sistema de arquivos.