Purchase or subscribe to the private offer
Once you complete any necessary prechecks, check permissions, have your billing account ID ready, and accept a private offer, you're ready to purchase the private offer.
If you accept the private offer using the emailed link (that is, option 1 in accept a private offer), you're redirected to the Azure portal to complete the purchase on the private offer management dashboard.
Alternatively, you can also find the private offer by logging into the Azure portal and select the private offers management dashboard in the marketplace.
To complete the purchase of your private offer, follow these steps:
In the Azure portal, access the marketplace. You can search for marketplace in the search bar in Azure and select the marketplace icon, as shown earlier on this page.
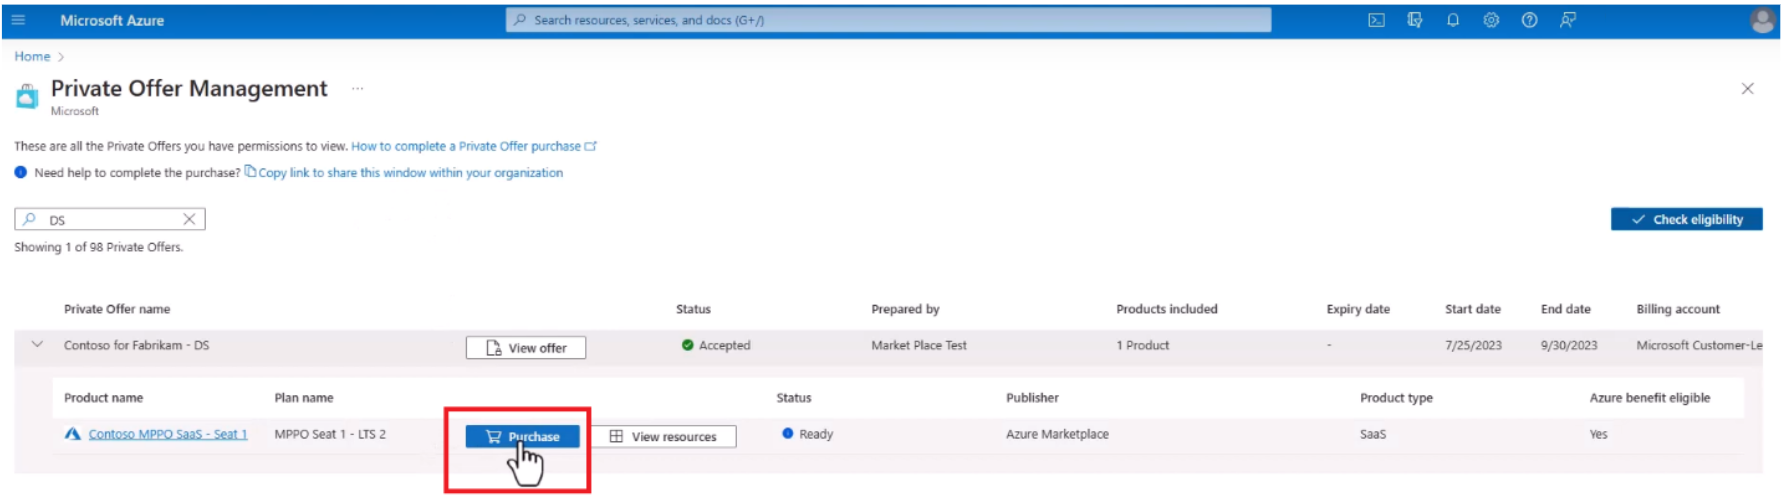
Select private offer management.
Under private offer management is a list of all the private offers with their status:

You can view two layers of information on any private offer: private offer information and product information.
Select the arrow (>) to expand the levels and view the different layers:

Private offer information contains information about the offer:
Item Description Private offer name The name of the Microsoft partner assigned to the private offer (for example, "offer for Contoso") View offer Directs you to the private offer acceptance page. If you've accepted the offer, you can view the offer details. Status - Pending: The offer is pending acceptance
- Accepted: The offer was accepted, and negotiated prices apply
- Ended: An offer that was accepted has reached the end of its term. To get a new offer at the same negotiated price, the Microsoft partner must create a new private offer
- Expired: The offer expiration date passed before the offer was accepted. If you still want this private offer, the ISV must create a new onePrepared by Name of the Microsoft partner who created the private offer Products included List of products included in the private offer Expiry date The last day the offer can be accepted (in UTC) Start date The start date of the private offer's term End date The end date of the private offer's term. Contact the Microsoft partner to get a new offer when the term is nearing an end to keep the same negotiated price Billing account The account to which the offer applies Product information contains information about the product or products included in the private offer:
Item Description Product name Name of the product Plan name Name of the plan Purchase Product purchase button. If the button is disabled, hover over the tool tip for information Manage resources This button takes you to the relevant blade where such resources are managed (for example, Software as a Service [SaaS], Virtual Machines [VMs]) Status Shows if the product is ready for purchase:
- Products might be ready for purchase up to one hour from the moment the private offer is accepted
- Some products can be purchased multiple times
- Some products can be purchased only oncePublisher Name of the Microsoft partner creating the private offer Product type Type of product, such as SaaS or VM Azure benefit eligible Shows if the product is Azure benefit eligible, meaning purchases count towards an Azure consumption commitment
To purchase the private offer, select Purchase:
Important
Depending on the type of solution, extra steps are required to complete the purchase, as explained in the next section.


Software-as-a-service (SaaS) products
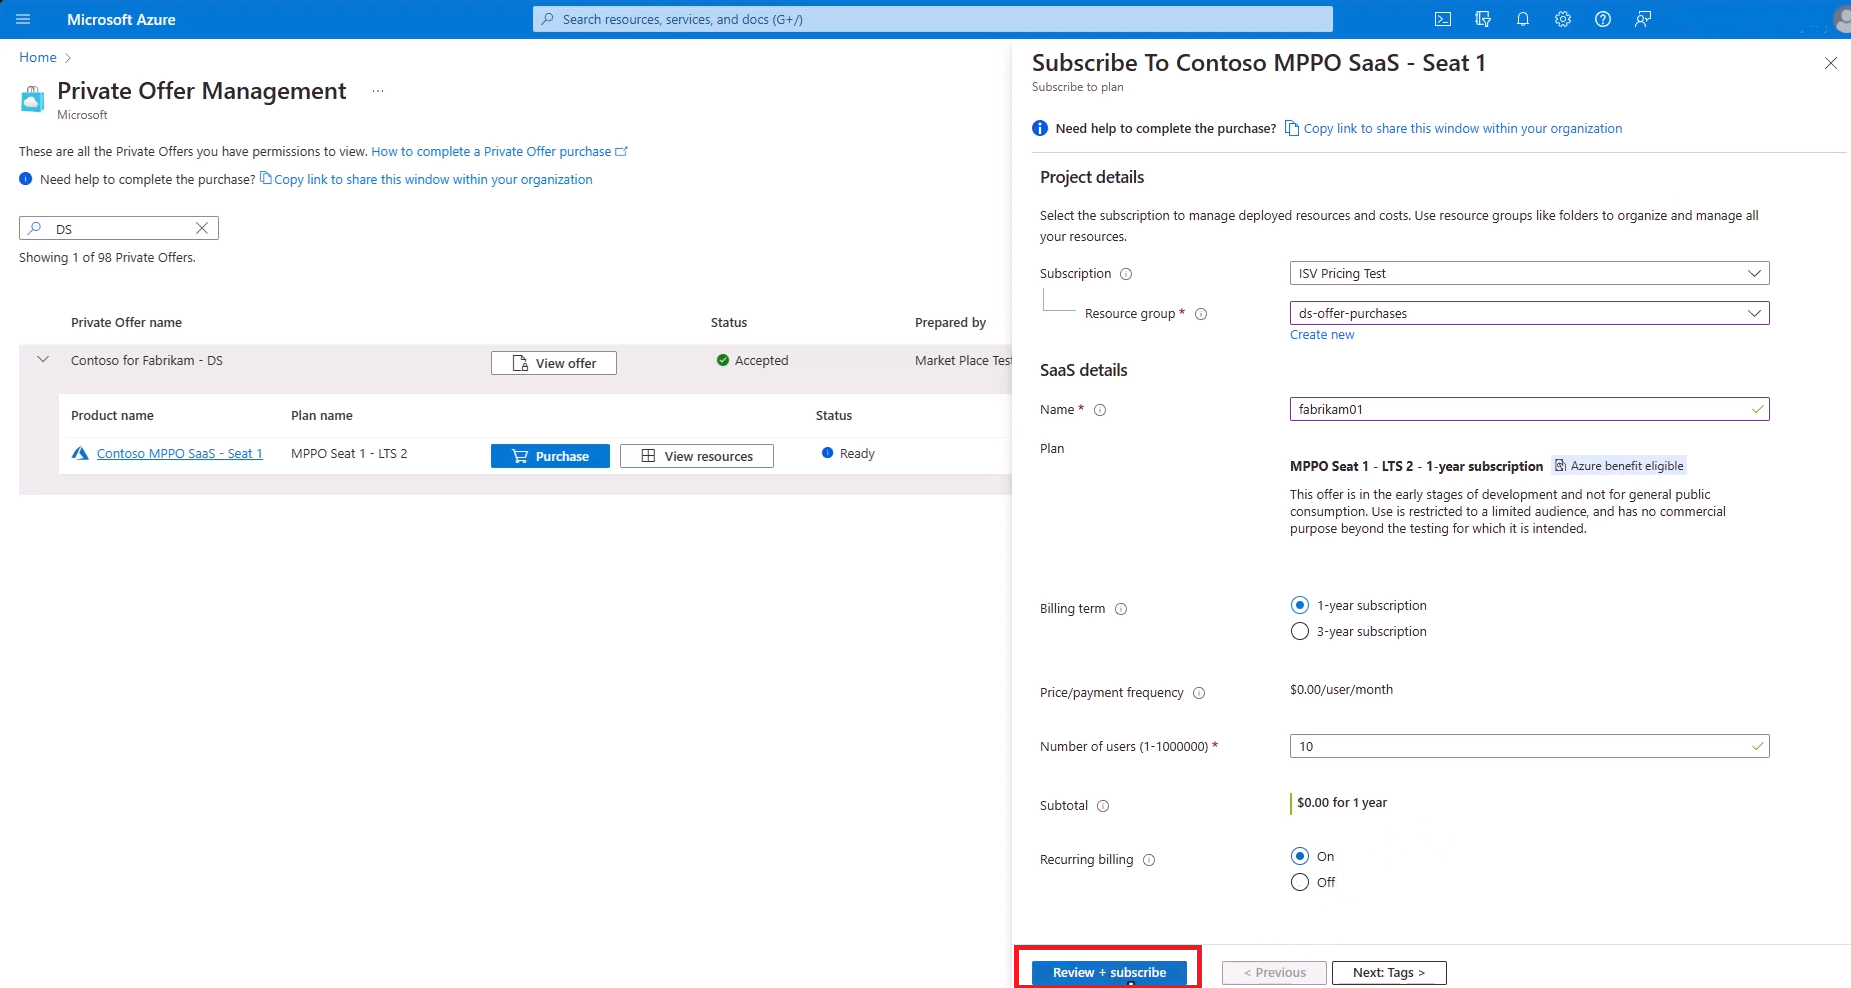
Complete all required fields under Project Details, select the Azure subscription you intend to use and the resource group.

Complete SaaS details.

Select Review + Subscribe.
Review the details of the offer and click Subscribe.
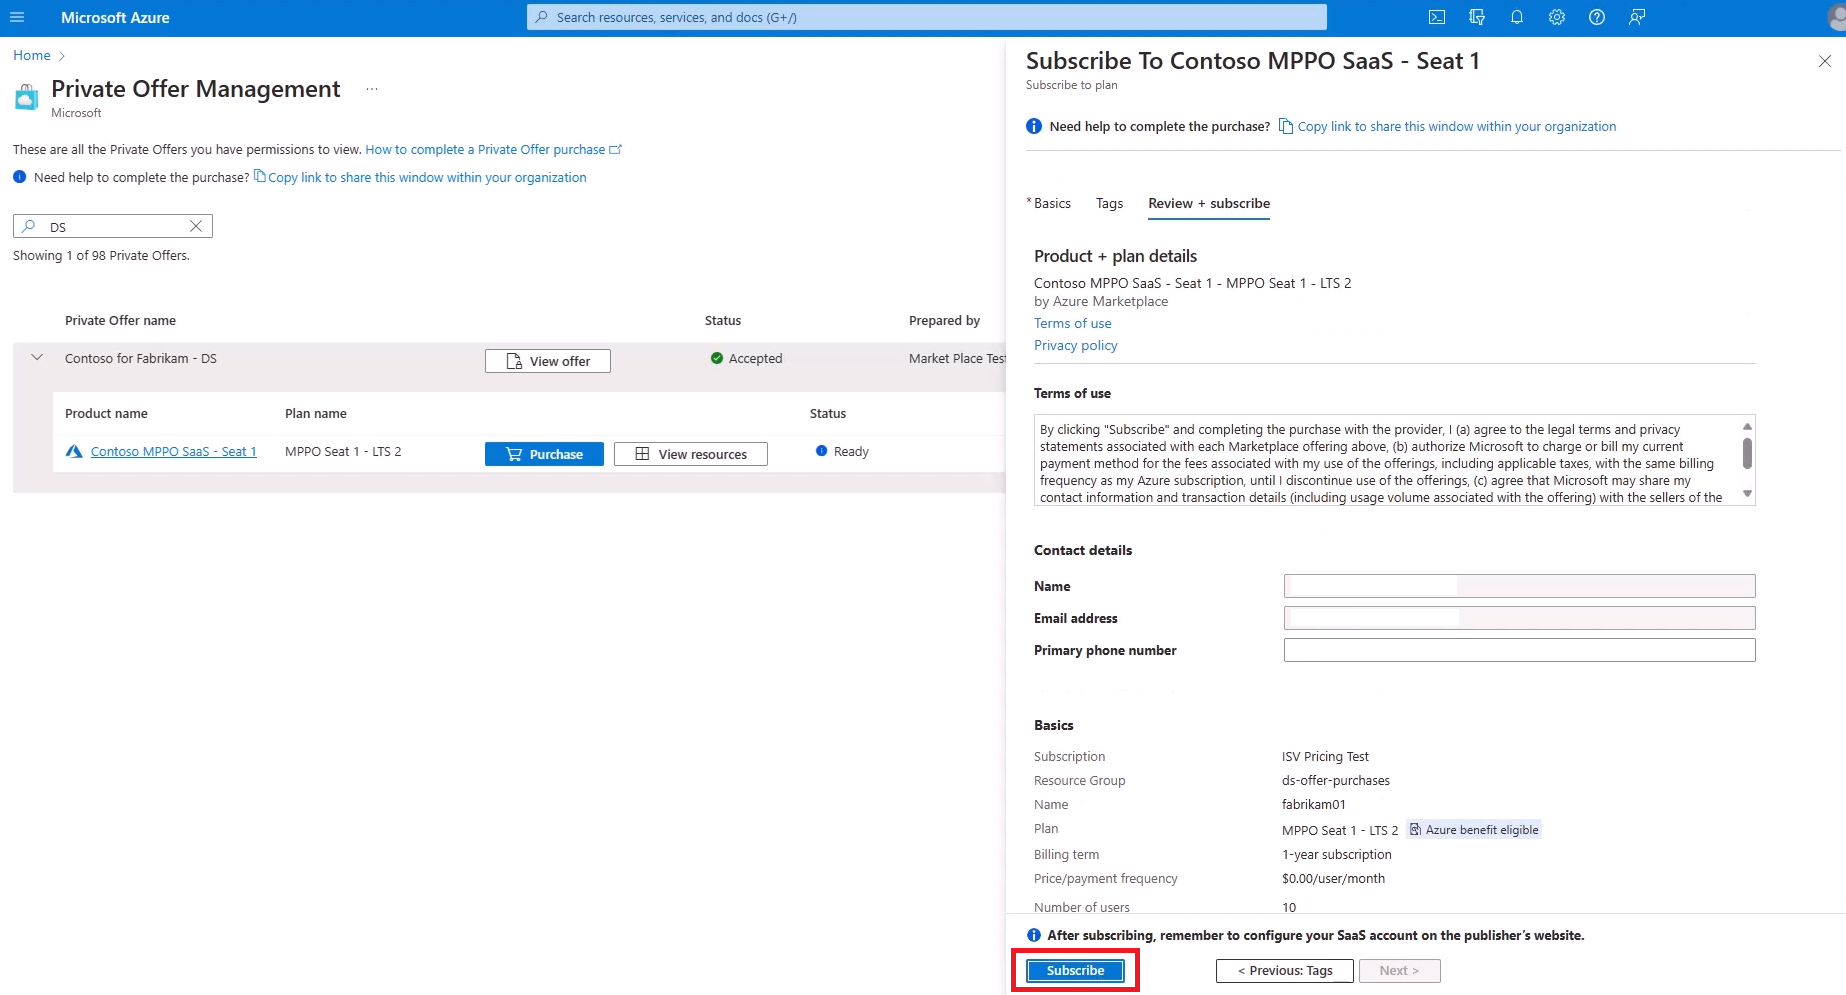
After you select subscribe, the subscription will be in progress.

Once deployment of the SaaS offer is complete, you need to configure the account on the Microsoft partner website. Select Configure account now.

Important
The purchase isn't complete until you've selected Configure account now to complete your SaaS activation. If you use a pop-up blocker, you might need to disable it to complete the purchase.


If this is a renewal of a SaaS product you purchased in the past:
- Find your private offer on the Private offers management dashboard.
- Select the product you want to purchase.
- Select View resources.
- Follow the instructions to manage your SaaS subscription.
Virtual machine (VM) products
If your VMs are already deployed, or if they'll be deployed by others later, with or without automation scripts, you don't need to do take further action. Accepting the offer causes the VM discounts to go into effect.
If you intend to deploy the VMs on your own via Azure portal:
Select Purchase on the VM product record on the Private offers management screen.
Follow the VM create wizard.
If you plan to buy VM reservations:
Continue to the Reservations menu and find the right product for purchase.
Note
This option doesn't apply to private offers which include virtual machine software reservation (VMSR) bundles with a prepackaged number of VM reservations. Refer to the section in this article about VMSR bundles.
If you plan to deploy these VM images as part of an Azure app or managed app:
Go to the public marketplace page and deploy the app.
Note
VMs are hidden from the marketplace and not for direct sell.
Virtual machine software reservations (VMSRs)
If you plan to use VMSRs to buy a bundle of prepackaged VM reservations for a specific number of VMs:
- Go to the Private offers management tab.
- Find the private offer with the VMSR bundle you want to buy, then select Purchase.
- Make sure the data in the bundle is correct and select Buy all reservations.
Completing the purchase might take a while. You'll get an email notification once the purchase is complete.
Azure apps and managed apps
If you plan to use Azure apps or managed apps:
- Find the private offer you accepted in Private offers management and select Purchase.
- From the panel that opens, choose the plan, and select Purchase.
You'll be redirected to the regular flow for creating your resource.