Application lifecycle management
By making dual-write solution-aware, you enable basic application lifecycle management (ALM) capabilities, such as transportation and backup/restore of dual-write table maps across environments. You also enable scenarios where you can get solutions that are published by Microsoft or an independent software vendor (ISV) from AppSource.
What is a dual-write solution?
A dual-write solution can contain one or more dual-write table maps. These maps can be imported into your environment (by selecting Solutions in Microsoft Power Apps). They can also be exported to other environments as a package. You can import Microsoft-published or ISV-published table maps from AppSource, modify them in your test environment, test them, and then, when they are ready, export them to your production environment. Additionally, you can publish your solution through AppSource, so that other people can use it.
There two types of solutions: managed and unmanaged.
A managed solution can't be modified, and it can be uninstalled after it's imported. When you import an unmanaged solution, you add all the components of that solution into your environment. When you import an unmanaged solution that contains components that you've already customized, your customizations are overwritten by the customizations in the imported unmanaged solution.
For more information about solutions, see the solutions overview.
Install the dual-write core solution
The dual-write core solution contains metadata for your table maps and must be installed in your environments.
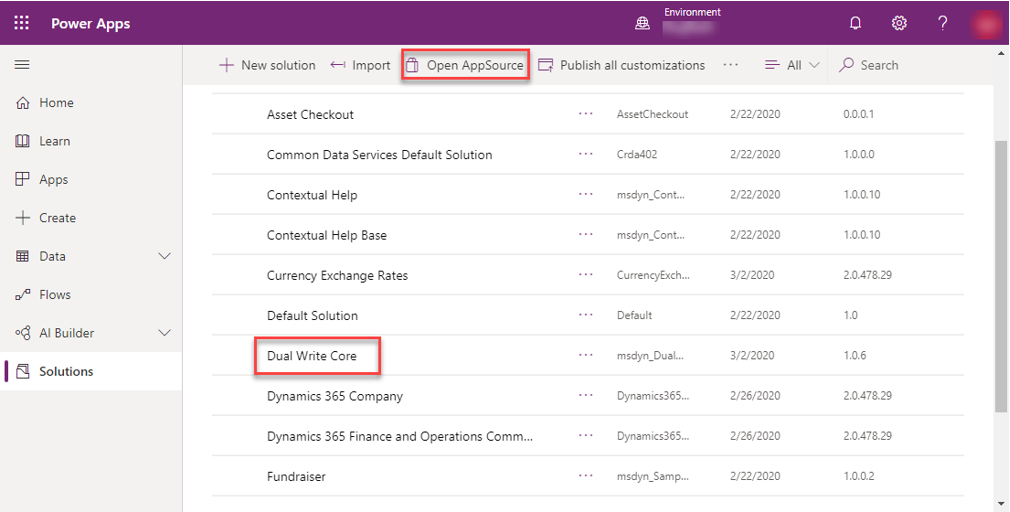
In Power Apps, in the left pane, select Solutions.
Select Open AppSource, and search for the solution that is named Dual Write Core.
Follow the prompts to import the solution.
Install the dual-write table maps solution
In Power Apps, in the left pane, select Solutions.
Select Open AppSource, and search for the solution that is named Dataverse Add-in for finance and operations package.
Follow the prompts to import the solution.
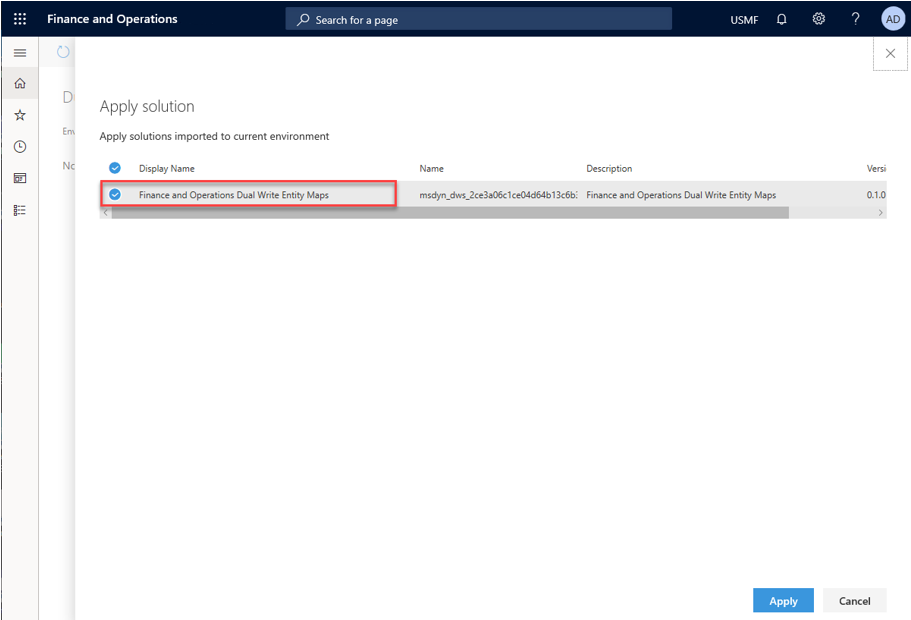
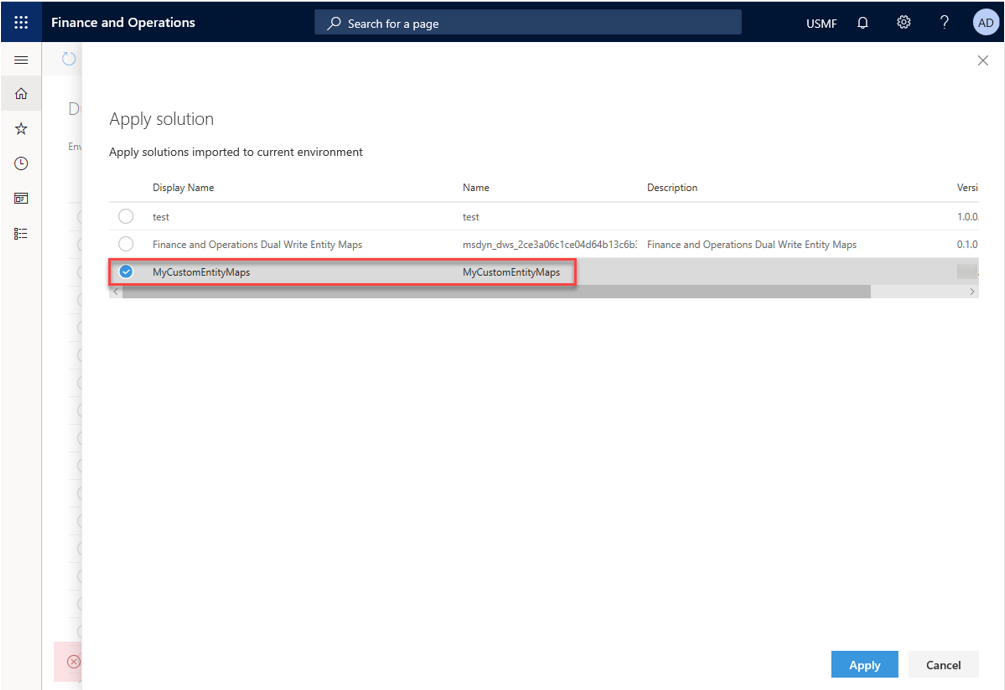
In the finance and operations app, on the Dual-write page, select Apply Solution to apply the table maps that you downloaded and installed. After you apply the solution, you will see that the default table maps are published.
You've now successfully imported and applied a Microsoft-published dual-write table maps solution to your environment.
Import table maps through a dual-write solution and apply them to your environment (New environments)
This section explains how to import table maps from AppSource and apply them to your environment.

Import the dual-write core solution.
- Create a new dual-write environment (a finance and operations app environment and a Dataverse environment).
- Follow the instructions in the Install the dual-write core solution section earlier in this article to install the dual-write core solution from AppSource in Power Apps.
- Verify that the dual-write core solution is listed under Solutions in Power Apps.
Import the Microsoft-published or ISV-published table maps solution.
- Follow the instructions in the Install the dual-write table maps solution section to download and install the Microsoft-published or ISV-published table maps from AppSource in Power Apps.
- Verify that the table maps solution is listed under Solutions in Power Apps.
Apply the dual-write table maps solution to your finance and operations app environment.
Apply the solution that you downloaded by selecting Apply Solutions on the Dual-write page in the finance and operations app, as described in the Install the dual-write table maps solution section.
Update table maps and export them to other environments as a solution
This section explains how to export your customized table maps as a solution, use it as a backup, and move the artifacts across environments and/or publish them to AppSource.

Customize your table maps
The first step is to customize your table maps by modifying existing table maps and adding a new table map.
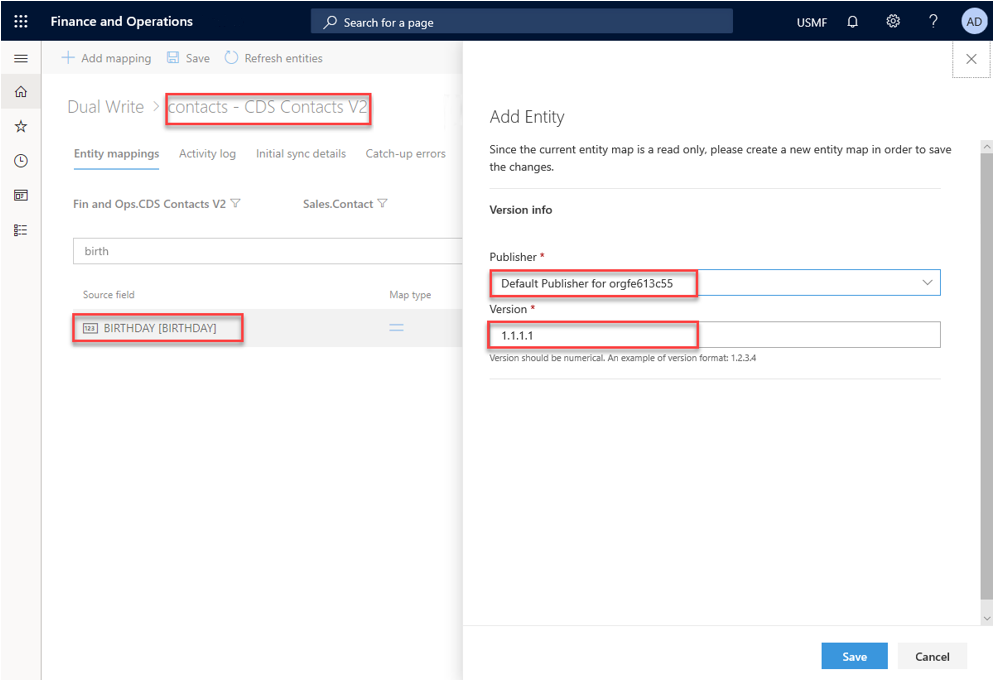
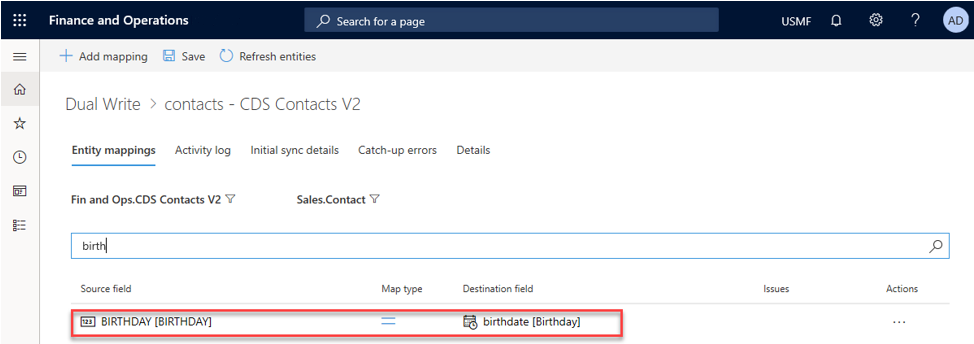
In the finance and operations app, on the Table mappings tab, customize the mappings for the default table map that you just installed by using a solution. To add a new table map, select Add Table. In both cases, when you save the table map, you're prompted to specify the publisher and the version number.
The following figure shows how to add a new column that is named birthday to the contacts - CDS Contacts V2 table map and select the default publisher.
Note
When you create a new solution by using these modified table maps, you must specify the same publisher.
The following figure shows how to add a new table map that is named Address books.

Confirm the table maps that you just modified and added. Be sure to enable and test them, to ensure that they work as you expect.

Create a new dual-write solution and add your components (Customized table maps)
Now that you've customized your mappings and added new mappings, the next step is to create a new dual-write solution and add the table maps to it.
In Power Apps, in the left pane, select Solutions, and then select New solution to create a solution. For this example, the solution is named MyCustomTableMaps. Be sure to select the same publisher that you selected in previous steps.
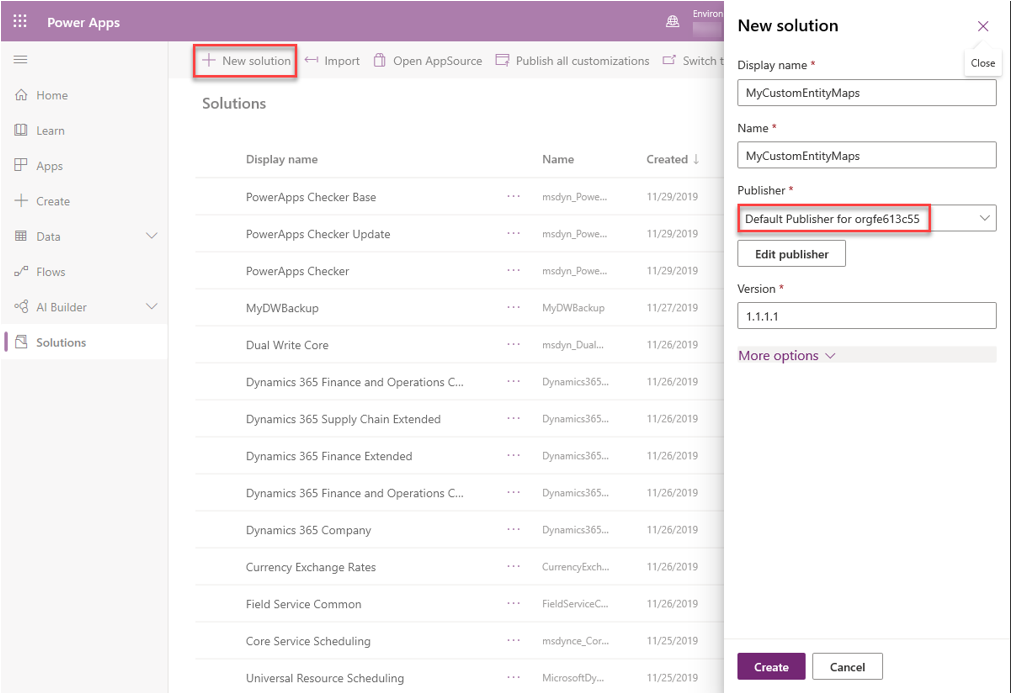
Select Create. The new solution appears on the Solutions list page.

Now that you've created your dual-write solution, you can add the customized table maps that you created in previous steps. Select the MyCustomTableMaps solution that you just created, select Add existing, point to Other, and then select Dual Write table map.
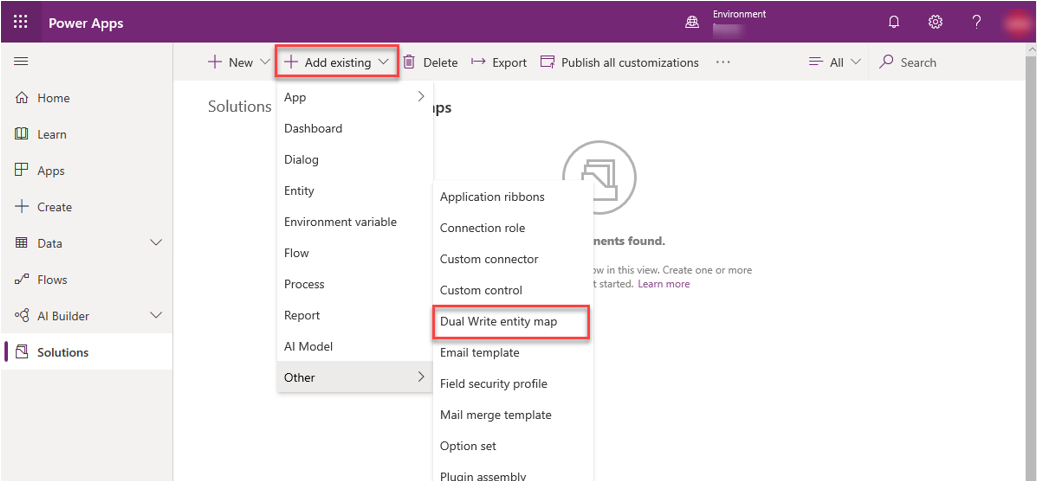
In the list, select the customized table maps, and add them to the solution. The solution should now contain your customized tables.

You've now customized your tables and put them into a solution.
Export and publish your solution
After you run the solution checker and make sure that there are no issues, you export the solution that you created and publish the changes.
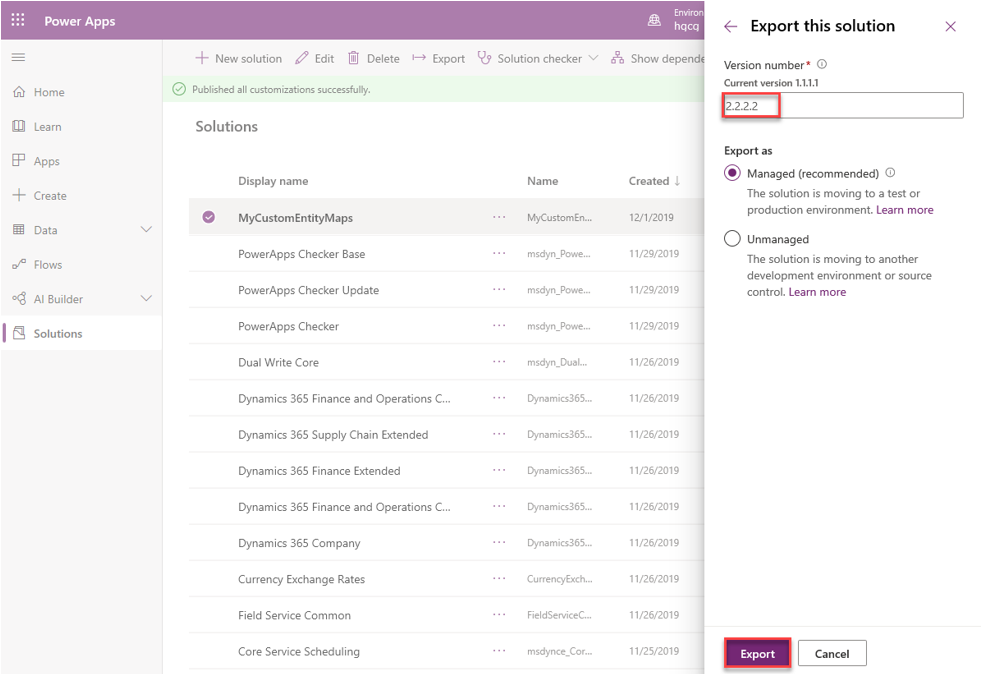
In the list of solutions, select your solution, and then select Export.
Update the version number, and select whether you want to export the solution as a managed or unmanaged solution. (We recommend that you export it as a managed solution.) Then select Export.
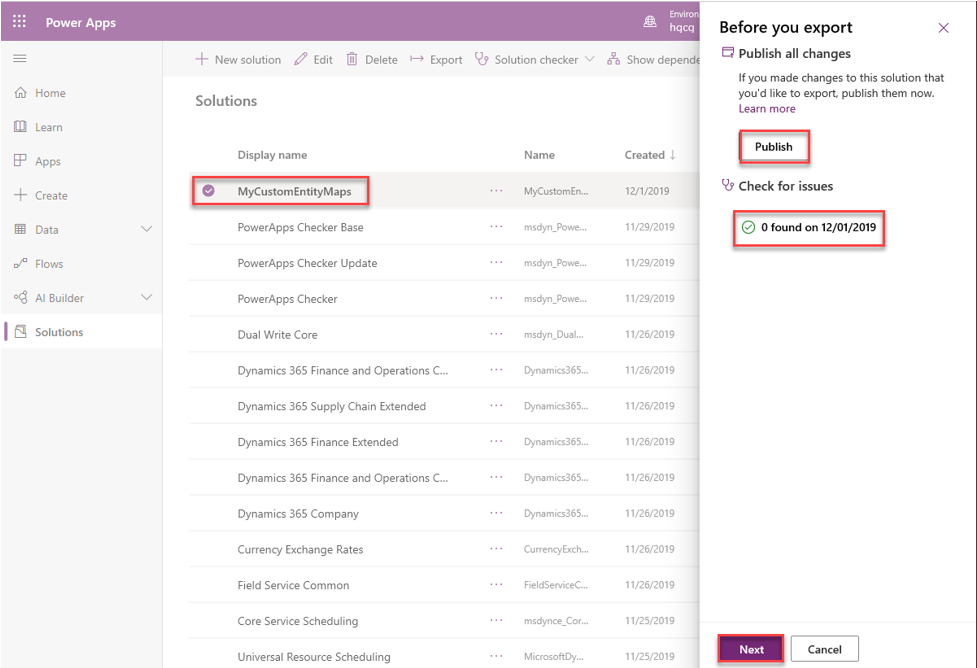
Before you export, select Publish all changes, and then select Check for issues. When you've finished, select Next to publish all your changes.
The solution, together with all its components, is exported to a zip file.
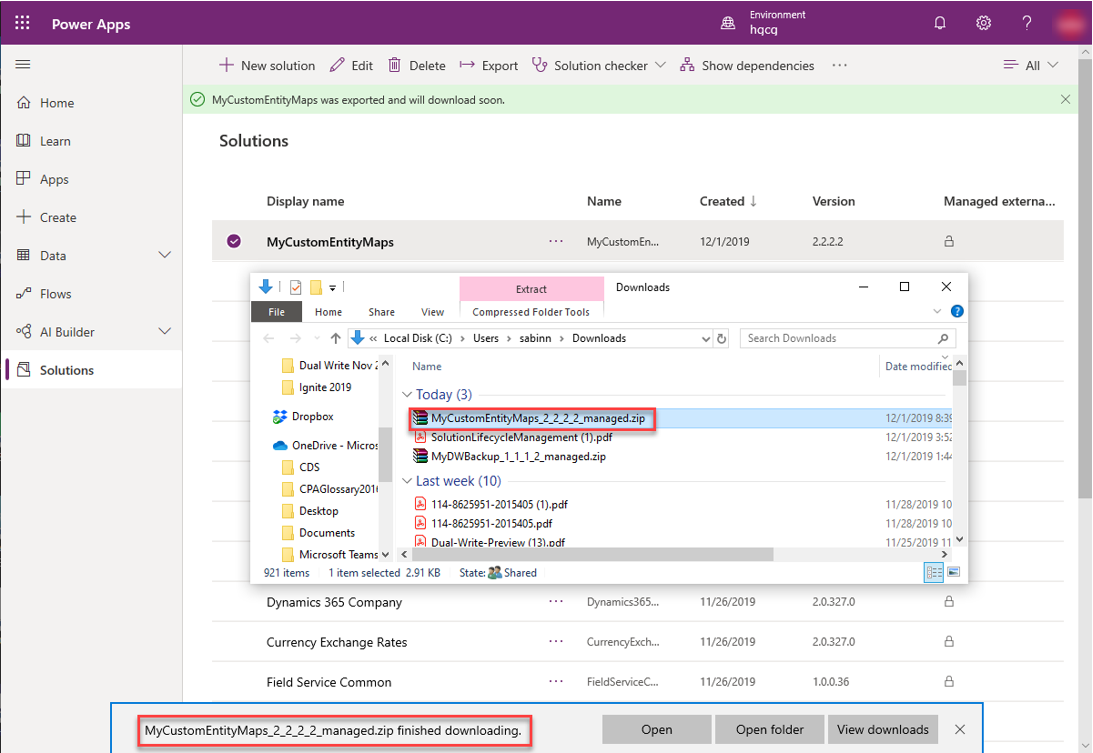
You've now customized your tables, added them to a new solution, and created a solution file that can be imported and applied to other environments. (This capability can be useful if you want to move table maps between test and production environments.) In a similar way, you can create a backup of all your table maps by adding them to a solution and exporting the solution as a package. That package can then be imported into to any environment to restore the table maps.
For information about how to publish the package to AppSource, see Publish your app on AppSource.
Test your exported solution package
You can test your exported solution package by importing and applying it to another environment.
In Power Apps, select Import to import the package into a new environment.
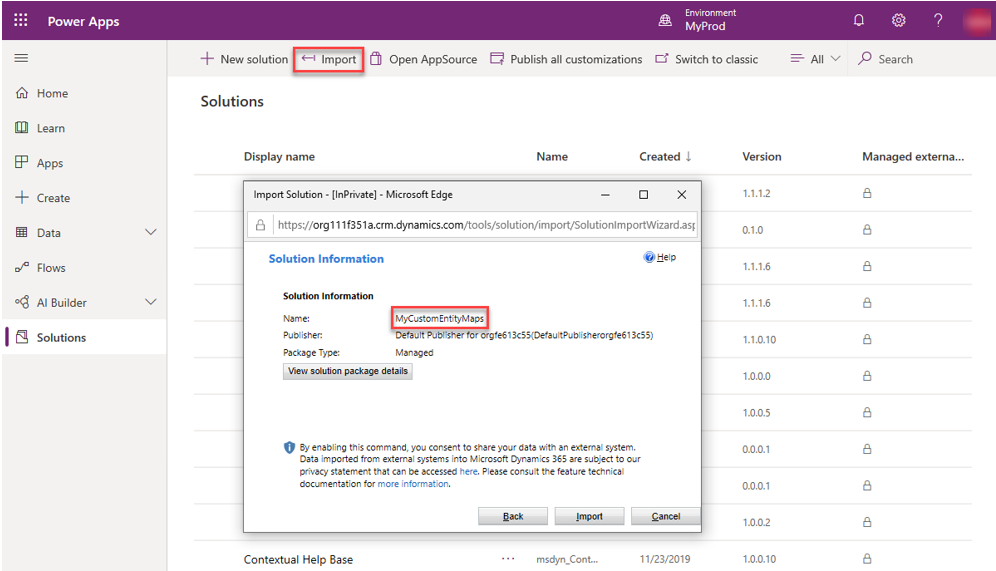
Apply the solution that you just imported to the environment.
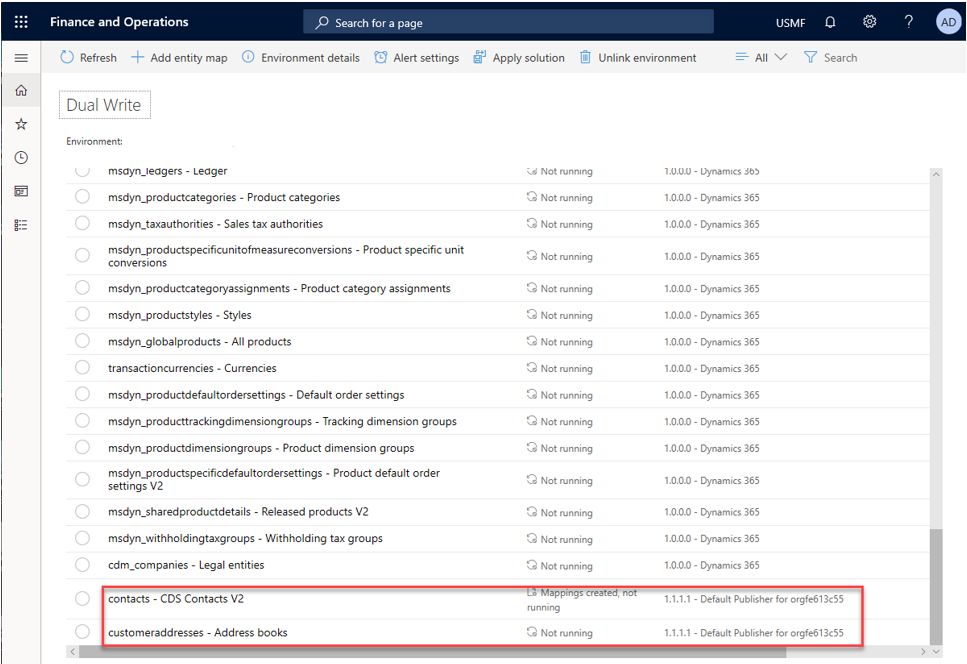
Verify that the two customized table maps appear on the dual-write table maps list page.
Make sure that the customizations from previous steps are preserved.
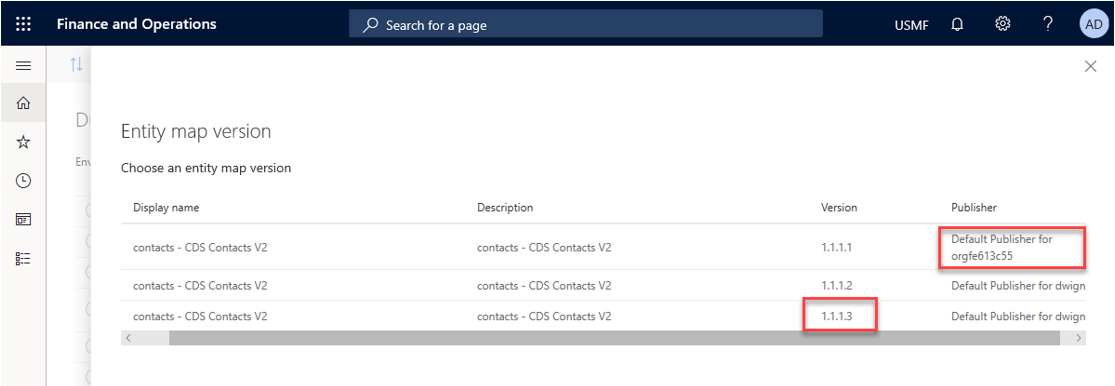
Use the table map version
Sometimes, a solution might contain different implementations of a table map. For example, the version of the contacts - CDS Contacts V2 table map might have a different publisher or a newer version number. In these cases, you can use the Table Map version button to select which table map you want to use in your environment.
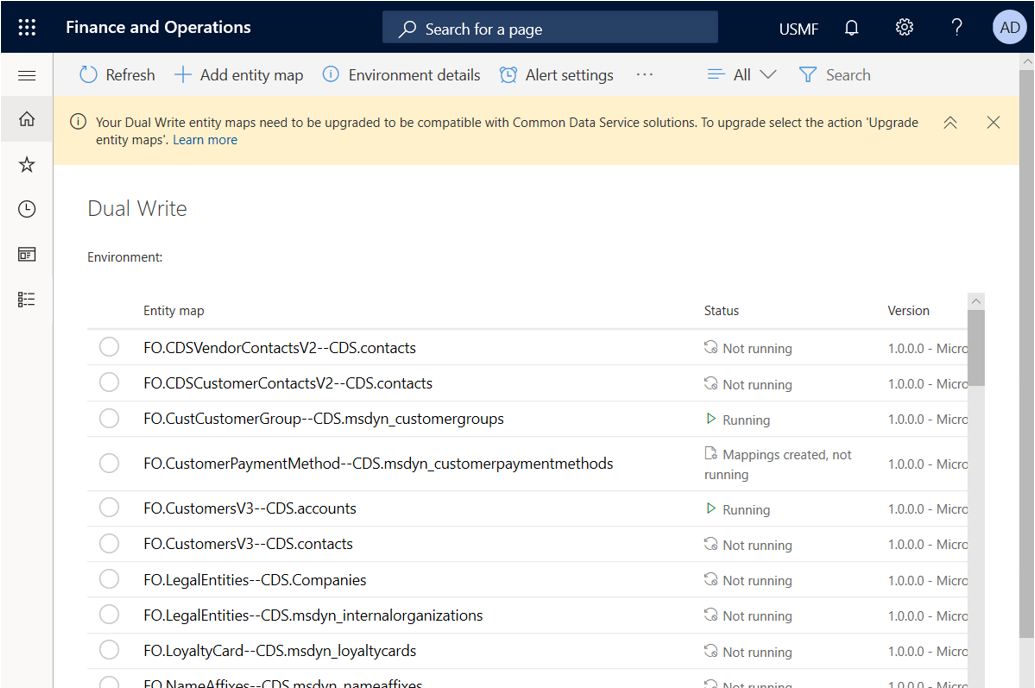
Upgrade existing dual-write environments for solution awareness (Existing environments)
Import the dual-write core solution.
- Follow the instructions in the Install the dual-write core solution section earlier in this article to import the dual-write core solution from AppSource into Power Apps.
- Verify that the dual-write core solution is listed under Solutions in Power Apps.
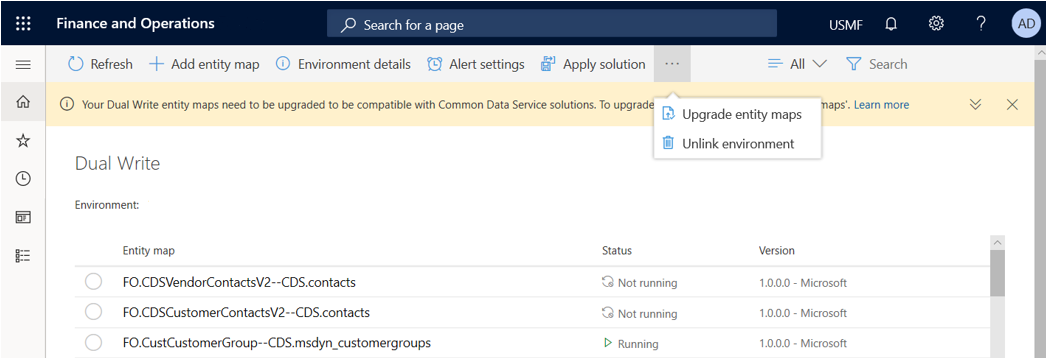
Upgrade the table maps.
You'll see a notification prompting you to upgrade.
Select Upgrade table maps at the top of the page.
The upgrade takes a few minutes. When it's completed, you receive a notification.
Обратная связь
Ожидается в ближайшее время: в течение 2024 года мы постепенно откажемся от GitHub Issues как механизма обратной связи для контента и заменим его новой системой обратной связи. Дополнительные сведения см. в разделе https://aka.ms/ContentUserFeedback.
Отправить и просмотреть отзыв по