Set up and deploy on-premises environments (Application 10.0.32 and later)
This article explains how to plan, set up, and deploy Microsoft Dynamics 365 Finance + Operations (on-premises) with Application version 10.0.32 later. Application version 10.0.32 includes platform update 56.
The Local Business Data Yammer group is available. There, you can post any questions or feedback that you have about the on-premises deployment.
Finance + Operations (on-premises) components
The Finance + Operations (on-premises) application consists of four main components:
- Application Object Server (AOS)
- Business Intelligence (BI)
- Financial Reporting/Management Reporter
- Data Management Framework (DMF)
These components depend on the following system software:
Windows Server (Only English-language operating system installations are supported.)
SQL Server
Important
Full-text search must be enabled.
SQL Server Reporting Services (SSRS)
SSRS is deployed on BI virtual machines (VMs). The SSRS nodes should also have a Database Engine instance that's running locally.
SQL Server Integration Services (SSIS)
SSIS is deployed on VMs that host the DMF service.
SQL Server Management Studio (SSMS)
Standalone Azure Service Fabric
Windows PowerShell 5.0 or later
Active Directory Federation Services (AD FS) on Windows Server
Domain controller
Important
The domain controller must be Windows Server 2012 R2 or later, and it must have a domain functional level of 2012 R2 or more. For more information about domain functional levels, see the following articles:
Optional but highly recommended: Active Directory Certificate Services (AD CS) on Windows Server
Important
For information about supported versions, see Microsoft Dynamics 365 Finance + Operations (on-premises) supported software.
Microsoft Dynamics Lifecycle Services
Finance + Operations (on-premises) bits are distributed through Microsoft Dynamics Lifecycle Services. Before you can deploy, you must purchase license keys through the Enterprise Agreements channel and set up an on-premises project in Lifecycle Services. Deployments can be initiated only through Lifecycle Services. For more information about how to set up on-premises projects in Lifecycle Services, see Set up on-premises projects in Lifecycle Services.
Authentication
The on-premises application works with AD FS. To interact with Lifecycle Services, you must also configure Microsoft Entra ID. To complete the deployment and configure the Lifecycle Services local agent, you must have Microsoft Entra ID. If you don't already have an Microsoft Entra tenant, you can get one for free by using one of the options that Microsoft Entra ID provides. For more information, see Quickstart: Set up a tenant.
Standalone Service Fabric
Finance + Operations (on-premises) uses standalone Service Fabric. For more information, see the Service Fabric documentation.
The setup of Finance + Operations (on-premises) deploys a set of applications inside Service Fabric. During deployment, each node in the cluster is defined as one of the following node types through configuration:
- AOSNodeType – Nodes of this type host AOS (business logic).
- OrchestratorType – Nodes of this node type work as Service Fabric Primary nodes, and host deployment and servicing logic.
- ReportServerType – Nodes of this type host SSRS and reporting logic.
- MRType – Nodes of this type host Management Reporter logic.
- SSISNodeType – Nodes of this type host the DMF service.
Infrastructure
Finance + Operations (on-premises) falls under the standard Microsoft support policy about operation on non-Microsoft virtualization platforms, specifically VMware. For more information, see Support policy for Microsoft software that runs on non-Microsoft hardware virtualization software. In short, Microsoft supports its products in this environment. However, if Microsoft is asked to investigate an issue, we might first ask the customer to reproduce the issue without the virtualization platform or on the Microsoft virtualization platform.
If you're using VMware, you must implement the fixes that are documented on the following webpages:
- After upgrading a virtual machine to hardware version 11, network dependent workloads experience performance degradation (2129176)
- Several issues with vmxnet3 virtual adapter
Warning
Dynamics 365 Finance + Operations (on-premises) isn't supported on any public cloud infrastructure, including Azure Cloud services. However, it can run on Azure Stack HCI and Azure Stack Hub.
The hardware configuration includes the following components:
- A standalone Service Fabric cluster that's based on Windows Server VMs
- SQL Server (Both Clustered SQL and Always-On are supported.)
- AD FS for authentication
- Server Message Block (SMB) version 3 file share for storage
- Optional: Microsoft Office Server
For more information, see System requirements for on-premises deployments.
Important
For information about supported versions, see Microsoft Dynamics 365 Finance + Operations (on-premises) supported software.
Hardware layout
Plan your infrastructure and Service Fabric cluster based on the recommended sizing in Hardware sizing requirements for on-premises environments. For more information about how to plan the Service Fabric cluster, see Plan and prepare your Service Fabric standalone cluster deployment.
The following table shows an example of a hardware layout. This example is used throughout this article to demonstrate the setup. When you complete the setup, you'll have to replace the machine names and IP addresses that are provided in the following instructions with the names and IP addresses of the machines in your environment.
Note
The Primary node of the Service Fabric cluster must have at least three nodes. In this example, OrchestratorType is designated as the Primary node type. If you have a node type that has more than three VMs, consider making that node type your Primary (Seed) node type to help increase the reliability of the cluster.
| Machine purpose | Service Fabric node type | Machine name | IP address |
|---|---|---|---|
| Domain controller | LBDEN01DC1 | 10.179.108.2 | |
| AD FS | LBDEN01ADFS1 | 10.179.108.3 | |
| File server | LBDEN01FS01 | 10.179.108.4 | |
| SQL Always On cluster | LBDEN01SQLA01 | 10.179.108.5 | |
| LBDEN01SQLA02 | 10.179.108.6 | ||
| LBDEN01SQLA | 10.179.108.9 | ||
| AOS 1 | AOSNodeType | LBDEN01SFAOS1 | 10.179.108.11 |
| AOS 2 | AOSNodeType | LBDEN01SFAOS2 | 10.179.108.12 |
| AOS 3 | AOSNodeType | LBDEN01SFAOS3 | 10.179.108.13 |
| Orchestrator 1 | OrchestratorType | LBDEN01SFORCH1 | 10.179.108.21 |
| Orchestrator 2 | OrchestratorType | LBDEN01SFORCH2 | 10.179.108.22 |
| Orchestrator 3 | OrchestratorType | LBDEN01SFORCH3 | 10.179.108.23 |
| Management Reporter node | MRType | LBDEN01SFMR1 | 10.179.108.31 |
| SSRS node 1 | ReportServerType | LBDEN01SFBI1 | 10.179.108.41 |
| SSIS node 1 | SSISNodeType | LBDEN01SFSSIS1 | 10.179.108.42 |
| Client | LBDEN01CLIENT1 | 10.179.108.51 |
The following table shows an example of a hardware layout where batch execution and interactive sessions are run in dedicated nodes. For more information, see Configure batch-only and interactive-only AOS nodes in on-premises deployments.
| Machine purpose | Service Fabric node type | Machine name | IP address |
|---|---|---|---|
| Domain controller | LBDEN01DC1 | 10.179.108.2 | |
| AD FS | LBDEN01ADFS1 | 10.179.108.3 | |
| File server | LBDEN01FS01 | 10.179.108.4 | |
| SQL Always On cluster | LBDEN01SQLA01 | 10.179.108.5 | |
| LBDEN01SQLA02 | 10.179.108.6 | ||
| LBDEN01SQLA | 10.179.108.9 | ||
| AOS 1 | BatchOnlyAOSNodeType | LBDEN01SFAOS1 | 10.179.108.11 |
| AOS 2 | BatchOnlyAOSNodeType | LBDEN01SFAOS2 | 10.179.108.12 |
| AOS 3 | BatchOnlyAOSNodeType | LBDEN01SFAOS3 | 10.179.108.13 |
| AOS 4 | InteractiveOnlyAOSNodeType | LBDEN01SFAOS4 | 10.179.108.14 |
| AOS 5 | InteractiveOnlyAOSNodeType | LBDEN01SFAOS5 | 10.179.108.15 |
| AOS 6 | InteractiveOnlyAOSNodeType | LBDEN01SFAOS6 | 10.179.108.16 |
| Orchestrator 1 | OrchestratorType | LBDEN01SFORCH1 | 10.179.108.21 |
| Orchestrator 2 | OrchestratorType | LBDEN01SFORCH2 | 10.179.108.22 |
| Orchestrator 3 | OrchestratorType | LBDEN01SFORCH3 | 10.179.108.23 |
| Management Reporter node | MRType | LBDEN01SFMR1 | 10.179.108.31 |
| SSRS node 1 | ReportServerType | LBDEN01SFBI1 | 10.179.108.41 |
| SSIS node 1 | SSISNodeType | LBDEN01SFSSIS1 | 10.179.108.42 |
| Client | LBDEN01CLIENT1 | 10.179.108.51 |
Overview of the setup process
You must complete the following steps to set up the infrastructure for Finance + Operations (on-premises). By reading all the steps before you begin, you can more easily plan your setup.
- Plan your domain name and Domain Name System (DNS) zones.
- Plan and acquire your certificates.
- Plan your users and service accounts.
- Create DNS zones, and add A records.
- Join VMs to the domain.
- Download setup scripts from Lifecycle Services.
- Describe your configuration.
- Create group managed service accounts (gMSAs).
- Set up file storage.
- Set up SQL Server.
- Configure certificates.
- Set up SSIS.
- Set up SSRS.
- Set up VMs.
- Set up a standalone Service Fabric cluster.
- Configure Lifecycle Services connectivity for the tenant.
- Configure the SQL Server certificate.
- Configure the databases.
- Encrypt credentials.
- Configure AD FS.
- Configure a connector, and install an on-premises local agent.
- Tear down CredSSP, if remoting was used.
- Deploy your Finance + Operations (on-premises) environment from Lifecycle Services.
- Connect to your Finance + Operations (on-premises) environment.
Setup
Prerequisites
Before you start the setup process, the following prerequisites must be in place. The setup of these prerequisites is out of the scope of this article.
- Active Directory Domain Services (AD DS) must be installed and configured in your network.
- AD FS must be deployed.
- SQL Server must be installed on the SSRS machines.
- SSRS must be installed (but not configured) in Native mode on the SSRS machines.
- Optional: AD CS is installed and configured in your network.
The following table shows the Windows features that are installed on the VMs by the infrastructure setup scripts that are downloaded from Lifecycle Services. For information about additional prerequisite software that must be downloaded and installed, see the Set up VMs section later in this article.
| Node type | Component | Details |
|---|---|---|
| AOS | The .NET Framework version 2.0–3.5 (CLR 2.0) | Windows features: NET-Framework-Features, NET-Framework-Core, NET-HTTP-Activation, NET-Non-HTTP-Activ |
| AOS | The .NET Framework version 4.0–4.6 (CLR 4.0) | Windows features: NET-Framework-45-Features, NET-Framework-45-Core, NET-Framework-45-ASPNET, NET-WCF-Services45, NET-WCF-TCP-PortSharing45 |
| AOS | Internet Information Services (IIS) | Windows features: WAS, WAS-Process-Model, WAS-NET-Environment, WAS-Config-APIs, Web-Server, Web-WebServer, Web-Security, Web-Filtering, Web-App-Dev, Web-Net-Ext, Web-Mgmt-Tools, Web-Mgmt-Console |
| BI | The .NET Framework version 2.0–3.5 (CLR 2.0) | Windows features: NET-Framework-Features, NET-Framework-Core, NET-HTTP-Activation, NET-Non-HTTP-Activ |
| BI | The .NET Framework version 4.0–4.6 (CLR 4.0) | Windows features: NET-Framework-45-Features, NET-Framework-45-Core, NET-Framework-45-ASPNET, NET-WCF-Services45, NET-WCF-TCP-PortSharing45 |
| MR | The .NET Framework version 2.0–3.5 (CLR 2.0) | Windows features: NET-Framework-Features, NET-Framework-Core, NET-HTTP-Activation, NET-Non-HTTP-Activ |
| MR | The .NET Framework version 4.0–4.6 (CLR 4.0) | Windows features: NET-Framework-45-Features, NET-Framework-45-Core, NET-Framework-45-ASPNET, NET-WCF-Services45, NET-WCF-TCP-PortSharing45 |
Step 1. Plan your domain name and DNS zones
We recommend that you use a publicly registered domain name for your production installation of AOS. In that way, the installation can be accessed outside the network, if outside access is required.
For example, if your company's domain is contoso.com, your zone for Finance + Operations (on-premises) might be d365ffo.onprem.contoso.com, and the host names might be as follows:
- ax.d365ffo.onprem.contoso.com for AOS machines
- sf.d365ffo.onprem.contoso.com for the Service Fabric cluster
Step 2. Plan and acquire your certificates
Secure Sockets Layer (SSL) certificates are required to secure a Service Fabric cluster and all the applications that are deployed. For your production and sandbox workloads, we recommend that you acquire certificates from a certificate authority (CA) such as DigiCert, Comodo, Symantec, GoDaddy, or GlobalSign. If your domain is set up with AD CS, you can use the Microsoft setup scripts to create the templates and certificates. Each certificate must contain a private key that was created for key exchange, and it must be exportable to a Personal Information Exchange (.pfx) file.
Self-signed certificates can be used only for testing purposes. For the sake of convenience, the setup scripts that are provided in Lifecycle Services include scripts that generate and export self-signed certificates. If you're using self-signed scripts, you'll be instructed to run the creation scripts during later steps in this article. As has been mentioned, these certificates can be used only for testing purposes.
Important
Microsoft plans to discontinue support for the generation of self-signed certificates through the setup scripts, in favor of automatic certificate creation through AD CS.
General certificate settings
| Setting | Value | Requirement |
|---|---|---|
| Signature algorithm | sha256RSA | Recommended |
| Signature hash algorithm | sha256 | Recommended |
| Public key | RSA (2048 bits) | Mandatory |
| Thumbprint algorithm | sha1 | Recommended |
| Cryptographic provider | Microsoft Enhanced RSA and AES Cryptographic Provider | Mandatory (except for the encipherment certificate) |
Overview of required certificates
| Purpose | Explanation | Additional requirements |
|---|---|---|
| SQL Server SSL certificate | This certificate is used to encrypt data that's transmitted across a network between an instance of SQL Server and a client application. | The domain name of the certificate should match the fully qualified domain name (FQDN) of the SQL Server instance or listener. For example, if the SQL listener is hosted on machine LBDEN01SQLA01, the certificate's DNS name is LBDEN01SQLA01.contoso.com.
|
| Service Fabric Server certificate | This certificate is used to help secure the node-to-node communication between the Service Fabric nodes. It's also used as the server certificate that's presented to the client that connects to the cluster. | For this certificate, you can also use the wildcard SSL certificate for your domain, such as *.contoso.com. (For more information, see the text that follows this table.) Otherwise, use the following values:
|
| Service Fabric Client certificate | Clients use this certificate to view and manage the Service Fabric cluster. |
|
| Encipherment certificate | This certificate is used to encrypt sensitive information such as the SQL Server password and user account passwords. | The certificate must be created by using the Microsoft Enhanced Cryptographic Provider v1.0 provider. The certificate key usage must include Data Encipherment (10), and shouldn't include server authentication or client authentication. For more information, see Managing secrets in Service Fabric applications.
|
| AOS SSL certificate | This certificate is used as the server certificate that's presented to the client for the AOS website. It's also used to enable Windows Communication Foundation (WCF)/Simple Object Access Protocol (SOAP) certificates. | You can use the same wildcard SSL certificate that you used as the Service Fabric server certificate. Otherwise, use the following values:
|
| Session Authentication certificate | AOS uses this certificate to help secure a user's session information. | This certificate is also the File Share certificate that is used at the time of deployment from Lifecycle Services.
|
| Data Encryption certificate | AOS uses this certificate to encrypt sensitive information. |
|
| Data Signing certificate | AOS uses this certificate to sign sensitive information. | This certificate is separate from the Data Encryption certificate.
|
| Financial Reporting Client certificate | This certificate is used to help secure the communication between the Financial Reporting services and AOS. |
|
| Reporting certificate | This certificate is used to help secure the communication between SSRS and AOS. | Important: Do not reuse the Financial Reporting Client certificate.
|
| SSRS Web Server certificate | This certificate is used as the server certificate that's presented to the client (AOS) for the SSRS web server. | The domain name of the certificate should match the FQDN of the SSRS node.
|
| On-premises local agent certificate | This certificate is used to help secure the communication between a local agent that's hosted on-premises and on Lifecycle Services. It enables the local agent to act on behalf of your Microsoft Entra tenant, and to communicate with Lifecycle Services to orchestrate and monitor deployments. Note: Only one on-premises local agent certificate is required for a tenant. |
|
You can use the wildcard SSL certificate for your domain to combine the Service Fabric Server certificate and the AOS SSL certificate. Here's an example of a Service Fabric Server certificate that's combined with an AOS SSL certificate.
Subject name
CN = *.d365ffo.onprem.contoso.com
Subject alternative names
DNS Name=ax.d365ffo.onprem.contoso.com
DNS Name=sf.d365ffo.onprem.contoso.com
DNS Name=*.d365ffo.onprem.contoso.com
Important
You can use the wildcard certificate to help secure only the first-level subdomain of the domain that it's issued to. Therefore, a certificate for *.onprem.contoso.com won't be valid for ax.d365ffo.onprem.contoso.com.
Step 3. Plan your users and service accounts
You must create several user or service accounts for Finance + Operations (on-premises) to work. You must create a combination of gMSAs, domain accounts, and SQL accounts. The following table shows the user accounts, their purpose, and example names that are used in this article.
| User account | Type | Purpose | User name |
|---|---|---|---|
| Financial Reporting Application Service Account | gMSA | Contoso\svc-FRAS$ | |
| Financial Reporting Process Service Account | gMSA | Contoso\svc-FRPS$ | |
| Financial Reporting Click Once Designer Service Account | gMSA | Contoso\svc-FRCO$ | |
| AOS Service Account | gMSA | Contoso\svc-AXSF$ | |
| SSRS bootstrapper Service Account | gMSA | The reporting service bootstrapper uses this account to configure the SSRS service. | Contoso\svc-ReportSvc$ |
| AOS Service Account | Domain account | This account is no longer used in new deployments since Application version 10.0.20.* | Contoso\AXServiceUser |
| AOS SQL DB Admin user | SQL user | Finance + Operations (on-premises) uses this user to authenticate with SQL Server**. This user is replaced by the gMSA user in upcoming releases***. | AXDBAdmin |
| Local Deployment Agent Service Account | gMSA | The local agent uses this account to orchestrate the deployment on various nodes. | Contoso\Svc-LocalAgent$ |
| Data Management Framework Service Account | gMSA | Contoso\svc-DIXF$ |
* These accounts shouldn't have their regional settings changed. They should have the default US English (EN-US) region settings.
** If the password of the SQL user contains special characters, you might encounter issues during deployment.
*** The SQL user name and password for SQL authentication are secured because they're encrypted and stored in the file share.
Step 4. Create DNS zones and add A records
DNS is integrated with AD DS, and lets you organize, manage, and find resources in a network. The following procedures show how to create a DNS forward lookup zone and A records for the AOS host name and Service Fabric cluster. In this example, the DNS zone name is d365ffo.onprem.contoso.com, and the A records/host names are as follows:
- ax.d365ffo.onprem.contoso.com for AOS machines
- sf.d365ffo.onprem.contoso.com for the Service Fabric cluster
Add a DNS zone
- Sign in to the domain controller machine, and select Start. Then open DNS Manager by entering dnsmgmt.msc and selecting the dnsmgmt (DNS) application.
- In the console tree, select and hold (or right-click) the domain controller name, and then select New Zone > Next.
- Select Primary Zone.
- Leave the Store the zone in Active Directory (available only if the DNS Server is a writeable domain controller checkbox selected, and then select Next.
- Select To all DNS Servers running on Domain Controllers in this domain: Contoso.com, and then select Next.
- Select Forward Lookup Zone, and then select Next.
- Enter the zone name for your setup, and then select Next. For example, enter d365ffo.onprem.contoso.com.
- Select Do not allow dynamic updates, and then select Next.
- Select Finish.
Set up an A record for AOS
In the new DNS zone, for each Service Fabric cluster node of the AOSNodeType type, create one A record that's named ax.d365ffo.onprem.contoso.com. Don't create A records for the other node types.
- In DNS Manager, under the Forward Lookup Zones folder, find the newly created zone.
- Select and hold (or right-click) the new zone, and then select New Host.
- Enter the name and IP address of the Service Fabric node. (For example, enter ax as the name and 10.179.108.12 as the IP address.) Then select Add Host.
- Leave both checkboxes cleared.
- Repeat steps 1 through 4 for each additional AOS node.
Set up an A record for the orchestrator
In the new DNS zone, for each Service Fabric cluster node of the OrchestratorType type, create an A record that's named sf.d365ffo.onprem.contoso.com. Don't create A records for the other node types.
- Select and hold (or right-click) the new zone, and then select New Host.
- Enter the name and IP address of the Service Fabric node. (For example, enter sf as the name and 10.179.108.15 as the IP address.) Then select Add Host.
- Leave both checkboxes cleared.
- Repeat steps 1 through 3 for each additional orchestrator node.
Step 5. Join VMs to the domain
Join each VM to the domain by completing the steps in Join a Computer to a Domain. Alternatively, use the following Windows PowerShell script.
$domainName = Read-Host -Prompt 'Specify domain name (ex: contoso.com)'
Add-Computer -DomainName $domainName -Credential (Get-Credential -Message 'Enter domain credential')
Important
You must restart the VMs after you join them to the domain.
Step 6. Download setup scripts from Lifecycle Services
Microsoft has provided several scripts to help improve the setup experience. Follow the instructions in Download the infrastructure scripts.
Important
The scripts must be run from a computer that's in the same domain as the on-premises infrastructure.
Step 7. Describe your configuration
The infrastructure setup scripts use the following configuration files to drive the setup:
- infrastructure\ConfigTemplate.xml
- infrastructure\D365FO-OP\NodeTopologyDefinition.xml
- infrastructure\D365FO-OP\DatabaseTopologyDefinition.xml
- infrastructure\D365FO-OP\FileShareTopologyDefinition.xml
Important
To ensure that the setup scripts work correctly, you must update these configuration files with the correct computer names, IP addresses, service accounts, and domain, based on the setup of your environment.
For detailed information about the configuration files that are available in the infrastructure scripts, and more information about how to fill in your configuration file, see Configure the infrastructure scripts for your Finance + Operations (on-premises) deployment.
Step 8. Create gMSAs
Open Windows PowerShell in elevated mode, change the directory to the Infrastructure folder in your file share, and run the following commands.
Important
These commands don't create an AxServiceUser domain user for you. You must create it yourself. This account is required only for base deployments before Application version 10.0.20.
.\Create-GMSAAccounts.ps1 -ConfigurationFilePath .\ConfigTemplate.xmlIf you must make changes to accounts or machines, update the ConfigTemplate.xml file in the Infrastructure folder in your file share, and then run the following command.
.\Create-GMSAAccounts.ps1 -ConfigurationFilePath .\ConfigTemplate.xml -Update
Step 9. Set up file storage
You must set up the following SMB 3.0 file shares:
A file share that stores user documents that are uploaded to AOS (for example, \\LBDEN01FS01\aos-storage)
A file share that stores the latest build and configuration files to orchestrate the deployment (for example, \\LBDEN01FS01\agent)
A file share that stores files for DMF (for example, \\LBDEN01FS01\dixf-share)
A file share that stores diagnostics information for the Service Fabric cluster (for example, \\LBDEN01FS01\diagnostics-store)
Warning
Keep this file share path as short as possible, to avoid exceeding the maximum path length on the files that are put in the share.
For information about how to enable SMB 3.0, see SMB Security Enhancements.
Important
- Secure dialect negotiation can't detect or prevent downgrades from SMB 2.0 or 3.0 to SMB 1.0. Therefore, we strongly recommend that you disable the SMB 1.0 server. In this way, you can take advantage of the full capabilities of SMB encryption. For information about how to disable SMB 1.0, see How to detect, enable and disable SMBv1, SMBv2, and SMBv3 in Windows.
- To help ensure that your data is protected while it's at rest in your environment, you must enable BitLocker Drive Encryption on every machine. For information about how to enable BitLocker, see BitLocker: How to deploy on Windows Server 2012 and later.
On the file share machine, run the following command.
Install-WindowsFeature -Name FS-FileServer -IncludeAllSubFeature -IncludeManagementToolsIf you want to change the default share names and base paths, update the FileShares section in the ConfigTemplate.xml file.
Run the following script to create the file shares.
.\New-FileShares.ps1 -ConfigurationFilePath .\ConfigTemplate.xmlRun the following script to apply the required configuration and permissions to each file share.
.\Configure-FileShares.ps1 -ConfigurationFilePath .\ConfigTemplate.xmlRun the following script to confirm that the required permissions and configuration have been applied to each file share.
.\Test-FileShares.ps1 -ConfigurationFilePath .\ConfigTemplate.xml
Step 10. Set up SQL Server
Install SQL Server with high availability, unless you're deploying in a sandbox environment. In that case, one instance of SQL Server is sufficient. (Nevertheless, you might want to install SQL Server with high availability in sandbox environments to test high-availability scenarios.)
Important
Avoid using named instances. If you use named instances, you might encounter issues, because the documentation and scripts assume that default instances are used.
You must enable the SQL Server and Windows Authentication mode.
You can install SQL Server with high availability either as SQL Server clusters that include a storage area network (SAN) or in an Always On configuration. Verify that the Database Engine, Full-Text Search, and SQL Server Management Tools are already installed.
Note
Make sure that Always On is set up as described in Select Initial Data Synchronization Page (Always On Availability Group Wizards), and follow the instructions in To Prepare Secondary Databases Manually.
Run the SQL service as either a domain user or a gMSA.
In the ConfigTemplate.xml file, fill in the SQL Server cluster configuration. If you're creating a SQL Server cluster, specify the name of each machine together with the listener name of your availability group. If you're creating a single instance instead of a cluster, specify the name of the machine, but leave the listener name blank. If you don't want the scripts to generate a certificate for your SQL Server cluster or instance, set the disabled attribute to true for the certificate of the SQLCert type.
Step 11. Configure certificates
Go to a machine where Remote Server Administration Tools are installed, or go to your domain controller.
Open Windows PowerShell, and go to the file share that contains your Infrastructure folder.
Generate certificates:
If you must generate certificates, run the following commands. These commands create the certificate templates in AD CS, generate the certificates from the templates, put the certificates in the LocalMachine\My certificate store on the machine, and update the thumbprints in the XML file.
# If you must create self-signed certs, set the generateSelfSignedCert attribute to true.
#.\New-SelfSignedCertificates.ps1 -ConfigurationFilePath .\ConfigTemplate.xml

.\New-ADCSCertificates.ps1 -ConfigurationFilePath .\ConfigTemplate.xml -CreateTemplates
.\New-ADCSCertificates.ps1 -ConfigurationFilePath .\ConfigTemplate.xml
If you must reuse any certificate and therefore don't have to generate the certificate, set the generateADCSCert attribute to false in the ConfigTemplate.xml file.
If you're using SSL certificates that were previously generated, skip certificate generation, and update the thumbprints in the ConfigTemplate.xml file. The certificates can be installed in the CurrentUser\My or LocalMachine\My certificate store. Additionally, their private keys must be exportable.
Warning
Because of a leading non-printable special character, the presence of which is difficult to determine, the Certificate Manager tool (certlm.msc) shouldn't be used to copy thumbprints on Windows Server 2016. If the non-printable special character is present, you'll receive the following error message: "X509 certificate not valid." To retrieve the thumbprints, see the results from Windows PowerShell commands, or run the following commands in Windows PowerShell.
dir cert:\CurrentUser\My
dir cert:\LocalMachine\My
dir cert:\LocalMachine\Root
In the ProtectTo field for each certificate, specify a semicolon-separated list of Active Directory users or groups. Only users and groups that are specified in the ProtectTo field have the permission to import the certificates that are exported by using the scripts. The scripts don't support passwords to help protect the exported certificates.
Export the certificates into .pfx files. As part of the export process, the following command checks that the correct cryptographic provider is set for your certificates.
# Exports certificates into a directory VMs\<VMName>. All the certs are written to the infrastructure\Certs folder.
.\Export-Certificates.ps1 -ConfigurationFilePath .\ConfigTemplate.xml
Step 12. Set up SSIS
To enable data management and SSIS workloads, you must install SSIS on at least two nodes (at least one if the environment is a sandbox environment). This step is required for the DMF service to run.
Important
For environments that were deployed with a base topology older than Application version 10.0.32, SSIS must be installed on all AOS nodes. Furthermore, the DMF service won't be available, and data management operations will be performed by the AOS.
For information about how to configure the DMF service, see Configure your environment with a dedicated Data Management Framework service.
- After you've decided which VMs need SSIS, verify that the machine has access to the SQL installation, and open the SQL Setup wizard.
- On the Feature Selection page, in the Features pane, select the Integration Services and SQL Client Connectivity SDK checkboxes.
- Complete the setup, and verify that the installation was successful.
For more information, see Install Integration Services (SSIS).
Step 13. Set up SSRS
You can configure more than one SSRS node. For more information, see Configuring High Availability for SSRS nodes.
Before you begin, make sure that the prerequisites that are listed at the beginning of this article are in place.
Important
- You must install the Database Engine when you install SSRS.
- Do not configure the SSRS instance. The reporting service automatically configures everything.
- Do not use named instances when you set up the database engine or the SSRS service.
- The following steps aren't required for environments that were deployed with a base topology older than Platform update 41. In those environments, SSRS should be manually configured according to the information in Configure SQL Server Reporting Services for on-premises deployments.
For each BI node, follow these steps:
Open Windows PowerShell in elevated mode, and go to the Infrastructure folder in your file share.
Run the following commands.
.\Initialize-Database.ps1 -ConfigurationFilePath .\ConfigTemplate.xml -ComponentName BI
.\Configure-Database.ps1 -ConfigurationFilePath .\ConfigTemplate.xml -ComponentName BI
The Initialize-Database.ps1 script maps the gMSA to the following databases and roles.
User Database Database role svc-ReportSvc$ master db_owner svc-ReportSvc$ msdb db_datareader, db_datawriter, db_securityadmin The Configure-Database.ps1 script performs the following action:
- Grant the CREATE ANY DATABASE permission to [contoso\svc-ReportSvc$].
Note
These scripts don't configure SSRS. SSRS is configured during deployment by the Service Fabric service (ReportingService) that's deployed to that node. Instead, these scripts grant the permissions that are required for the Service Fabric service (ReportingService) to perform the necessary configuration.
Step 14. Set up VMs
Open Windows PowerShell in elevated mode, and go to the Infrastructure folder in your file share.
# Exports the script files to be executed on each VM into a directory VMs\<VMName>.
# .\Export-Scripts.ps1 -ConfigurationFilePath .\ConfigTemplate.xml -D365FOVersion "10.0.17"
.\Export-Scripts.ps1 -ConfigurationFilePath .\ConfigTemplate.xml -D365FOVersion "<Version of Dynamics 365 that you will deploy>"
Note
The scripts install or require different versions, depending on the version of Finance + Operations (on-premises) that you deploy. Specify the Application version that you'll deploy, so that the scripts can correctly configure your environment for that version. If you'll be deploying Application version 10.0.17 with Platform update 41, you should specify 10.0.17 for the D365FOVersion parameter.
Download the following Microsoft Windows Installers (MSIs) into a file share that can be accessed by all VMs. For example, use the same file share where you put your Infrastructure folder.
Component Download link Expected file name Required since Not required after SNAC – ODBC driver 13 ODBC Driver 13.1 msodbcsql.msi 10.0.0 Not applicable SNAC – ODBC driver 17.5.x ODBC Driver 17.5.2 msodbcsql_17_5.msi 10.0.17 Not applicable SQL Server Management Studio 18.x SSMS 18.x SSMS-Setup-18-ENU.exe 10.0.31 Not applicable Visual C++ Redistributable Packages for Microsoft Visual Studio 2013 Update for Visual C++ 2013 and Visual C++ Redistributable Package vcredist_x64.exe 10.0.0 Not applicable Microsoft Visual C++ 2015-2019 Redistributable Combined Visual C++ vc_redist.x64_1519.exe 10.0.17 10.0.30 Microsoft Visual C++ 2015-2022 Redistributable Combined Visual C++ vc_redist.x64_1522.exe 10.0.31 Not applicable Access Database Engine 2016 Redistributable Microsoft Access Database Engine 2016 Redistributable AccessDatabaseEngine_x64_2016.exe 10.0.32 Not applicable The .NET Framework version 4.8 (CLR 4.0) .NET Framework 4.8 Offline Installer ndp48-x86-x64-allos-enu.exe 10.0.0 Not applicable The .NET Framework version 4.7.2 (CLR 4.0) .NET Framework 4.7.2 Offline Installer ndp472-x86-x64-allos-enu.exe 10.0.0 Not applicable
Important
- Make sure that the Management Studio setup is in US English.
- Make sure that the installer files have the names that are specified in the "Expected file name" column of the preceding table. Rename any files that don't have the expected name. Otherwise, you'll encounter errors when you run the Configure-PreReqs.ps1 script.
Next, follow these steps for each VM, or use remoting from a single machine.
Note
- The following procedure requires execution on multiple VMs. However, to simplify the process, you can use the remoting scripts that are provided. These scripts let you run the required scripts from a single machine, such as the same machine that's used to run the .\Export-Scripts.ps1 command. When the remoting scripts are available, they're declared after a # If Remoting comment in the Windows PowerShell sections. If you use the remoting scripts, you might not have to run the remaining scripts in a section. In these cases, see the section text.
- Remoting uses WinRM. In some cases, it requires that CredSSP be enabled. The remoting module enables and disables CredSSP on an execution-by-execution basis. We recommend that you disable CredSSP when it isn't used. Otherwise, there's a risk of credential theft. When you've completed the setup, see the Tear down CredSSP, if remoting was used section later in this article.
Copy the contents of each infrastructure\VMs\<VMName> folder to the corresponding VM. (If the remoting scripts are used, they'll automatically copy the contents to the target VMs.) Then run the following command as an administrator.
# Install prereq software on the VMs.

# If remoting, execute
# .\Configure-PreReqs-AllVMs.ps1 -MSIFilePath <share folder path of the MSIs> -ConfigurationFilePath .\ConfigTemplate.xml

.\Configure-PreReqs.ps1 -MSIFilePath <path of the MSIs>
Important
- Each time that you're prompted, restart the machine. Make sure that you rerun the .\Configure-PreReqs.ps1 command after each restart, until all the prerequisites are installed. In the case of remoting, rerun the AllVMs script when all the machines are back online.
- If you use the remoting scripts, make sure that the current user has access to the file share folder where the MSIs are located. Also make sure that no user is accessing machines of the AOSNodeType, MRType, and ReportServerType types. Otherwise, the remoting scripts will fail to restart the machines, because users are signed in to them.
Run the following command to complete the VM setup.
# If remoting, execute
# .\Complete-PreReqs-AllVMs.ps1 -ConfigurationFilePath .\ConfigTemplate.xml

.\Complete-PreReqs.ps1
Run the following command to validate the VM setup.
# If Remoting, execute
# .\Test-D365FOConfiguration-AllVMs.ps1 -ConfigurationFilePath .\ConfigTemplate.xml

.\Test-D365FOConfiguration.ps1
Important
If you used remoting, be sure to run the cleanup steps after the setup is completed. For instructions, see the Tear down CredSSP, if remoting was used section later in this article.
Step 15. Set up a standalone Service Fabric cluster
Download the Service Fabric standalone installation package to one of your Service Fabric nodes.
After the zip file is downloaded, select and hold (or right-click) it, and then select Properties. In the Properties dialog box, select the Unblock checkbox.
Copy the zip file to one of the nodes in the Service Fabric cluster, and unzip it. Make sure that the infrastructure folder has access to this folder.
Go to the infrastructure folder, and run the following command to generate the Service Fabric ClusterConfig.json file.
.\New-SFClusterConfig.ps1 -ConfigurationFilePath .\ConfigTemplate.xml -TemplateConfig <ServiceFabricStandaloneInstallerPath>\ClusterConfig.X509.MultiMachine.jsonYou might have to make additional modifications to your cluster configuration, based on your environment. For more information, see Step 1B: Create a multi-machine cluster, Secure a standalone cluster on Windows using X.509 certificates, and Create a standalone cluster running on Windows Server.
Copy the ClusterConfig.json file that's generated to <ServiceFabricStandaloneInstallerPath>.
Open Windows PowerShell in elevated mode, go to <ServiceFabricStandaloneInstallerPath>, and run the following command to test the ClusterConfig.json file.
.\TestConfiguration.ps1 -ClusterConfigFilePath .\ClusterConfig.jsonIf the test is successful, run the following command to deploy the cluster.
# If using offline (internet-disconnected) install
# .\CreateServiceFabricCluster.ps1 -ClusterConfigFilePath .\ClusterConfig.json -FabricRuntimePackagePath <Path to MicrosoftAzureServiceFabric.cab download>

.\CreateServiceFabricCluster.ps1 -ClusterConfigFilePath .\ClusterConfig.json
After the cluster is created, open Service Fabric Explorer on any client machine, and validate the installation:
- Install the Service Fabric client certificate in the CurrentUser\My certificate store if it isn't already installed.
- In Internet Explorer, select Tools (the gear symbol), and then select Compatibility View settings. Clear the Display intranet sites in Compatibility View checkbox.
- Go to
https://sf.d365ffo.onprem.contoso.com:19080, where sf.d365ffo.onprem.contoso.com is the host name of the Service Fabric cluster that's specified in the zone. If DNS name resolution isn't configured, use the IP address of the machine. - Select the client certificate. The Service Fabric Explorer page appears.
- Verify that all nodes appear as green.
Important
- If your client machine is a server machine (for example, a machine that's running Windows Server 2019), you must turn off the Internet Explorer Enhanced Security Configuration when you access the Service Fabric Explorer page.
- If any antivirus software is installed, make sure that you set exclusion. Follow the guidance in the Service Fabric documentation.
Step 16. Configure Lifecycle Services connectivity for the tenant
An on-premises local agent is used to orchestrate deployment and servicing of Finance + Operations (on-premises) through Lifecycle Services. To establish connectivity from Lifecycle Services to the Finance + Operations (on-premises) tenant, you must configure a certificate that enables the local agent to act on behalf of your Microsoft Entra tenant (for example, contoso.onmicrosoft.com).
Use the on-premises agent certificate that you acquired from a CA or the self-signed certificate that you generated by using scripts. The on-premises agent certificate can be reused across multiple sandbox and production environments per tenant.
Only user accounts that have the Global Administrator directory role can add certificates to authorize Lifecycle Services. By default, the person who signs up for Microsoft 365 for your organization is the global administrator for the directory.
Important
- You must configure the certificate exactly one time per tenant. All on-premises environments under the same tenant must use the same certificate to connect with Lifecycle Services.
- If you run the script below on a server machine (for example, a machine that's running Windows Server 2019), you must temporarily turn off the Internet Explorer Enhanced Security Configuration. Otherwise, the content on the Azure sign-in page is blocked.
Sign in to the customer's Azure portal to verify that you have the Global Administrator directory role.
From the infrastructure folder, run the following commands to determine whether the certificate is already registered.
# If you have issues downloading the Azure PowerShell Az module, run the following:
# [Net.ServicePointManager]::SecurityProtocol = [Net.SecurityProtocolType]::Tls12

Install-Module Az -RequiredVersion 7.4.0
.\Add-CertToServicePrincipal.ps1 -CertificateThumbprint 'OnPremLocalAgent Certificate Thumbprint' -Test
Important
If you previously installed AzureRM, you should remove it, because it might not be compatible with any existing AzureRM installations in Windows PowerShell 5.1. For more information, see Migrate Azure PowerShell from AzureRM to Az.
If the script indicates that the certificate isn't registered, run the following command.
.\Add-CertToServicePrincipal.ps1 -CertificateThumbprint 'OnPremLocalAgent Certificate Thumbprint'
Note
If you have multiple tenants that are associated with the login account, you can run the following command to pass the tenant ID as a parameter. In this way, you can ensure that the context is set to the correct tenant.
.\Add-CertToServicePrincipal.ps1 -CertificateThumbprint 'OnPremLocalAgent Certificate Thumbprint' -TenantId 'xxxx-xxxx-xxxx-xxxx'
Step 17. Configure the SQL Server certificate
Get an SSL certificate from a CA to configure SQL Server for Finance + Operations (on-premises). By default, an AD CS or self-signed certificate was generated in a previous step.
Note
If you're ordering the certificate from a public CA, ensure that the subject alternative name of the certificate matches the FQDN of each node/instance in the SQL availability group.
Use a script to deploy certificates for an Always On SQL availability group or instance
The following script automates the steps of the manual process that's described in the next section. If you aren't using remoting, connect to a SQL Server machine, and open Windows PowerShell with administrator privileges. Then go to the infrastructure folder in your file share, and run the following command. Complete these steps for each node.
# If Remoting, execute
#.\Configure-SQLCert-AllVMs.ps1 -ConfigurationFilePath .\ConfigTemplate.xml

.\Configure-SQLCert.ps1 -PfxCertificatePath ".\Certs\SQL1.contoso.com.pfx"
You can verify that everything has been configured correctly by running the following command.
# If Remoting, execute
#.\Configure-SQLCert-AllVMs.ps1 -ConfigurationFilePath .\ConfigTemplate.xml -Test

.\Configure-SQLCert.ps1 -PfxCertificatePath ".\Certs\SQL1.contoso.com.pfx" -Test
Manually configure the certificate for an Always On SQL availability group or instance
The infrastructurescripts folder should include a folder that's named Certs. In this folder, find the .pfx file that has your certificate.
For each node of the SQL Server cluster, follow these steps:
Copy the generated .pfx file to the node, and import the certificate into the LocalMachine store.
Grant certificate permissions to the account that's used to run the SQL service:
- Open the Certificate Manager tool (certlm.msc).
- Select and hold (or right-click) the certificate that was created, and then select Tasks > Manage Private Keys.
- Add the SQL Server service account, and grant it Read access.
Enable ForceEncryption and the new certificate in SQL Server Configuration Manager:
- Open SQL Server Configuration Manager, expand SQL Server Network Configuration, select and hold (or right-click) Protocols for [server instance], and then select Properties.
- In the Properties dialog box, on the Certificate tab, in the Certificate field, select the desired certificate.
- On the Flags tab, in the ForceEncryption box, select Yes.
- Select OK to save your changes.
Restart the SQL service.
If you used self-signed certificates, export the certificate (.cer file), and install it in the trusted root of each Service Fabric node. You'll have only one certificate for all the nodes in your SQL Server cluster.
Note
For more information, see How to enable SSL encryption for an instance of SQL Server by using Microsoft Management Console.
Important
If you used remoting, be sure to run the cleanup steps after the setup is completed. For instructions, see the Tear down CredSSP, if remoting was used section later in this article.
Step 18. Configure the databases
Sign in to Lifecycle Services.
On the dashboard, select the Shared asset library tile.
Select Model as the asset type. Then, in the grid, select the data type for the release that you want, and download the zip file.
Release Database Version 10.0.39 Microsoft Dynamics 365 Finance + Operations (on-premises), Version 10.0.39 Demo Data Version 10.0.39 Microsoft Dynamics 365 Finance + Operations (on-premises), Version 10.0.39 Empty Data Version 10.0.38 Microsoft Dynamics 365 Finance + Operations (on-premises), Version 10.0.38 Demo Data Version 10.0.38 Microsoft Dynamics 365 Finance + Operations (on-premises), Version 10.0.38 Empty Data Version 10.0.35 Microsoft Dynamics 365 Finance + Operations (on-premises), Version 10.0.35 Demo Data Version 10.0.35 Microsoft Dynamics 365 Finance + Operations (on-premises), Version 10.0.35 Empty Data Version 10.0.32 Microsoft Dynamics 365 Finance + Operations (on-premises), Version 10.0.32 Demo Data Version 10.0.32 Microsoft Dynamics 365 Finance + Operations (on-premises), Version 10.0.32 Empty Data The zip file contains a single backup (.bak) file. Select the file to download, based on your requirements.
After the zip file is downloaded, verify that it's unblocked. Select and hold (or right-click) the file, and then select Properties. In the Properties dialog box, select the Unblock checkbox.
Make sure that the database section in the infrastructure\ConfigTempate.xml file is correctly configured with the following information:
- The database name.
- The database file and log settings. The database settings shouldn't be lower than the default values that are specified.
- The path of the backup file that you downloaded earlier. The default name of the Finance + Operations (on-premises) database is AXDB.
Important
- The user who is running the SQL service and the user who is running the scripts should have Read access on the folder or share where the backup file is located.
- If an existing database already has the same name, it won't be overwritten.
Connect to a machine in your SQL Server cluster. Then open Windows PowerShell in elevated mode, and go to the Infrastructure folder in your file share.
Configure the OrchestratorData database
Run the following command.
.\Initialize-Database.ps1 -ConfigurationFilePath .\ConfigTemplate.xml -ComponentName OrchestratorThe Initialize-Database.ps1 script performs the following actions:
- Create an empty database that's named OrchestratorData. This database is used by the on-premises local agent to orchestrate deployments.
- Grant db_owner permissions on the database to the local agent gMSA (svc-LocalAgent$).
Configure the Finance + Operations (on-premises) database
Run the following commands.
.\Initialize-Database.ps1 -ConfigurationFilePath .\ConfigTemplate.xml -ComponentName AOS
.\Configure-Database.ps1 -ConfigurationFilePath .\ConfigTemplate.xml -ComponentName AOS
The Initialize-Database.ps1 script performs the following actions:
Restore the database from the specified backup file.
Create a new user that SQL authentication is enabled for (axdbadmin).
Map users to database roles, based on the following table for the AXDB database.
User Type Database role svc-AXSF$ gMSA db_owner svc-LocalAgent$ gMSA db_owner svc-FRPS$ gMSA db_owner svc-FRAS$ gMSA db_owner axdbadmin SqlUser db_owner Map users to database roles, based on the following table for the TempDB database.
User Type Database role svc-AXSF$ gMSA db_datareader, db_datawriter, db_ddladmin axdbadmin SqlUser db_datareader, db_datawriter, db_ddladmin
The Configure-Database.ps1 script performs the following actions:
- Set READ_COMMITTED_SNAPSHOT to ON.
- Set ALLOW_SNAPSHOT_ISOLATION to ON.
- Set the specified database file and log settings.
- Grant the VIEW SERVER STATE permission to axdbadmin.
- Grant the ALTER ANY EVENT SESSION permission to axdbadmin.
- Grant the VIEW SERVER STATE permission to [contoso\svc-AXSF$].
- Grant the ALTER ANY EVENT SESSION permission to [contoso\svc-AXSF$].
Run the following command to reset the database users.
.\Reset-DatabaseUsers.ps1 -DatabaseServer '<FQDN of the SQL server>' -DatabaseName '<AX database name>'
Configure the Financial Reporting database
Run the following command.
.\Initialize-Database.ps1 -ConfigurationFilePath .\ConfigTemplate.xml -ComponentName MRThe Initialize-Database.ps1 script performs the following actions:
Create an empty database that's named FinancialReporting.
Map the users to database roles, based on the following table.
User Type Database role svc-LocalAgent$ gMSA db_owner svc-FRPS$ gMSA db_owner svc-FRAS$ gMSA db_owner
Step 19. Encrypt credentials
Copy your infrastructure folder to an AOS node.
Create the Credentials.json file by running the following command.
.\Configure-CredentialsJson.ps1 -ConfigurationFilePath .\ConfigTemplate.xml -Action CreateThe script prompts you to enter several credentials:
- AccountPassword – The encrypted domain user password for the AOS domain user (contoso\axserviceuser). If you're deploying by using a recent base deployment where a gMSA is used instead of the domain user, this prompt is skipped. However, the script creates a placeholder value, because the installers still look for it. Microsoft will address this issue in a future update.
- SqlUser – The encrypted SQL user (axdbadmin) that has access to the Finance + Operations (on-premises) database (AXDB).
- SqlPassword – The encrypted SQL password.
Note
The script automatically puts the Credentials.json file in the SMB file share (\\AX7SQLAOFILE1\agent\Credentials\Credentials.json).
The script requests the credentials that are required for the Entity Store feature, but this request can be skipped. For more information, see PowerBI.com integration with on-premises environments.
Step 20. Configure AD FS
Before you can complete this procedure, AD FS must be deployed on Windows Server. For information about how to deploy AD FS, see Deployment Guide Windows Server 2016 and 2012 R2 AD FS Deployment Guide.
Finance + Operations (on-premises) requires additional configuration of AD FS, beyond the default out-of-box configuration. The following Windows PowerShell commands must be run on the machine where the AD FS role service is installed. The user account must have enough permissions to administer AD FS. For example, the user must have a domain administrator account. For complex AD FS scenarios, consult your domain administrator.
Configure the AD FS identifier so that it matches the AD FS token issuer.
This command is related to adding new users by using the Import users option on the Users page (System administration > Users > Users) in the Finance + Operations (on-premises) client.
$adfsProperties = Get-AdfsProperties
Set-AdfsProperties -Identifier $adfsProperties.IdTokenIssuer
Warning
If your AD FS is set up to work with Microsoft 365 (formerly Office 365) for single sign-on, this step breaks that scenario. Don't run the preceding command if you'll use the AD FS Microsoft 365 compatibility deployment option.
To ensure that the scenario continues to work, you can specify a deployment option to adapt your Dynamics 365 for Finance + Operations (on-premises) installation to that requirement. For more information, see AD FS Microsoft 365 compatibility.
You should disable Windows Integrated Authentication (WIA) for intranet authentication connections, unless you've configured AD FS for mixed environments. For more information about how to configure WIA so that it can be used with AD FS, see Configure browsers to use Windows Integrated Authentication (WIA) with AD FS.
This command is related to using forms authentication upon sign-in to the Finance + Operations (on-premises) client. Other options, such as single sign-on, aren't supported.
Set-AdfsGlobalAuthenticationPolicy -PrimaryIntranetAuthenticationProvider FormsAuthentication, MicrosoftPassportAuthenticationFor sign-in, the user's email address must be acceptable authentication input.
This command is related to setting up email claims. Other options, such as transformation rules, might be available but require additional setup.
Add-Type -AssemblyName System.Net
$fqdn = ([System.Net.Dns]::GetHostEntry('localhost').HostName).ToLower()
$domainName = $fqdn.Substring($fqdn.IndexOf('.')+1)
Set-AdfsClaimsProviderTrust -TargetIdentifier 'AD AUTHORITY' -AlternateLoginID mail -LookupForests $domainName
For sign-in through the Office add-ins, Cross Origin Resource Sharing (CORS) headers must be enabled.
Set-AdfsResponseHeaders -EnableCORS $true
Set-AdfsResponseHeaders -CORSTrustedOrigins https://az689774.vo.msecnd.net
Note
These commands can be run only on an AD FS server that's running Windows Server 2019 or later. AD FS on Windows Server 2016 has been deprecated. For more information, see Microsoft Dynamics 365 Finance + Operations (on-premises) supported software.
Restart the AD FS service so that the settings are applied correctly.
Before AD FS can trust Finance + Operations (on-premises) for the exchange of authentication, various application entries must be registered under an AD FS application group in AD FS. To speed up the setup process and help reduce errors, you can use the Publish-ADFSApplicationGroup.ps1 script for registration. Run the script by using a user account that has enough permissions to administer AD FS (for example, an administrator account.)
For more information about how to use the script, see the documentation that's listed in the script. Make a note of the client IDs that are specified in the output, because you'll need this information in Lifecycle Services later. If you lose the client IDs, sign in to the machine where AD FS is installed, open Server Manager, and go to Tools > AD FS Management > Application Groups > Microsoft Dynamics 365 for Operations On-premises. You can find the client IDs under the native applications.
Note
If you want to reuse your previously configured AD FS server for additional environments, see Reuse the same AD FS instance for multiple environments.
Connect to a server that's hosting your AD FS instance or farm, open Windows PowerShell with administrator privileges, and go to the Infrastructure folder in your file share. Then run the following command.
# Host URL is your DNS record\host name for accessing the AOS
.\Publish-ADFSApplicationGroup.ps1 -HostUrl 'https://ax.d365ffo.onprem.contoso.com'

Finally, verify that you can access the AD FS OpenID configuration URL on a Service Fabric node of the AOSNodeType type. To do this check, try to open https://<adfs-dns-name>/adfs/.well-known/openid-configuration in a web browser. If you receive a message that states that the site isn't secure, you haven't added your AD FS SSL certificate to the Trusted Root Certification Authorities store. This step is described in the AD FS deployment guide. If you're using remoting, you can run the following command to install the certificate on all nodes in the Service Fabric cluster.
# If remoting, execute
.\Install-ADFSCert-AllVMs.ps1 -ConfigurationFilePath .\ConfigTemplate.xml
If you can access the URL, a JavaScript Object Notation (JSON) file is returned. This file contains your AD FS configuration, and it indicates that your AD FS URL is trusted.
You've now completed the setup of the infrastructure. The following sections describe how to set up your connector and deploy your Finance + Operations (on-premises) environment in Lifecycle Services.
Step 21. Configure a connector and install an on-premises local agent
Sign in to Lifecycle Services, and open your on-premises implementation project.
Select the Menu button (sometimes referred to as the hamburger or the hamburger button), and then select Project settings.
Select On-premises connectors.
Select Add to create a new on-premises connector.
On the 1: Setup host infrastructure tab, select Download agent installer.
After the zip file is downloaded, verify that it's unblocked. Select and hold (or right-click) the file, and then select Properties. In the Properties dialog box, select the Unblock checkbox.
Unzip the agent installer on one of the Service Fabric nodes of the OrchestratorType type.
After the file is unzipped, go back to your on-premises connector in Lifecycle Services.
On the 2: Configure agent tab, select Enter configuration, and enter the configuration settings. To get the required values, run the following command on any machine that has the infrastructure folder and up-to-date configuration files.
.\Get-AgentConfiguration.ps1 -ConfigurationFilePath .\ConfigTemplate.xmlNote
Make sure that you select the correct SQL Server version for your installation: either version 2016 or version 2019.
Save the configuration, and then select Download configurations to download the localagent-config.json configuration file.
Copy the localagent-config.json file to the machine where the agent installer package is located.
The local agent has some additional, optional configurations that can be set to specify environment-specific setup/requirements. For information about the additional options, see Deployment configurations for the local agent.
In a PowerShell window, go to the folder that contains the agent installer, and run the following command.
LocalAgentCLI.exe Install <path of config.json>Note
The user who runs this command must have db_owner permissions on the OrchestratorData database.
After the local agent is successfully installed, go back to your on-premises connector in Lifecycle Services.
On the 3: Validate setup tab, select Message agent to test for Lifecycle Services connectivity to your local agent. When a connection is successfully established, you'll receive the following message: "Validation complete. Agent connection established."
Step 22. Tear down CredSSP, if remoting was used
If you used any of the remoting scripts during setup, be sure to run the following command during breaks in the setup process, or after the setup is completed.
.\Disable-CredSSP-AllVMs.ps1 -ConfigurationFilePath .\ConfigTemplate.xml
If the previous remoting Windows PowerShell window was accidentally closed, and CredSSP was left enabled, this command disables it on all the machines that are specified in the configuration file.
Step 23. Deploy your Finance + Operations (on-premises) environment from Lifecycle Services
In Lifecycle Services, open your on-premises implementation project.
Go to Environment > Sandbox, and select Configure. To get the required values, run the following command on the primary domain controller VM. That VM must have access to AD FS and the DNS server settings.
.\Get-DeploymentSettings.ps1 -ConfigurationFilePath .\ConfigTemplate.xmlFor new deployments, select your environment topology, and then complete the wizard to start your deployment.
During the preparation phase, Lifecycle Services assembles the Service Fabric application packages for your environment. It then sends a message to the local agent to start deployment. You should notice that the environment state is Preparing.
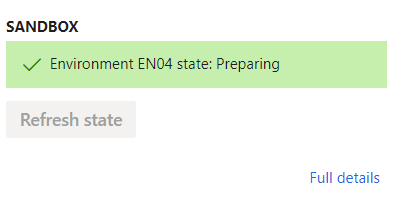
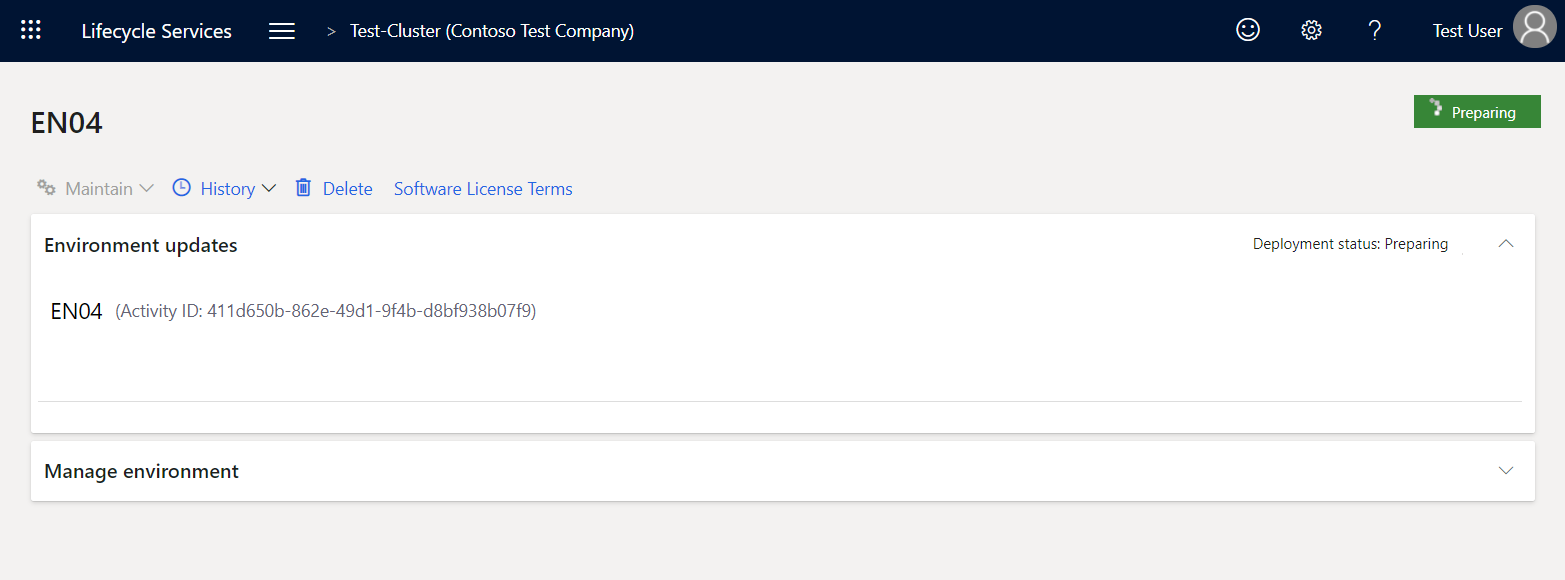
Select Full details to open the environment details page. Notice that the upper-right corner of the page shows the environment status as Preparing.
The local agent picks up the deployment request, starts the deployment, and communicates back to Lifecycle Services when the environment is ready. When deployment is started, you should notice that the environment state is changed to Deploying.
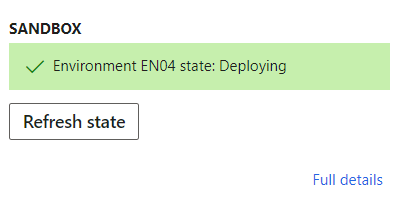
Select Full details to open the environment details page. Notice that the upper-right corner of the page shows the environment status as Deploying.

If the deployment fails, the environment state is changed to Failed, and the Reconfigure button becomes available for the environment. Fix the underlying issue, select Reconfigure, update any configuration changes, and then select Deploy to retry the deployment.
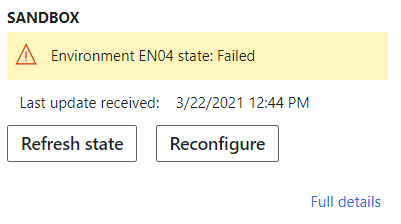
For information about how to reconfigure an environment, see Reconfigure environments to take a new platform or topology.
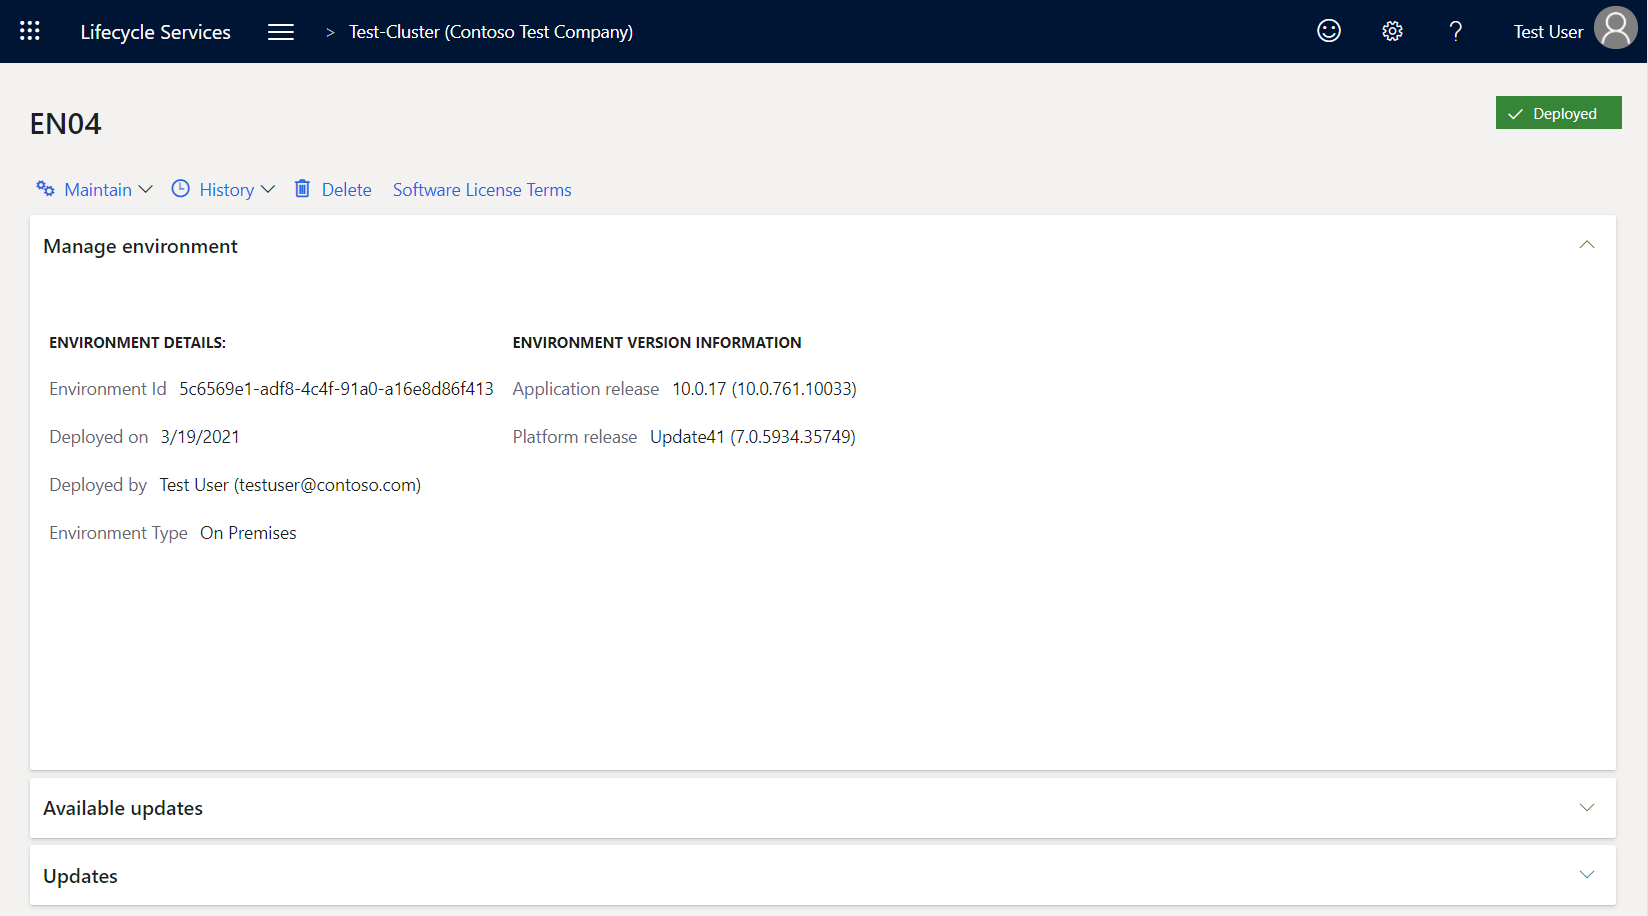
The following illustration shows a successful deployment. Notice that the upper-right corner of the page shows the environment status as Deployed.
Step 24. Connect to your Finance + Operations (on-premises) environment
- In a web browser, go to
https://[yourD365FOdomain]/namespaces/AXSF, where yourD365FOdomain is the domain name that you defined in the Step 1. Plan your domain name and DNS zones section earlier in this article.
Known issues
When you run the .\Create-GMSAAccounts.ps1 script, you receive the following error message: "Key does not exist"
If you're creating and generating gMSA passwords in your domain for the first time, you must first create the Key Distribution Services KDS Root Key. For more information, see Create the Key Distribution Services KDS Root Key.
When you run the remoting script Configure-Prereqs-AllVms cmdlet, you receive the following error message: "The WinRM client cannot process the request"
Follow the instructions in the error message to enable the Allow delegation fresh credentials computer policy on all machines of the Service Fabric cluster.
When you run the Publish-ADFSApplicationGroup cmdlet, you receive the following error message: "ADMIN0077: Access control policy does not exist: Permit everyone"
If AD FS is installed with a non-English version of Windows Server 2016, the Permit everyone access control policy is created in the local language. Invoke the cmdlet in the following way to specify the AccessControlPolicyName parameter.
.\Publish-ADFSApplicationGroup.ps1 -HostUrl 'https://ax.d365ffo.onprem.contoso.com' -AccessControlPolicyName '<Permit everyone access control policy in your language>'
Additional resources
- Apply updates to on-premises deployments
- Redeploy on-premises environments
- Configure document management
- Import Electronic reporting (ER) configurations
- Document generation, publishing, and printing in on-premises deployments
- Configure proxies for on-premises environments
- Set up technical support for finance and operations apps
- Client internet connectivity
Обратная связь
Ожидается в ближайшее время: в течение 2024 года мы постепенно откажемся от GitHub Issues как механизма обратной связи для контента и заменим его новой системой обратной связи. Дополнительные сведения см. в разделе https://aka.ms/ContentUserFeedback.
Отправить и просмотреть отзыв по