Exercise - Use AI Builder actions in Power Automate
In this section, you discover and use AI Builder actions in Power Automate through the creation of a simple flow.
Prerequisites
Access to Power Automate.
A license or trial of the AI Builder.
An environment with a Microsoft Dataverse database. (Applicable only for work or school accounts).
A Microsoft Office 365 account with access to OneDrive and Excel Online (Business).
A basic understanding of Power Automate and experience with creating a flow is recommended.
Create a flow from a solution
To add AI Builder actions in a flow, create the flow from a Microsoft Dataverse solution.
From the Power Automate home page, go to Solutions from the left navigation bar then select + New solution.
Enter My AI Builder solution for Solution name, select a Publisher, and then select Create.
Now select the My AI Builder solution solution to open it.
Select + New > Automation > cloud flow > Instant in the action bar on the top of the screen. The flow designer screen appears and asks you to choose the trigger action.
Enter My AI Builder flow for the name, select Manually trigger a flow, and then select Create.
Select the trigger and then from the left hand properties panel, select Add an input.
Select Text.
Name your input My Text, as shown in the following figure.

Select + icon and then select Add an action. You now add an AI Builder action.
Search for and add an AI Builder action
In the search field, enter "Analyze sentiment" and select the Analyze positive or negative sentiment in text action.
Select Sign in if prompted.
Configure the AI Builder action
Each AI Builder action has different parameters, depending on the underlying model requirements.
For the AI Builder sentiment analysis model, Language and Text are the two mandatory fields to fill in.
In the Language field, select English as the language.
Select the Text field and then select the Enter the data from previous step button.

Select My Text, which is defined in the trigger action.

The My Text value is provided during flow testing, so you don't need to focus on it right now.
Select Save. Your flow is now saved with an autogenerated name. You can change it by selecting the generated name on the upper-left corner of the flow designer screen.
Use the model's inference
For this exercise, you use a Microsoft Excel file in OneDrive to store the text sentiment that the AI model detects.
Create an Excel file named AI Builder results.xlsx in your OneDrive.
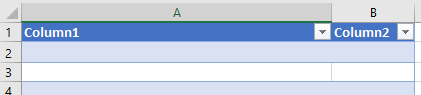
In this file, insert a table with two columns and then save the file (make sure that you use the Insert > Table function of Excel).
In My AI Builder flow, select + Insert a new step and then select Add an action.
Search for add a row into table and select Add a row into a table action from Excel Online (Business).
Sign in if prompted.
Complete the Location, Document Library, and File fields to point to the Excel file you created.
In the Table field, select the name of the table that you created in your Excel file.
Select Show all.

Select Column 1 field and then select the Enter the data from previous step button.
Select My Text from the dynamic content pane.
Select Column 2 field and then select the Enter the data from previous step button.
Select Overall text sentiment from the dynamic content pane.
The Add a row into a table action should now look like this image.

Select Save.
Test the flow
Before productizing a flow, it's always a good idea to test it during design phase.
Select Test on the upper-right corner of the flow designer screen.
Select Manually - Perform the starting action to trigger it. and then select Test.
Select Continue.
Provide the value of the My Text field from the trigger action. This text is what you want to analyze the sentiment for. For this example, we enter It was the best sandcastle he had ever seen.
Select Run flow.
Select Done.
If your flow ran successfully, you would see all steps shown with a green checkmark.
You can expand the actions to view the running inputs and outputs of each action, which is a good way to debug your flow.
Check that the line is correctly added in the Excel file.

For more information, see Use AI Builder in Power Automate.