Set up Retail SDK build pipeline
Important
Support for the Retail SDK will end in October 2023. Please use or migrate to the Commerce SDK, which provides several benefits including a simplified development and update experience, and improved performance.
This article shows how to set up the Azure DevOps build pipeline for the Retail SDK, by using the Azure DevOps build agent (a Microsoft-hosted agent). To generate the build for Retail SDK, a dedicated build machine isn't required except for Modern POS (MPOS). The setup works with the Azure DevOps build agent. This article applies to Retail SDK version 10.0.11 or greater.
Prerequisites
The Retail SDK must be added to Azure Repos (Git repository), GitHub, or Azure DevOps. The Retail SDK is available in the service volume drive of the development virtual machine (VM) from Lifecycle Services (LCS). To provision a development VM in LCS, follow the steps in Deploy and access development environments.
Set up a build pipeline in Azure DevOps
Sign in to your Azure DevOps organization.
Select Pipeline and click New pipeline.
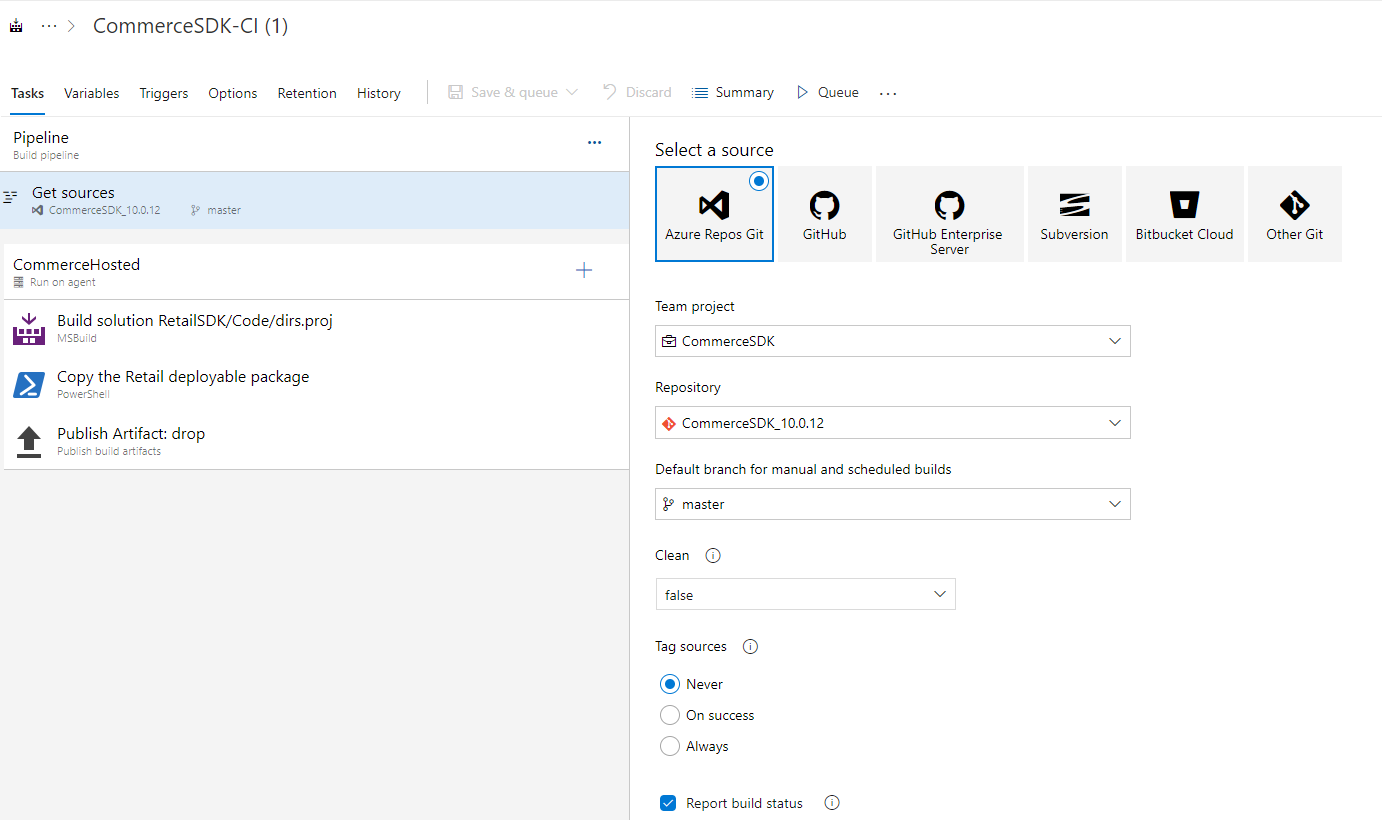
Select your source repo.
Click the pipeline and provide a name for your pipeline. For Agent pool, choose Azure Pipelines. For Agent Specification, enter vs2017-win2016.
On the Get sources tab, select your Retail SDK repo.
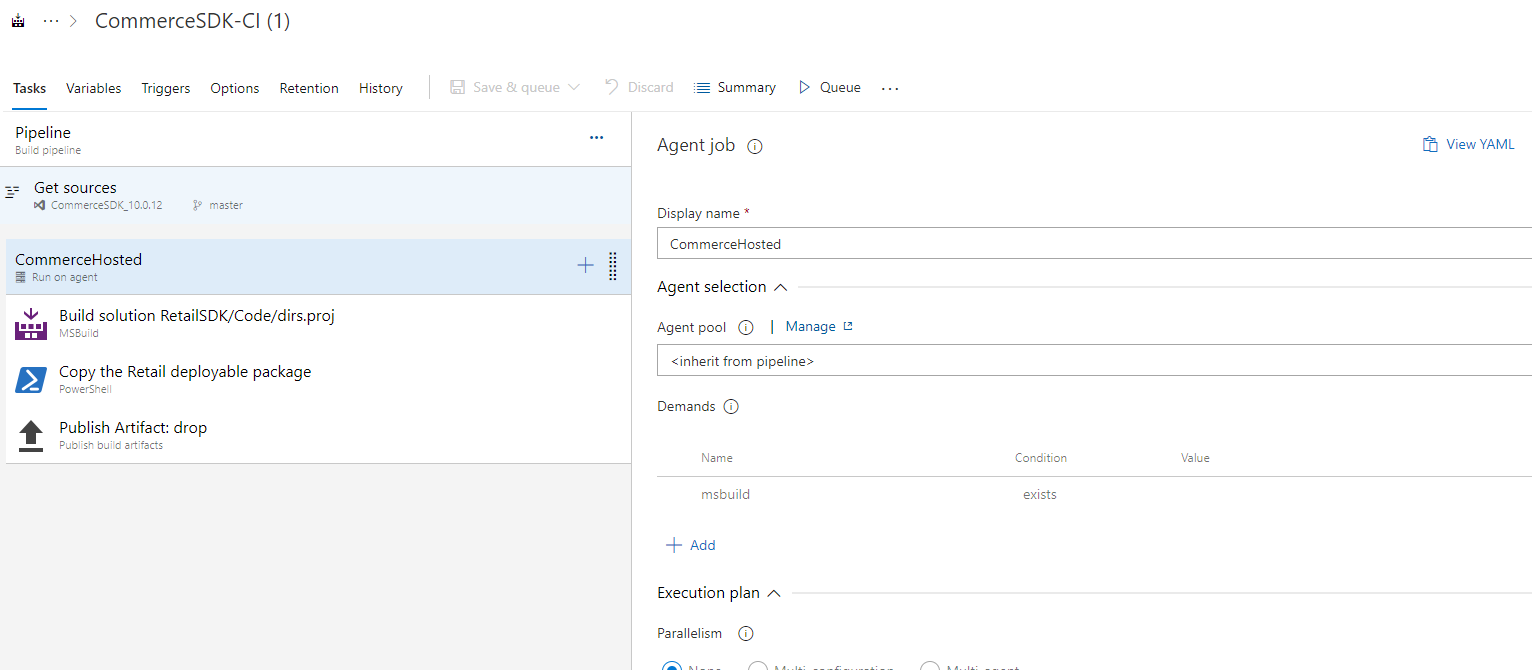
In the Agent job panel, provide a display name. For Agent pool, select <inherit from pipeline>.
Add an MSBuild task. For Project, select RetailSDK\dirs.proj or RetailSDK\Code\dirs.proj. The choice depends on how the Retail SDK is structured. Set MSBuild Version to MSBuild 15.0. Set MSBuild Architecture to MsBuild x86.

Add a PowerShell task (Run PowerShell script on Linux, macOS, or Windows). Provide a name for the task. For Type, select Inline.
In the Script section, copy and paste this script.
    # Script to copy the Retail deployable package with Build number.

    Copy-Item "$(Build.SourcesDirectory)\RetailSDK\Packages\RetailDeployablePackage\RetailDeployablePackage.zip" -Destination
    "$(Build.ArtifactStagingDirectory)\RetailDeployablePackage_$(Build.BuildNumber).zip"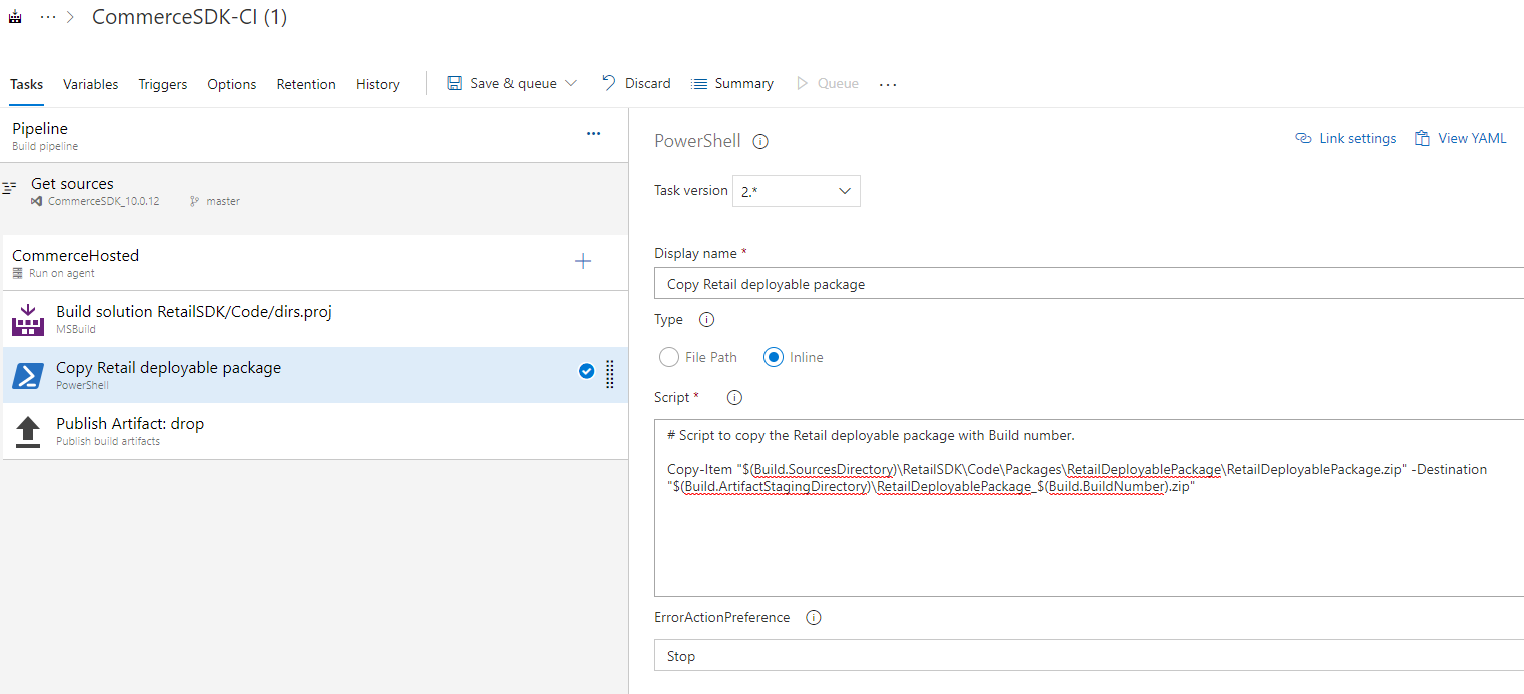
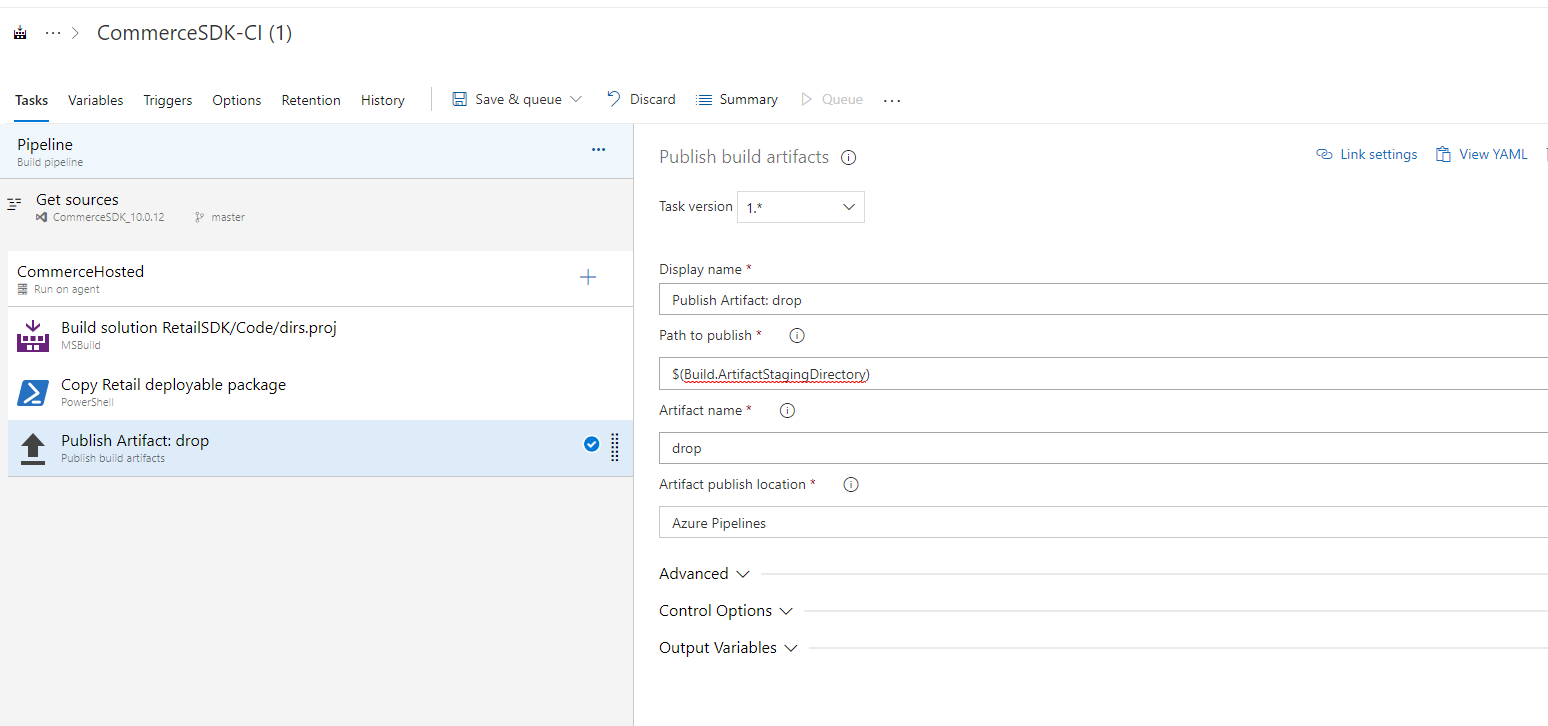
Add a Publish Artifact task. Provide the Display name and Artifact name (drop name). Set the Path to publish to $(Build.ArtifactStagingDirectory).
Save the changes and queue the build.
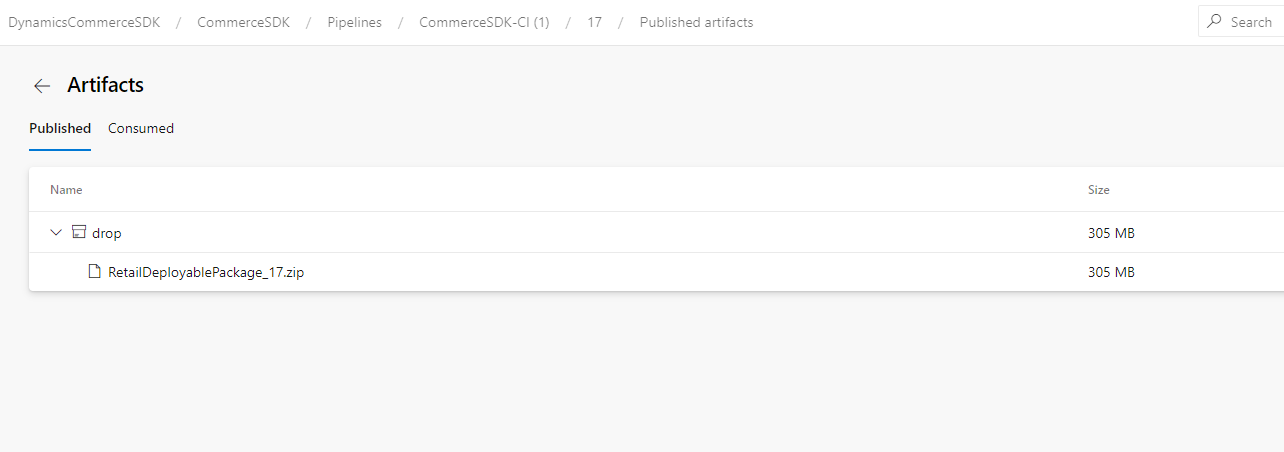
When the build is complete, you can download the deployable package from the Published Artifacts.
Sample YAML script for the pipeline
The following YAML script specifies the pipeline.
pool:
  name: Azure Pipelines
  demands: msbuild

steps:
- task: MSBuild@1
  displayName: 'Build solution RetailSDK/Code/dirs.proj'
  inputs:
    solution: RetailSDK/Code/dirs.proj
    msbuildVersion: 15.0

- powershell: |
   # Script to copy the Retail deployable package with Build number.

   Copy-Item "$(Build.SourcesDirectory)\RetailSDK\Packages\RetailDeployablePackage\RetailDeployablePackage.zip" -Destination
   "$(Build.ArtifactStagingDirectory)\RetailDeployablePackage_$(Build.BuildNumber).zip"

  displayName: 'Copy the Retail deployable package'

- task: PublishBuildArtifacts@1
  displayName: 'Publish Artifact: drop'
Set up an Azure DevOps build pipeline that uses a build machine
If the build machine uses MSBuild with the Azure DevOps pipeline, follow these steps in the build machine to enable it for the Retail SDK, version 10.0.11:
- Install Visual Studio 2017 on the build machine.
- Optional: On the build machine, run MSBuild (version 15.0) from the developer command prompt for Visual Studio 2017. Open the developer command prompt for Visual Studio 2017, go to the Retail SDK root folder, and run the command
msbuild dirs.proj. Make sure that the command is successfully completed. - On the build machine, add an environment variable for MSBuild (version 15.0). Go to System Properties > Environment Variables > System variables. Select Path, select New, and add the path variable for MSBuild. Then move the entry for the path environment variable to the top of the list. The path depends on the location where you installed Visual Studio 2017. To get the path for MSBuild, open the developer command prompt for Visual Studio 2017, and run the command
where msbuild. An example of the path is C:\Program Files(x86)\Microsoft Visual Studio\2017\Enterprise\MSBuild\15.0\Bin\. - Restart the Azure DevOps build agent in the build machines.
- In the Azure DevOps pipeline, set the Agent Pool field to Default, and change the MSBuild version to 15.0 or later.
Troubleshooting
If the build from Azure DevOps fails with a NuGet error, check for these issues:
- The Azure Pipeline isn't using MSBuild version 15.0 for NuGet restore.
- The extension projects haven't been upgraded to use the package reference model.
Повратне информације
Стиже ускоро: Током 2024. године постепено ћемо укидати проблеме са услугом GitHub као механизам повратних информација за садржај и заменити га новим системом повратних информација. За додатне информације, погледајте: https://aka.ms/ContentUserFeedback.
Пошаљите и прегледајте повратне информације за