Quickstart: Create a Game Development Virtual Machine with Unreal Engine
Important
Azure Game Development Virtual Machine is scheduled for retirement on February 1st, 2024. Learn more.
Get up and running with a Windows 11 or Windows Server 2022 Game Development Virtual Machine which has Unreal Engine and other common game development tools pre-installed. Unreal Engine is an incredibly powerful and advanced real-time 3D creation tool for photorealistic visuals and immersive experiences.
Note
Game Dev VM supports Windows 10 and Windows Server 2019 too, and can be deployed via ARM template. Please refer to Create a Virtual Machine with an ARM template for steps.
Prerequisites
- An Azure account with an active subscription. Create an account for free. Please note Azure free accounts do not support GPU enabled virtual machine SKUs. To understand what Azure subscriptions support GPU SKUs, please refer to this offer types chart.
- An Epic Games account to accept Epic Games store End User License Agreement after signing in to this VM.
- Multi-tenant Hosting Rights for Windows 11 is required. Verify you have an eligible Windows 11 subscription license or a Visual Studio subscription for dev/test scenarios.
Deploy your Game Development Virtual Machine
Create a Game Dev VM instance
Go to the Azure portal. Or, the Azure Game Development VM marketplace page, click "Get It Now" under the Azure icon, click "Continue" in the pop up window to give consent and then skip the next step .
In the Portal, go to the Azure Marketplace and search Azure Game Development VM
Select the Create button.
On the Basics tab, complete the following information, then select Next: Game Developer Tools >:
| Parameters | Value/Description |
|---|---|
| Subscription | Choose the subscription from the drop-down list |
| Resource Group | Create a new or select an existing Resource Group |
| Region | Select the Azure region that's most appropriate. For the best user experience choose the Azure Region closest to the users. Learn more about Azure Regions |
| Use as a build server | This is optional. If you do not expect to use 3D applications or work with 3D content on this VM, instead you want to use it for game build purpose, as illustrated in this build servers example, you can check this box. It gives you more VM size options since GPU is not required |
| VM Size | This VM currently supports the sizes NV, NVv3,T4,A10. Choose a size that is appropriate for your workload. Read more about choosing the right GPU SKU size. |
| Azure Spot VM | Select the checkbox to choose Spot VM. Learn more about Spot VM before choosing the option. |
| Virtual machine name | Enter the name of the virtual machine |
| Admin Creds | Enter the local username and password |
| Operating System | Windows 11 or Windows Server 22 |
On the Game Development Tools tab complete the following information, then select Next Remote Access Configuration >:
| Parameters | Value/Description |
|---|---|
| Game Engine | Choose which version of Unreal Engine to install. Please note that Unreal Engine 5.1 is in preview on Game Dev VM with a graphics driver version warning which you can safely ignore. If you don't need install any game engine from the list, you can choose No game engine installed option. |
| Unreal Pixel Stream | VM supports Unreal Pixel Streaming. You can check the box if you want to enable this feature, which opens the required ports |
| Perforce Depot | Connect to and sync a Perforce depot if you already have a Perforce Helix Core version control server in place. Learn more Integrate with a Perforce Depot |
| Game SDK Installed | Choose which version of GDK to install, Xbox console development, there will need to be additional steps to enable this development, as specified in the NDA developer program |
| Incredibuild | To install Incredibuild select the free trial or upload the license |
Note
A dedicated Azure data disk will be created and connected to the VM. This disk has a volume of 255GB with drive letter E and saves all the game engine files. You will be able to add more data disks in the Data Storage section.
On the Remote Access Configuration tab complete the following information, then select Next: VM Network >:
| Parameters | Value/Description |
|---|---|
| Remote Access Technology | Choose RDP, Teradici or Parasec |
| (If you chose RDP) Azure Virtual Desktop Integration | Click the box to integrate with Azure Virtual Desktop, then select a Host Pool |
| (If you chose Teradici) Teridici Configuration | Add CAS+ Registration Key |
| (If you chose Parsec) Parsec Configuration | Add the Parsec information required |
On the VM Network tab complete the following information, then select Next: Data Storage >:
| Parameters | Value/Description |
|---|---|
| Public IP Address | Create or select existing public IP name, if you do not want use a public IP then select None |
| DNS Prefix | Give this VM a unique DNS Prefix or use the default prefix for the public IP |
| Virtual Network | Create a new or select an existing Virtual Network space the VM |
| Subnet Name | Choose the subnet name you want to assign to this VM. The Private IP address is the next available IP address in the subnet |
Important
It is best practice to not expose Virtual Machines directly to the internet with a public IP. Plan for inbound and outbound internet connectivity
On the Data Storage tab complete the following information, then select Next: Management >:
| Parameters | Value/Description |
|---|---|
| Number of Data Disks | Choose the number of data disks needed for this VM, |
| Data Disk Size | Select the size of the data disk. Each disk will have the same size |
| Azure Storage File Share Configuration | Click the check box if you need to mount an existing azure file share |
Note
- If you don’t want to use the striped disk, please set the number of data disks to be 1. If you don’t want to attach a data disk at all, please set the number to be 0. This VM will still have an OS disk and a temporary data disk as the default configuration.
- It is highly recommended to choose at least 2 disks that will be striped together for the best IOPS performance, and to install your source control and game projects on that drive for the best experience and available space on the VM. The C drive defaults to 256GB and could quickly run out of space for medium to large projects.
On the Management tab complete the following information, then select Next: Advanced >:
| Parameters | Value/Description |
|---|---|
| Identity | Choose if you want to use System Assigned Managed Identity, learn more about Managed Identity |
| Azure AD | Choose if you want to enable AAD for your VM, learn more about AAD |
| Guest OS updates | Select Automatic or Manuel updates for your VM |
On the Advanced tab complete the following information, then select Next: Tags >:
| Parameters | Value/Description |
|---|---|
| Support for custom image creation with sysprep | If you are planning on using this VM to create a custom image, select the check box |
On the Tags tab, complete the following information then select Next: Review + create >
Tags are used to categorize resources, usually for billing management purposes. If you don't need tags now, you can skip this page and check out resource tagging to learn more.
On the Review + create tab, ensure validation passes and review the information that will be used during deployment. If the validation has failed, review the previous sections.
Select Create.
Note
- There is no additional charge for the software that comes pre-loaded on the virtual machine. You do pay the compute cost for the VM size that you chose in the Size step. If you choose Teradici or Parsec as your remote access tool, you bring your own license to the VM on Azure.
- Provisioning takes 10 to 20 minutes. You can view the status of your VM on the Azure portal.
Access the Game Development VM
After the VM is created and provisioned, there are three methods to access this VM, depending on the Remote access technology you chose before.
Method 1: RDP. This remote method is always available.
Follow the steps listed to connect and sign on to Azure-based virtual machine. Use the credentials that you configured when created this virtual machine before. If you enable AAD for this VM, you can also use your corporate credentials for RDP access if you meet the requirements.
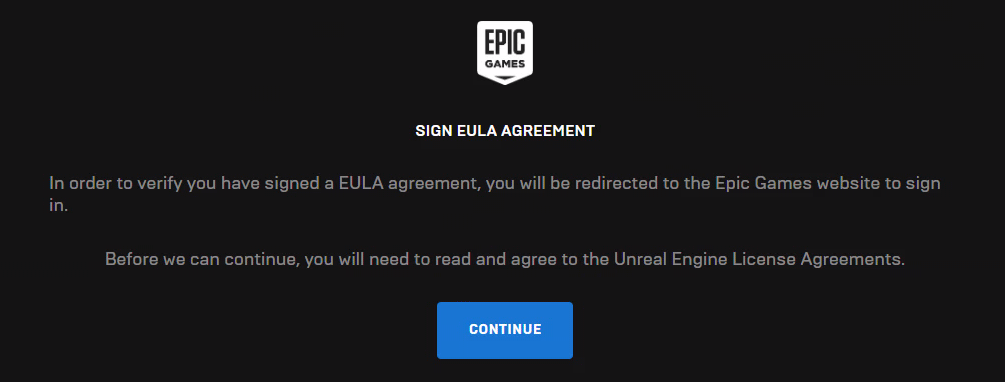
Once you sign on to the VM, you'll be prompted immediately to accept Epic Games store End User License Agreement (EULA). If your Epic Games account has already accepted the latest EULA agreement, there is no need to accept it again, and you will be redirected to the desktop after your Epic Games account is authenticated. This is a one-time step when first deploying a new game development VM, and you don’t need repeat this step when you access this VM again.
Note
Your VM may stay at the Windows welcome screen for up to 1 minute until you see the above EULA Agreement--this is normal.
You're ready to start using the tools that are installed and configured on the VM. Many of the tools can be accessed through Start menu tiles and desktop icons.
Note
You may see a command prompt window pop up which shows the Microsoft GDK or other components are being installed in the background. This may take up to 10 minutes. You can safely ignore it but leave the window open, as it will automatically close once all the tasks are finished.

Alternatively, you can follow the steps to remote into the Game Development Virtual Machine with either Teradici or Parsec depending on your chosen method of remote access technology.
Clean up resources
When no longer needed, you can delete the resource group, virtual machine, and all related resources.
- On the Overview page for the VM, select the Resource group link.
- At the top of the page for the resource group, select Delete resource group.
- A page will open warning you that you are about to delete resources. Type the name of the resource group and select Delete to finish deleting the resources and the resource group.
Next steps
- Explore the tools on the Game Dev VM by opening the Start menu.
- Start to learn and use Unreal Engine.
- Learn about game development on Azure by reading Azure for Gaming and trying out tutorials.
- Read more about the Game Development Virtual Machine.
Geri Bildirim
Çok yakında: 2024 boyunca, içerik için geri bildirim mekanizması olarak GitHub Sorunları’nı kullanımdan kaldıracak ve yeni bir geri bildirim sistemiyle değiştireceğiz. Daha fazla bilgi için bkz. https://aka.ms/ContentUserFeedback.
Gönderin ve geri bildirimi görüntüleyin