Connect to an Access database in .NET Framework applications
Note
Datasets and related classes are legacy .NET Framework technologies from the early 2000s that enable applications to work with data in memory while the applications are disconnected from the database. They are especially useful for applications that enable users to modify data and persist the changes back to the database. Although datasets have proven to be a very successful technology, we recommend that new .NET applications use Entity Framework Core. Entity Framework provides a more natural way to work with tabular data as object models, and it has a simpler programming interface.
You can connect to an Access database (either an .mdb file or an .accdb file) by using Visual Studio. After you define the connection, the data appears in the Data Sources window. From there, you can drag tables or views onto your design surface.
Note
If you're using Visual Studio to connect to Access databases, you will need to be aware that versions of Visual Studio prior to Visual Studio 2022 are all 32-bit processes. This means some of the data tools in Visual Studio 2019 and earlier will only be able to connect to Access databases using 32-bit data providers.
If you're using Visual Studio 2022 to connect to Access databases, you will need to be aware that Visual Studio 2022 is now a 64-bit process. This means some of the data tools in Visual Studio will not be able to connect to Access databases using 32-bit data providers.
If you need to maintain 32-bit applications that connect to Access databases, you will still be able to build and run the application with Visual Studio 2022. However, if you need to use any of the Visual Studio Data Tools such as Server Explorer, Data Source Wizard, or the DataSet Designer, you will need to use an earlier version of Visual Studio that is still a 32-bit process. The last version of Visual Studio that was a 32-bit process was Visual Studio 2019.
If you plan on converting the project to be a 64-bit process, it's recommended that you use the 64-bit Microsoft Access database Engine, also called Access Connectivity Engine (ACE). Please see OLE DB Provider for Jet and ODBC driver are 32-bit versions only for more information.
Prerequisites
To use these procedures, you need a Windows Forms or WPF project and either an Access database (.accdb file) or an Access 2000-2003 database (.mdb file). Follow the procedure that corresponds to your file type.
Create a dataset for an .accdb file
Connect to databases created with Microsoft 365, Access 2016, Access 2013, Access 2010, or Access 2007 by using the following procedure.
Open a Windows Forms or WPF application project in Visual Studio.
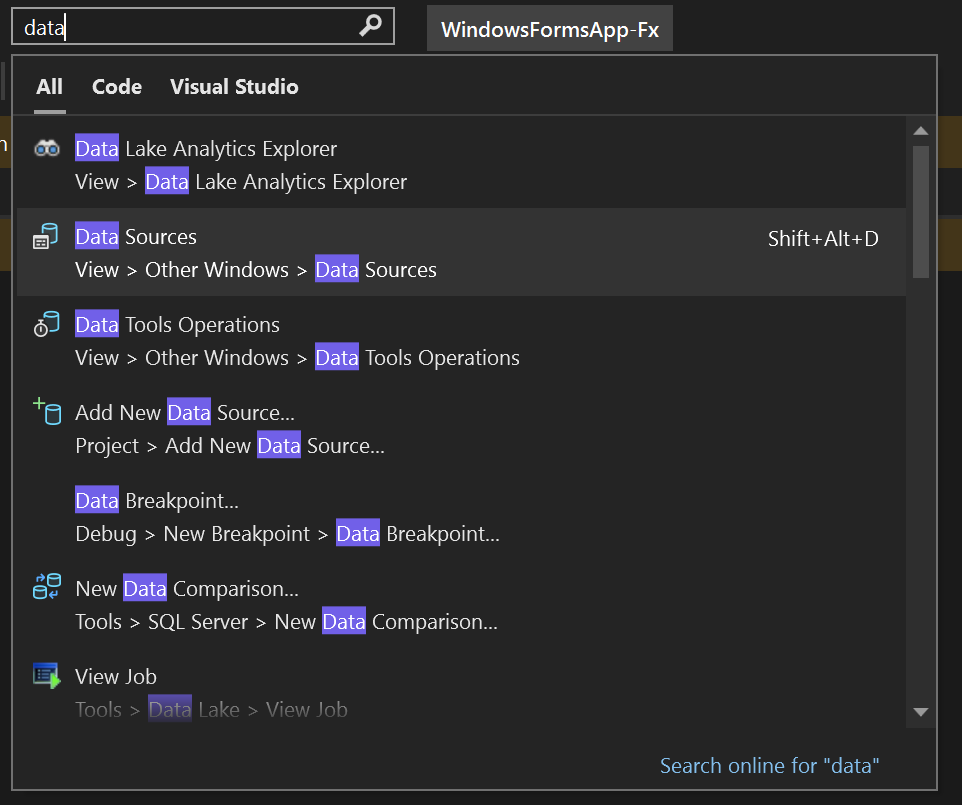
To open the Data Sources window, press Ctrl+Q, enter "data" in the search box, and choose Data Sources window. Or on the View menu, select Other Windows > Data Sources. Or on the keyboard, press Shift+Alt+D.
In the Data Sources window, click Add New Data Source.
The Data Source Configuration Wizard opens.

Select Database on the Choose a Data Source Type page, and then select Next.
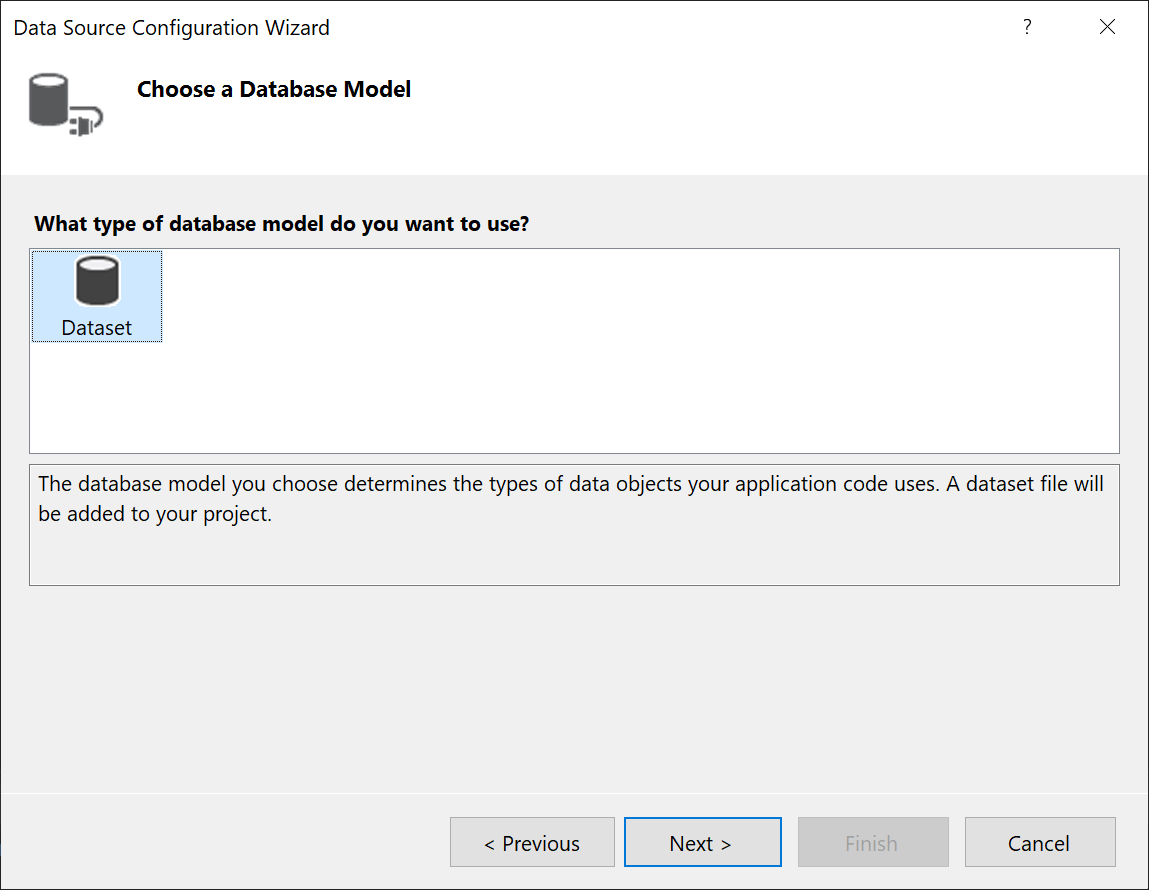
Select Dataset on the Choose a Database Model page, and then select Next.
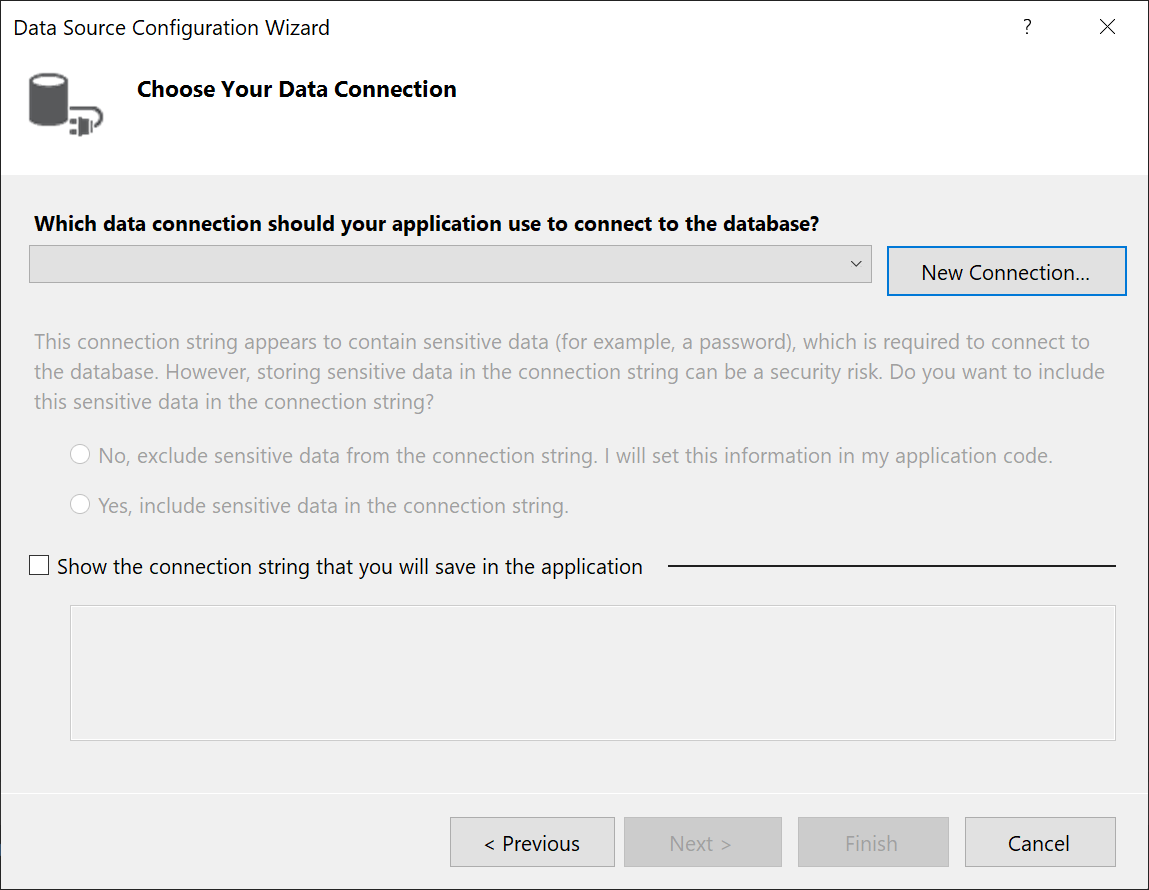
On the Choose your Data Connection page, select New Connection to configure a new data connection.
The Add Connection dialog box opens.

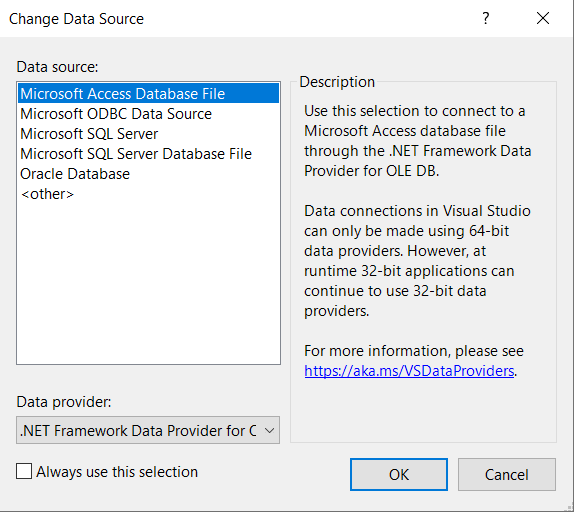
If Data source is not set to Microsoft Access Database File, select the Change button.
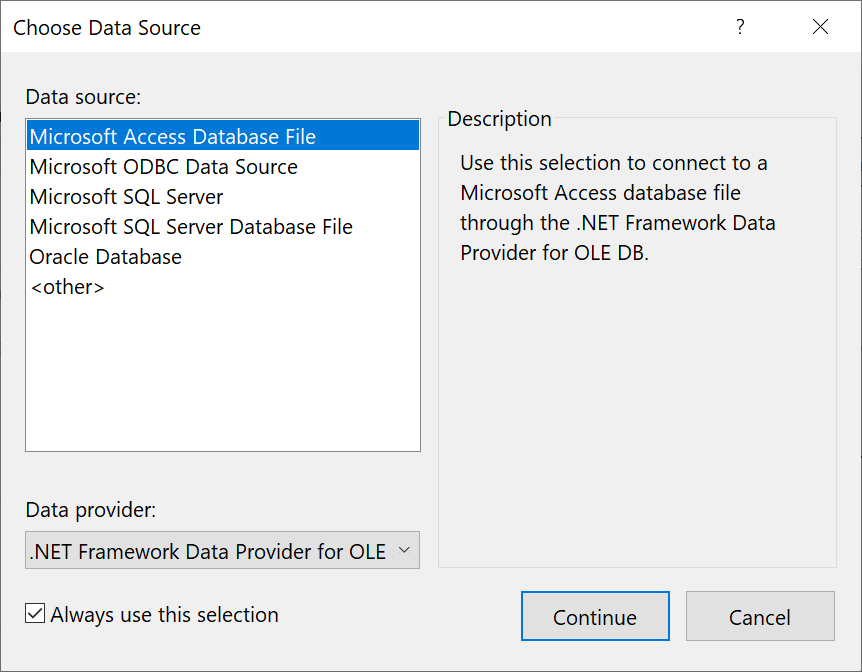
The Change Data Source dialog box opens. In the list of data sources, choose Microsoft Access Database File. The option .NET Framework Data Provider for OLE DB is already preselected. Choose OK.
Choose Browse next to Database file name, and then navigate to your
.accdbfile and choose Open.Note
If the bitness (32-bit or 64-bit) of Microsoft Office and Visual Studio do not match, you will see an error while connecting to an Access database. In Visual Studio 2019, you will get an error that the database provider is not registered. In Visual Studio 2022, you will see an error that you can't connect to a 32-bit data provider. To resolve this error, make sure that if you are using a 32-bit version of Office, you are using Visual Studio 2019 or earlier; for a 64-bit version of Office, you need Visual Studio 2022 or later.
Enter a user name and password (if necessary), and then choose OK.
Select Next on the Choose your Data Connection page.
You might get a dialog box telling you the data file is not in your current project. Select Yes or No.
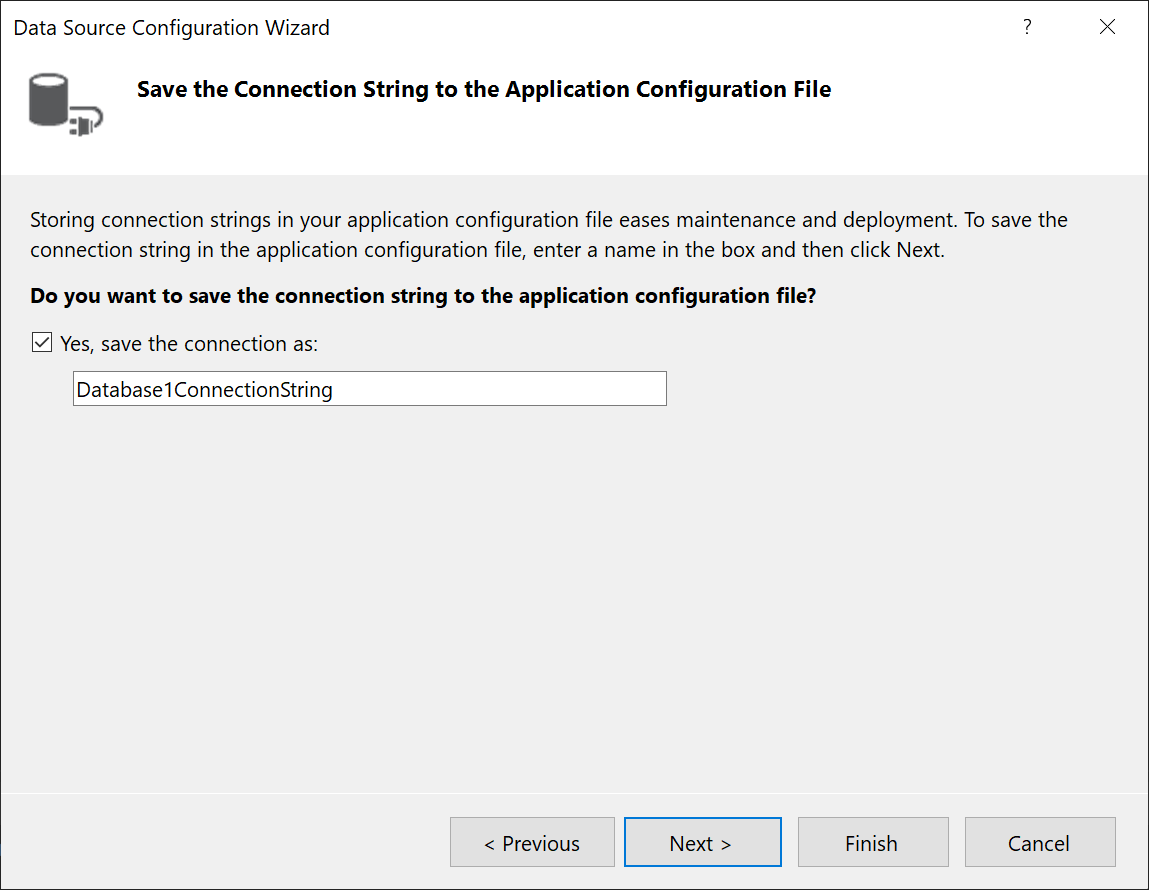
Select Next on the Save connection string to the Application Configuration file page.
Expand the Tables node on the Choose your Database Objects page.

Select the tables or views you want to include in your dataset, and then select Finish.
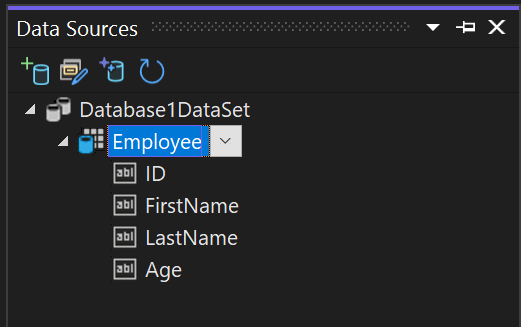
The dataset is added to your project, and the tables and views appear in the Data Sources window.
Create a dataset for an .accdb file
Connect to databases created with Microsoft 365, Access 2016, Access 2013, Access 2010, or Access 2007 by using the following procedure.
Open a Windows Forms or WPF application project in Visual Studio.
To open the Data Sources window, press Ctrl+Q, enter "data" in the search box, and choose Data Sources window. Or on the View menu, select Other Windows > Data Sources. Or on the keyboard, press Shift+Alt+D.

In the Data Sources window, click Add New Data Source.
The Data Source Configuration Wizard opens.
Select Database on the Choose a Data Source Type page, and then select Next.
Select Dataset on the Choose a Database Model page, and then select Next.
On the Choose your Data Connection page, select New Connection to configure a new data connection.
The Add Connection dialog box opens.
If Data source is not set to Microsoft Access Database File, select the Change button.
The Change Data Source dialog box opens. In the list of data sources, choose Microsoft Access Database File. The option .NET Framework Data Provider for OLE DB is already preselected. Choose OK.
Choose Browse next to Database file name, and then navigate to your
.accdbfile and choose Open.Note
If the bitness (32-bit or 64-bit) of Microsoft Office and Visual Studio do not match, you will see an error while connecting to an Access database. In Visual Studio 2019, you will get an error that the database provider is not registered. In Visual Studio 2022, you will see an error that you can't connect to a 32-bit data provider. To resolve this error, make sure that if you are using a 32-bit version of Office, you are using Visual Studio 2019 or earlier; for a 64-bit version of Office, you need Visual Studio 2022 or later.
Enter a user name and password (if necessary), and then choose OK.
Select Next on the Choose your Data Connection page.
You might get a dialog box telling you the data file is not in your current project. Select Yes or No.
Select Next on the Save connection string to the Application Configuration file page.
Expand the Tables node on the Choose your Database Objects page.
Select the tables or views you want to include in your dataset, and then select Finish.
The dataset is added to your project, and the tables and views appear in the Data Sources window.
Create a dataset for an .mdb file
Connect to databases created with Access 2000-2003 by using the following procedure.
Open a Windows Forms or WPF application project in Visual Studio.
On the View menu, select Other Windows > Data Sources.
In the Data Sources window, click Add New Data Source.
The Data Source Configuration Wizard opens.
Select Database on the Choose a Data Source Type page, and then select Next.
Select Dataset on the Choose a Database Model page, and then select Next.
On the Choose your Data Connection page, select New Connection to configure a new data connection.
If the data source is not Microsoft Access Database File (OLE DB), select Change to open the Change Data Source dialog box and select Microsoft Access Database File, and then select OK.
In the Database file name, specify the path and name of the
.mdbfile you want to connect to, and then select OK.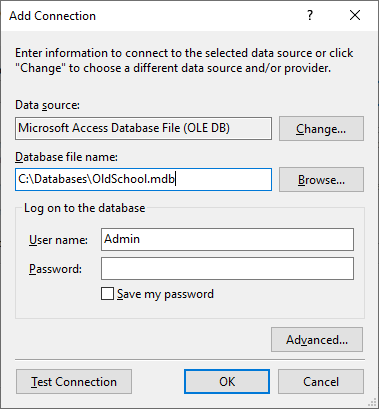
Select Next on the Choose your Data Connection page.
Select Next on the Save connection string to the Application Configuration file page.
Expand the Tables node on the Choose your Database Objects page.
Select whatever tables or views you want in your dataset, and then select Finish.
The dataset is added to your project, and the tables and views appear in the Data Sources window.
Next steps
The dataset that you just created is available in the Data Sources window. You can now perform any of the following tasks:
Select items in the Data Sources window and drag them onto your form or design surface (see Bind Windows Forms controls to data in Visual Studio or WPF data binding overview).
Open the data source in the Dataset Designer to add or edit the objects that make up the dataset.
Add validation logic to the ColumnChanging or RowChanging event of the data tables in the dataset (see Validate data in datasets).
Related content
Feedback
Coming soon: Throughout 2024 we will be phasing out GitHub Issues as the feedback mechanism for content and replacing it with a new feedback system. For more information see: https://aka.ms/ContentUserFeedback.
Submit and view feedback for