Walkthrough: Create an n-tier data application with ADO.NET and the .NET Framework
Note
Datasets and related classes are legacy .NET Framework technologies from the early 2000s that enable applications to work with data in memory while the applications are disconnected from the database. They are especially useful for applications that enable users to modify data and persist the changes back to the database. Although datasets have proven to be a very successful technology, we recommend that new .NET applications use Entity Framework Core. Entity Framework provides a more natural way to work with tabular data as object models, and it has a simpler programming interface.
N-tier data applications are applications that access data and are separated into multiple logical layers, or tiers. Separating application components into discrete tiers increases the maintainability and scalability of the application. It does this by enabling easier adoption of new technologies that can be applied to a single tier without requiring you to redesign the whole solution. N-tier architecture includes a presentation tier, a middle-tier, and a data tier. The middle tier typically includes a data access layer, a business logic layer, and shared components such as authentication and validation. The data tier includes a relational database. N-tier applications usually store sensitive information in the data access layer of the middle-tier to maintain isolation from end users who access the presentation tier. For more information, see N-tier data applications overview.
One way to separate the various tiers in an n-tier application is to create discrete projects for each tier that you want to include in your application. Typed datasets contain a DataSet Project property that determines which projects the generated dataset and TableAdapter code should go into.
This walkthrough demonstrates how to separate dataset and TableAdapter code into discrete class library projects by using the Dataset Designer. After you separate the dataset and TableAdapter code, you create a Windows Communication Foundation Services and WCF Data Services in Visual Studio service to call into the data access tier. Finally, you create a Windows Forms application as the presentation tier. This tier accesses data from the data service.
During this walkthrough, you perform the following steps:
Create a new n-tier solution that contains multiple projects.
Add two class library projects to the n-tier solution.
Create a typed dataset by using the Data Source Configuration Wizard.
Separate the generated TableAdapters and dataset code into discrete projects.
Create a Windows Communication Foundation (WCF) service to call into the data access tier.
Create functions in the service to retrieve data from the data access tier.
Create a Windows Forms application to serve as the presentation tier.
Create Windows Forms controls that are bound to the data source.
Write code to populate the data tables.
Prerequisites
To complete this tutorial, you need the .NET desktop development and Data storage and processing workloads installed in Visual Studio. To install them, open Visual Studio Installer and choose Modify (or More > Modify) next to the version of Visual Studio you want to modify. See Modify Visual Studio.
This walkthrough uses SQL Server Express LocalDB and the Northwind sample database.
If you don't have SQL Server Express LocalDB, install it either from the SQL Server Express download page, or through the Visual Studio Installer. In the Visual Studio Installer, you can install SQL Server Express LocalDB as part of the .NET desktop development workload, or as an individual component.
Install the Northwind sample database by following these steps:
In Visual Studio, open the SQL Server Object Explorer window. (SQL Server Object Explorer is installed as part of the Data storage and processing workload in the Visual Studio Installer.) Expand the SQL Server node. Right-click on your LocalDB instance and select New Query.
A query editor window opens.
Copy the Northwind Transact-SQL script to your clipboard. This T-SQL script creates the Northwind database from scratch and populates it with data.
Paste the T-SQL script into the query editor, and then choose the Execute button.
After a short time, the query finishes running and the Northwind database is created.
In Visual Studio, open the SQL Server Object Explorer window. (SQL Server Object Explorer is installed as part of the Data storage and processing workload in the Visual Studio Installer.) Expand the SQL Server node. Right-click on your LocalDB instance and select New Query.
If you don't see the LocalDB instance, use the toolbar button Add SQL Server. The dialog appears. In the dialog, expand Local and choose MSSQLLocalDB. Enter the appropriate credentials. You can leave the default choice for database.
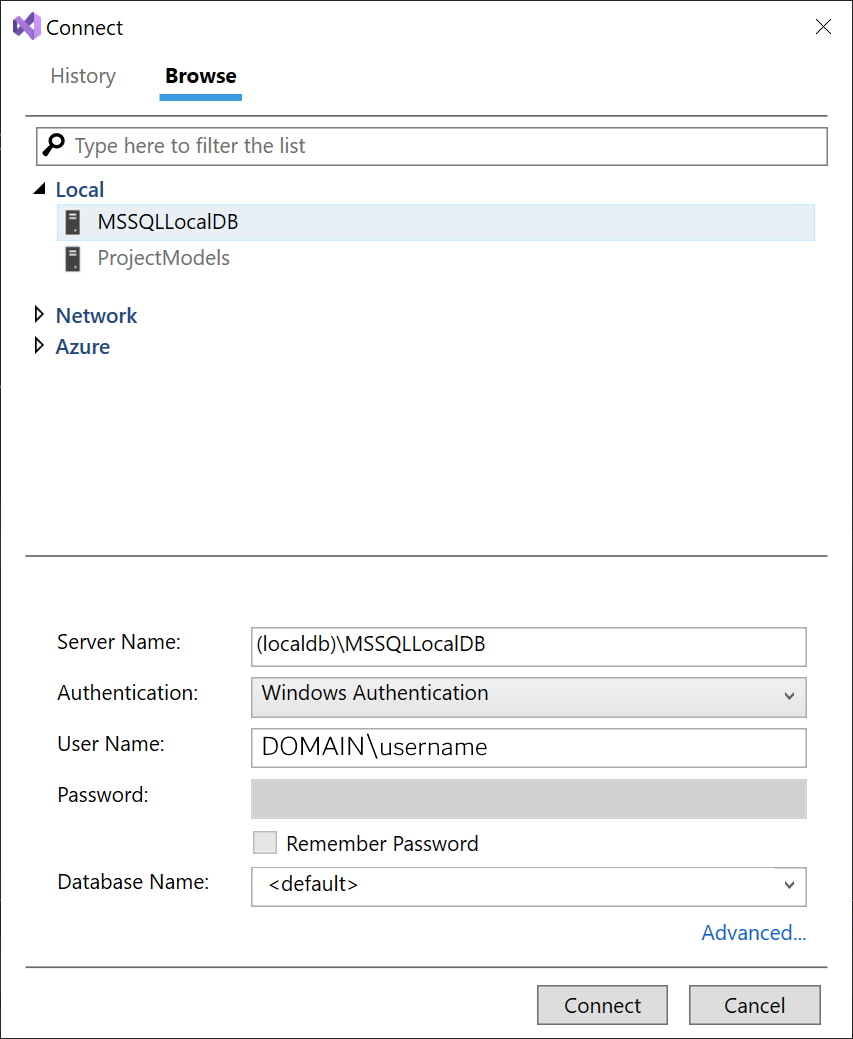
Choose Connect. A node is added for LocalDB in SQL Server Object Explorer.
Right-click on your LocalDB instance and select New Query.
A query editor window opens.
Copy the Northwind Transact-SQL script to your clipboard. This T-SQL script creates the Northwind database from scratch and populates it with data.
Paste the T-SQL script into the query editor, and then choose the Execute button.
After a short time, the query finishes running and the Northwind database is created.
Create the n-tier solution and class library to hold the dataset (DataEntityTier)
The first step of this walkthrough is to create a solution and two class library projects. The first class library holds the dataset (the generated typed DataSet class and DataTables that hold the application's data). This project is used as the data entity layer of the application and is typically located in the middle tier. The dataset creates the initial dataset and automatically separates the code into the two class libraries.
Note
Be sure to name the project and solution correctly before you click OK. Doing so will make it easier for you to complete this walkthrough.
To create the n-tier solution and DataEntityTier class library
In Visual Studio, create a project using the Windows Forms App (.NET Framework) project template for C# or Visual Basic. .NET Core, .NET 5 and later are not supported.
Name the project DataEntityTier.
Name the solution NTierWalkthrough, and then choose OK.
An NTierWalkthrough solution that contains the DataEntityTier project is created and added to Solution Explorer.
Create the class library to hold the TableAdapters (DataAccessTier)
The next step after you create the DataEntityTier project is to create another class library project. This project holds the generated TableAdapters and is called the data access tier of the application. The data access tier contains the information that is required to connect to the database and is typically located in the middle tier.
To create a separate class library for the TableAdapters
Right-click on the solution in Solution Explorer and choose Add > New Project.
Choose the Class Library (.NET Framework) project template.
Name the project DataAccessTier and choose OK.
The DataAccessTier project is created and added to the NTierWalkthrough solution.
Create the Dataset
The next step is to create a typed dataset. Typed datasets are created with both the dataset class (including DataTables classes) and the TableAdapter classes in a single project. (All classes are generated into a single file.) When you separate the dataset and TableAdapters into different projects, it is the dataset class that is moved to the other project, leaving the TableAdapter classes in the original project. Therefore, create the dataset in the project that will ultimately contain the TableAdapters (the DataAccessTier project). You create the dataset by using the Data Source Configuration Wizard.
Note
You must have access to the Northwind sample database to create the connection. For information about how to set up the Northwind sample database, see How to: Install sample databases.
To create the dataset
Select the DataAccessTier in Solution Explorer.
On the Data menu, select Show Data Sources.
The Data Sources window opens.
In the Data Sources window, select Add New Data Source to start the Data Source Configuration Wizard.
On the Choose a Data Source Type page, select Database and then select Next.
On the Choose Your Data Connection page, perform one of the following actions:
If a data connection to the Northwind sample database is available in the dropdown list, select it.
or
Select New Connection to open the Add Connection dialog box.
If the database requires a password, select the option to include sensitive data, and then choose Next.
Note
If you selected a local database file (instead of connecting to SQL Server) you might be asked if you want to add the file to the project. Choose Yes to add the database file to the project.
Select Next on the Save the Connection String to the Application Configuration File page.
Expand the Tables node on the Choose Your Database Objects page.
Select the checkboxes for the Customers and Orders tables, and then choose Finish.
NorthwindDataSet is added to the DataAccessTier project and appears in the Data Sources window.
Separate the TableAdapters from the Dataset
After you create the dataset, separate the generated dataset class from the TableAdapters. You do this by setting the DataSet Project property to the name of the project in which to store the separated out dataset class.
To separate the TableAdapters from the Dataset
Double-click NorthwindDataSet.xsd in Solution Explorer to open the dataset in the Dataset Designer.
Select an empty area on the designer.
Locate the DataSet Project node in the Properties window.
In the DataSet Project list, select DataEntityTier.
On the Build menu, select Build Solution.
The dataset and TableAdapters are separated into the two class library projects. The project that originally contained the whole dataset (
DataAccessTier) now contains only the TableAdapters. The project designated in the DataSet Project property (DataEntityTier) contains the typed dataset: NorthwindDataSet.Dataset.Designer.vb (or NorthwindDataSet.Dataset.Designer.cs).
Note
When you separate datasets and TableAdapters (by setting the DataSet Project property), existing partial dataset classes in the project will not be moved automatically. Existing dataset partial classes must be manually moved to the dataset project.
Create a New Service Application
This walkthrough demonstrates how to access the data access tier by using a WCF service, so let's create a new WCF service application.
To create a new WCF Service application
Right-click on the solution in Solution Explorer and choose Add > New Project.
In the New Project dialog box, in the left-hand pane, select WCF. In the middle pane, select WCF Service Library.
Name the project DataService and select OK.
The DataService project is created and added to the NTierWalkthrough solution.
Create methods in the data access tier to return the customers and orders data
The data service has to call two methods in the data access tier: GetCustomers and GetOrders. These methods return the Northwind Customers and Orders tables. Create the GetCustomers and GetOrders methods in the DataAccessTier project.
To create a method in the data access tier that returns the Customers table
In Solution Explorer, double-click NorthwindDataset.xsd to open the dataset.
Right-click CustomersTableAdapter and click Add Query.
On the Choose a Command Type page, leave the default value of Use SQL statements and click Next.
On the Choose a Query Type page, leave the default value of SELECT which returns rows and click Next.
On the Specify a SQL SELECT statement page, leave the default query and click Next.
On the Choose Methods to Generate page, type GetCustomers for the Method name in the Return a DataTable section.
Click Finish.
To create a method in the data access tier that returns the Orders table
Right-click OrdersTableAdapter and click Add Query.
On the Choose a Command Type page, leave the default value of Use SQL statements and click Next.
On the Choose a Query Type page, leave the default value of SELECT which returns rows and click Next.
On the Specify a SQL SELECT statement page, leave the default query and click Next.
On the Choose Methods to Generate page, type GetOrders for the Method name in the Return a DataTable section.
Click Finish.
On the Build menu, click Build Solution.
Add a reference to the data entity and data access tiers to the data service
Because the data service requires information from the dataset and TableAdapters, add references to the DataEntityTier and DataAccessTier projects.
To add references to the data service
Right-click DataService in Solution Explorer and click Add Reference.
Click the Projects tab in the Add Reference dialog box.
Select both the DataAccessTier and DataEntityTier projects.
Click OK.
Add functions to the service to call the GetCustomers and GetOrders methods in the data access tier
Now that the data access tier contains the methods to return data, create methods in the data service to call the methods in the data access tier.
Note
For C# projects, you must add a reference to the System.Data.DataSetExtensions assembly for the following code to compile.
To create the GetCustomers and GetOrders functions in the data service
In the DataService project, double-click IService1.vb or IService1.cs.
Add the following code under the Add your service operations here comment:
[OperationContract] DataEntityTier.NorthwindDataSet.CustomersDataTable GetCustomers(); [OperationContract] DataEntityTier.NorthwindDataSet.OrdersDataTable GetOrders();Note
The code for this tutorial is available in C# and Visual Basic. To switch the code language on this page between C# and Visual Basic, use the code language switcher at the top of the page on the right side.
In the DataService project, double-click Service1.vb (or Service1.cs).
Add the following code to the Service1 class:
public DataEntityTier.NorthwindDataSet.CustomersDataTable GetCustomers() { DataAccessTier.NorthwindDataSetTableAdapters.CustomersTableAdapter CustomersTableAdapter1 = new DataAccessTier.NorthwindDataSetTableAdapters.CustomersTableAdapter(); return CustomersTableAdapter1.GetCustomers(); } public DataEntityTier.NorthwindDataSet.OrdersDataTable GetOrders() { DataAccessTier.NorthwindDataSetTableAdapters.OrdersTableAdapter OrdersTableAdapter1 = new DataAccessTier.NorthwindDataSetTableAdapters.OrdersTableAdapter(); return OrdersTableAdapter1.GetOrders(); }On the Build menu, click Build Solution.
Create a presentation tier to display data from the data service
Now that the solution contains the data service that has methods, which call into the data access tier, create another project that calls into the data service and present the data to users. For this walkthrough, create a Windows Forms application; this is the presentation tier of the n-tier application.
To create the presentation tier project
Right-click on the solution in Solution Explorer and choose Add > New Project.
In the New Project dialog box, in the left-hand pane, select Windows Desktop. In the middle pane, select Windows Forms App.
Name the project PresentationTier and click OK.
The PresentationTier project is created and added to the NTierWalkthrough solution.
Set the PresentationTier project as the startup project
We'll set the PresentationTier project to be the startup project for the solution, because it's the actual client application that presents and interacts with the data.
To set the new presentation tier project as the startup project
- In Solution Explorer, right-click PresentationTier and click Set as StartUp Project.
Add References to the Presentation Tier
The client application, PresentationTier requires a service reference to the data service in order to access the methods in the service. In addition, a reference to the dataset is required to enable type sharing by the WCF service. Until you enable type sharing through the data service, code added to the partial dataset class is not available to the presentation tier. Because you typically add code, such as validation code to the row and column changing events of a data table, it's likely that you'll want to access this code from the client.
To add a reference to the presentation tier
In Solution Explorer, right-click PresentationTier and select Add Reference.
In the Add Reference dialog box, select the Projects tab.
Select DataEntityTier and choose OK.
To add a service reference to the presentation tier
In Solution Explorer, right-click PresentationTier and select Add Service Reference.
In the Add Service Reference dialog box, select Discover.
Select Service1 and choose OK.
Note
If you have multiple services on the current computer, select the service that you created previously in this walkthrough (the service that contains the
GetCustomersandGetOrdersmethods).
Add DataGridViews to the form to display the data returned by the data service
After you add the service reference to the data service, the Data Sources window is automatically populated with the data that is returned by the service.
To add two data bound DataGridViews to the form
In Solution Explorer, select the PresentationTier project.
In the Data Sources window, expand NorthwindDataSet and locate the Customers node.
Drag the Customers node onto Form1.
In the Data Sources window, expand the Customers node and locate the related Orders node (the Orders node nested in the Customers node).
Drag the related Orders node onto Form1.
Create a
Form1_Loadevent handler by double-clicking an empty area of the form.Add the following code to the
Form1_Loadevent handler.
Increase the maximum message size allowed by the service
The default value for maxReceivedMessageSize is not large enough to hold the data retrieved from the Customers and Orders tables. In the following steps, you'll increase the value to 6553600. You change the value on the client, which automatically updates the service reference.
Note
The lower default size is intended to limit exposure to denial of service (DoS) attacks. For more information, see MaxReceivedMessageSize.
To increase the maxReceivedMessageSize value
In Solution Explorer, double-click the app.config file in the PresentationTier project.
Locate the maxReceivedMessageSize attribute and change the value to
6553600. If you don't see thebasicHttpBindingentry, add one like the following example:<system.serviceModel> <bindings> <basicHttpBinding> <binding maxBufferSize="6553600" maxReceivedMessageSize="6553600" /> </basicHttpBinding> </bindings> </system.serviceModel>
Test the application
Run the application by pressing F5. The data from the Customers and Orders tables is retrieved from the data service and displayed on the form.
Next steps
Depending on your application requirements, there are several steps that you might want to perform after you save related data in the Windows-based application. For example, you could make the following enhancements to this application:
Add validation to the dataset.
Add additional methods to the service for updating data back to the database.
Related content
Feedback
Coming soon: Throughout 2024 we will be phasing out GitHub Issues as the feedback mechanism for content and replacing it with a new feedback system. For more information see: https://aka.ms/ContentUserFeedback.
Submit and view feedback for