Configure Udemy as a content source for Microsoft Viva Learning
This article shows you how to configure Udemy as a third-party learning content source for Microsoft Viva Learning. You'll need a Microsoft Viva Suite or Viva Learning license to add Udemy as a content source for your organization.
Note
Content accessible through Viva Learning is subject to terms other than the Microsoft Product Terms. Udemy content and any associated services are subject to Udemy's privacy and service terms.
Configure in your Udemy portal
Note
You'll need to have admin permissions in Udemy to complete these steps.
Follow these steps to enable the APIs in your Udemy Business environment and generate client credentials for your LMS/LXP application to access them.
Please submit a support ticket to Udemy Business Support to request that the Course Collection Sync API be enabled for {organization}.udemy.com. Replace {organization} with your own Udemy subdomain.
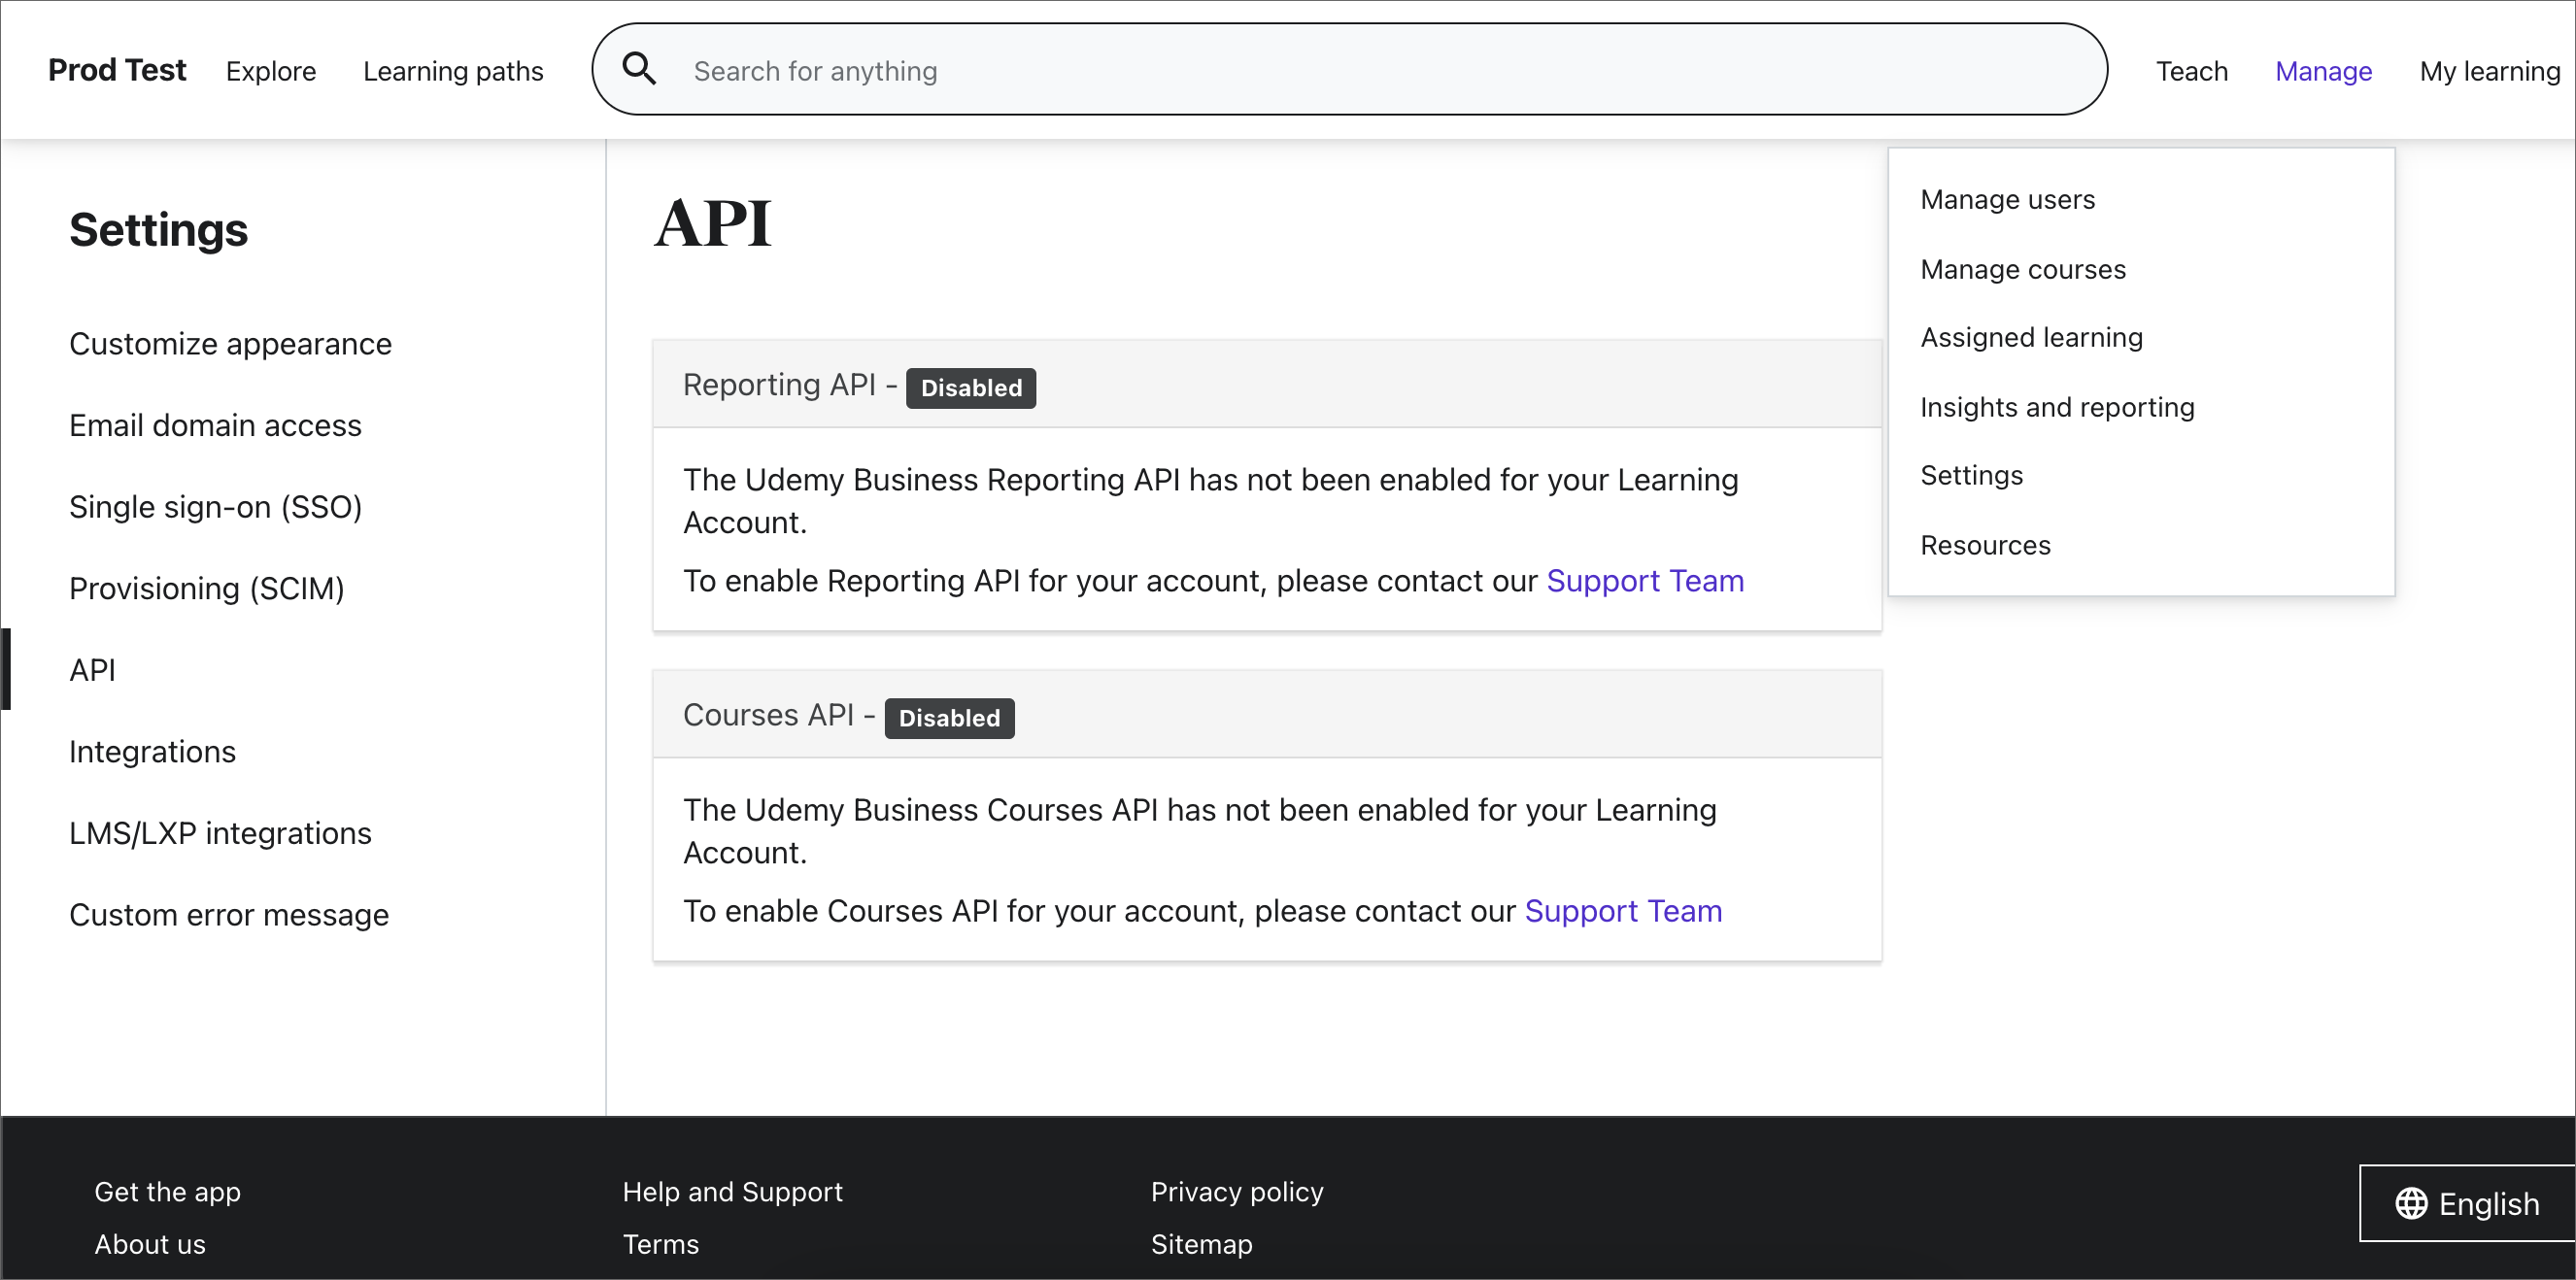
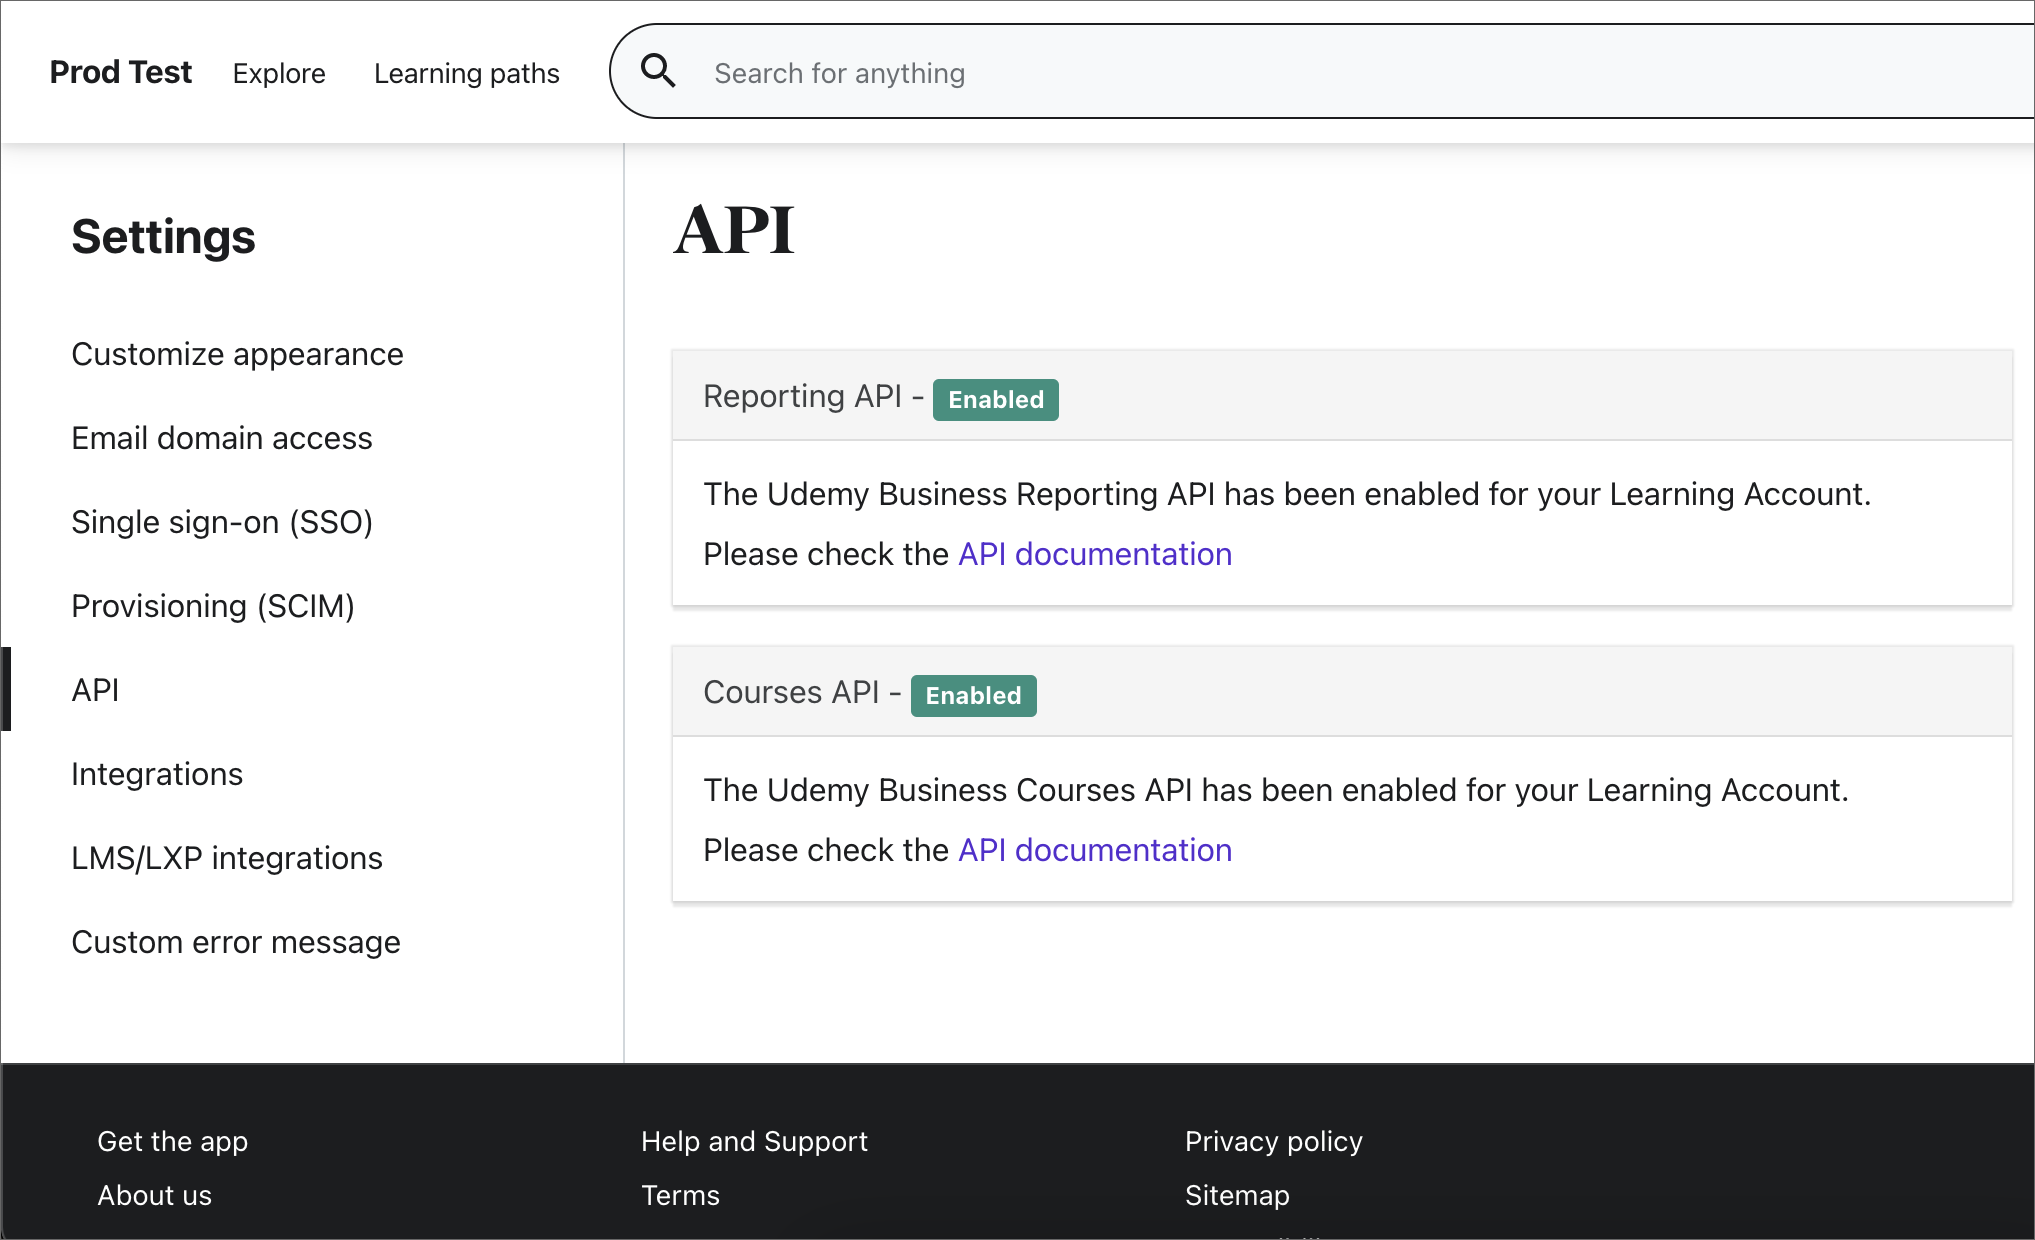
Navigate to Manage, then Settings, then API. Check the status of your APIs. If they're disabled, you can contact support to have them enabled or follow the steps below to enable them.
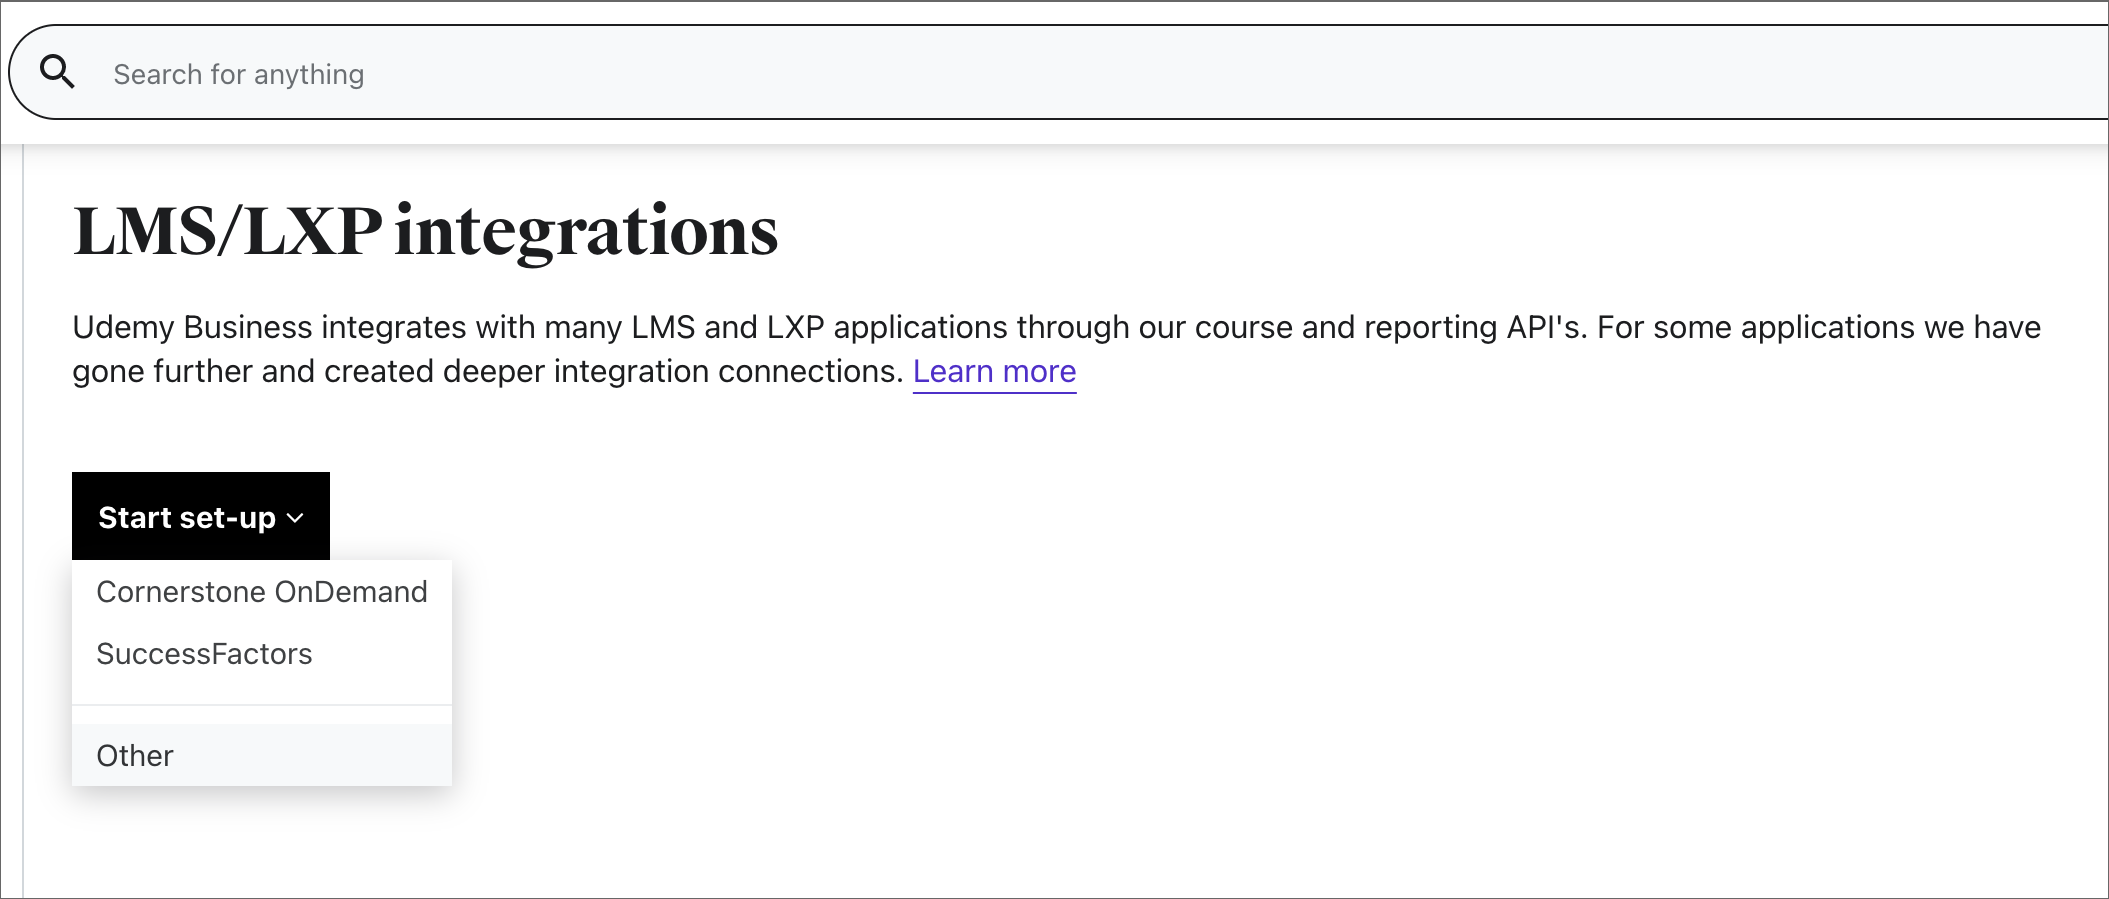
If the APIs are disabled, navigate to LMS/LXP integrations, then Start Set-up, then Other.
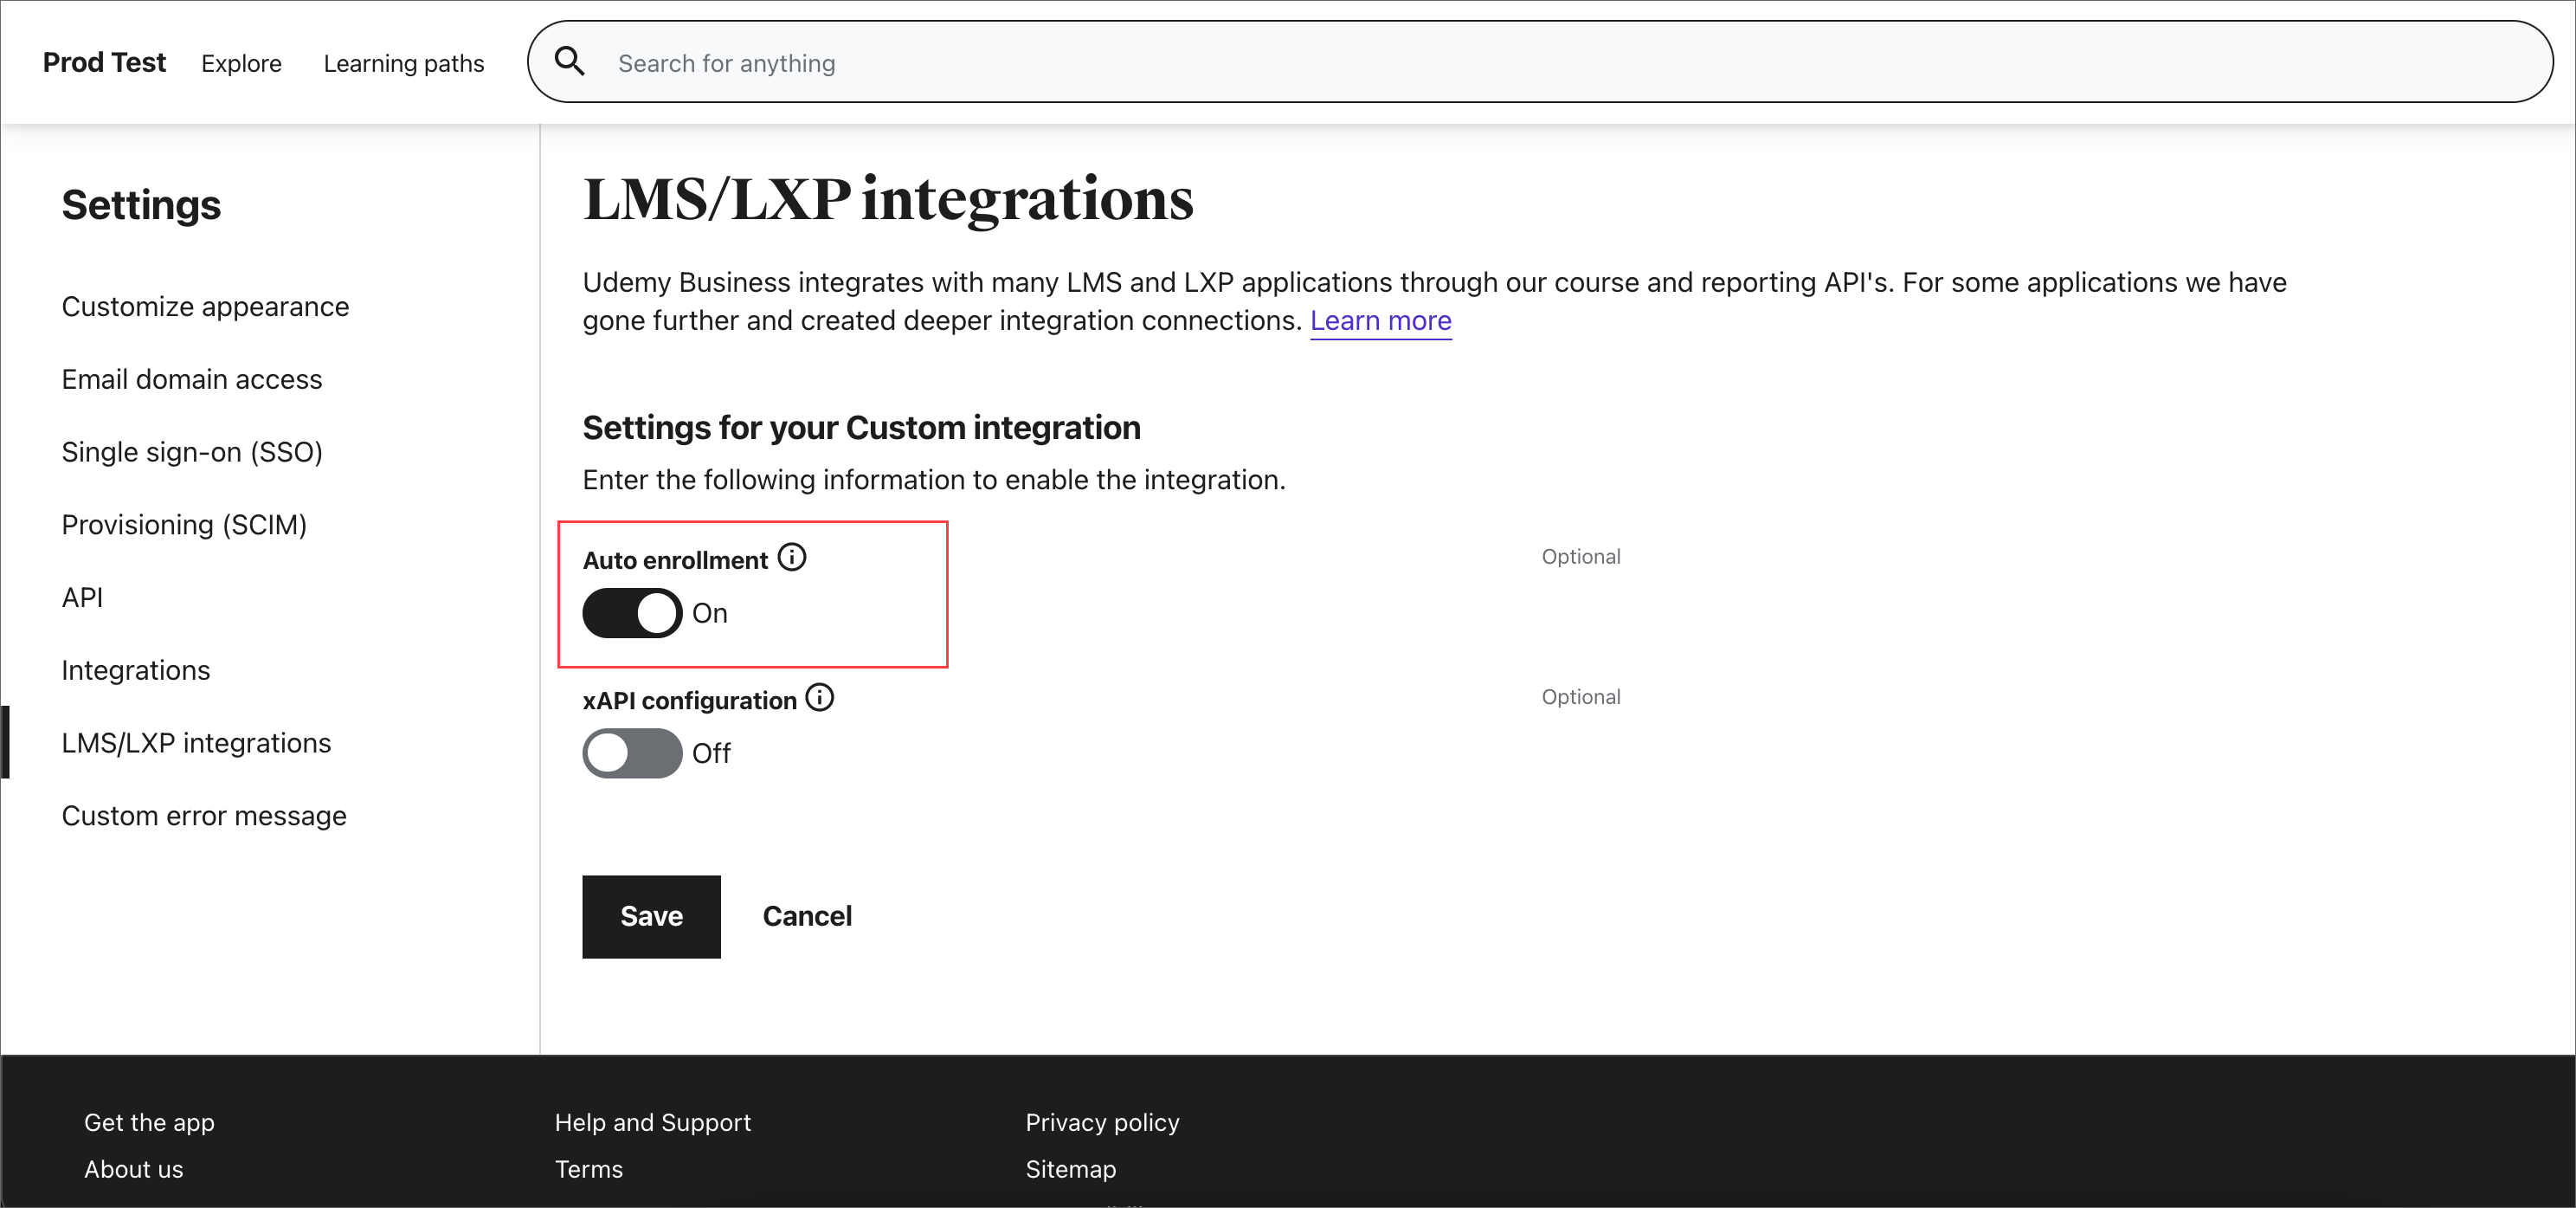
In the following screen, type in the name of your custom LMS/LXP or third-party application. Then, turn on or off the auto-enrollment option and select Save. The auto enrollment option allows users that launch a course through their LMS/LXP to automatically be enrolled in Udemy.
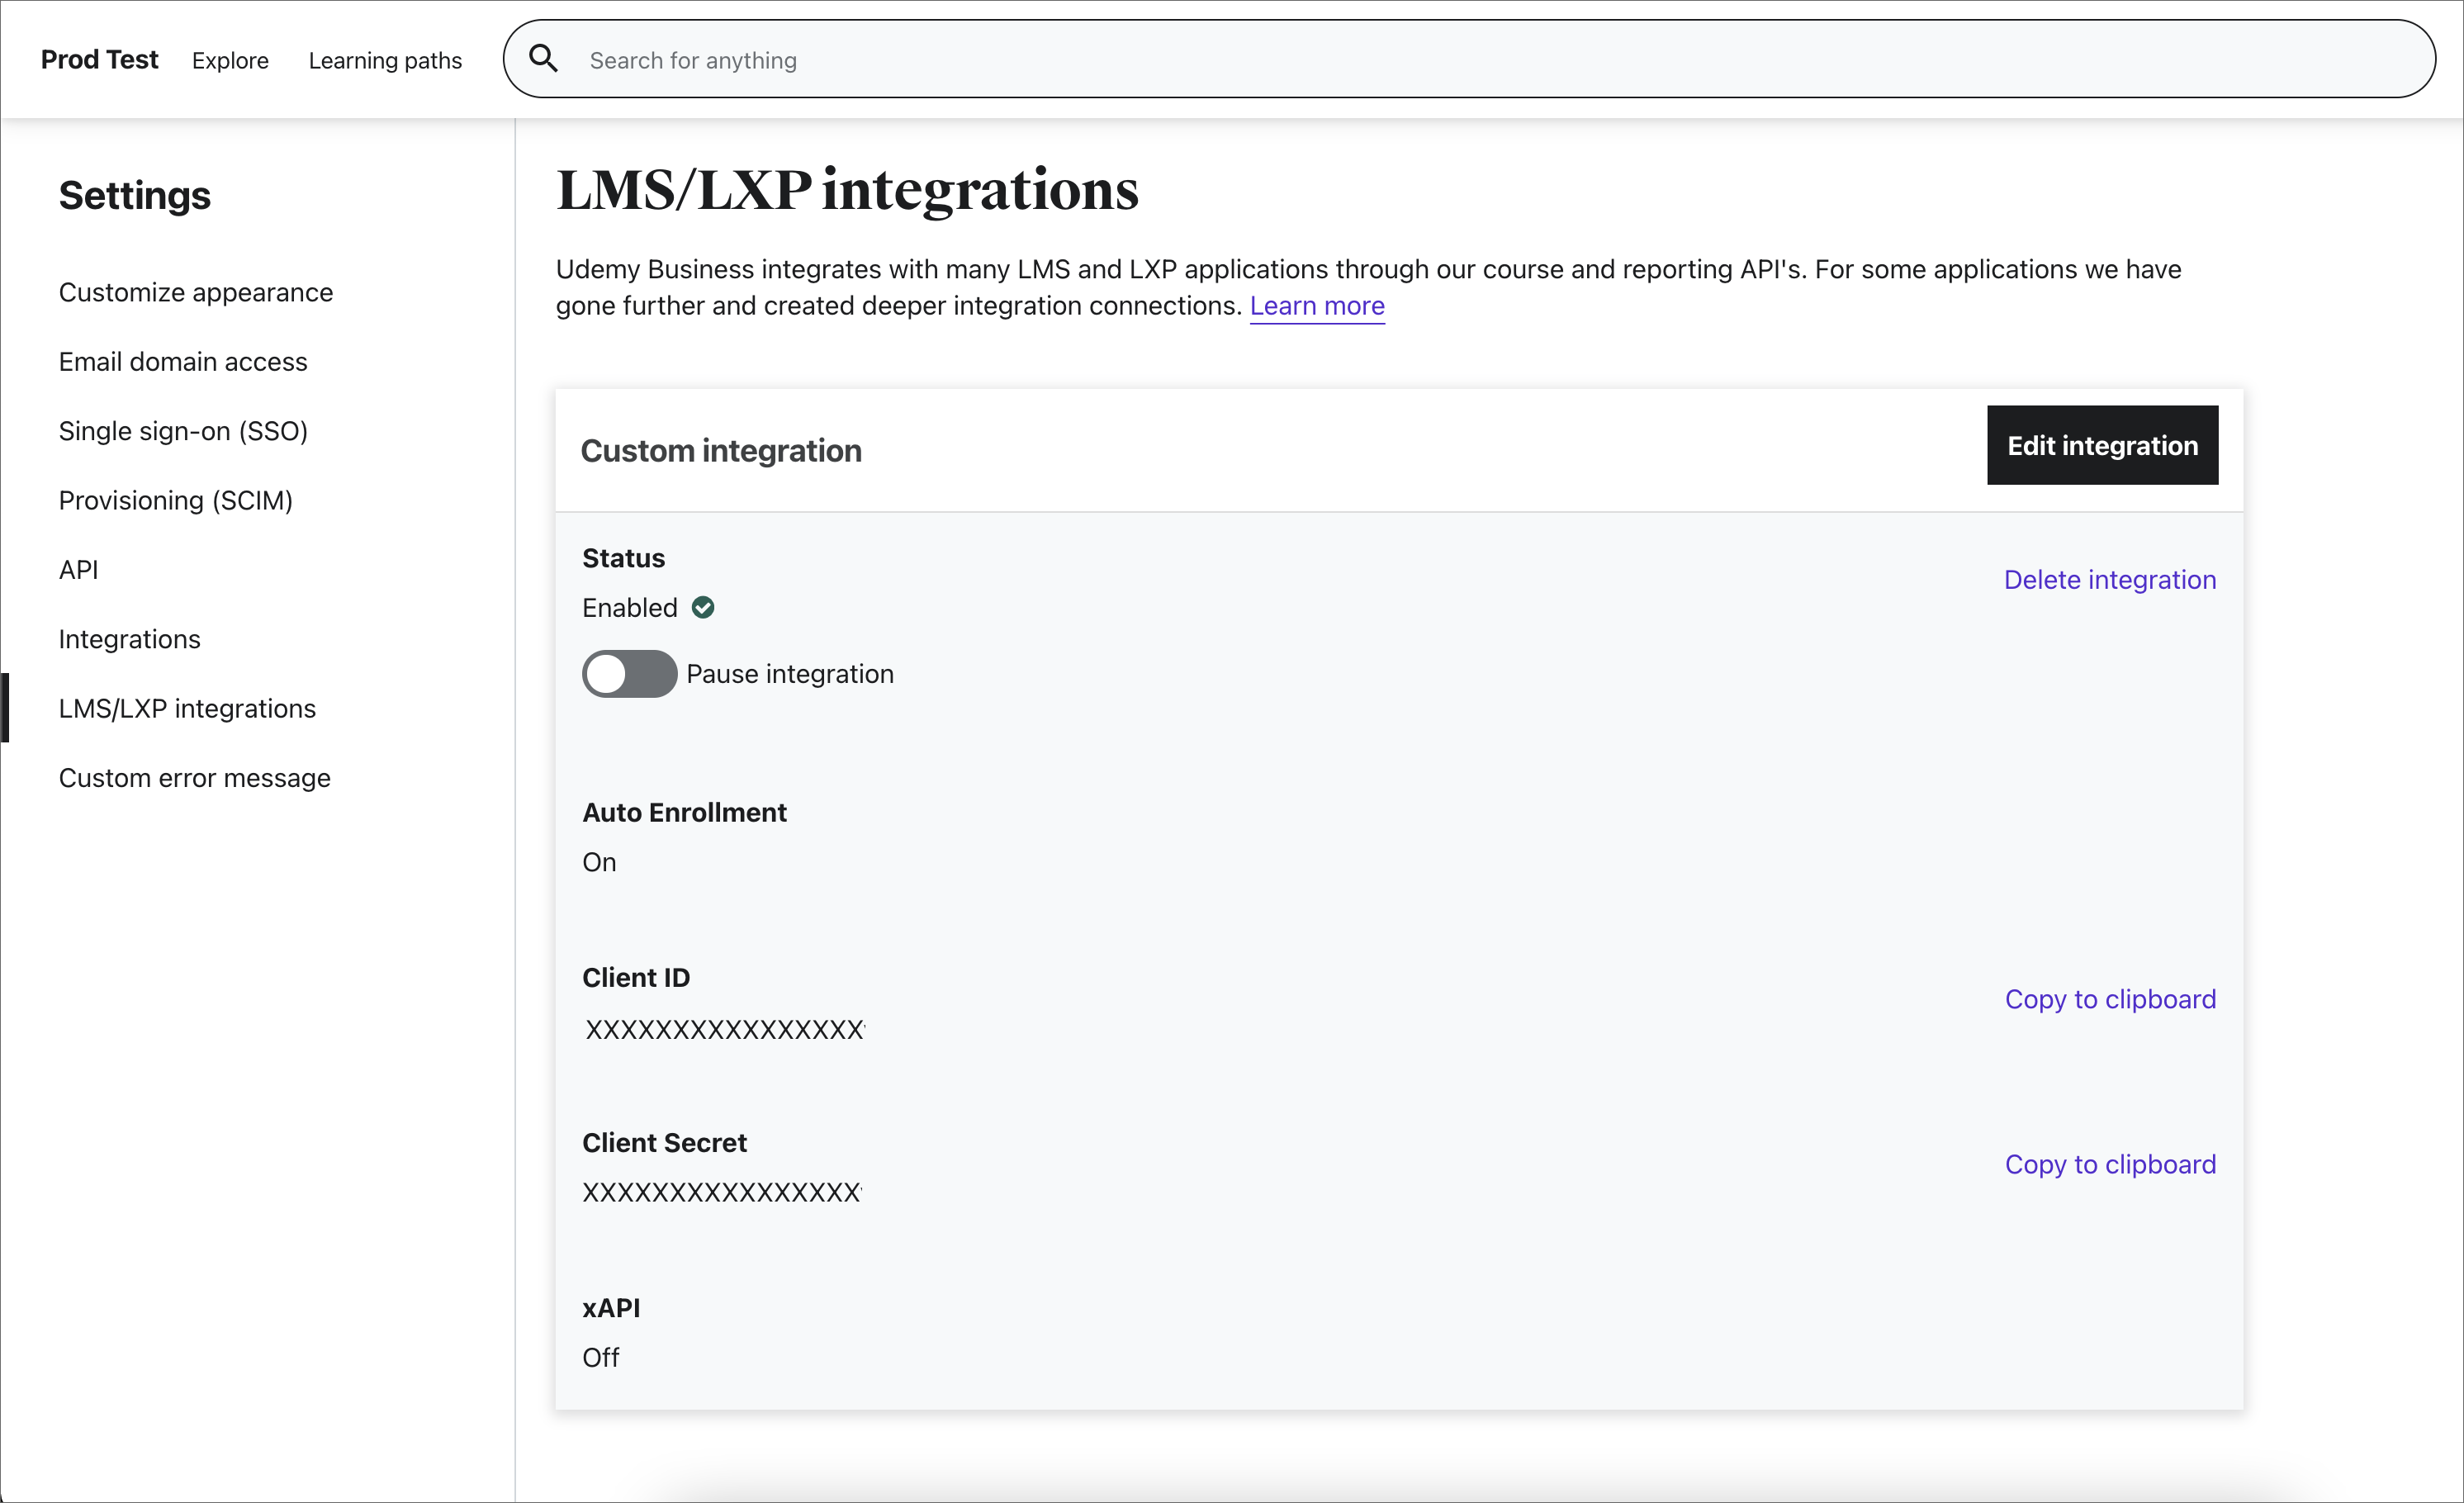
Once you've saved, your Client ID and Client Secret will be generated and you can copy them from the screen. You can now access the APIs using the provided client credentials.
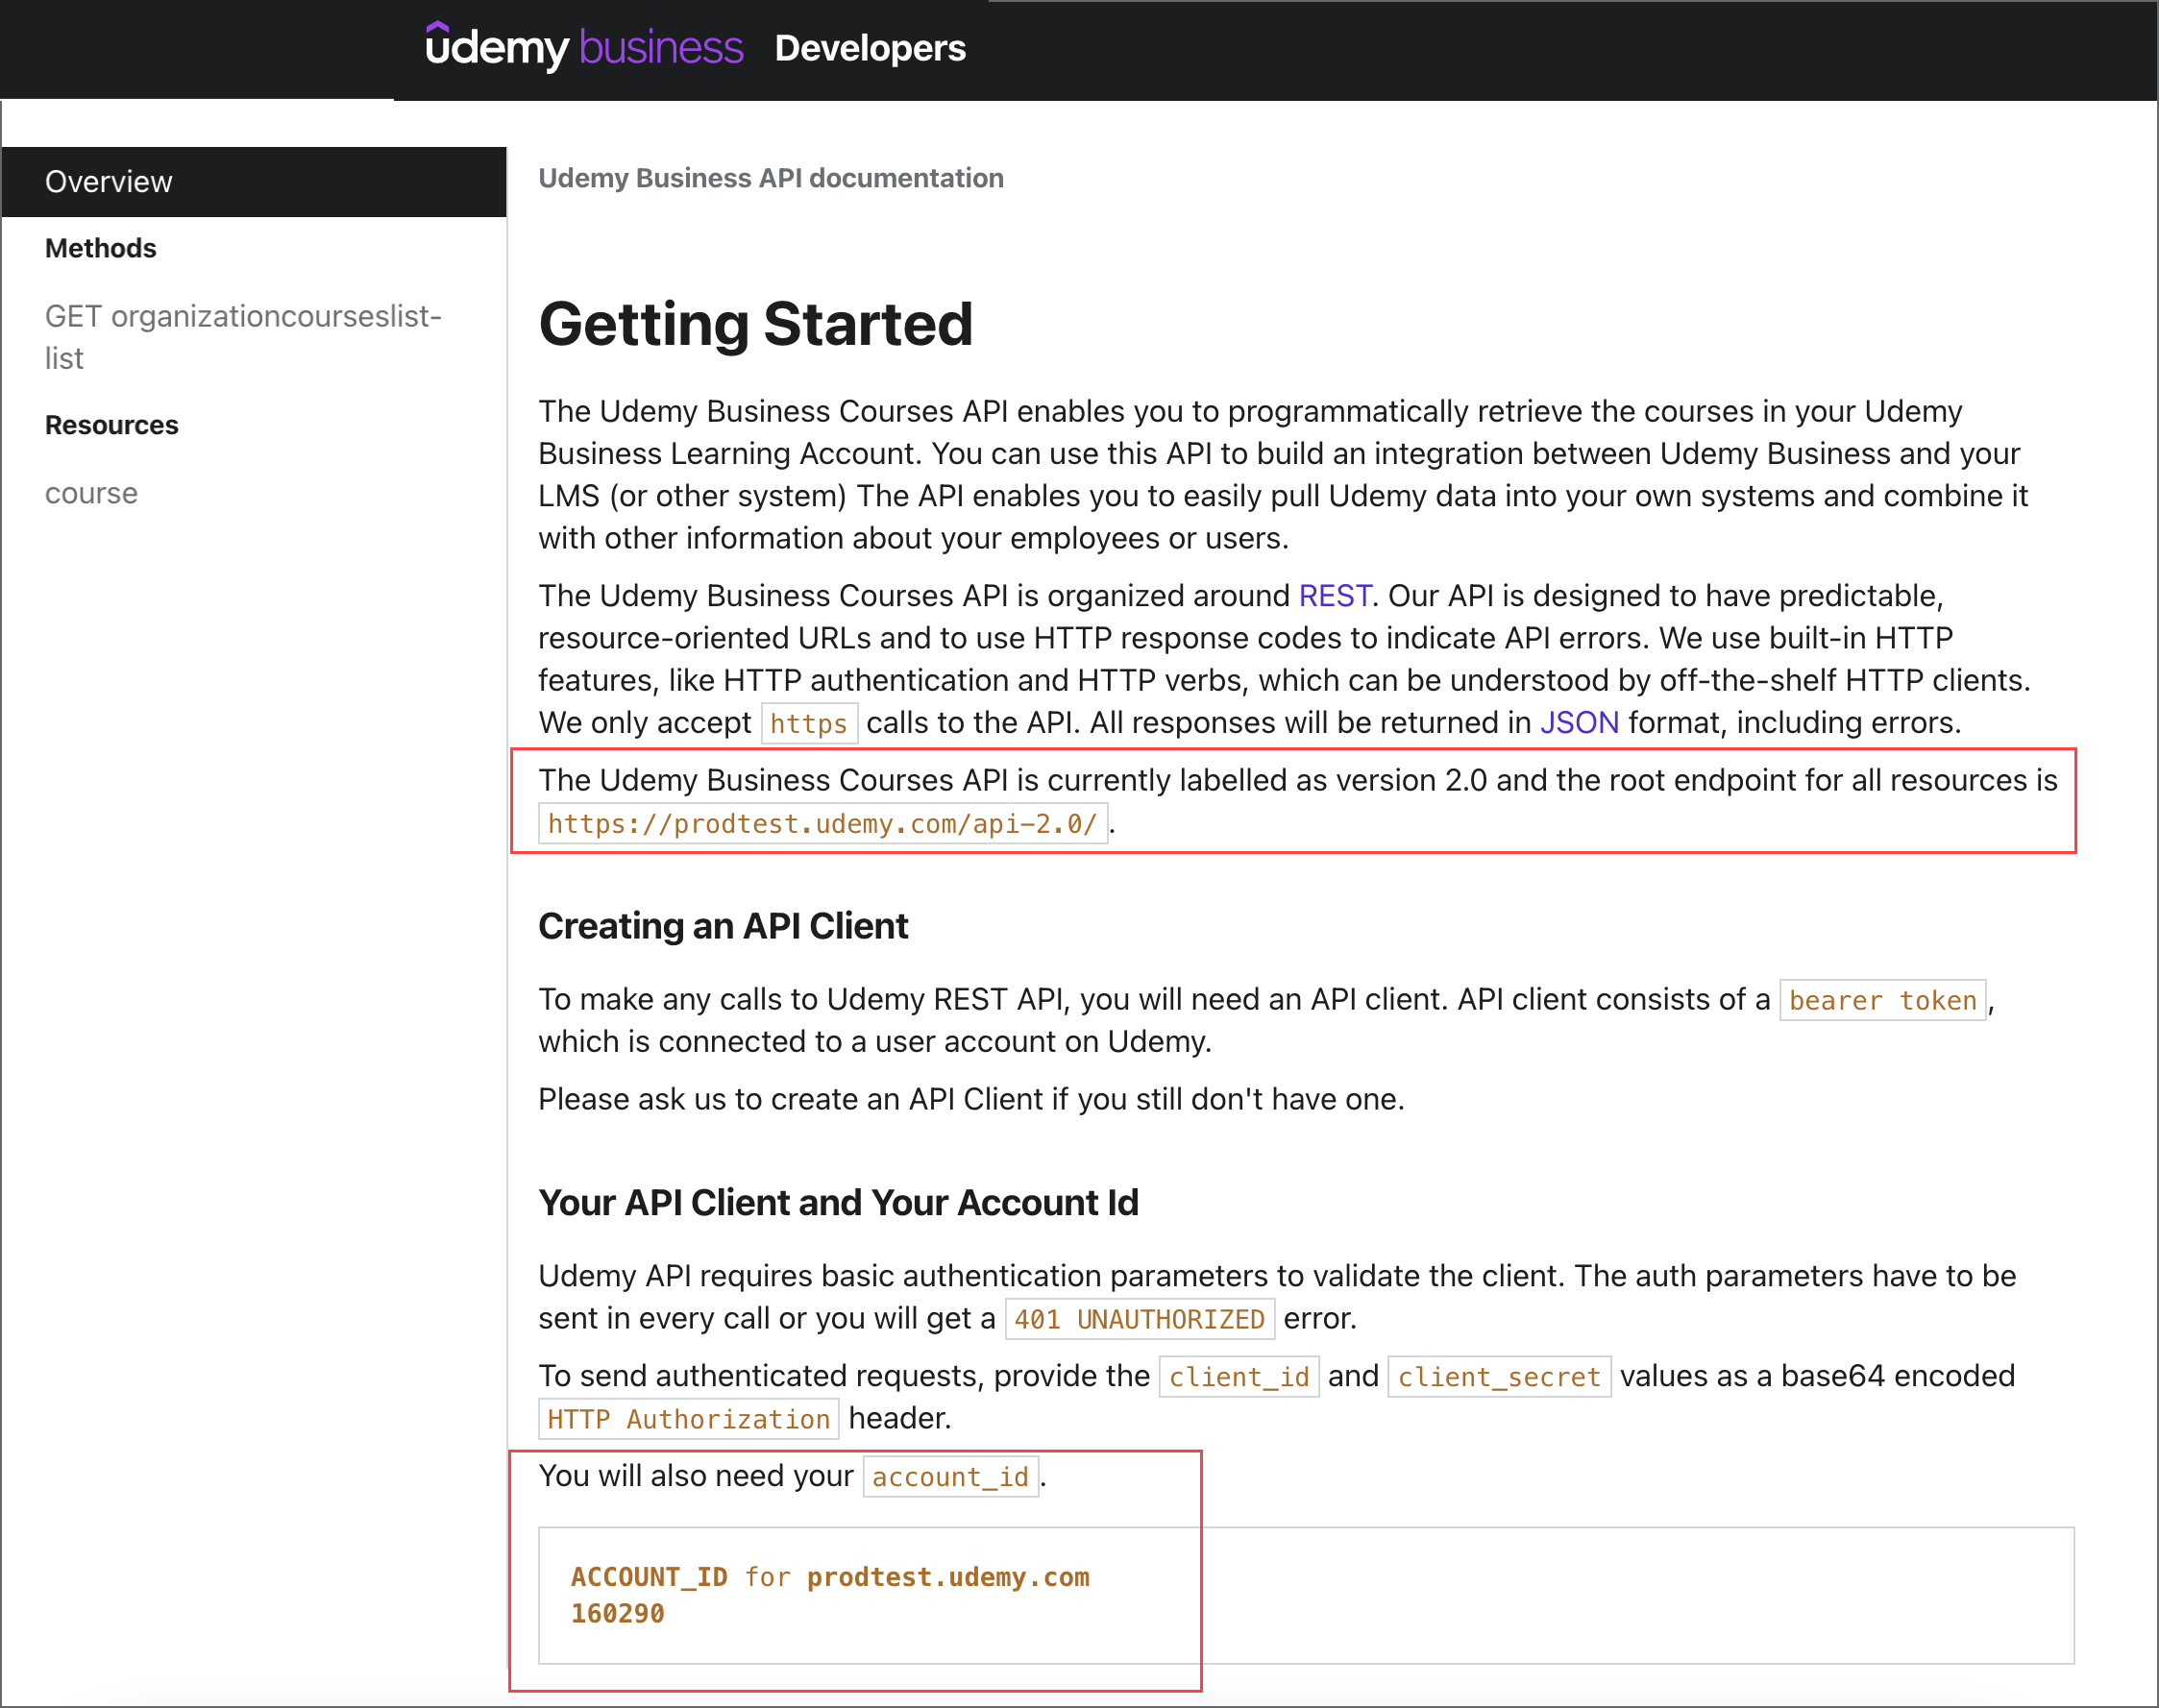
To access the API endpoints, you need to have your ACCOUNT_ID and endpoint URL. You can access this information and also try out the APIs by navigating to Manage, then Settings, then API. Once you've enabled the APIs, you should see the status of the APIs as "Enabled". Select the API documentation link.
Get the API endpoint URL and ACCOUNT_ID from the overview page. Navigate to the supported methods to try out an API call. You're now all set to make calls to the Udemy Business APIs.


Configure in the Viva Learning Admin tab
After you've received the required configuration details from Udemy portal by using the previous steps, the tenant admin needs to configure Udemy as a learning source in the Viva Learning Admin tab.
Note
You'll need to have M365 admin or Knowledge manager permissions in Microsoft 365 to complete these steps..
Open Viva Learning App in Teams or go to the Viva Learning Web App
Go to the Admin tab in Viva Learning and select Manage Providers on the left menu. Select Add Provider
Select Udemy from list and select Next.
Fill in the following required configuration details:
- Client's Host URL: This is the API endpoint URL gathered from Udemy portal in step 6. If the API endpoint URL is "https://prodtest.udemy.com/api-2.0/", the Client’s Host URL will be "prodtest.udemy.com".
- Organization ID: This is the ACCOUNT_ID gathered from Udemy portal in step 6.
- Client ID: This is the Client ID gathered from Udemy portal in step 4.
- Client Secret: This is the Client Secret gathered from Udemy portal in step 4.
Select Save to activate Udemy content in Microsoft Viva Learning. It may take up to 24 hours for the content to be available in Viva Learning.
Feedback
Coming soon: Throughout 2024 we will be phasing out GitHub Issues as the feedback mechanism for content and replacing it with a new feedback system. For more information see: https://aka.ms/ContentUserFeedback.
Submit and view feedback for