Bundle MSIX packages
This article describes the process of creating a bundle after converting x86 and x64 versions of your Windows installers using the MSIX Packaging Tool.
By bundling the multiple architecture versions of your installer into one entity, only the bundle needs to be uploaded to the Store or another distribution location. The Windows 10 deployment platform is aware of the .msixbundle package type and will only download the files that are applicable for your device's architecture. Keep in mind that if you decide to distribute an .msixbundle for a particular app, you cannot revert back to distributing just an MSIX package.
The following section presents a step-by-step approach to build an .msixbundle. It assumes that you have already converted your existing x86 and x64 versions of the Windows installer to MSIX packages.
Setup
You will need the following setup to successfully build an MSIX bundle:
- Windows 10 SDK (version 1809 or above)
- Converted x64 and x86 MSIX packages
Step 1: Find MakeAppx.exe
MakeAppx.exe is a tool available in the Windows 10 SDK that allows for packaging and bundling of MSIX packages. You will use this tool to bundle the two MSIX packages together.
MakeAppx.exe can be used to extract the file contents of a Windows 10 app package or bundle. It also encrypts and decrypts app packages and bundles.
After the Windows 10 SDK is installed, MakeAppx.exe is usually found here:
- [x86] - C:\Program Files (x86)\Windows Kits\10\bin\10.0.17763.0\x86\MakeAppx.exe
- [x64] - C:\Program Files (x86)\Windows Kits\10\bin\10.0.17763.0\x64\MakeAppx.exe
Step 2: Bundle the packages
The easiest way to bundle packages with MakeApp.exe is to add all the packages that you want to bundle together in one folder. The directory must be free of everything else except the packages that need to be bundled.
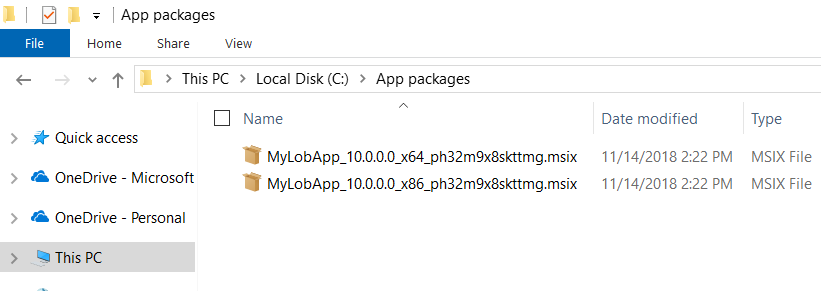
Move the app packages that you want to bundle into one directory, as shown in the following screenshot.
Note
MakeAppx.exe only bundles packages that have the same identity, which means that the AppID, publisher, version needs to be the same. Only the package processor architecture for an application package can be different.
MakeAppx.exe has the following command line syntax.
C:\> "C:\Program Files (x86)\Windows Kits\10\bin\10.0.17763.0\x86\MakeAppx.exe" bundle /d input_directorypath
/p <filepath>.msixbundle
Here is an example command.
C:\> "C:\Program Files (x86)\Windows Kits\10\bin\10.0.17763.0\x86\MakeAppx.exe" bundle /d c:\AppPackages\
/p c:\MyLOBApp_10.0.0.0_ph32m9x8skttmg.msixbundle
After running the command, an unsigned .msixbundle will be created in the path specified. Packages do not need to be signed before bundling.
Step 3: Sign the bundle
After you create the bundle, you must sign the package before you can distribute the app to your users or install it.
To sign a package, you will need a general code signing certificate and use SignTool.exe from the Windows 10 SDK.
We strongly recommend that you use a trusted cert from certificate authority as that allows for the package to be distributed and deployed on your end users devices seamlessly. Once you have access to the private certificate (.pfx file), you can sign the package as shown below.
Note
SignTool.exe is available in the same directory as MakeAppx.exe in the Windows 10 SDK.
SignTool.exe has the following command line syntax.
C:\> "C:\Program Files (x86)\Windows Kits\10\bin\10.0.17763.0\x86\SignTool.exe" sign /fd <Hash Algorithm> /a
/f <Path to Certificate>.pfx /p <Your Password> <File path>.msixbundle
Here is an example command.
C:\> "C:\Program Files (x86)\Windows Kits\10\bin\10.0.17763.0\x86\SignTool.exe" sign /fd SHA256 /a
/f c:\private-cert.pfx /p aaabbb123 c:\MyLOBApp_10.0.0.0_ph32m9x8skttmg.msixbundle
For more information about signing app packages with SignTool.exe, see this article.
After successfully signing the bundle, you are ready to host it on a network share or on any content distribution network to distribute it to your users.
Feedback
Coming soon: Throughout 2024 we will be phasing out GitHub Issues as the feedback mechanism for content and replacing it with a new feedback system. For more information see: https://aka.ms/ContentUserFeedback.
Submit and view feedback for