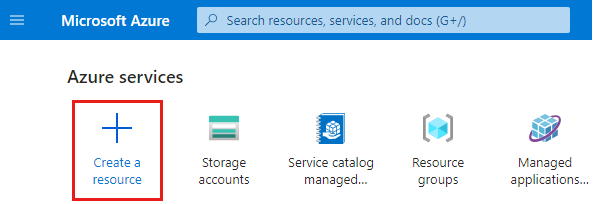
快速入門:建立和發佈 Azure 受控應用程式定義
本快速入門將簡介如何使用 Azure 受控應用程式。 您可以建立和發佈儲存在服務類別目錄中的受控應用程式定義,以供貴組織成員使用。
若要將受控應用程式發佈至您的服務類別目錄,請執行下列工作:
- 建立 Azure Resource Manager 範本 (ARM 範本),該範本會定義要與受控應用程式一起部署的資源。
- 部署受控應用程式時,定義入口網站的使用者介面元素。
- 建立包含必要 JSON 檔案的 .zip 套件。 .zip 套件檔案對於服務類別目錄的受控應用程式定義具有 120 MB 限制。
- 發佈受控應用程式定義,使其可在您的服務類別目錄中使用。
如果您的受控應用程式定義超過 120 MB,或基於組織的合規性原因而想使用自己的儲存體帳戶,請移至快速入門:自備儲存體來建立及發佈 Azure 受控應用程式定義。
您可以使用 Bicep 開發受控應用程式定義,但必須先將其轉換成 ARM 範本 JSON,才能在 Azure 中發佈定義。 如需詳細資訊,請移至快速入門:使用 Bicep 建立和發佈 Azure 受控應用程式定義。
您也可以使用 Bicep 從服務類別目錄部署受控應用程式定義。 如需詳細資訊,請移至快速入門:使用 Bicep 部署 Azure 受控應用程式定義。
必要條件
若要完成此快速入門,您需要下列項目:
- 具有作用中訂閱,以及對 Microsoft Entra 資源 (例如使用者、群組或服務主體) 具有使用權限的 Azure 帳戶。 如果您沒有帳戶,請在開始之前建立免費帳戶。
- Visual Studio Code 搭配最新的 Azure Resource Manager 工具延伸模組。 針對 Bicep 檔案,請安裝適用於 Visual Studio Code 的 Bicep 延伸模組。
- 安裝最新版的 Azure PowerShell 或 Azure CLI。
建立 ARM 範本
每個受控應用程式定義都包含名為 mainTemplate.json 的檔案。 此範本會定義要部署的 Azure 資源,而且與一般 ARM 範本不同。
開啟 Visual Studio Code,建立具有區分大小寫名稱 mainTemplate.json 的檔案,並加以儲存。
新增下列 JSON 並儲存檔案。 其中會定義資源用於部署應用程式的 App Service、App Service 方案和儲存體帳戶。 此儲存體帳戶並不適用於儲存受控應用程式定義。
{
  "$schema": "https://schema.management.azure.com/schemas/2019-04-01/deploymentTemplate.json#",
  "contentVersion": "1.0.0.0",
  "parameters": {
    "location": {
      "type": "string",
      "defaultValue": "[resourceGroup().location]"
    },
    "appServicePlanName": {
      "type": "string",
      "maxLength": 40,
      "metadata": {
        "description": "App Service plan name."
      }
    },
    "appServiceNamePrefix": {
      "type": "string",
      "maxLength": 47,
      "metadata": {
        "description": "App Service name prefix."
      }
    },
    "storageAccountNamePrefix": {
      "type": "string",
      "maxLength": 11,
      "metadata": {
        "description": "Storage account name prefix."
      }
    },
    "storageAccountType": {
      "type": "string",
      "allowedValues": [
        "Premium_LRS",
        "Standard_LRS",
        "Standard_GRS"
      ],
      "metadata": {
        "description": "Storage account type allowed values"
      }
    }
  },
  "variables": {
    "appServicePlanSku": "F1",
    "appServicePlanCapacity": 1,
    "appServiceName": "[format('{0}{1}', parameters('appServiceNamePrefix'), uniqueString(resourceGroup().id))]",
    "storageAccountName": "[format('{0}{1}', parameters('storageAccountNamePrefix'), uniqueString(resourceGroup().id))]"
  },
  "resources": [
    {
      "type": "Microsoft.Web/serverfarms",
      "apiVersion": "2022-03-01",
      "name": "[parameters('appServicePlanName')]",
      "location": "[parameters('location')]",
      "sku": {
        "name": "[variables('appServicePlanSku')]",
        "capacity": "[variables('appServicePlanCapacity')]"
      }
    },
    {
      "type": "Microsoft.Web/sites",
      "apiVersion": "2022-03-01",
      "name": "[variables('appServiceName')]",
      "location": "[parameters('location')]",
      "properties": {
        "serverFarmId": "[resourceId('Microsoft.Web/serverfarms', parameters('appServicePlanName'))]",
        "httpsOnly": true,
        "siteConfig": {
          "appSettings": [
            {
              "name": "AppServiceStorageConnectionString",
              "value": "[format('DefaultEndpointsProtocol=https;AccountName={0};EndpointSuffix={1};Key={2}', variables('storageAccountName'), environment().suffixes.storage, listKeys(resourceId('Microsoft.Storage/storageAccounts', variables('storageAccountName')), '2022-09-01').keys[0].value)]"
            }
          ]
        }
      },
      "dependsOn": [
        "[resourceId('Microsoft.Web/serverfarms', parameters('appServicePlanName'))]",
        "[resourceId('Microsoft.Storage/storageAccounts', variables('storageAccountName'))]"
      ]
    },
    {
      "type": "Microsoft.Storage/storageAccounts",
      "apiVersion": "2022-09-01",
      "name": "[variables('storageAccountName')]",
      "location": "[parameters('location')]",
      "sku": {
        "name": "[parameters('storageAccountType')]"
      },
      "kind": "StorageV2",
      "properties": {
        "accessTier": "Hot"
      }
    }
  ],
  "outputs": {
    "appServicePlan": {
      "type": "string",
      "value": "[parameters('appServicePlanName')]"
    },
    "appServiceApp": {
      "type": "string",
      "value": "[reference(resourceId('Microsoft.Web/sites', variables('appServiceName')), '2022-03-01').defaultHostName]"
    },
    "storageAccount": {
      "type": "string",
      "value": "[reference(resourceId('Microsoft.Storage/storageAccounts', variables('storageAccountName')), '2022-09-01').primaryEndpoints.blob]"
    }
  }
}
定義入口網站體驗
身為發行者,您可以定義用來建立受控應用程式的入口網站體驗。 createUiDefinition.json 檔案會產生入口網站使用者介面。 您可以使用下拉式清單和文字輸入框等控制項元素,定義使用者為每個參數提供輸入的方式。
在此範例中,使用者介面會提示您輸入 App Service 名稱前置詞、App Service 方案的名稱、儲存體帳戶前置詞和儲存體帳戶類型。 在部署期間,mainTemplate.json 中的變數會使用 uniqueString 函式,將 13 個字元的字串附加至名稱前置詞,讓名稱在 Azure 中是全域唯一的。
開啟 Visual Studio Code,建立具有區分大小寫名稱 createUiDefinition.json 的檔案,並加以儲存。
將下列 JSON 程式碼新增至檔案,並加以儲存。
{
  "$schema": "https://schema.management.azure.com/schemas/0.1.2-preview/CreateUIDefinition.MultiVm.json#",
  "handler": "Microsoft.Azure.CreateUIDef",
  "version": "0.1.2-preview",
  "parameters": {
    "basics": [
      {}
    ],
    "steps": [
      {
        "name": "webAppSettings",
        "label": "Web App settings",
        "subLabel": {
          "preValidation": "Configure the web app settings",
          "postValidation": "Completed"
        },
        "elements": [
          {
            "name": "appServicePlanName",
            "type": "Microsoft.Common.TextBox",
            "label": "App Service plan name",
            "placeholder": "App Service plan name",
            "defaultValue": "",
            "toolTip": "Use alphanumeric characters or hyphens with a maximum of 40 characters.",
            "constraints": {
              "required": true,
              "regex": "^[a-z0-9A-Z-]{1,40}$",
              "validationMessage": "Only alphanumeric characters or hyphens are allowed, with a maximum of 40 characters."
            },
            "visible": true
          },
          {
            "name": "appServiceName",
            "type": "Microsoft.Common.TextBox",
            "label": "App Service name prefix",
            "placeholder": "App Service name prefix",
            "defaultValue": "",
            "toolTip": "Use alphanumeric characters or hyphens with minimum of 2 characters and maximum of 47 characters.",
            "constraints": {
              "required": true,
              "regex": "^[a-z0-9A-Z-]{2,47}$",
              "validationMessage": "Only alphanumeric characters or hyphens are allowed, with a minimum of 2 characters and maximum of 47 characters."
            },
            "visible": true
          }
        ]
      },
      {
        "name": "storageConfig",
        "label": "Storage settings",
        "subLabel": {
          "preValidation": "Configure the storage settings",
          "postValidation": "Completed"
        },
        "elements": [
          {
            "name": "storageAccounts",
            "type": "Microsoft.Storage.MultiStorageAccountCombo",
            "label": {
              "prefix": "Storage account name prefix",
              "type": "Storage account type"
            },
            "toolTip": {
              "prefix": "Enter maximum of 11 lowercase letters or numbers.",
              "type": "Available choices are Standard_LRS, Standard_GRS, and Premium_LRS."
            },
            "defaultValue": {
              "type": "Standard_LRS"
            },
            "constraints": {
              "allowedTypes": [
                "Premium_LRS",
                "Standard_LRS",
                "Standard_GRS"
              ]
            },
            "visible": true
          }
        ]
      }
    ],
    "outputs": {
      "location": "[location()]",
      "appServicePlanName": "[steps('webAppSettings').appServicePlanName]",
      "appServiceNamePrefix": "[steps('webAppSettings').appServiceName]",
      "storageAccountNamePrefix": "[steps('storageConfig').storageAccounts.prefix]",
      "storageAccountType": "[steps('storageConfig').storageAccounts.type]"
    }
  }
}
如需詳細資訊,請參閱開始使用 CreateUiDefinition。
封裝檔案
將兩個檔案新增至名為 app.zip 的封裝檔案。 這兩個檔案必須位於 .zip 檔案的根層級。 如果這些檔案在資料夾中,您就會在建立受控應用程式定義時收到錯誤,指出必要的檔案不存在。
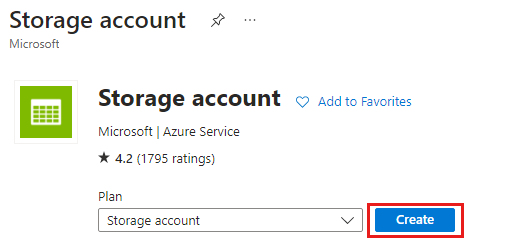
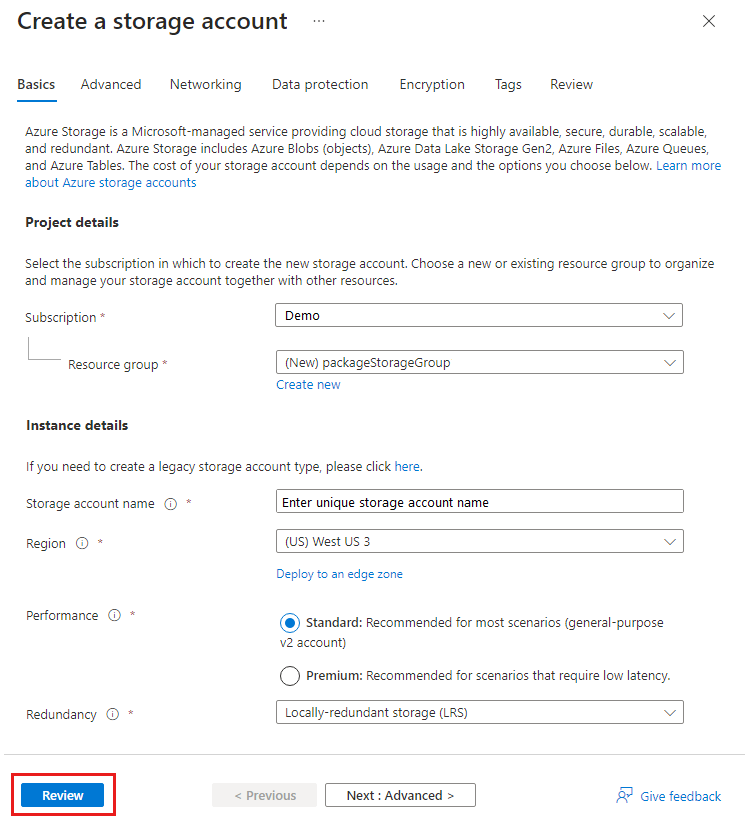
將 app.zip 上傳至 Azure 儲存體帳戶,以便在部署受控應用程式定義時使用。 儲存體帳戶名稱在整個 Azure 中必須是全域唯一的,長度必須是 3-24 個字元,且只有小寫字母和數字。 在命令中,以您唯一的儲存體帳戶名稱取代包括角括弧 (<>) 的預留位置 <demostorageaccount>。
在 Visual Studio Code 開啟新的 PowerShell 終端,並登入您的 Azure 訂用帳戶。
Connect-AzAccount
此命令會開啟您的預設瀏覽器,並提示您登入 Azure。 如需詳細資訊,請移至使用 Azure PowerShell 登入。
New-AzResourceGroup -Name packageStorageGroup -Location westus3
$storageAccount = New-AzStorageAccount `
-ResourceGroupName packageStorageGroup `
-Name "<demostorageaccount>" `
-Location westus3 `
-SkuName Standard_LRS `
-Kind StorageV2
$ctx = $storageAccount.Context
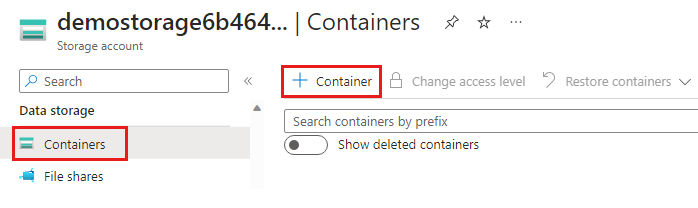
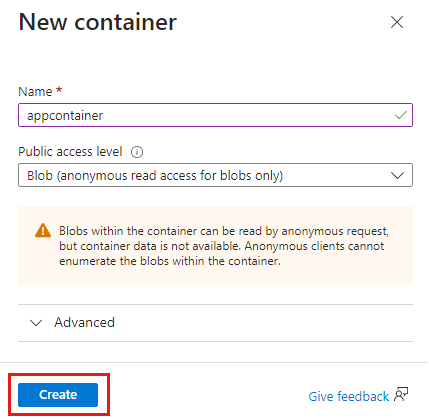
New-AzStorageContainer -Name appcontainer -Context $ctx -Permission blob
Set-AzStorageBlobContent `
-File "app.zip" `
-Container appcontainer `
-Blob "app.zip" `
-Context $ctx


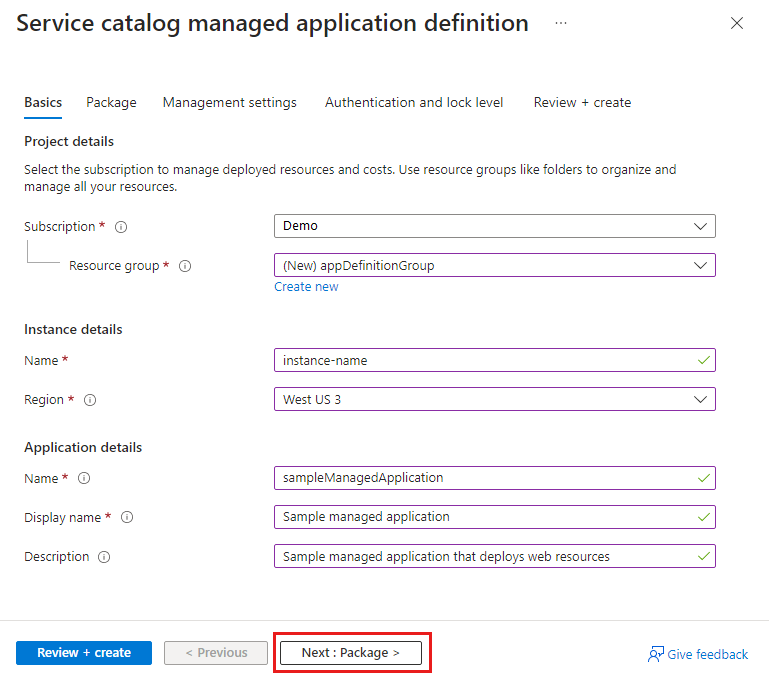
建立受控應用程式定義
在本節中,您會從 Microsoft Entra ID 取得身分識別資訊、建立資源群組,以及部署受控應用程式定義。
取得群組識別碼和角色定義識別碼
下一個步驟是選取要代表客戶管理資源的使用者、安全性群組或應用程式。 此身分識別會根據指派的角色,取得受控資源群組的權限。 角色可以是任何內建的 Azure 角色,例如擁有者或參與者。
此範例使用安全性群組,而您的 Microsoft Entra 帳戶應該是群組的成員。 若要取得群組的物件識別碼,請使用群組名稱取代包括角括號 (<>) 的預留位置 <managedAppDemo>。 您部署受控應用程式定義時,將會使用此變數的值。
若要建立新的 Microsoft Entra 群組,請移至管理 Microsoft Entra 群組和群組成員資格。
$principalid=(Get-AzADGroup -DisplayName <managedAppDemo>).Id
接下來,取得您要為使用者、群組或應用程式授與存取權限的 Azure 內建角色之角色定義識別碼。 您部署受控應用程式定義時,將會使用此變數的值。
$roleid=(Get-AzRoleDefinition -Name Owner).Id
發佈受控應用程式定義
為您的受控應用程式定義建立資源群組。
New-AzResourceGroup -Name appDefinitionGroup -Location westus3
blob 命令會建立變數來儲存封裝 .zip 檔案的 URL。 該變數會用於建立受控應用程式定義的命令中。
$blob = Get-AzStorageBlob -Container appcontainer -Blob app.zip -Context $ctx
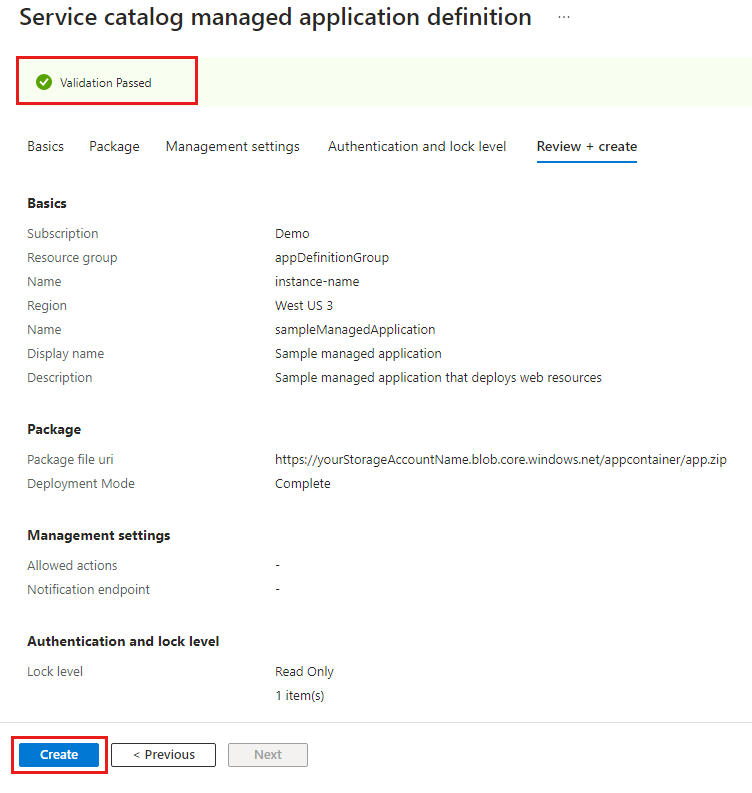
New-AzManagedApplicationDefinition `
-Name "sampleManagedApplication" `
-Location "westus3" `
-ResourceGroupName appDefinitionGroup `
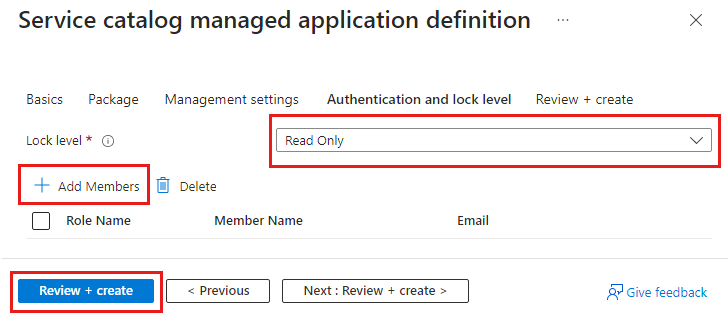
-LockLevel ReadOnly `
-DisplayName "Sample managed application" `
-Description "Sample managed application that deploys web resources" `
-Authorization "${principalid}:$roleid" `
-PackageFileUri $blob.ICloudBlob.StorageUri.PrimaryUri.AbsoluteUri
命令完成時,您的資源群組中會有受控應用程式定義。
上述範例中使用的部分參數:
ResourceGroupName:資源群組的名稱,其中會建立受控應用程式定義。LockLevel:受控資源群組上的lockLevel可避免客戶在此資源群組執行不當作業。 目前唯一支援的鎖定等級是ReadOnly。ReadOnly規定客戶只能讀取受控資源群組中存在的資源。 發行者身分識別若獲得授與受控資源群組的存取權限,則不受鎖定等級的限制。Authorization:描述用來授與權限給受控資源群組的主體識別碼及角色定義識別碼。"${principalid}:$roleid"或者您可以針對每個變數"${principalid}:${roleid}"使用大括號。- 使用逗號分隔多個值:
"${principalid1}:$roleid1", "${principalid2}:$roleid2"。
PackageFileUri:包含必要檔案的 .zip 封裝檔案位置。
確定使用者可以看到您的定義
您可以存取受控應用程式定義,但您想確保您組織中的其他使用者可以存取它。 至少在定義上將讀者角色授與給他們。 他們可能已從訂用帳戶或資源群組繼承此存取層級。 若要查看可存取定義和新增使用者或群組的人員,請參閱使用 Azure 入口網站指派 Azure 角色。
清除資源
如果您要部署定義,請繼續閱讀與文章相關的後續步驟一節,以瞭解如何部署定義。
如果您已完成受控應用程式定義,就可刪除您所建立名為 packageStorageGroup 和 appDefinitionGroup 的資源群組。
命令會提示您確認是否移除資源群組。
Remove-AzResourceGroup -Name packageStorageGroup

Remove-AzResourceGroup -Name appDefinitionGroup
下一步
您已發佈受控應用程式定義。 下一個步驟是了解如何部署該定義的執行個體。