快速入门:在 Azure Stack Hub 中使用 PowerShell 创建 Linux 服务器 VM
可以使用 Azure Stack Hub PowerShell (VM) 创建 Ubuntu Server 20.04 LTS 虚拟机。 在本文中,我们将创建和使用虚拟机。 本文还介绍以下操作:
- 通过远程客户端连接到 VM。
- 安装 NGINX Web 服务器并查看默认主页。
- 清理未使用的资源。
先决条件
Azure Stack Hub 市场中的 Linux 映像。 默认情况下,Azure Stack Hub 市场中没有 Linux 映像。 让 Azure Stack Hub 操作员提供所需的 Ubuntu Server 20.04 LTS 映像。 操作员可以使用将市场项从 Azure 下载到 Azure Stack Hub 中的说明。
Azure Stack Hub 需要使用特定版本的 Azure CLI 来创建和管理其资源。
- 如果未针对 Azure Stack Hub 配置 PowerShell,请参阅安装用于 Azure Stack Hub 的 PowerShell。
- 设置 Azure Stack Hub PowerShell 后,需连接到 Azure Stack Hub 环境。 有关说明,请参阅以用户身份使用 PowerShell 连接到 Azure Stack Hub。
Windows 用户配置文件的 .ssh 目录中保存的名为 id_rsa.pub 的安全外壳 (SSH) 公钥。 有关如何创建 SSH 密钥的详细信息,请参阅将 SSH 公钥用于 Azure Stack Hub。
创建资源组
资源组是一个逻辑容器,可以在其中部署和管理 Azure Stack Hub 资源。 若要创建资源组,请运行以下代码块:
注意
我们在以下代码示例中为所有变量分配了值。 但是,你可以分配自己的值。
# Create variables to store the location and resource group names.
$location = "local"
$ResourceGroupName = "myResourceGroup"

New-AzResourceGroup `
  -Name $ResourceGroupName `
  -Location $location
创建存储资源
创建用于存储启动诊断输出的存储帐户。
# Create variables to store the storage account name and the storage account SKU information
$StorageAccountName = "mystorageaccount"
$SkuName = "Standard_LRS"

# Create a new storage account
$StorageAccount = New-AzStorageAccount `
  -Location $location `
  -ResourceGroupName $ResourceGroupName `
  -Type $SkuName `
  -Name $StorageAccountName

Set-AzCurrentStorageAccount `
  -StorageAccountName $storageAccountName `
  -ResourceGroupName $resourceGroupName
创建网络资源
创建虚拟网络、子网和公共 IP 地址。 这些资源用来与 VM 建立网络连接。
# Create a subnet configuration
$subnetConfig = New-AzVirtualNetworkSubnetConfig `
  -Name mySubnet `
  -AddressPrefix 192.168.1.0/24

# Create a virtual network
$vnet = New-AzVirtualNetwork `
  -ResourceGroupName $ResourceGroupName `
  -Location $location `
  -Name MyVnet `
  -AddressPrefix 192.168.0.0/16 `
  -Subnet $subnetConfig

# Create a public IP address and specify a DNS name
$pip = New-AzPublicIpAddress `
  -ResourceGroupName $ResourceGroupName `
  -Location $location `
  -AllocationMethod Static `
  -IdleTimeoutInMinutes 4 `
  -Name "mypublicdns$(Get-Random)"
创建网络安全组和网络安全组规则
网络安全组使用入站和出站规则来保护 VM。 为端口 3389 创建一个入站规则来允许传入的远程桌面连接,为端口 80 创建一个入站规则来允许传入的 Web 流量。
# Create variables to store the network security group and rules names.
$nsgName = "myNetworkSecurityGroup"
$nsgRuleSSHName = "myNetworkSecurityGroupRuleSSH"
$nsgRuleWebName = "myNetworkSecurityGroupRuleWeb"


# Create an inbound network security group rule for port 22
$nsgRuleSSH = New-AzNetworkSecurityRuleConfig -Name $nsgRuleSSHName -Protocol Tcp `
-Direction Inbound -Priority 1000 -SourceAddressPrefix * -SourcePortRange * -DestinationAddressPrefix * `
-DestinationPortRange 22 -Access Allow

# Create an inbound network security group rule for port 80
$nsgRuleWeb = New-AzNetworkSecurityRuleConfig -Name $nsgRuleWebName -Protocol Tcp `
-Direction Inbound -Priority 1001 -SourceAddressPrefix * -SourcePortRange * -DestinationAddressPrefix * `
-DestinationPortRange 80 -Access Allow

# Create a network security group
$nsg = New-AzNetworkSecurityGroup -ResourceGroupName $ResourceGroupName -Location $location `
-Name $nsgName -SecurityRules $nsgRuleSSH,$nsgRuleWeb
为 VM 创建网卡
网卡将 VM 连接到子网、网络安全组和公共 IP 地址。
# Create a virtual network card and associate it with public IP address and NSG
$nic = New-AzNetworkInterface `
  -Name myNic `
  -ResourceGroupName $ResourceGroupName `
  -Location $location `
  -SubnetId $vnet.Subnets[0].Id `
  -PublicIpAddressId $pip.Id `
  -NetworkSecurityGroupId $nsg.Id
创建 VM
创建 VM 配置。 此配置包含部署 VM 时序使用的设置(例如:用户凭据、大小和 VM 映像)。
# Define a credential object
$UserName='demouser'
$securePassword = ConvertTo-SecureString ' ' -AsPlainText -Force
$cred = New-Object System.Management.Automation.PSCredential ($UserName, $securePassword)

# Create the VM configuration object
$VmName = "VirtualMachinelatest"
$VmSize = "Standard_D1"
$VirtualMachine = New-AzVMConfig `
  -VMName $VmName `
  -VMSize $VmSize

$VirtualMachine = Set-AzVMOperatingSystem `
  -VM $VirtualMachine `
  -Linux `
  -ComputerName "MainComputer" `
  -Credential $cred

$VirtualMachine = Set-AzVMSourceImage `
  -VM $VirtualMachine `
  -PublisherName "Canonical" `
  -Offer "UbuntuServer" `
  -Skus "20.04-LTS" `
  -Version "latest"

# Set the operating system disk properties on a VM
$VirtualMachine = Set-AzVMOSDisk `
  -VM $VirtualMachine `
  -CreateOption FromImage | `
  Set-AzVMBootDiagnostic -ResourceGroupName $ResourceGroupName `
  -StorageAccountName $StorageAccountName -Enable |`
  Add-AzVMNetworkInterface -Id $nic.Id

# Configure SSH keys
$sshPublicKey = Get-Content "$env:USERPROFILE\.ssh\id_rsa.pub"

# Add the SSH key to the VM
Add-AzVMSshPublicKey -VM $VirtualMachine `
 -KeyData $sshPublicKey `
 -Path "/home/$UserName/.ssh/authorized_keys"

# Create the VM
New-AzVM `
  -ResourceGroupName $ResourceGroupName `
 -Location $location `
  -VM $VirtualMachine
VM 快速创建:完整脚本
注意
此步骤实际上是将前面的代码合并到一起,但使用密码而不是 SSH 密钥进行身份验证。
## Create a resource group

<#
A resource group is a logical container where you can deploy and manage Azure Stack Hub resources. From your development kit or the Azure Stack Hub integrated system, run the following code block to create a resource group. Though we've assigned values for all the variables in this article, you can use these values or assign new ones.
#>

# Edit your variables, if required

# Create variables to store the location and resource group names
$location = "local"
$ResourceGroupName = "myResourceGroup"

# Create variables to store the storage account name and the storage account SKU information
$StorageAccountName = "mystorageaccount"
$SkuName = "Standard_LRS"

# Create variables to store the network security group and rules names
$nsgName = "myNetworkSecurityGroup"
$nsgRuleSSHName = "myNetworkSecurityGroupRuleSSH"
$nsgRuleWebName = "myNetworkSecurityGroupRuleWeb"

# Create variable for VM password
$VMPassword = 'Password123!'

# End of variables - no need to edit anything past that point to deploy a single VM

# Create a resource group
New-AzResourceGroup `
  -Name $ResourceGroupName `
  -Location $location

## Create storage resources

# Create a storage account, and then create a storage container for the Ubuntu Server 20.04 LTS image

# Create a new storage account
$StorageAccount = New-AzStorageAccount `
  -Location $location `
  -ResourceGroupName $ResourceGroupName `
  -Type $SkuName `
  -Name $StorageAccountName

Set-AzCurrentStorageAccount `
  -StorageAccountName $storageAccountName `
  -ResourceGroupName $resourceGroupName

# Create a storage container to store the VM image
$containerName = 'osdisks'
$container = New-AzureStorageContainer `
  -Name $containerName `
  -Permission Blob


## Create networking resources

# Create a virtual network, a subnet, and a public IP address, resources that are used provide network connectivity to the VM

# Create a subnet configuration
$subnetConfig = New-AzVirtualNetworkSubnetConfig `
  -Name mySubnet `
  -AddressPrefix 192.168.1.0/24

# Create a virtual network
$vnet = New-AzVirtualNetwork `
  -ResourceGroupName $ResourceGroupName `
  -Location $location `
  -Name MyVnet `
  -AddressPrefix 192.168.0.0/16 `
  -Subnet $subnetConfig

# Create a public IP address and specify a DNS name
$pip = New-AzPublicIpAddress `
  -ResourceGroupName $ResourceGroupName `
  -Location $location `
  -AllocationMethod Static `
  -IdleTimeoutInMinutes 4 `
  -Name "mypublicdns$(Get-Random)"


### Create a network security group and a network security group rule

<#
The network security group secures the VM by using inbound and outbound rules. Create an inbound rule for port 3389 to allow incoming Remote Desktop connections and an inbound rule for port 80 to allow incoming web traffic.
#>

# Create an inbound network security group rule for port 22
$nsgRuleSSH = New-AzNetworkSecurityRuleConfig -Name $nsgRuleSSHName -Protocol Tcp `
-Direction Inbound -Priority 1000 -SourceAddressPrefix * -SourcePortRange * -DestinationAddressPrefix * `
-DestinationPortRange 22 -Access Allow

# Create an inbound network security group rule for port 80
$nsgRuleWeb = New-AzNetworkSecurityRuleConfig -Name $nsgRuleWebName -Protocol Tcp `
-Direction Inbound -Priority 1001 -SourceAddressPrefix * -SourcePortRange * -DestinationAddressPrefix * `
-DestinationPortRange 80 -Access Allow

# Create a network security group
$nsg = New-AzNetworkSecurityGroup -ResourceGroupName $ResourceGroupName -Location $location `
-Name $nsgName -SecurityRules $nsgRuleSSH,$nsgRuleWeb

### Create a network card for the VM

# The network card connects the VM to a subnet, network security group, and public IP address.

# Create a virtual network card and associate it with public IP address and NSG
$nic = New-AzNetworkInterface `
  -Name myNic `
  -ResourceGroupName $ResourceGroupName `
  -Location $location `
  -SubnetId $vnet.Subnets[0].Id `
  -PublicIpAddressId $pip.Id `
  -NetworkSecurityGroupId $nsg.Id

## Create a VM
<#
Create a VM configuration. This configuration includes the settings used when deploying the VM. For example: user credentials, size, and the VM image.
#>

# Define a credential object
$UserName='demouser'
$securePassword = ConvertTo-SecureString $VMPassword -AsPlainText -Force
$cred = New-Object System.Management.Automation.PSCredential ($UserName, $securePassword)

# Create the VM configuration object
$VmName = "VirtualMachinelatest"
$VmSize = "Standard_D1"
$VirtualMachine = New-AzVMConfig `
  -VMName $VmName `
  -VMSize $VmSize

$VirtualMachine = Set-AzVMOperatingSystem `
  -VM $VirtualMachine `
  -Linux `
  -ComputerName "MainComputer" `
  -Credential $cred

$VirtualMachine = Set-AzVMSourceImage `
  -VM $VirtualMachine `
  -PublisherName "Canonical" `
  -Offer "UbuntuServer" `
  -Skus "20.04-LTS" `
  -Version "latest"

$osDiskName = "OsDisk"
$osDiskUri = '{0}vhds/{1}-{2}.vhd' -f `
  $StorageAccount.PrimaryEndpoints.Blob.ToString(),`
  $vmName.ToLower(), `
  $osDiskName

# Set the operating system disk properties on a VM
$VirtualMachine = Set-AzVMOSDisk `
  -VM $VirtualMachine `
  -Name $osDiskName `
  -VhdUri $OsDiskUri `
  -CreateOption FromImage | `
  Add-AzVMNetworkInterface -Id $nic.Id

# Create the VM
New-AzVM `
  -ResourceGroupName $ResourceGroupName `
 -Location $location `
  -VM $VirtualMachine
连接到 VM
部署 VM 后,为其配置一个 SSH 连接。 若要获取 VM 的公共 IP 地址,请使用 Get-AzPublicIpAddress 命令:
Get-AzPublicIpAddress -ResourceGroupName myResourceGroup | Select IpAddress
从安装有 SSH 的客户端系统中,使用以下命令连接到 VM。 如果在 Windows 上操作,可以使用 PuTTY 创建连接。
ssh <Public IP Address>
出现提示时,以 azureuser 身份登录。 如果在创建 SSH 密钥时使用了通行短语,则必须提供该通行短语。
安装 NGINX Web 服务器
若要更新包源并安装最新的 NGINX 包,请运行以下脚本:
#!/bin/bash

# update package source
apt-get -y update

# install NGINX
apt-get -y install nginx
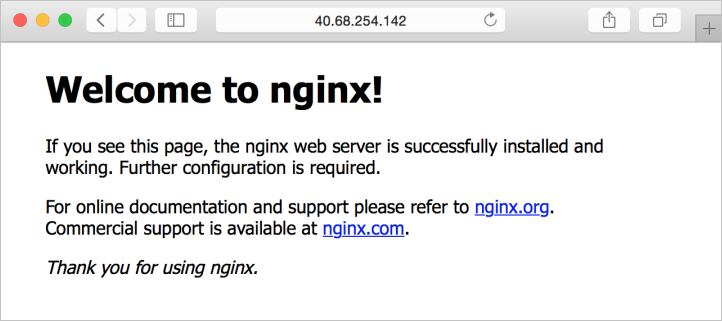
查看 NGINX 欢迎页
在 VM 上安装 NGINX Web 服务器并打开端口 80 后,可通过 VM 的公共 IP 地址访问 Web 服务器。 打开 Web 浏览器并转到 http://<public IP address>。
清理资源
可以使用 Remove-AzResourceGroup 命令清理不再需要的资源。 若要删除资源组及其所有资源,请运行以下命令:
Remove-AzResourceGroup -Name myResourceGroup
后续步骤
在本快速入门中,你已部署了一台基本的 Linux 服务器 VM。 若要了解 Azure Stack Hub VM 的详细信息,请访问 Azure Stack Hub 中 VM 的注意事项。
反馈
即将发布:在整个 2024 年,我们将逐步淘汰作为内容反馈机制的“GitHub 问题”,并将其取代为新的反馈系统。 有关详细信息,请参阅:https://aka.ms/ContentUserFeedback。
提交和查看相关反馈