你当前正在访问 Microsoft Azure Global Edition 技术文档网站。 如果需要访问由世纪互联运营的 Microsoft Azure 中国技术文档网站,请访问 https://docs.azure.cn。
部署由 Vagrant 托管的本地 Windows Server 实例并将其连接到 Azure Arc
以下文章提供了有关使用 Vagrant 部署本地 Windows 10 虚拟机的指南,并将其作为已启用 Azure Arc 的服务器资源进行连接。
先决条件
克隆 Azure Arc 快速入门存储库。
git clone https://github.com/microsoft/azure_arc.git将 Azure CLI 更新到 2.7 及更高版本或者直接安装该版本。 使用以下命令检查你当前安装的版本。
az --versionVagrant 依赖于底层虚拟机监控程序。 对于本指南,我们将使用 Oracle VM VirtualBox。
安装 VirtualBox。
- 如果你是 macOS 用户,请运行
brew cask install virtualbox - 如果你是 Windows 用户,则可以使用 Chocolatey 包
- 如果你是 Linux 用户,可以在 下载适用于 Linux 主机的 VirtualBox 中找到所有包安装方法。
- 如果你是 macOS 用户,请运行
安装 Vagrant
- 如果你是 macOS 用户,请运行
brew cask install vagrant - 如果你是 Windows 用户,则可以使用 Chocolatey 包
- 如果你是 Linux 用户,请访问 Vagrant 下载页。
- 如果你是 macOS 用户,请运行
创建 Azure 服务主体。
要将 Vagrant 虚拟机连接到 Azure Arc,需要一个被分配了“参与者”角色的 Azure 服务主体。 要创建此角色,请登录你的 Azure 帐户并运行以下命令。 还可以在 Azure Cloud Shell 中运行此命令。
az login
az account set -s <Your Subscription ID>
az ad sp create-for-rbac -n "<Unique SP Name>" --role contributor --scopes "/subscriptions/<Your Subscription ID>"
例如:
az ad sp create-for-rbac -n "http://AzureArcServers" --role contributor --scopes "/subscriptions/00000000-0000-0000-0000-000000000000"输出应如下所示:
{
  "appId": "XXXXXXXXXXXXXXXXXXXXXXXXXXXX",
  "displayName": "http://AzureArcServers",
  "password": "XXXXXXXXXXXXXXXXXXXXXXXXXXXX",
  "tenant": "XXXXXXXXXXXXXXXXXXXXXXXXXXXX"
}
注意
我们强烈建议你将服务主体的范围限定为特定的 Azure 订阅和资源组。
Vagrant 文件在 VM 操作系统上执行脚本以安装所有需要的工件并注入环境变量。 编辑
scripts/vars.ps1PowerShell 脚本以匹配你创建的 Azure 服务主体。subscriptionId= 你的 Azure 订阅 IDappId= 你的 Azure 服务主体名称password= 你的 Azure 服务主体密码tenantId= Azure 租户 IDresourceGroup= Azure 资源组名称location= Azure 区域
部署
像任何 Vagrant 部署一样,需要一个 vagrantfile 和一个 Vagrant box。 在高层次上,部署将:
- 下载 Windows 10 映像文件 Vagrant box
- 执行 Azure Arc 安装脚本
编辑 scripts/vars.ps1 脚本以匹配你的环境后,从 Vagrantfile 文件夹中运行 vagrant up。 由于这是你第一次创建 VM,因此第一次运行将比后续运行慢得多。 这是因为部署是第一次下载 Windows 10 box。

下载完成后,将启动实际的预配。 如以下屏幕截图所示,此过程需要 7 到 10 分钟。

注意
如果看到有关证书检查吊销的错误,请将此配置添加到Vagrantfile:
config.vm.box_download_insecure = true
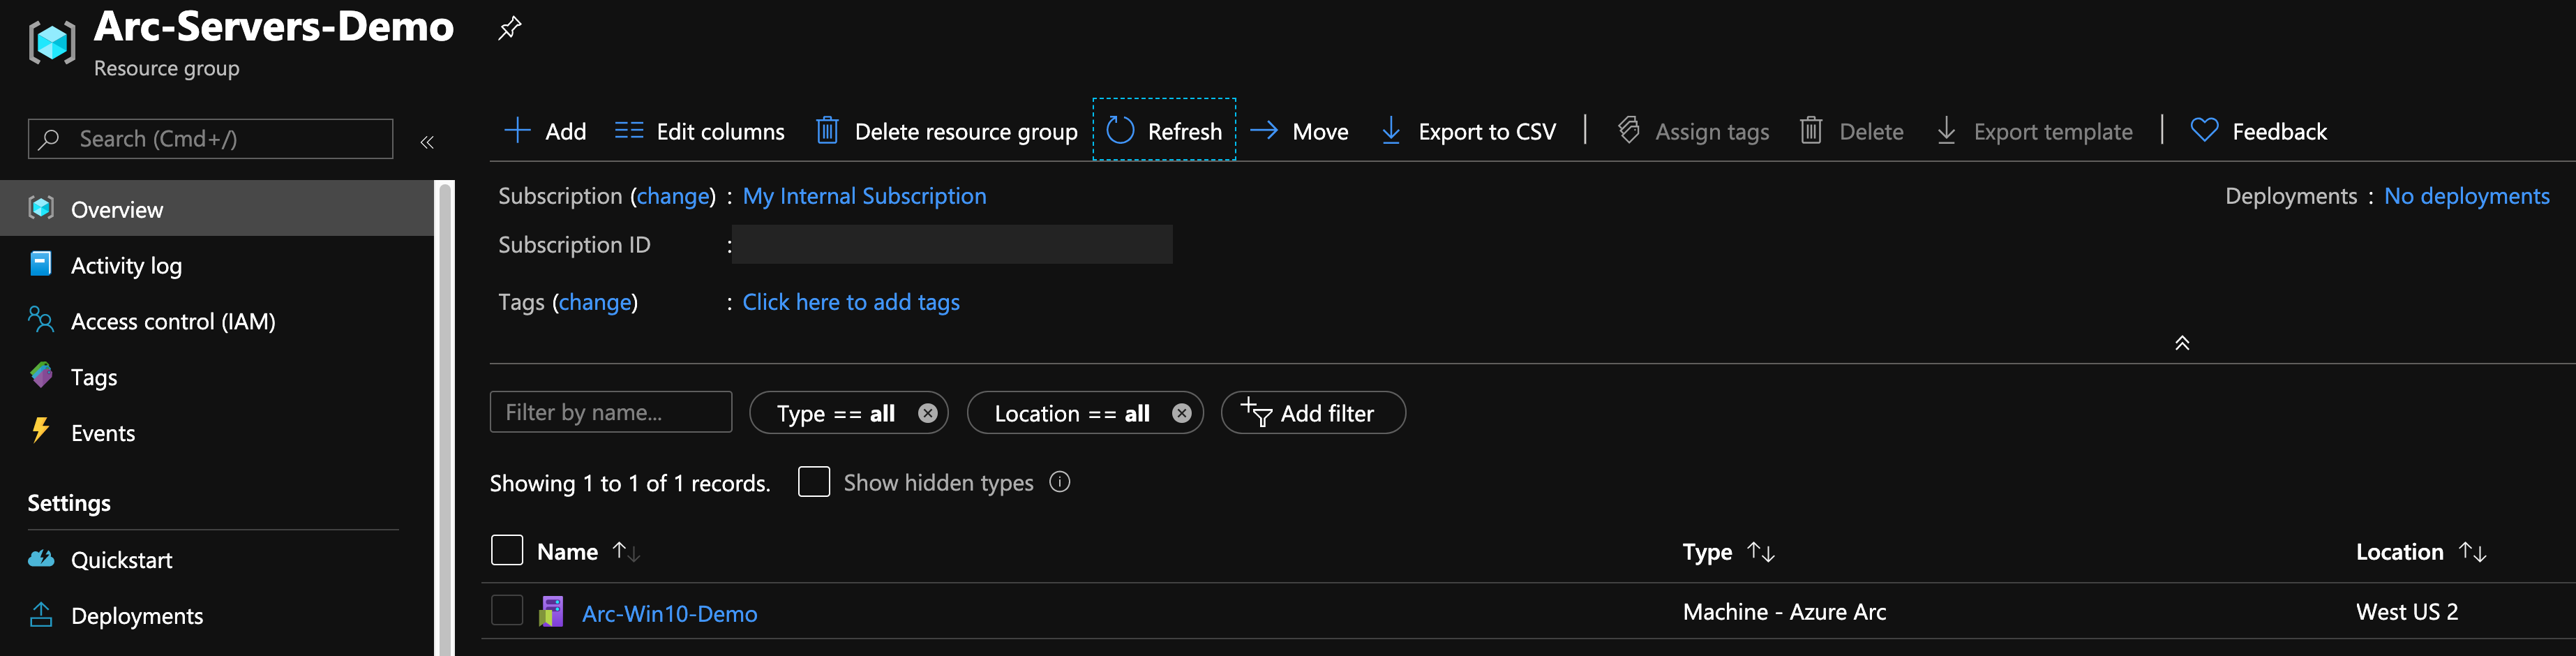
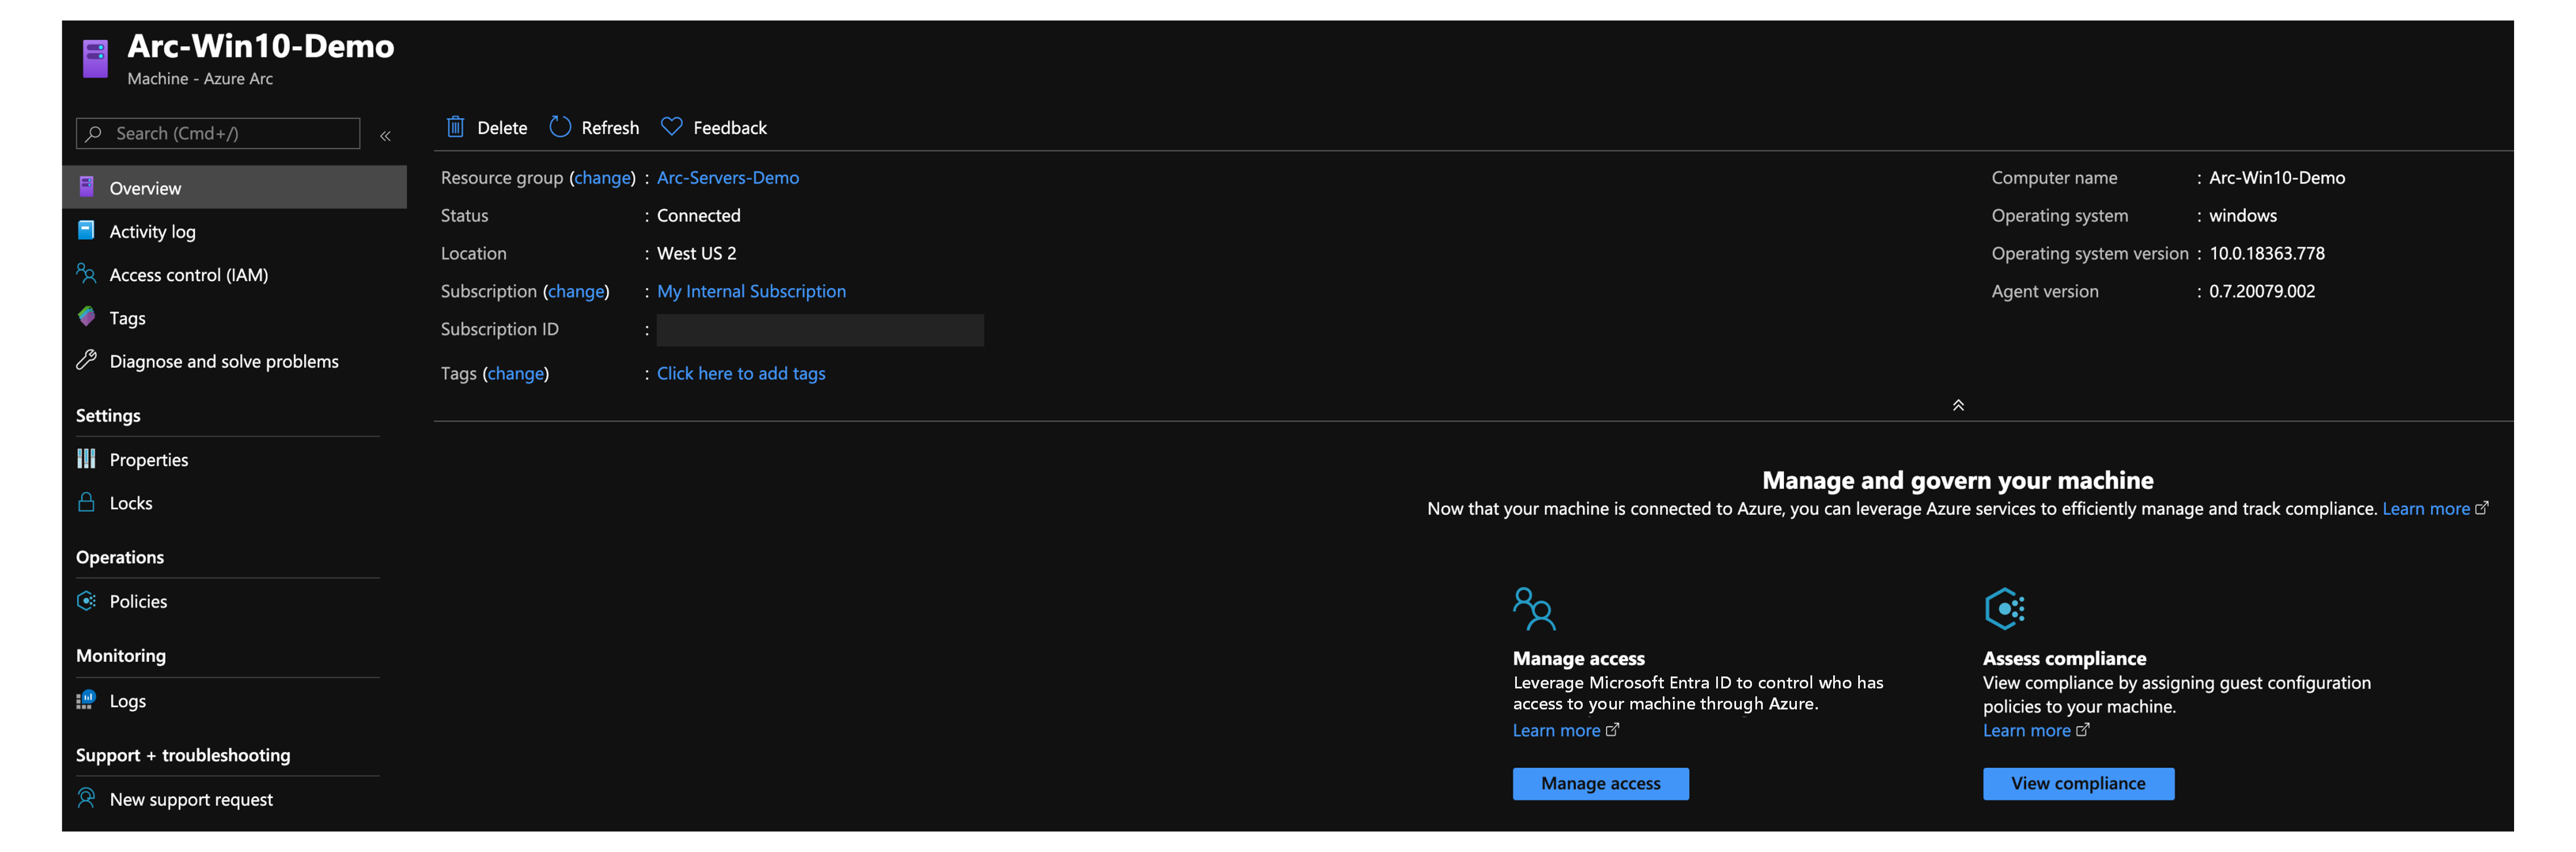
完成后,你将部署一个本地 Windows 10 VM,并将其作为新资源组中启用了 Azure Arc 的新服务器进行连接。
半自动部署(可选)
运行登录区域最后一步是将 VM 注册为支持 Azure Arc 的新服务器资源。

如果要演示/控制实际的注册过程,请执行以下操作:
在
install_arc_agentPowerShell 脚本中,注释掉run connect command部分并保存文件。 你还可以注释掉或更改资源组的创建。

使用
vagrant rdp命令通过 RDP 连接到 VM。 使用vagrant/vagrant作为用户名/密码。
以管理员身份打开 PowerShell ISE 并使用你的环境变量编辑
C:\runtime\vars.ps1文件。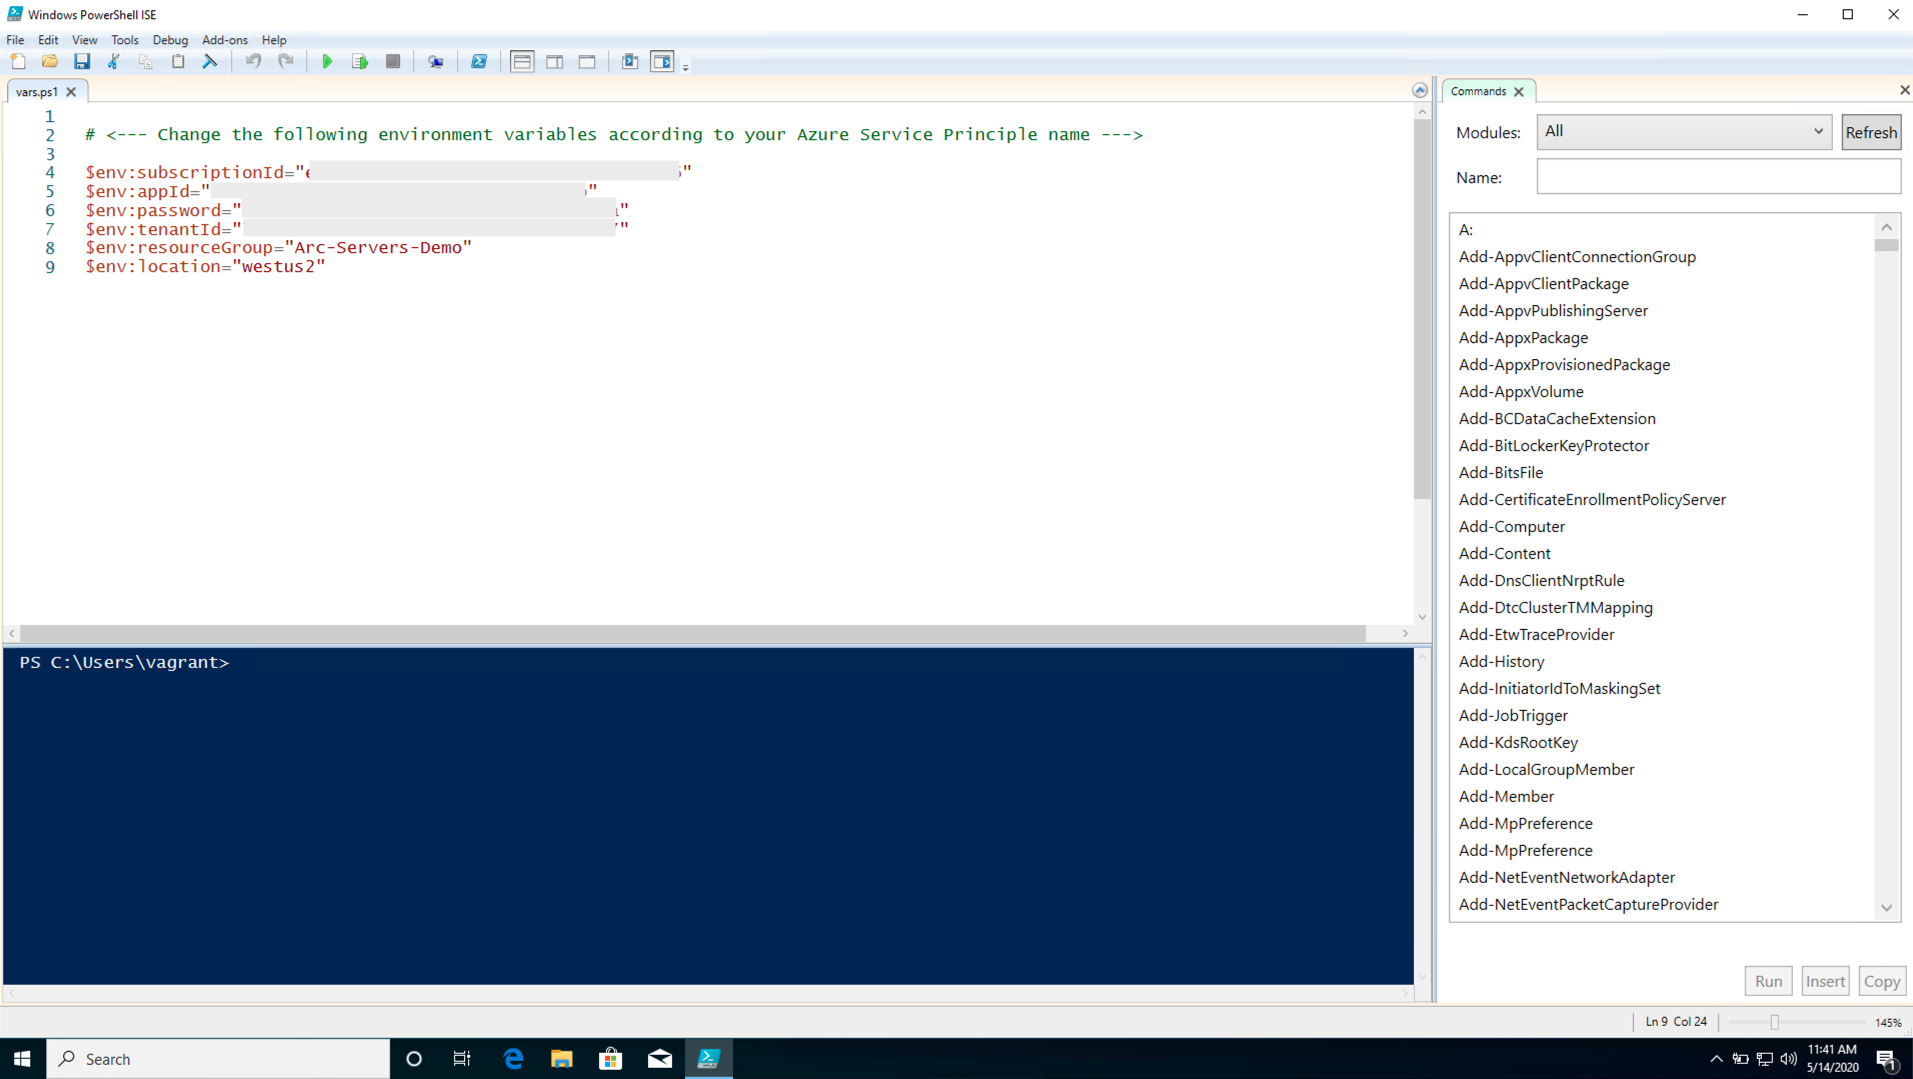
粘贴
Invoke-Expression C:\runtime\vars.ps1命令,az group create --location $env:location --name $env:resourceGroup --subscription $env:subscriptionId命令和你输出的azcmagent connect命令相同,然后执行脚本。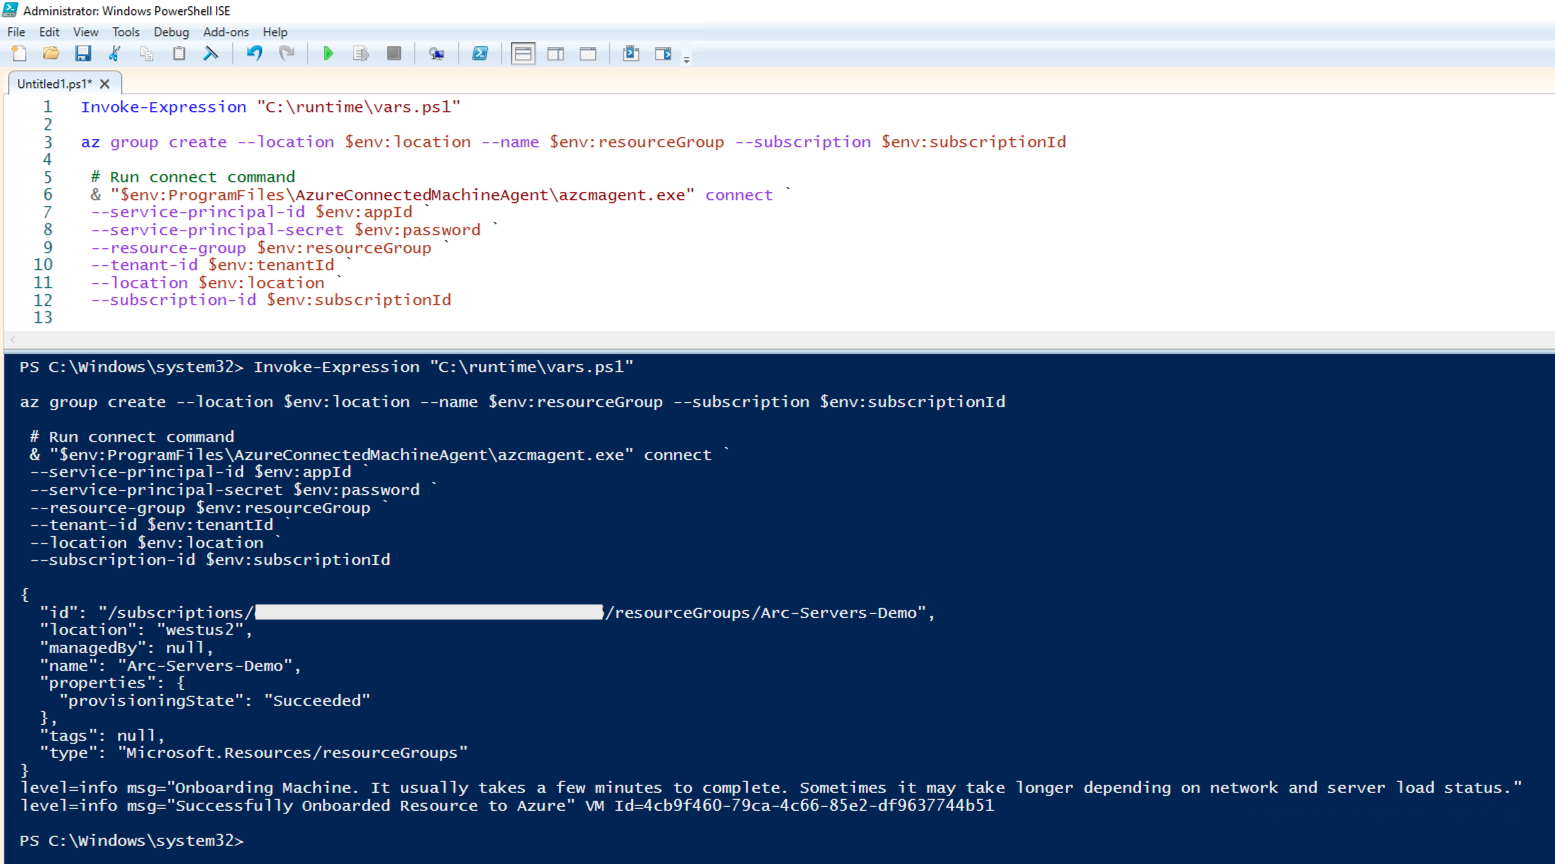
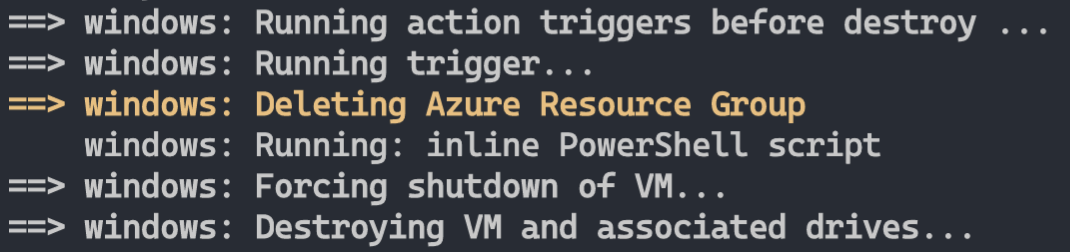
删除部署
要删除整个部署,请运行 vagrant destroy -f 命令。 vagrantfile 包含一个 before: destroy Vagrant 触发器,该触发器运行命令以在销毁实际 VM 之前删除 Azure 资源组。
反馈
即将发布:在整个 2024 年,我们将逐步淘汰作为内容反馈机制的“GitHub 问题”,并将其取代为新的反馈系统。 有关详细信息,请参阅:https://aka.ms/ContentUserFeedback。
提交和查看相关反馈