iOS 6 简介
iOS 6 包含各种用于开发应用的新技术,Xamarin.iOS 6 为 C# 开发人员带来了这些新技术。
借助 iOS 6 和 Xamarin.iOS 6,开发人员现在拥有了大量可以使用的功能来创建 iOS 应用程序,包括面向 iPhone 5 的应用程序。 本文档列出了一些更令人激动的可用新功能,并链接到了每个主题的对应文章。 此外,它还提到了在开发人员转为使用 iOS 6 和 iPhone 5 的新分辨率时需要重视的几个变化。
集合视图简介
集合视图支持使用任意布局显示内容。 利用集合视图,可以轻松地创建开箱即用的网格式布局,它们也支持自定义布局。 有关详细信息,请参阅集合视图简介指南。
PassKit 简介
PassKit 框架支持应用程序与 Passbook 应用中管理的数字通行证进行交互。 有关详细信息,请参阅 Pass Kit 简介指南。
EventKit 简介
EventKit 框架提供了一种方法来访问日历、日历事件和日历数据库存储的提醒数据。 虽然从 iOS 4 开始就提供了对日历和日历事件的访问权限,但 iOS 6 现在公开了对提醒数据的访问权限。 有关详细信息,请参阅 EventKit 简介指南。
社交框架简介
社交框架提供统一的 API,用于与 Twitter、Facebook 以及中国用户的新浪微博等社交网络交互。 有关详细信息,请参阅社交框架简介指南。
对 StoreKit 的更改
Apple 在 Store Kit 中引入了两项新功能:从应用中购买和下载 iTunes 或 App Store 内容,以及托管应用内购买的内容文件。 有关详细信息,请参阅 Store Kit 的相关更改指南。
其他更改
ViewWillUnload 和 ViewDidUnload 已弃用
iOS 6 中不再调用 UIViewController 的 ViewWillUnload 和 ViewDidUnload 方法。 在早期版本的 iOS 中,应用程序可能分别使用这些方法在视图卸载之前保存状态以及清理代码。
例如,Visual Studio for Mac 将创建一个名为 ReleaseDesignerOutlets 的方法(如下所示),然后从 ViewDidUnload 调用该方法:
void ReleaseDesignerOutlets ()
{
    if (myOutlet != null) {
        myOutlet.Dispose ();
        myOutlet = null;
    }
}
但在 iOS 6 中,不再需要调用 ReleaseDesignerOutlets。
如果是清理代码,iOS 6 应用程序应使用 DidReceiveMemoryWarning。 但是,应谨慎使用调用 Dispose 的代码,并且只对内存密集型对象使用,如下所示:
if (myImageView != null){
    if (myImageView.Superview == null){
        myImageView.Dispose();
        myImageView = null;
    }
}
同样,很少需要调用上述 Dispose。 通常,大多数应用程序应该移除事件处理程序。
如果是保存状态,应用程序可以在 ViewWillDisappear 和 ViewDidDisappear(而非 ViewWillUnload)中执行此操作。
iPhone 5 分辨率
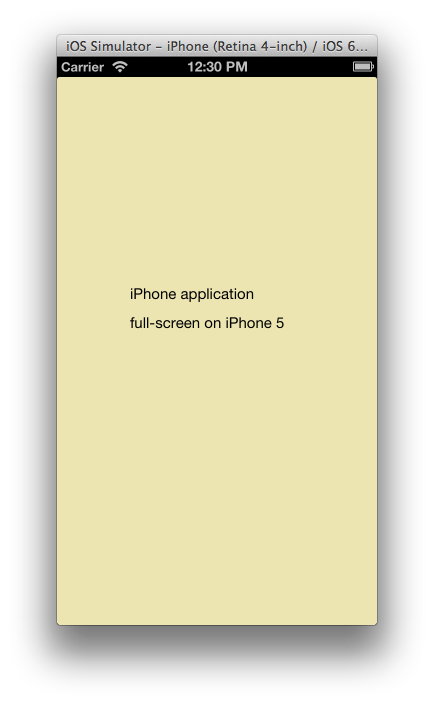
iPhone 5 设备分辨率为 640x1136。 面向 iOS 早期版本的应用程序在 iPhone 5 上运行时将显示上下黑边,如下所示:
为了使应用程序在 iPhone 5 上全屏显示,只需添加一个名为 Default-568h@2x.png 的图像(分辨率为 640x1136)。 以下屏幕截图显示了包含此图像后运行的应用程序:
为 UINavigationBar 创建子类
在 iOS 6 中,可以为 UINavigationBar 创建子类。 这样便可以对 UINavigationBar 的外观进行额外的控制。 例如,应用程序可以通过创建子类来添加子视图,为这些视图添加动画和修改 UINavigationBar 的边界。
下面的代码显示了一个示例,即添加 UIImageView 的已创建子类的 UINavigationBar:
public class CustomNavBar : UINavigationBar
{
UIImageView iv;
public CustomNavBar (IntPtr h) : base(h)
{
iv = new UIImageView (UIImage.FromFile ("monkey.png"));
iv.Frame = new CGRect (75, 0, 30, 39);
}
public override void Draw (RectangleF rect)
{
base.Draw (rect);
TintColor = UIColor.Purple;
AddSubview (iv);
}
}
若要将已创建子类的 UINavigationBar 添加到 UINavigationController,请使用采用 UINavigationBar 和 UIToolbar 类型的 UINavigationController 构造函数,如下所示:
navController = new UINavigationController (typeof(CustomNavBar), typeof(UIToolbar));
使用此 UINavigationBar 子类会导致显示如以下屏幕截图所示的图像视图:
接口方向
在 iOS 6 之前,应用程序可以替代 ShouldAutorotateToInterfaceOrientation,为特定控制器支持的任何方向返回 true。 例如,以下代码将仅用于支持纵向:
public override bool ShouldAutorotateToInterfaceOrientation (UIInterfaceOrientation toInterfaceOrientation)
    {
        return (toInterfaceOrientation == UIInterfaceOrientation.Portrait);
    }
在 iOS 6 中,ShouldAutorotateToInterfaceOrientation 已弃用。
相反,应用程序可以在根视图控制器上替代 GetSupportedInterfaceOrientations,如下所示:
public override UIInterfaceOrientationMask GetSupportedInterfaceOrientations ()
    {
        return UIInterfaceOrientationMask.Portrait;
    }
在 iPad 上,如果未实现 GetSupportedInterfaceOrientation,则默认为所有四个方向。 在 iPhone 和 iPod Touch 上,默认为除 PortraitUpsideDown 以外的所有方向。


