Xamarin.Mac 中的集合视图
本文介绍如何在 Xamarin.Mac 应用中使用集合视图。 它介绍如何在 Xcode 和 Interface Builder 中创建和维护集合视图,以及如何以编程方式使用这些视图。
在 Xamarin.Mac 应用中使用 C# 和 .NET 时,开发人员有权访问与使用 Objective-CXcode 的开发人员相同的 AppKit 集合视图控件。 由于 Xamarin.Mac 直接与 Xcode 集成,因此开发人员使用 Xcode 的 Interface Builder 来创建和维护集合视图。
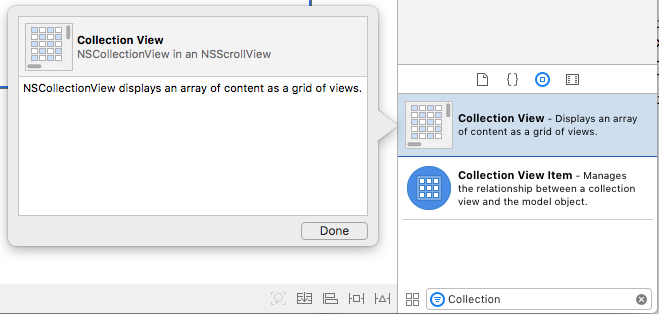
NSCollectionView显示使用 NSCollectionViewLayout组织的子视图的网格。 网格中的每个子视图都由 NSCollectionViewItem 表示,它管理从 .xib 文件加载视图的内容。

本文介绍在 Xamarin.Mac 应用中使用集合视图的基础知识。 强烈建议先完成 Hello, Mac 文章,特别是 Xcode 和接口生成器简介 以及 输出口和操作 部分,因为它涵盖了本文中使用的关键概念和技术。
你可能还想要查看 Xamarin.Mac Internals 文档的向 Objective-CC# 类/方法公开部分,其中介绍了Register用于将 C# 类Objective-C连接到对象和 UI 元素的 和 Export 命令。
关于集合视图
集合视图 (NSCollectionView) main目标是使用集合视图布局 (NSCollectionViewLayout) 以有条理的方式直观地排列一组对象,每个对象 (NSCollectionViewItem) 在较大的集合中获取自己的视图。 集合视图通过数据绑定和Key-Value编码技术工作,因此,在继续阅读本文之前,应先阅读 数据绑定和Key-Value编码 文档。
集合视图没有标准的内置集合视图项 (如大纲或表视图) ,因此开发人员负责使用其他 AppKit 控件(如图像字段、文本字段、标签等)设计和实现 原型视图 。此原型视图将用于显示和处理由集合视图管理的每个项,并存储在文件中 .xib 。
由于开发人员负责集合视图项的外观,因此集合视图没有内置支持突出显示网格中的选定项。 本文将介绍实现此功能。
定义数据模型
在接口生成器中绑定集合视图之前,必须在 Xamarin.Mac 应用中定义Key-Value编码 (KVC) /Key-Value Observing (KVO) 兼容类,以充当绑定 的数据模型 。 数据模型提供将在集合中显示的所有数据,并接收用户在运行应用程序时在 UI 中对数据所做的任何修改。
以管理一组员工的应用为例,以下类可用于定义数据模型:
using System;
using Foundation;
using AppKit;

namespace MacDatabinding
{
    [Register("PersonModel")]
    public class PersonModel : NSObject
    {
        #region Private Variables
        private string _name = "";
        private string _occupation = "";
        private bool _isManager = false;
        private NSMutableArray _people = new NSMutableArray();
        #endregion

        #region Computed Properties
        [Export("Name")]
        public string Name {
            get { return _name; }
            set {
                WillChangeValue ("Name");
                _name = value;
                DidChangeValue ("Name");
            }
        }

        [Export("Occupation")]
        public string Occupation {
            get { return _occupation; }
            set {
                WillChangeValue ("Occupation");
                _occupation = value;
                DidChangeValue ("Occupation");
            }
        }

        [Export("isManager")]
        public bool isManager {
            get { return _isManager; }
            set {
                WillChangeValue ("isManager");
                WillChangeValue ("Icon");
                _isManager = value;
                DidChangeValue ("isManager");
                DidChangeValue ("Icon");
            }
        }

        [Export("isEmployee")]
        public bool isEmployee {
            get { return (NumberOfEmployees == 0); }
        }

        [Export("Icon")]
        public NSImage Icon
        {
            get
            {
                if (isManager)
                {
                    return NSImage.ImageNamed("IconGroup");
                }
                else
                {
                    return NSImage.ImageNamed("IconUser");
                }
            }
        }

        [Export("personModelArray")]
        public NSArray People {
            get { return _people; }
        }

        [Export("NumberOfEmployees")]
        public nint NumberOfEmployees {
            get { return (nint)_people.Count; }
        }
        #endregion

        #region Constructors
        public PersonModel ()
        {
        }

        public PersonModel (string name, string occupation)
        {
            // Initialize
            this.Name = name;
            this.Occupation = occupation;
        }

        public PersonModel (string name, string occupation, bool manager)
        {
            // Initialize
            this.Name = name;
            this.Occupation = occupation;
            this.isManager = manager;
        }
        #endregion

        #region Array Controller Methods
        [Export("addObject:")]
        public void AddPerson(PersonModel person) {
            WillChangeValue ("personModelArray");
            isManager = true;
            _people.Add (person);
            DidChangeValue ("personModelArray");
        }

        [Export("insertObject:inPersonModelArrayAtIndex:")]
        public void InsertPerson(PersonModel person, nint index) {
            WillChangeValue ("personModelArray");
            _people.Insert (person, index);
            DidChangeValue ("personModelArray");
        }

        [Export("removeObjectFromPersonModelArrayAtIndex:")]
        public void RemovePerson(nint index) {
            WillChangeValue ("personModelArray");
            _people.RemoveObject (index);
            DidChangeValue ("personModelArray");
        }

        [Export("setPersonModelArray:")]
        public void SetPeople(NSMutableArray array) {
            WillChangeValue ("personModelArray");
            _people = array;
            DidChangeValue ("personModelArray");
        }
        #endregion
    }
}
PersonModel数据模型将在本文的其余部分使用。
使用集合视图
使用集合视图进行数据绑定非常类似于表视图的绑定,因为 NSCollectionViewDataSource 用于为集合提供数据。 由于集合视图没有预设的显示格式,因此需要执行更多工作来提供用户交互反馈和跟踪用户选择。
创建单元原型
由于集合视图不包括默认单元格原型,开发人员需要将一个或多个 .xib 文件添加到 Xamarin.Mac 应用,以定义各个单元格的布局和内容。
请执行以下操作:
在解决方案资源管理器中,右键单击项目名称,然后选择“添加新>文件...”
选择 “Mac>视图控制器”,为它命名 (如
EmployeeItem以下示例) ,然后单击“ 新建 ”按钮创建: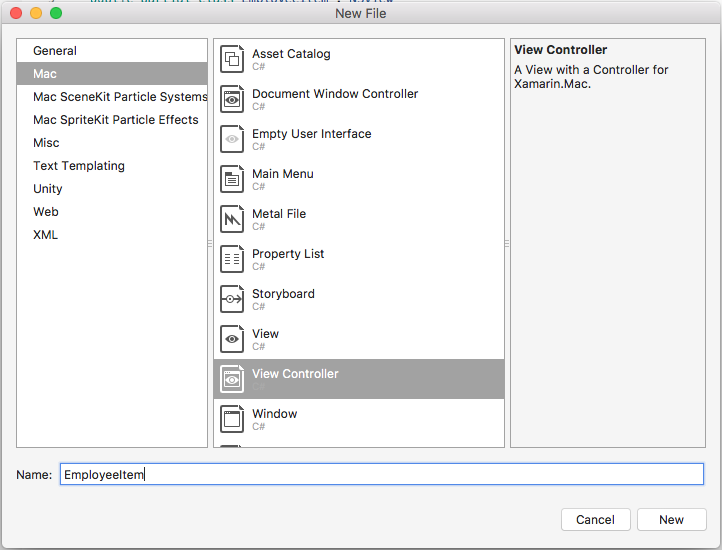
这会将
EmployeeItem.cs、EmployeeItemController.cs和EmployeeItemController.xib文件添加到项目的解决方案。双击
EmployeeItemController.xib文件以将其打开,以便在 Xcode 的 Interface Builder 中编辑。向视图添加一个 和
NSImageView两NSLabel个NSBox控件,并按如下所示对其进行布局: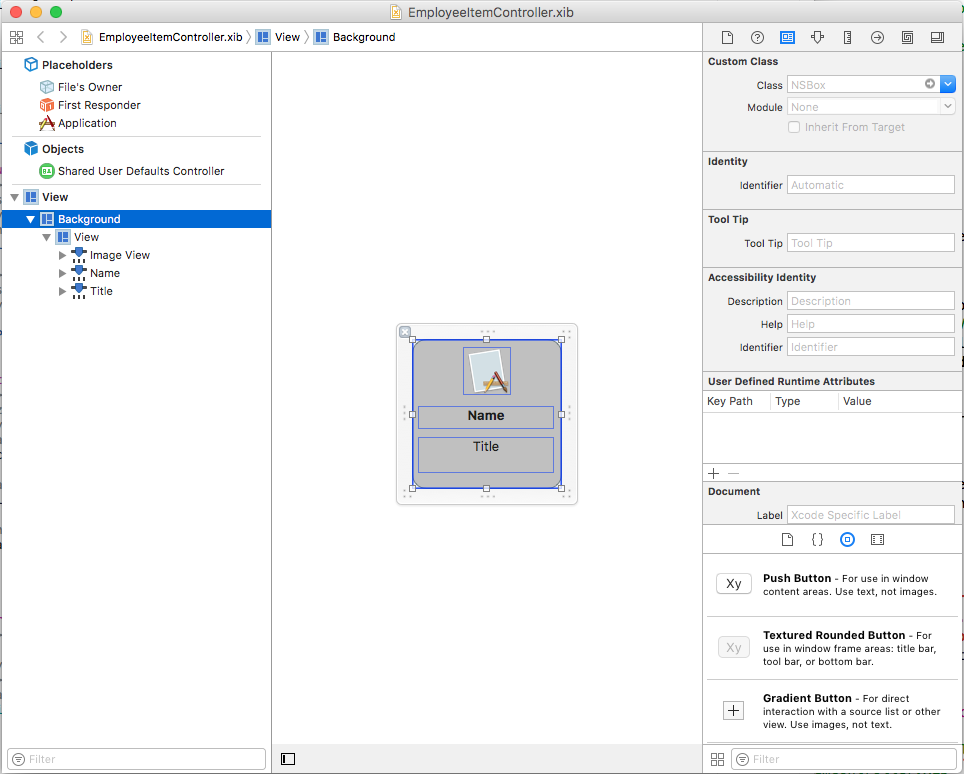
打开助手编辑器并为 创建一个输出口
NSBox,以便可用于指示单元格的选择状态: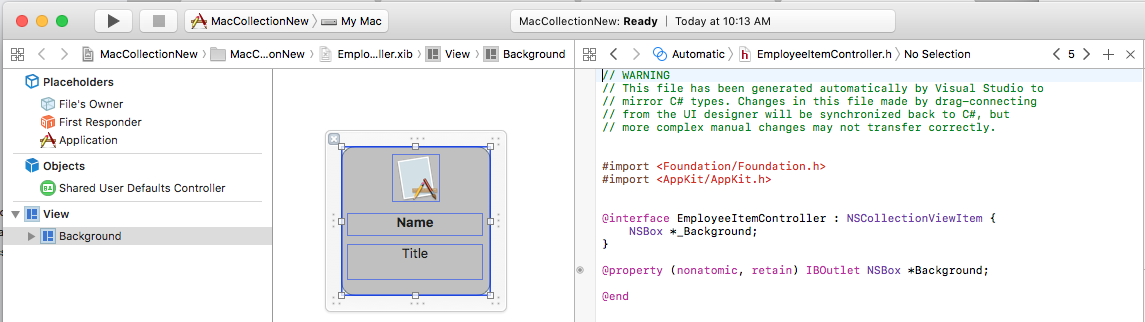
返回到 “标准编辑器” 并选择“图像视图”。
在绑定检查器中,选择“绑定到>文件的所有者”,并输入模型键路径
self.Person.Icon:
选择第一个标签,然后在绑定检查器中,选择“绑定到>文件的所有者”,然后输入的模型键路径
self.Person.Name:
选择第二个标签,在绑定检查器中,选择“绑定到>文件的所有者”,并输入模型键路径
self.Person.Occupation: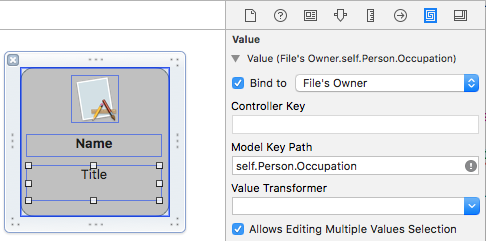
保存对文件的更改,
.xib并返回到 Visual Studio 以同步更改。
EmployeeItemController.cs编辑文件,使其如下所示:
using System;
using System.Collections.Generic;
using System.Linq;
using Foundation;
using AppKit;

namespace MacCollectionNew
{
    /// <summary>
    /// The Employee item controller handles the display of the individual items that will
    /// be displayed in the collection view as defined in the associated .XIB file.
    /// </summary>
    public partial class EmployeeItemController : NSCollectionViewItem
    {
        #region Private Variables
        /// <summary>
        /// The person that will be displayed.
        /// </summary>
        private PersonModel _person;
        #endregion

        #region Computed Properties
        // strongly typed view accessor
        public new EmployeeItem View
        {
            get
            {
                return (EmployeeItem)base.View;
            }
        }

        /// <summary>
        /// Gets or sets the person.
        /// </summary>
        /// <value>The person that this item belongs to.</value>
        [Export("Person")]
        public PersonModel Person
        {
            get { return _person; }
            set
            {
                WillChangeValue("Person");
                _person = value;
                DidChangeValue("Person");
            }
        }

        /// <summary>
        /// Gets or sets the color of the background for the item.
        /// </summary>
        /// <value>The color of the background.</value>
        public NSColor BackgroundColor {
            get { return Background.FillColor; }
            set { Background.FillColor = value; }
        }

        /// <summary>
        /// Gets or sets a value indicating whether this <see cref="T:MacCollectionNew.EmployeeItemController"/> is selected.
        /// </summary>
        /// <value><c>true</c> if selected; otherwise, <c>false</c>.</value>
        /// <remarks>This also changes the background color based on the selected state
        /// of the item.</remarks>
        public override bool Selected
        {
            get
            {
                return base.Selected;
            }
            set
            {
                base.Selected = value;

                // Set background color based on the selection state
                if (value) {
                    BackgroundColor = NSColor.DarkGray;
                } else {
                    BackgroundColor = NSColor.LightGray;
                }
            }
        }
        #endregion

        #region Constructors
        // Called when created from unmanaged code
        public EmployeeItemController(IntPtr handle) : base(handle)
        {
            Initialize();
        }

        // Called when created directly from a XIB file
        [Export("initWithCoder:")]
        public EmployeeItemController(NSCoder coder) : base(coder)
        {
            Initialize();
        }

        // Call to load from the XIB/NIB file
        public EmployeeItemController() : base("EmployeeItem", NSBundle.MainBundle)
        {
            Initialize();
        }

        // Added to support loading from XIB/NIB
        public EmployeeItemController(string nibName, NSBundle nibBundle) : base(nibName, nibBundle) {

            Initialize();
        }

        // Shared initialization code
        void Initialize()
        {
        }
        #endregion
    }
}
详细查看此代码时, 类继承自 NSCollectionViewItem ,因此它可以充当集合视图单元格的原型。 属性 Person 公开用于将数据绑定到 Xcode 中的图像视图和标签的类。 这是上面创建的 的 PersonModel 实例。
属性BackgroundColor是控件 的FillColor快捷方式NSBox,用于显示单元格的选择状态。 通过重写 Selected 的 NSCollectionViewItem属性,以下代码设置或清除此选择状态:
public override bool Selected
{
    get
    {
        return base.Selected;
    }
    set
    {
        base.Selected = value;

        // Set background color based on the selection state
        if (value) {
            BackgroundColor = NSColor.DarkGray;
        } else {
            BackgroundColor = NSColor.LightGray;
        }
    }
}
创建集合视图数据源
集合视图数据源 (NSCollectionViewDataSource) 为集合视图提供所有数据,并根据需要使用原型) 创建和填充集合视图单元 (.xib 。
在项目中添加一个新类,调用它 CollectionViewDataSource 并使其如下所示:
using System;
using System.Collections.Generic;
using AppKit;
using Foundation;

namespace MacCollectionNew
{
    /// <summary>
    /// Collection view data source provides the data for the collection view.
    /// </summary>
    public class CollectionViewDataSource : NSCollectionViewDataSource
    {
        #region Computed Properties
        /// <summary>
        /// Gets or sets the parent collection view.
        /// </summary>
        /// <value>The parent collection view.</value>
        public NSCollectionView ParentCollectionView { get; set; }

        /// <summary>
        /// Gets or sets the data that will be displayed in the collection.
        /// </summary>
        /// <value>A collection of PersonModel objects.</value>
        public List<PersonModel> Data { get; set; } = new List<PersonModel>();
        #endregion

        #region Constructors
        /// <summary>
        /// Initializes a new instance of the <see cref="T:MacCollectionNew.CollectionViewDataSource"/> class.
        /// </summary>
        /// <param name="parent">The parent collection that this datasource will provide data for.</param>
        public CollectionViewDataSource(NSCollectionView parent)
        {
            // Initialize
            ParentCollectionView = parent;

            // Attach to collection view
            parent.DataSource = this;

        }
        #endregion

        #region Override Methods
        /// <summary>
        /// Gets the number of sections.
        /// </summary>
        /// <returns>The number of sections.</returns>
        /// <param name="collectionView">The parent Collection view.</param>
        public override nint GetNumberOfSections(NSCollectionView collectionView)
        {
            // There is only one section in this view
            return 1;
        }

        /// <summary>
        /// Gets the number of items in the given section.
        /// </summary>
        /// <returns>The number of items.</returns>
        /// <param name="collectionView">The parent Collection view.</param>
        /// <param name="section">The Section number to count items for.</param>
        public override nint GetNumberofItems(NSCollectionView collectionView, nint section)
        {
            // Return the number of items
            return Data.Count;
        }

        /// <summary>
        /// Gets the item for the give section and item index.
        /// </summary>
        /// <returns>The item.</returns>
        /// <param name="collectionView">The parent Collection view.</param>
        /// <param name="indexPath">Index path specifying the section and index.</param>
        public override NSCollectionViewItem GetItem(NSCollectionView collectionView, NSIndexPath indexPath)
        {
            var item = collectionView.MakeItem("EmployeeCell", indexPath) as EmployeeItemController;
            item.Person = Data[(int)indexPath.Item];

            return item;
        }
        #endregion
    }
}
详细查看此代码时, 类继承自 NSCollectionViewDataSource ,并通过其 Data 属性公开实例列表PersonModel。
由于此集合只有一个部分,因此代码将重写 GetNumberOfSections 方法并始终返回 1。 此外,该方法 GetNumberofItems 在返回属性列表中的项 Data 数时被重写。
每当需要新单元格时,将 GetItem 调用 方法,如下所示:
public override NSCollectionViewItem GetItem(NSCollectionView collectionView, NSIndexPath indexPath)
{
    var item = collectionView.MakeItem("EmployeeCell", indexPath) as EmployeeItemController;
    item.Person = Data[(int)indexPath.Item];

    return item;
}
MakeItem调用集合视图的 方法来创建或返回 的EmployeeItemController可重用实例,并且其 Person 属性设置为在请求的单元格中显示的项。
EmployeeItemController必须事先使用以下代码将 注册到集合视图控制器:
EmployeeCollection.RegisterClassForItem(typeof(EmployeeItemController), "EmployeeCell");
调用中使用的MakeItem标识符 (EmployeeCell) 必须与注册到集合视图的视图控制器的名称匹配。 下面将详细介绍此步骤。
处理项目选择
若要处理集合中项的选择和取消选择,需要 。NSCollectionViewDelegate 由于此示例将使用内置 NSCollectionViewFlowLayout 布局类型, NSCollectionViewDelegateFlowLayout 因此需要此委托的特定版本。
向项目添加新类,调用它 CollectionViewDelegate 并使其如下所示:
using System;
using Foundation;
using AppKit;

namespace MacCollectionNew
{
    /// <summary>
    /// Collection view delegate handles user interaction with the elements of the
    /// collection view for the Flow-Based layout type.
    /// </summary>
    public class CollectionViewDelegate : NSCollectionViewDelegateFlowLayout
    {
        #region Computed Properties
        /// <summary>
        /// Gets or sets the parent view controller.
        /// </summary>
        /// <value>The parent view controller.</value>
        public ViewController ParentViewController { get; set; }
        #endregion

        #region Constructors
        /// <summary>
        /// Initializes a new instance of the <see cref="T:MacCollectionNew.CollectionViewDelegate"/> class.
        /// </summary>
        /// <param name="parentViewController">Parent view controller.</param>
        public CollectionViewDelegate(ViewController parentViewController)
        {
            // Initialize
            ParentViewController = parentViewController;
        }
        #endregion

        #region Override Methods
        /// <summary>
        /// Handles one or more items being selected.
        /// </summary>
        /// <param name="collectionView">The parent Collection view.</param>
        /// <param name="indexPaths">The Index paths of the items being selected.</param>
        public override void ItemsSelected(NSCollectionView collectionView, NSSet indexPaths)
        {
            // Dereference path
            var paths = indexPaths.ToArray<NSIndexPath>();
            var index = (int)paths[0].Item;

            // Save the selected item
            ParentViewController.PersonSelected = ParentViewController.Datasource.Data[index];

        }

        /// <summary>
        /// Handles one or more items being deselected.
        /// </summary>
        /// <param name="collectionView">The parent Collection view.</param>
        /// <param name="indexPaths">The Index paths of the items being deselected.</param>
        public override void ItemsDeselected(NSCollectionView collectionView, NSSet indexPaths)
        {
            // Dereference path
            var paths = indexPaths.ToArray<NSIndexPath>();
            var index = paths[0].Item;

            // Clear selection
            ParentViewController.PersonSelected = null;
        }
        #endregion
    }
}
ItemsSelected和 ItemsDeselected 方法将被重写,用于设置或清除PersonSelected当用户选择或取消选择项时正在处理集合视图的视图控制器的属性。 下面将详细介绍这一点。
在 Interface Builder 中创建集合视图
所有必需的支持部分都到位后,可以编辑main情节提要,并为其添加集合视图。
请执行以下操作:
双击
Main.Storyboard解决方案资源管理器中的文件,将其打开以在 Xcode 的 Interface Builder 中编辑。将集合视图拖动到主视图中,然后调整其大小以填充视图:
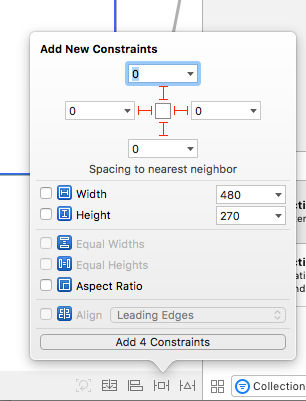
选中“集合视图”后,使用约束编辑器在调整其大小时将其固定到视图:
确保在 “设计图面 ” (选中“集合视图”,而不是) 包含它的 “边框滚动视图 ”或“ 剪裁视图 ”,切换到 “助手编辑器” 并为集合视图创建 一个输出口 :
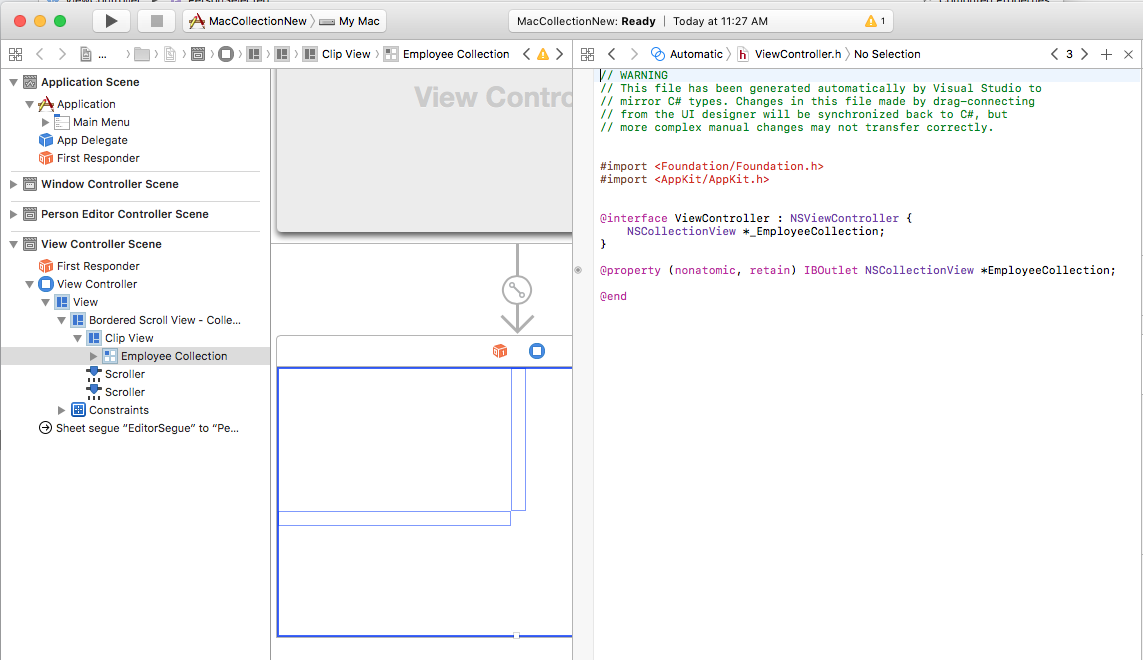
保存更改并返回到 Visual Studio 进行同步。
将这一切汇集在一起
现在,所有支持部分都已使用类来充当数据模型 (PersonModel) ,添加了 一个 NSCollectionViewDataSource 用于提供数据,创建了 一个 NSCollectionViewDelegateFlowLayout 来处理项目选择,一个 NSCollectionView 添加到主情节提要,并公开为出口 (EmployeeCollection) 。
最后一步是编辑包含集合视图的视图控制器,并将所有部分组合在一起以填充集合并处理项选择。
ViewController.cs编辑文件,使其如下所示:
using System;
using AppKit;
using Foundation;
using CoreGraphics;

namespace MacCollectionNew
{
    /// <summary>
    /// The View controller controls the main view that houses the Collection View.
    /// </summary>
    public partial class ViewController : NSViewController
    {
        #region Private Variables
        private PersonModel _personSelected;
        private bool shouldEdit = true;
        #endregion

        #region Computed Properties
        /// <summary>
        /// Gets or sets the datasource that provides the data to display in the
        /// Collection View.
        /// </summary>
        /// <value>The datasource.</value>
        public CollectionViewDataSource Datasource { get; set; }

        /// <summary>
        /// Gets or sets the person currently selected in the collection view.
        /// </summary>
        /// <value>The person selected or <c>null</c> if no person is selected.</value>
        [Export("PersonSelected")]
        public PersonModel PersonSelected
        {
            get { return _personSelected; }
            set
            {
                WillChangeValue("PersonSelected");
                _personSelected = value;
                DidChangeValue("PersonSelected");
                RaiseSelectionChanged();
            }
        }
        #endregion

        #region Constructors
        /// <summary>
        /// Initializes a new instance of the <see cref="T:MacCollectionNew.ViewController"/> class.
        /// </summary>
        /// <param name="handle">Handle.</param>
        public ViewController(IntPtr handle) : base(handle)
        {
        }
        #endregion

        #region Override Methods
        /// <summary>
        /// Called after the view has finished loading from the Storyboard to allow it to
        /// be configured before displaying to the user.
        /// </summary>
        public override void ViewDidLoad()
        {
            base.ViewDidLoad();

            // Initialize Collection View
            ConfigureCollectionView();
            PopulateWithData();
        }
        #endregion

        #region Private Methods
        /// <summary>
        /// Configures the collection view.
        /// </summary>
        private void ConfigureCollectionView()
        {
            EmployeeCollection.RegisterClassForItem(typeof(EmployeeItemController), "EmployeeCell");

            // Create a flow layout
            var flowLayout = new NSCollectionViewFlowLayout()
            {
                ItemSize = new CGSize(150, 150),
                SectionInset = new NSEdgeInsets(10, 10, 10, 20),
                MinimumInteritemSpacing = 10,
                MinimumLineSpacing = 10
            };
            EmployeeCollection.WantsLayer = true;

            // Setup collection view
            EmployeeCollection.CollectionViewLayout = flowLayout;
            EmployeeCollection.Delegate = new CollectionViewDelegate(this);

        }

        /// <summary>
        /// Populates the Datasource with data and attaches it to the collection view.
        /// </summary>
        private void PopulateWithData()
        {
            // Make datasource
            Datasource = new CollectionViewDataSource(EmployeeCollection);

            // Build list of employees
            Datasource.Data.Add(new PersonModel("Craig Dunn", "Documentation Manager", true));
            Datasource.Data.Add(new PersonModel("Amy Burns", "Technical Writer"));
            Datasource.Data.Add(new PersonModel("Joel Martinez", "Web & Infrastructure"));
            Datasource.Data.Add(new PersonModel("Kevin Mullins", "Technical Writer"));
            Datasource.Data.Add(new PersonModel("Mark McLemore", "Technical Writer"));
            Datasource.Data.Add(new PersonModel("Tom Opgenorth", "Technical Writer"));
            Datasource.Data.Add(new PersonModel("Larry O'Brien", "API Docs Manager", true));
            Datasource.Data.Add(new PersonModel("Mike Norman", "API Documentor"));

            // Populate collection view
            EmployeeCollection.ReloadData();
        }
        #endregion

        #region Events
        /// <summary>
        /// Selection changed delegate.
        /// </summary>
        public delegate void SelectionChangedDelegate();

        /// <summary>
        /// Occurs when selection changed.
        /// </summary>
        public event SelectionChangedDelegate SelectionChanged;

        /// <summary>
        /// Raises the selection changed event.
        /// </summary>
        internal void RaiseSelectionChanged() {
            // Inform caller
            if (this.SelectionChanged != null) SelectionChanged();
        }
        #endregion
    }
}
详细查看此代码后,定义了一个 Datasource 属性,用于保存将为集合视图提供数据的 的 CollectionViewDataSource 实例。 PersonSelected属性定义为保存PersonModel表示集合视图中当前选定项的 。 当所选内容发生更改时, SelectionChanged 此属性也会引发 事件。
类 ConfigureCollectionView 用于使用以下行向集合视图注册充当单元格原型的视图控制器:
EmployeeCollection.RegisterClassForItem(typeof(EmployeeItemController), "EmployeeCell");
请注意,用于注册原型的 标识符 (EmployeeCell) 与上面定义的 方法中 GetItem 调用的 CollectionViewDataSource 标识符匹配:
var item = collectionView.MakeItem("EmployeeCell", indexPath) as EmployeeItemController;
...
此外,视图控制器的类型 必须与 定义原型的文件 .xib 的名称 完全匹配。 在本示例中, EmployeeItemController 和 EmployeeItemController.xib。
集合视图中项的实际布局由集合视图布局类控制,可以通过将新实例分配给 CollectionViewLayout 属性在运行时动态更改。 更改此属性可更新集合视图外观,但不对更改进行动画处理。
Apple 附带两种内置布局类型,这些布局类型与集合视图将处理大多数典型用途: NSCollectionViewFlowLayout 和 NSCollectionViewGridLayout。 如果开发人员需要自定义格式(如将项放在一个圆圈中),他们可以创建 的 NSCollectionViewLayout 自定义实例并重写所需的方法以实现所需的效果。
此示例使用默认流布局,以便创建 类的 NSCollectionViewFlowLayout 实例并对其进行配置,如下所示:
var flowLayout = new NSCollectionViewFlowLayout()
{
    ItemSize = new CGSize(150, 150),
    SectionInset = new NSEdgeInsets(10, 10, 10, 20),
    MinimumInteritemSpacing = 10,
    MinimumLineSpacing = 10
};
属性 ItemSize 定义集合中每个单元格的大小。 属性 SectionInset 定义集合边缘的嵌入,单元格将布局到该集合中。 MinimumInteritemSpacing 定义项之间的最小间距,并 MinimumLineSpacing 定义集合中行之间的最小间距。
布局分配给集合视图,并附加 的 CollectionViewDelegate 实例以处理项选择:
// Setup collection view
EmployeeCollection.CollectionViewLayout = flowLayout;
EmployeeCollection.Delegate = new CollectionViewDelegate(this);
方法 PopulateWithData 创建 的新实例 CollectionViewDataSource,用数据填充它,将其附加到集合视图,并调用 ReloadData 方法来显示项:
private void PopulateWithData()
{
    // Make datasource
    Datasource = new CollectionViewDataSource(EmployeeCollection);

    // Build list of employees
    Datasource.Data.Add(new PersonModel("Craig Dunn", "Documentation Manager", true));
    ...

    // Populate collection view
    EmployeeCollection.ReloadData();
}
方法 ViewDidLoad 被重写,并调用 ConfigureCollectionView 和 PopulateWithData 方法以向用户显示最终的集合视图:
public override void ViewDidLoad()
{
    base.ViewDidLoad();

    // Initialize Collection View
    ConfigureCollectionView();
    PopulateWithData();
}
总结
本文详细介绍了如何使用 Xamarin.Mac 应用程序中的集合视图。 首先,它考虑了如何使用Key-Value编码 (KVC) 和 Key-Value Observing (KVO) 向 公开 C# 类 Objective-C 。 接下来,它演示了如何在 Xcode 的 Interface Builder 中使用符合 KVO 的类以及将数据绑定到集合视图。 最后,它演示了如何在 C# 代码中与集合视图交互。