在 Katana 中啟用 Windows 驗證
本文說明如何在 Katana 中啟用 Windows 驗證。 它涵蓋兩種案例:使用 IIS 來裝載 Katana,以及使用 HttpListener 在自訂程式中自我裝載 Katana。 感謝 Barry Dorrans、David Matson 和 Chris Chris Chris 來檢閱本文。
Katana 是 Microsoft 的 OWIN實作,這是適用于 .NET 的 Open Web Interface。 您可以 在這裡閱讀 OWIN 和 Katana 簡介。 OWIN 架構有數層:
- 主機:管理 OWIN 管線執行所在的進程。
- 伺服器:開啟網路通訊端並接聽要求。
- 中介軟體:處理 HTTP 要求和回應。
Katana 目前提供兩部伺服器,這兩部伺服器都支援 Windows 整合式驗證:
- Microsoft.Owin.Host.SystemWeb。 使用 IIS 搭配 ASP.NET 管線。
- Microsoft.Owin.Host.HttpListener。 使用 System.Net.HttpListener。 此伺服器目前是自我裝載 Katana 時的預設選項。
注意
Katana 目前不提供 Windows 驗證的 OWIN 中介軟體,因為此功能已在伺服器中使用。
IIS 中的 Windows 驗證
使用 Microsoft.Owin.Host.SystemWeb,您只要在 IIS 中啟用 Windows 驗證即可。
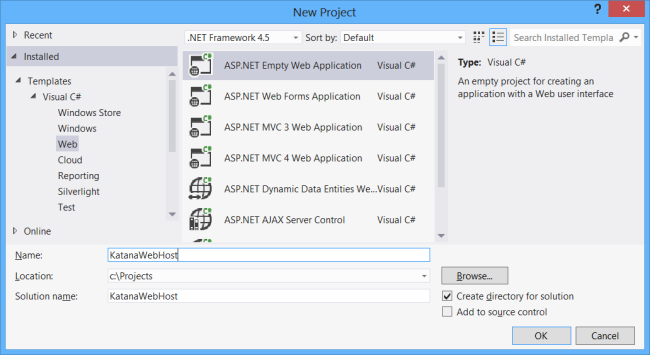
讓我們從使用「ASP.NET 空白 Web 應用程式」專案範本建立新的 ASP.NET 應用程式開始。
接下來,新增 NuGet 套件。 從 [ 工具] 功能表中,選取 [NuGet 套件管理員],然後選取 [ 套件管理員主控台]。 在 [Package Manager Console] 視窗中,輸入下列命令:
Install-Package Microsoft.Owin.Host.SystemWeb -pre
現在,使用下列程式碼新增名為 Startup 的類別:
using Owin;

namespace KatanaWebHost
{
    public class Startup
    {
        public void Configuration(IAppBuilder app)
        {
            app.Run(context =>
            {
                context.Response.ContentType = "text/plain";
                return context.Response.WriteAsync("Hello World!");
            });
        }
    }
}
您只需要為在 IIS 上執行的 OWIN 建立 「Hello world」 應用程式。 按 F5,進行應用程式偵錯。 您應該會在瀏覽器視窗中看到 「Hello World!」 。

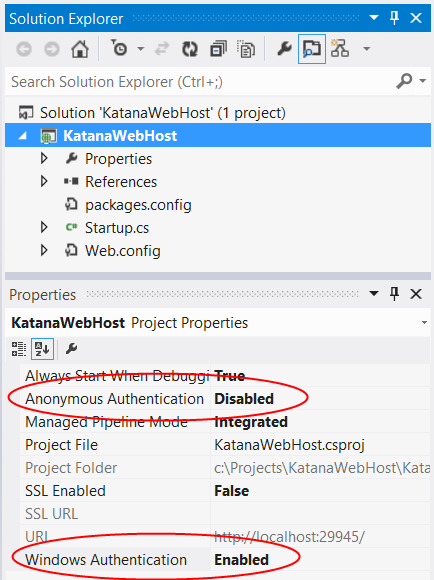
接下來,我們將在 IIS Express 中啟用 Windows 驗證。 從 [ 檢視] 功能表中,選取 [ 屬性]。 按一下 方案總管 中的專案名稱,即可檢視專案屬性。
在 [ 屬性 ] 視窗中,將 [匿名驗證 ] 設定為 [已停用 ],並將 [Windows 驗證 ] 設定為 [已啟用]。
當您從 Visual Studio 執行應用程式時,IIS Express將需要使用者的 Windows 認證。 您可以使用 Fiddler 或其他 HTTP 偵錯工具來查看這一點。 以下是 HTTP 回應範例:
HTTP/1.1 401 Unauthorized
Cache-Control: private
Content-Type: text/html; charset=utf-8
Server: Microsoft-IIS/8.0
WWW-Authenticate: Negotiate
WWW-Authenticate: NTLM
X-Powered-By: ASP.NET
Date: Sun, 28 Jul 2013 07:28:51 GMT
Content-Length: 6062
Proxy-Support: Session-Based-Authentication
此回應中的WWW-Authenticate標頭表示伺服器支援使用 Kerberos 或 NTLM 的 Negotiate 通訊協定。
稍後,當您將應用程式部署至伺服器時,請遵循 下列步驟 ,在該伺服器上啟用 IIS 中的 Windows 驗證。
HttpListener 中的 Windows 驗證
如果您使用 Microsoft.Owin.Host.HttpListener 來自我裝載 Katana,您可以直接在 HttpListener 實例上啟用 Windows 驗證。
首先,建立新的主控台應用程式。 接下來,新增 NuGet 套件。 從 [ 工具] 功能表中,選取 [NuGet 套件管理員],然後選取 [ 套件管理員主控台]。 在 [Package Manager Console] 視窗中,輸入下列命令:
Install-Package Microsoft.Owin.SelfHost -Pre
現在,使用下列程式碼新增名為 Startup 的類別:
using Owin;
using System.Net;

namespace KatanaSelfHost
{
    class Startup
    {
        public void Configuration(IAppBuilder app)
        {
            HttpListener listener =
                (HttpListener)app.Properties["System.Net.HttpListener"];
            listener.AuthenticationSchemes =
                AuthenticationSchemes.IntegratedWindowsAuthentication;

            app.Run(context =>
            {
                context.Response.ContentType = "text/plain";
                return context.Response.WriteAsync("Hello World!");
            });
        }
    }
}
這個類別會從之前實作相同的 「Hello world」 範例,但它也會將 Windows 驗證設定為驗證配置。
在 函式 Main 內,啟動 OWIN 管線:
using Microsoft.Owin.Hosting;
using System;

namespace KatanaSelfHost
{
    class Program
    {
        static void Main(string[] args)
        {
            using (WebApp.Start<Startup>("http://localhost:9000"))
            {
                Console.WriteLine("Press Enter to quit.");
                Console.ReadKey();
            }
        }
    }
}
您可以在 Fiddler 中傳送要求,以確認應用程式正在使用 Windows 驗證:
HTTP/1.1 401 Unauthorized
Content-Length: 0
Server: Microsoft-HTTPAPI/2.0
WWW-Authenticate: Negotiate
WWW-Authenticate: NTLM
Date: Sun, 28 Jul 2013 21:02:21 GMT
Proxy-Support: Session-Based-Authentication
[相關主題]
意見反應
即將登場:在 2024 年,我們將逐步淘汰 GitHub 問題作為內容的意見反應機制,並將它取代為新的意見反應系統。 如需詳細資訊,請參閱:https://aka.ms/ContentUserFeedback。
提交並檢視相關的意見反應