成員資格及系統管理
作者 :Erik Reitan
本教學課程系列將教導您使用 ASP.NET 4.5 和 Microsoft Visual Studio Express 2013 for Web 建置 ASP.NET Web Forms應用程式的基本概念。 具有C# 原始程式碼的Visual Studio 2013專案隨附于本教學課程系列。
本教學課程說明如何更新 Wingtip Toys 範例應用程式,以新增自訂角色並使用 ASP.NET 身分識別。 它也會示範如何實作具有自訂角色的使用者可從網站新增和移除產品的系統管理頁面。
ASP.NET 身分識別 是用來建置 ASP.NET Web 應用程式的成員資格系統,可在 ASP.NET 4.5 中使用。 ASP.NET 身分識別用於Visual Studio 2013 Web Form專案範本,以及ASP.NET MVC、ASP.NET Web API和ASP.NET 單頁應用程式的範本。 當您開始使用空的 Web 應用程式時,也可以使用 NuGet 特別安裝 ASP.NET 身分識別系統。 不過,在本教學課程系列中,您會使用Web Form projecttemplate,其中包含 ASP.NET 身分識別系統。 ASP.NET 身分識別可讓您輕鬆地整合使用者特定的設定檔資料與應用程式資料。 另外,ASP.NET 身分識別可讓您選擇應用程式中使用者設定檔的持續性模型。 您可以將資料儲存在SQL Server資料庫或其他資料存放區,包括NoSQL資料存放區,例如 Windows Azure 儲存體資料表。
本教學課程是以 Wingtip Toys 教學課程系列中標題為「使用 PayPal 結帳和付款」的上一個教學課程為基礎。
您將學到什麼:
- 如何使用程式碼將自訂角色和使用者新增至應用程式。
- 如何限制系統管理資料夾和頁面的存取權。
- 如何為屬於自訂角色的使用者提供導覽。
- 如何使用模型系結,以產品類別填入 DropDownList 控制項。
- 如何使用 FileUpload 控制項將檔案上傳至 Web 應用程式。
- 如何使用驗證控制項來實作輸入驗證。
- 如何從應用程式中新增和移除產品。
這些功能包含在教學課程中:
- ASP.NET Identity
- 組態和授權
- 模型繫結
- 不幹擾驗證
ASP.NET Web Forms提供成員資格功能。 藉由使用預設範本,您有內建的成員資格功能,可在應用程式執行時立即使用。 本教學課程說明如何使用 ASP.NET 身分識別來新增自訂角色,並將使用者指派給該角色。 您將瞭解如何限制系統管理資料夾的存取權。 您會將頁面新增至系統管理資料夾,以允許具有自訂角色的使用者新增和移除產品,以及在新增產品之後預覽產品。
新增自訂角色
使用 ASP.NET 身分識別,您可以新增自訂角色,並使用程式碼將使用者指派給該角色。
在方案總管中,以滑鼠右鍵按一下Logic資料夾,然後建立新的類別。
將新類別命名為 RoleActions.cs。
修改程式碼,使其如下所示:
using System; using System.Collections.Generic; using System.Linq; using System.Web; namespace WingtipToys.Logic { internal class RoleActions { } }在方案總管中,開啟Global.asax.cs檔案。
藉由新增醒目提示為黃色的程式碼來修改 Global.asax.cs 檔案,使其如下所示:
using System;
using System.Collections.Generic;
using System.Linq;
using System.Web;
using System.Web.Optimization;
using System.Web.Routing;
using System.Web.Security;
using System.Web.SessionState;
using System.Data.Entity;
using WingtipToys.Models;
using WingtipToys.Logic;

namespace WingtipToys
{
    public class Global : HttpApplication
    {
        void Application_Start(object sender, EventArgs e)
        {
          // Code that runs on application startup
          RouteConfig.RegisterRoutes(RouteTable.Routes);
          BundleConfig.RegisterBundles(BundleTable.Bundles);

          // Initialize the product database.
          Database.SetInitializer(new ProductDatabaseInitializer());

          // Create the custom role and user.
          RoleActions roleActions = new RoleActions();
          roleActions.AddUserAndRole();
        }
    }
}
請注意,
AddUserAndRole是以紅色加上底線標示的文字。 按兩下 AddUserAndRole 程式碼。
醒目提示方法開頭的字母 「A」 會加上底線。將滑鼠停留在字母 「A」 上,然後按一下可讓您為方法產生方法存根的
AddUserAndRoleUI。
按一下標題為的選項:
Generate method stub for "AddUserAndRole" in "WingtipToys.Logic.RoleActions"從Logic資料夾開啟RoleActions.cs檔案。
方法AddUserAndRole已新增至類別檔案。藉由移除
NotImplementedException並以黃色醒目提示的程式碼來修改RoleActions.cs檔案,使其如下所示:using System; using System.Collections.Generic; using System.Configuration; using System.Linq; using System.Web; using WingtipToys.Models; using Microsoft.AspNet.Identity; using Microsoft.AspNet.Identity.EntityFramework; namespace WingtipToys.Logic { internal class RoleActions { internal void AddUserAndRole() { // Access the application context and create result variables. Models.ApplicationDbContext context = new ApplicationDbContext(); IdentityResult IdRoleResult; IdentityResult IdUserResult; // Create a RoleStore object by using the ApplicationDbContext object. // The RoleStore is only allowed to contain IdentityRole objects. var roleStore = new RoleStore<IdentityRole>(context); // Create a RoleManager object that is only allowed to contain IdentityRole objects. // When creating the RoleManager object, you pass in (as a parameter) a new RoleStore object. var roleMgr = new RoleManager<IdentityRole>(roleStore); // Then, you create the "canEdit" role if it doesn't already exist. if (!roleMgr.RoleExists("canEdit")) { IdRoleResult = roleMgr.Create(new IdentityRole { Name = "canEdit" }); } // Create a UserManager object based on the UserStore object and the ApplicationDbContext // object. Note that you can create new objects and use them as parameters in // a single line of code, rather than using multiple lines of code, as you did // for the RoleManager object. var userMgr = new UserManager<ApplicationUser>(new UserStore<ApplicationUser>(context)); var appUser = new ApplicationUser { UserName = "canEditUser@wingtiptoys.com", Email = "canEditUser@wingtiptoys.com" }; IdUserResult = userMgr.Create(appUser, ConfigurationManager.AppSettings["AppUserPasswordKey"]); // If the new "canEdit" user was successfully created, // add the "canEdit" user to the "canEdit" role. if (!userMgr.IsInRole(userMgr.FindByEmail("canEditUser@wingtiptoys.com").Id, "canEdit")) { IdUserResult = userMgr.AddToRole(userMgr.FindByEmail("canEditUser@wingtiptoys.com").Id, "canEdit"); } } } }
上述程式碼會先建立成員資格資料庫的資料庫內容。 成員資格資料庫也會儲存為App_Data資料夾中的 .mdf檔案。 一旦第一位使用者登入此 Web 應用程式,您就能夠檢視此資料庫。
注意
如果您想要將成員資格資料連同產品資料一起儲存,您可以考慮使用與您用來在上述程式碼中儲存產品資料的相同 DbCoNtext 。
internal關鍵字是類型 (的存取修飾詞,例如類別) 和類型成員 (,例如方法或屬性) 。 內部類型或成員只能在包含在相同元件 (.dll 檔案) 的檔案記憶體取。 當您建置應用程式時,會建立元件檔案 (.dll) ,其中包含執行應用程式時所執行的程式碼。
物件 RoleStore 會根據資料庫內容建立提供角色管理。
注意
請注意,建立 物件時 RoleStore ,它會使用泛型 IdentityRole 類型。 這表示 RoleStore 只允許 包含 IdentityRole 物件。 此外,使用泛型時,記憶體中的資源會更妥善地處理。
接下來,系統會 RoleManager 根據 RoleStore 您剛才建立的物件來建立 物件。 RoleManager物件會公開角色相關 API,可用來自動儲存對 的 RoleStore 變更。 RoleManager只允許包含 IdentityRole 物件,因為程式碼會使用 <IdentityRole> 泛型型別。
您可以呼叫 RoleExists 方法來判斷成員資格資料庫中是否存在 「canEdit」 角色。 如果不是,您可以建立角色。
UserManager建立物件似乎比 RoleManager 控制項更複雜,但幾乎相同。 它只會以一行編碼,而不是數行。 在這裡,您傳遞的參數會具現化為括弧中包含的新物件。
接下來,您會建立新的 ApplicationUser 物件來建立 「canEditUser」 使用者。 然後,如果您成功建立使用者,請將使用者新增至新的角色。
注意
在本教學課程系列稍後的「ASP.NET 錯誤處理」教學課程期間,將會更新錯誤處理。
下次應用程式啟動時,名為 「canEditUser」 的使用者將會新增為應用程式名為 「canEdit」 的角色。 在本教學課程稍後,您將以 「canEditUser」 使用者身分登入,以顯示您將在本教學課程期間新增的其他功能。 如需 ASP.NET 身分識別的 API 詳細資料,請參閱 Microsoft.AspNet.Identity 命名空間。 如需初始化 ASP.NET 身分識別系統的其他詳細資料,請參閱 AspnetIdentitySample。
限制系統管理頁面的存取
Wingtip Toys 範例應用程式可讓匿名使用者和登入的使用者檢視和購買產品。 不過,具有自訂 「canEdit」 角色的登入使用者可以存取受限制的頁面,以便新增和移除產品。
新增系統管理資料夾和頁面
接下來,您將為屬於 Wingtip Toys 範例應用程式自訂角色的 「canEditUser」 使用者建立名為管理員的資料夾。
- 以滑鼠右鍵按一下方案總管 中Wingtip Toys) 的專案 (名稱,然後選取 [新增資料夾 >]。
- 將新資料夾命名為 管理員。
- 以滑鼠右鍵按一下管理員資料夾,然後選取 [新增- >新增專案]。
[ 加入新項目 ] 對話方塊隨即出現。 - 選取左側的[Visual C#- >Web範本] 群組。 從中間清單中,選取 [主版頁面的 Web 表單],將它命名為 AdminPage.aspx, 然後選取 [ 新增]。
- 選取 [Site.Master ] 檔案作為主版頁面,然後選擇 [ 確定]。
新增Web.config檔案
藉由將Web.config檔案新增至管理員資料夾,您可以限制存取資料夾中所包含的頁面。
以滑鼠右鍵按一下[管理員] 資料夾,然後選取 [新增- >新增專案]。
[ 加入新項目 ] 對話方塊隨即出現。從 Visual C# Web 範本清單中,從中間清單中選取[Web 組態檔],接受預設Web.config名稱,然後選取 [新增]。
使用下列內容來取代 Web.config 檔案中的現有 XML 內容:
<?xml version="1.0"?>
<configuration>
  <system.web>
    <authorization>
      <allow roles="canEdit"/>
      <deny users="*"/>
    </authorization>
  </system.web>
</configuration>
儲存 Web.config 檔案。 Web.config檔案指定只有屬於應用程式 「canEdit」 角色的使用者才能存取包含在管理員資料夾中的頁面。
包含自訂角色導覽
若要讓自訂 「canEdit」 角色的使用者流覽至應用程式的系統管理區段,您必須新增 Site.Master 頁面的連結。 只有屬於 「canEdit」 角色的使用者才能看到管理員連結並存取管理區段。
在 方案總管中,尋找並開啟Site.Master頁面。
若要為 「canEdit」 角色的使用者建立連結,請將以黃色醒目提示的標記新增至下列未排序的清單
<ul>元素,讓清單如下所示:<ul class="nav navbar-nav"> <li><a runat="server" id="adminLink" visible="false" href="~/Admin/AdminPage">Admin</a></li> <li><a runat="server" href="~/">Home</a></li> <li><a runat="server" href="~/About">About</a></li> <li><a runat="server" href="~/Contact">Contact</a></li> <li><a runat="server" href="~/ProductList">Products</a></li> <li><a runat="server" href="~/ShoppingCart" ID="cartCount"> </a></li> </ul>開啟 Site.Master.cs 檔案。 將以黃色醒目提示的程式碼新增至
Page_Load處理常式,讓管理員連結只對 「canEditUser」 使用者顯示。 處理常式Page_Load會顯示如下:protected void Page_Load(object sender, EventArgs e) { if (HttpContext.Current.User.IsInRole("canEdit")) { adminLink.Visible = true; } }
載入頁面時,程式碼會檢查登入的使用者是否具有 「canEdit」 的角色。 如果使用者屬於 「canEdit」 角色,則包含 AdminPage.aspx 頁面連結的 span 元素 (,因此會看見範圍內的連結) 。
啟用產品管理
到目前為止,您已建立 「canEdit」 角色,並新增 「canEditUser」 使用者、系統管理資料夾和系統管理頁面。 您已設定系統管理資料夾和頁面的存取權限,並已將 「canEdit」 角色使用者的導覽連結新增至應用程式。 接下來,您會將標記新增至 AdminPage.aspx 頁面,並將程式碼新增至 AdminPage.aspx.cs 程式碼後置檔案,讓具有 「canEdit」 角色的使用者新增和移除產品。
在方案總管中,從管理員資料夾開啟AdminPage.aspx檔案。
以下列專案取代現有的標記:
<%@ Page Title="" Language="C#" MasterPageFile="~/Site.Master" AutoEventWireup="true" CodeBehind="AdminPage.aspx.cs" Inherits="WingtipToys.Admin.AdminPage" %> <asp:Content ID="Content1" ContentPlaceHolderID="MainContent" runat="server"> <h1>Administration</h1> <hr /> <h3>Add Product:</h3> <table> <tr> <td><asp:Label ID="LabelAddCategory" runat="server">Category:</asp:Label></td> <td> <asp:DropDownList ID="DropDownAddCategory" runat="server" ItemType="WingtipToys.Models.Category" SelectMethod="GetCategories" DataTextField="CategoryName" DataValueField="CategoryID" > </asp:DropDownList> </td> </tr> <tr> <td><asp:Label ID="LabelAddName" runat="server">Name:</asp:Label></td> <td> <asp:TextBox ID="AddProductName" runat="server"></asp:TextBox> <asp:RequiredFieldValidator ID="RequiredFieldValidator1" runat="server" Text="* Product name required." ControlToValidate="AddProductName" SetFocusOnError="true" Display="Dynamic"></asp:RequiredFieldValidator> </td> </tr> <tr> <td><asp:Label ID="LabelAddDescription" runat="server">Description:</asp:Label></td> <td> <asp:TextBox ID="AddProductDescription" runat="server"></asp:TextBox> <asp:RequiredFieldValidator ID="RequiredFieldValidator2" runat="server" Text="* Description required." ControlToValidate="AddProductDescription" SetFocusOnError="true" Display="Dynamic"></asp:RequiredFieldValidator> </td> </tr> <tr> <td><asp:Label ID="LabelAddPrice" runat="server">Price:</asp:Label></td> <td> <asp:TextBox ID="AddProductPrice" runat="server"></asp:TextBox> <asp:RequiredFieldValidator ID="RequiredFieldValidator3" runat="server" Text="* Price required." ControlToValidate="AddProductPrice" SetFocusOnError="true" Display="Dynamic"></asp:RequiredFieldValidator> <asp:RegularExpressionValidator ID="RegularExpressionValidator1" runat="server" Text="* Must be a valid price without $." ControlToValidate="AddProductPrice" SetFocusOnError="True" Display="Dynamic" ValidationExpression="^[0-9]*(\.)?[0-9]?[0-9]?$"></asp:RegularExpressionValidator> </td> </tr> <tr> <td><asp:Label ID="LabelAddImageFile" runat="server">Image File:</asp:Label></td> <td> <asp:FileUpload ID="ProductImage" runat="server" /> <asp:RequiredFieldValidator ID="RequiredFieldValidator4" runat="server" Text="* Image path required." ControlToValidate="ProductImage" SetFocusOnError="true" Display="Dynamic"></asp:RequiredFieldValidator> </td> </tr> </table> <p></p> <p></p> <asp:Button ID="AddProductButton" runat="server" Text="Add Product" OnClick="AddProductButton_Click" CausesValidation="true"/> <asp:Label ID="LabelAddStatus" runat="server" Text=""></asp:Label> <p></p> <h3>Remove Product:</h3> <table> <tr> <td><asp:Label ID="LabelRemoveProduct" runat="server">Product:</asp:Label></td> <td><asp:DropDownList ID="DropDownRemoveProduct" runat="server" ItemType="WingtipToys.Models.Product" SelectMethod="GetProducts" AppendDataBoundItems="true" DataTextField="ProductName" DataValueField="ProductID" > </asp:DropDownList> </td> </tr> </table> <p></p> <asp:Button ID="RemoveProductButton" runat="server" Text="Remove Product" OnClick="RemoveProductButton_Click" CausesValidation="false"/> <asp:Label ID="LabelRemoveStatus" runat="server" Text=""></asp:Label> </asp:Content>接下來,以滑鼠右鍵按一下AdminPage.aspx,然後按一下 [檢視程式碼],以開啟AdminPage.aspx.aspx程式碼後置檔案。
以下列程式碼取代 AdminPage.aspx.cs 程式碼後置檔案中的現有程式碼:
using System;
using System.Collections.Generic;
using System.Linq;
using System.Web;
using System.Web.UI;
using System.Web.UI.WebControls;
using WingtipToys.Models;
using WingtipToys.Logic;

namespace WingtipToys.Admin
{
  public partial class AdminPage : System.Web.UI.Page
  {
    protected void Page_Load(object sender, EventArgs e)
    {
      string productAction = Request.QueryString["ProductAction"];
      if (productAction == "add")
      {
        LabelAddStatus.Text = "Product added!";
      }

      if (productAction == "remove")
      {
        LabelRemoveStatus.Text = "Product removed!";
      }
    }

    protected void AddProductButton_Click(object sender, EventArgs e)
    {
      Boolean fileOK = false;
      String path = Server.MapPath("~/Catalog/Images/");
      if (ProductImage.HasFile)
      {
        String fileExtension = System.IO.Path.GetExtension(ProductImage.FileName).ToLower();
        String[] allowedExtensions = { ".gif", ".png", ".jpeg", ".jpg" };
        for (int i = 0; i < allowedExtensions.Length; i++)
        {
          if (fileExtension == allowedExtensions[i])
          {
            fileOK = true;
          }
        }
      }

      if (fileOK)
      {
        try
        {
          // Save to Images folder.
          ProductImage.PostedFile.SaveAs(path + ProductImage.FileName);
          // Save to Images/Thumbs folder.
          ProductImage.PostedFile.SaveAs(path + "Thumbs/" + ProductImage.FileName);
        }
        catch (Exception ex)
        {
          LabelAddStatus.Text = ex.Message;
        }

        // Add product data to DB.
        AddProducts products = new AddProducts();
        bool addSuccess = products.AddProduct(AddProductName.Text, AddProductDescription.Text,
            AddProductPrice.Text, DropDownAddCategory.SelectedValue, ProductImage.FileName);
        if (addSuccess)
        {
          // Reload the page.
          string pageUrl = Request.Url.AbsoluteUri.Substring(0, Request.Url.AbsoluteUri.Count() - Request.Url.Query.Count());
          Response.Redirect(pageUrl + "?ProductAction=add");
        }
        else
        {
          LabelAddStatus.Text = "Unable to add new product to database.";
        }
      }
      else
      {
        LabelAddStatus.Text = "Unable to accept file type.";
      }
    }

    public IQueryable GetCategories()
    {
      var _db = new WingtipToys.Models.ProductContext();
      IQueryable query = _db.Categories;
      return query;
    }

    public IQueryable GetProducts()
    {
      var _db = new WingtipToys.Models.ProductContext();
      IQueryable query = _db.Products;
      return query;
    }

    protected void RemoveProductButton_Click(object sender, EventArgs e)
    {
      using (var _db = new WingtipToys.Models.ProductContext())
      {
        int productId = Convert.ToInt16(DropDownRemoveProduct.SelectedValue);
        var myItem = (from c in _db.Products where c.ProductID == productId select c).FirstOrDefault();
        if (myItem != null)
        {
          _db.Products.Remove(myItem);
          _db.SaveChanges();

          // Reload the page.
          string pageUrl = Request.Url.AbsoluteUri.Substring(0, Request.Url.AbsoluteUri.Count() - Request.Url.Query.Count());
          Response.Redirect(pageUrl + "?ProductAction=remove");
        }
        else
        {
          LabelRemoveStatus.Text = "Unable to locate product.";
        }
      }
    }
  }
}
在您針對 AdminPage.aspx.cs 程式碼後置檔案輸入的程式碼中,稱為 AddProducts 的類別會執行將產品新增至資料庫的實際工作。 此類別尚不存在,因此您現在會加以建立。
在方案總管中,以滑鼠右鍵按一下[邏輯] 資料夾,然後選取 [新增- >新增專案]。
[ 加入新項目 ] 對話方塊隨即出現。選取左側的Visual C# - >Code範本群組。 然後,從中間清單中選取 [類別],並將其命名為 AddProducts.cs。
新的類別檔案隨即顯示。將現有的程式碼取代為下列程式碼:
using System;
using System.Collections.Generic;
using System.Linq;
using System.Web;
using WingtipToys.Models;

namespace WingtipToys.Logic
{
    public class AddProducts
    {
        public bool AddProduct(string ProductName, string ProductDesc, string ProductPrice, string ProductCategory, string ProductImagePath)
        {
            var myProduct = new Product();
            myProduct.ProductName = ProductName;
            myProduct.Description = ProductDesc;
            myProduct.UnitPrice = Convert.ToDouble(ProductPrice);
            myProduct.ImagePath = ProductImagePath;
            myProduct.CategoryID = Convert.ToInt32(ProductCategory);

            using (ProductContext _db = new ProductContext())
            {
                // Add product to DB.
                _db.Products.Add(myProduct);
                _db.SaveChanges();
            }
            // Success.
            return true;
        }
    }
}
AdminPage.aspx頁面可讓屬於 「canEdit」 角色的使用者新增和移除產品。 新增產品時,會驗證產品的詳細資料,然後輸入資料庫中。 新的產品可立即提供給 Web 應用程式的所有使用者使用。
不具干擾性驗證
使用者在 AdminPage.aspx 頁面上提供的產品詳細資料會使用驗證控制項 (RequiredFieldValidator 和 RegularExpressionValidator) 進行驗證。 這些控制項會自動使用不具干擾性的驗證。 非干擾式驗證可讓驗證控制項使用 JavaScript 進行用戶端驗證邏輯,這表示頁面不需要進行伺服器驗證。 根據預設,根據下列組態設定, Web.config檔案中 會包含非干擾驗證:
<add key="ValidationSettings:UnobtrusiveValidationMode" value="WebForms" />
[規則運算式]
AdminPage.aspx頁面上的產品價格是使用RegularExpressionValidator控制項進行驗證。 此控制項會驗證關聯的輸入控制項值是否 (「AddProductPrice」 TextBox) 符合正則運算式指定的模式。 正則運算式是模式比對標記法,可讓您快速尋找和比對特定字元模式。 RegularExpressionValidator控制項包含名為 ValidationExpression 的屬性,其中包含用來驗證價格輸入的正則運算式,如下所示:
<asp:RegularExpressionValidator
    ID="RegularExpressionValidator1" runat="server"
    Text="* Must be a valid price without $." ControlToValidate="AddProductPrice"
    SetFocusOnError="True" Display="Dynamic"
    ValidationExpression="^[0-9]*(\.)?[0-9]?[0-9]?$">
</asp:RegularExpressionValidator>
FileUpload 控制項
除了輸入和驗證控制項之外,您還可以將 FileUpload 控制項新增至 AdminPage.aspx 頁面。 此控制項提供上傳檔案的功能。 在此情況下,您只允許上傳影像檔。 在程式碼後置檔案中, (AdminPage.aspx.cs) 按一下 時 AddProductButton ,程式碼會檢查 HasFileFileUpload 控制項的 屬性。 如果控制項有檔案,而且允許根據副檔名) (檔案類型,則會將影像儲存至應用程式的 Images 資料夾和Images/Thumbs 資料夾。
模型繫結
稍早在本教學課程系列中,您已使用模型系結來填入 ListView 控制項、 FormsView 控制項、 GridView 控制項和 DetailView 控制項。 在本教學課程中,您會使用模型系結,以產品類別清單填入 DropDownList 控制項。
您新增至AdminPage.aspx檔案的標記包含名為 DropDownAddCategory 的DropDownList控制項:
<asp:DropDownList ID="DropDownAddCategory" runat="server"
        ItemType="WingtipToys.Models.Category"
        SelectMethod="GetCategories" DataTextField="CategoryName"
        DataValueField="CategoryID" >
    </asp:DropDownList>
您可以藉由設定 ItemType 屬性和 SelectMethod 屬性,使用模型系結來填入此DropDownList。 屬性 ItemType 會指定您在填入控制項時使用 WingtipToys.Models.Category 型別。 您在本教學課程系列開頭定義此類型,方法是建立 Category 類別 (如下所示) 。 類別 Category 位於Category.cs檔案內的Models資料夾中。
public class Category
{
    [ScaffoldColumn(false)]
    public int CategoryID { get; set; }

    [Required, StringLength(100), Display(Name = "Name")]
    public string CategoryName { get; set; }

    [Display(Name = "Product Description")]
    public string Description { get; set; }

    public virtual ICollection<Product> Products { get; set; }
}
SelectMethodDropDownList控制項的 屬性指定您使用 GetCategories 方法 (如下所示) 包含在AdminPage.aspx.cs) 的程式碼後置檔案 (。
public IQueryable GetCategories()
{
  var _db = new WingtipToys.Models.ProductContext();
  IQueryable query = _db.Categories;
  return query;
}
這個方法會 IQueryable 指定介面是用來根據 Category 型別評估查詢。 傳回的值是用來填入頁面標記中的 DropDownList , (AdminPage.aspx) 。
設定 DataTextField 屬性可指定清單中每個專案所顯示的文字。 屬性 DataTextField 會使用 CategoryName 上述) 所示類別 Category 的 (,在 DropDownList 控制項中顯示每個類別。 在 DropDownList 控制項中選取專案時所傳遞的實際值是以 屬性為基礎 DataValueField 。 屬性 DataValueField 會設定為 CategoryID ,如上述類別中所 Category 定義 (所示) 。
應用程式的運作方式
當屬於 「canEdit」 角色的使用者第一次流覽至頁面時, DropDownAddCategoryDropDownList控制項會填入如下所述。 DropDownRemoveProductDropDownList控制項也會使用相同的方法來填入產品。 屬於 「canEdit」 角色的使用者會選取類別類型,並將產品詳細資料新增 (Name、 Description、 Price和 Image File) 。 當屬於 「canEdit」 角色的使用者按一下 [ 新增產品 ] 按鈕時, AddProductButton_Click 就會觸發事件處理常式。 AddProductButton_Click位於程式碼後置檔案中的事件處理常式 (AdminPage.aspx.cs) 會檢查映射檔,以確定它符合允許的檔案類型 (.gif、 .png、.jpeg或.jpg) 。 然後,影像檔案會儲存到 Wingtip Toys 範例應用程式的資料夾中。 接下來,新的產品會新增至資料庫。 若要完成新增產品,會建立 類別的新實例 AddProducts 並命名產品。 類別 AddProducts 有名為 AddProduct 的方法,而 products 物件會呼叫此方法,以將產品新增至資料庫。
// Add product data to DB.
AddProducts products = new AddProducts();
bool addSuccess = products.AddProduct(AddProductName.Text, AddProductDescription.Text,
    AddProductPrice.Text, DropDownAddCategory.SelectedValue, ProductImage.FileName);
如果程式碼成功將新產品新增至資料庫,頁面就會重載查詢字串值 ProductAction=add 。
Response.Redirect(pageUrl + "?ProductAction=add");
當頁面重載時,查詢字串會包含在 URL 中。 藉由重載頁面,屬於 「canEdit」 角色的使用者可以立即在AdminPage.aspx頁面上的DropDownList控制項中看到更新。 此外,透過包含 URL 的查詢字串,頁面可以向使用者顯示屬於 「canEdit」 角色的成功訊息。
當 AdminPage.aspx 頁面重載時, Page_Load 會呼叫 事件。
protected void Page_Load(object sender, EventArgs e)
{
    string productAction = Request.QueryString["ProductAction"];
    if (productAction == "add")
    {
        LabelAddStatus.Text = "Product added!";
    }

    if (productAction == "remove")
    {
        LabelRemoveStatus.Text = "Product removed!";
    }
}
Page_Load事件處理常式會檢查查詢字串值,並判斷是否要顯示成功訊息。
執行應用程式
您現在可以執行應用程式,以查看如何在購物車中新增、刪除和更新專案。 購物車總計將反映購物車中所有專案的總成本。
在 方案總管中,按F5來執行 Wingtip Toys 範例應用程式。
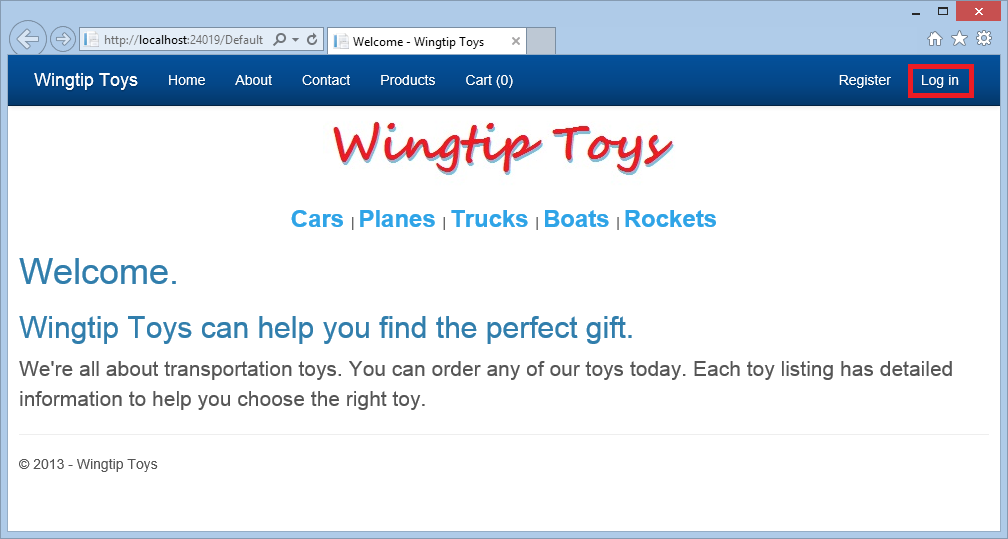
瀏覽器隨即開啟並顯示 Default.aspx 頁面。按一下頁面頂端的 [ 登入] 連結。
[Login.aspx] 頁面隨即顯示。
輸入使用者名稱和密碼。
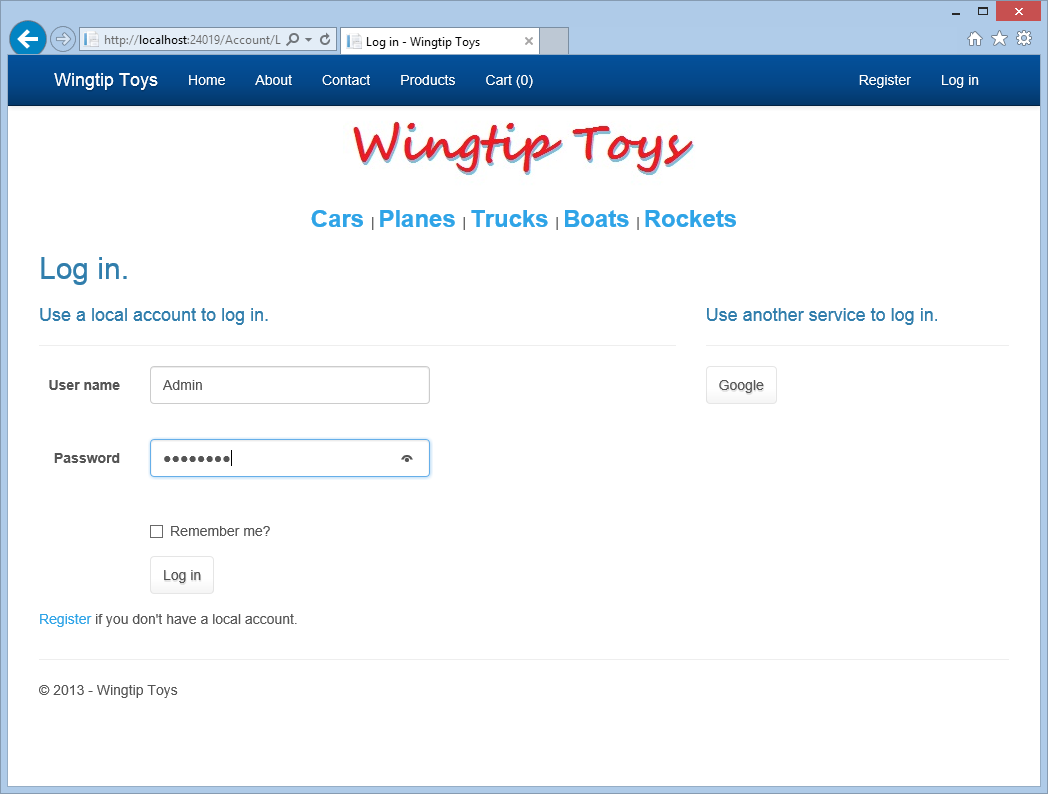
按一下頁面底部附近的 [ 登入 ] 按鈕。
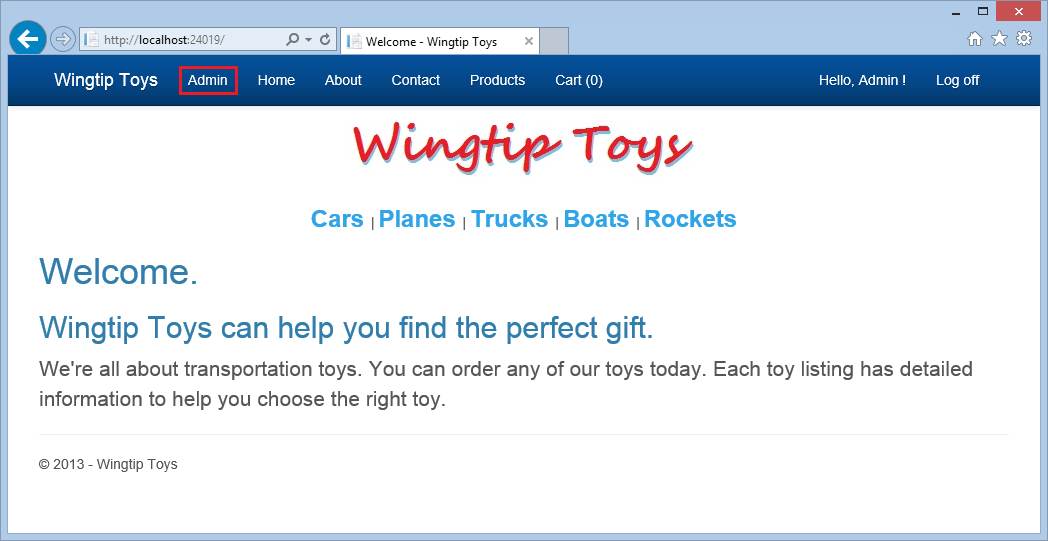
在下一頁頂端,選取管理員連結以流覽至AdminPage.aspx頁面。
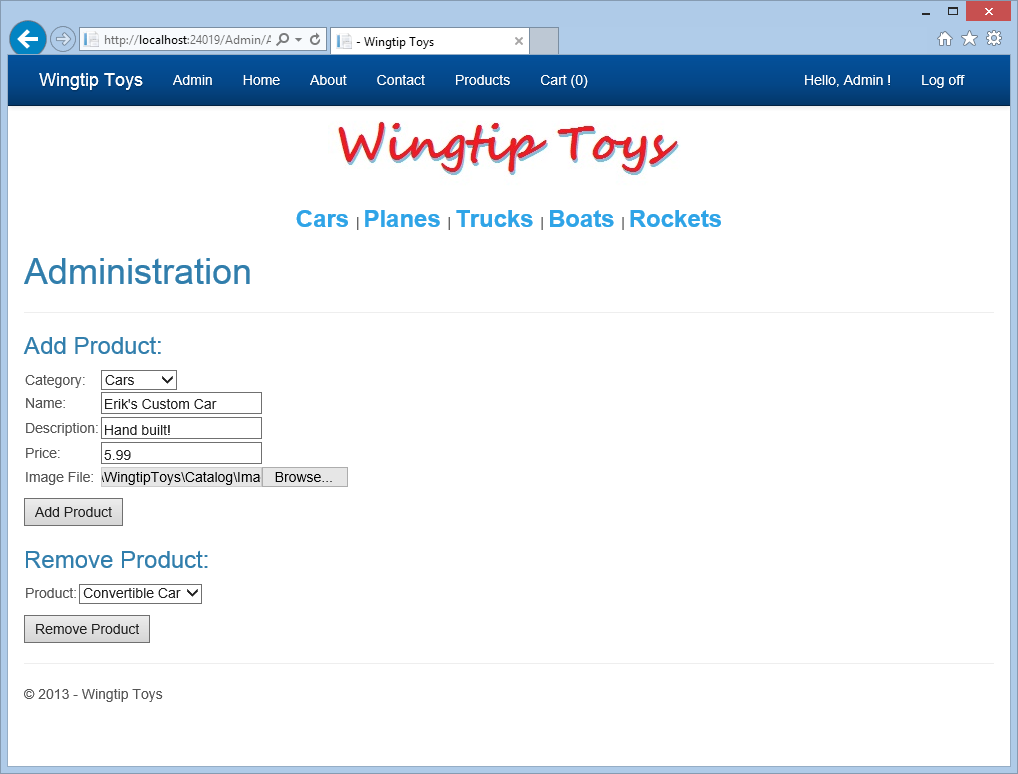
若要測試輸入驗證,請按一下 [ 新增產品 ] 按鈕,而不需新增任何產品詳細資料。
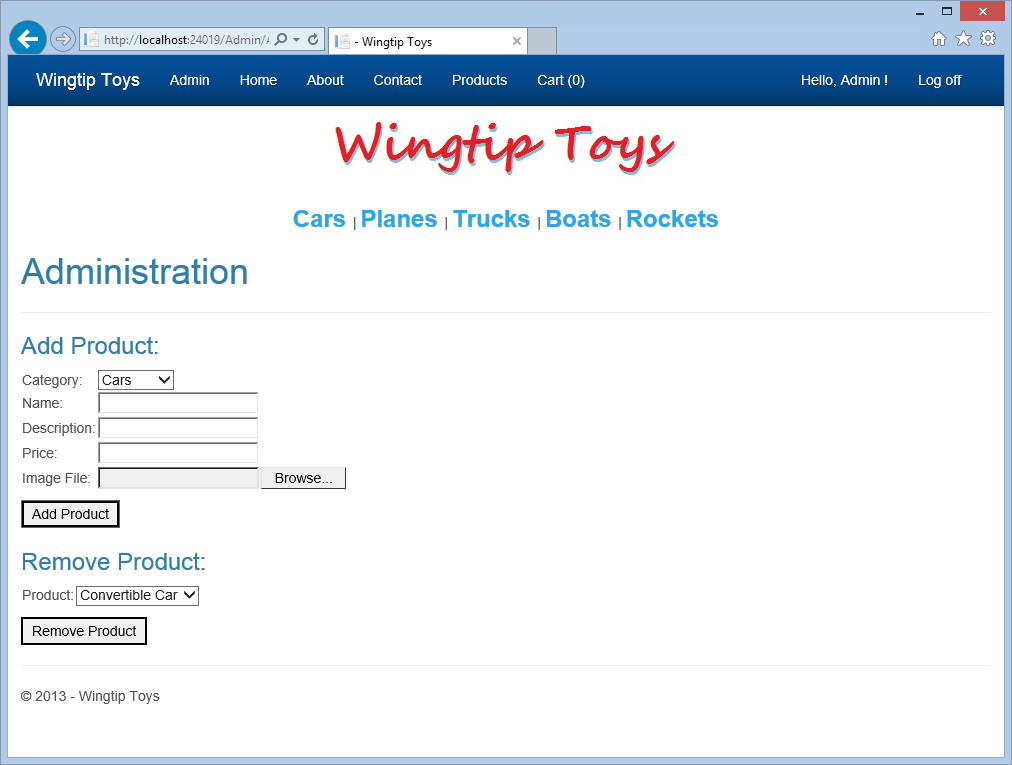
請注意,會顯示必要的欄位訊息。
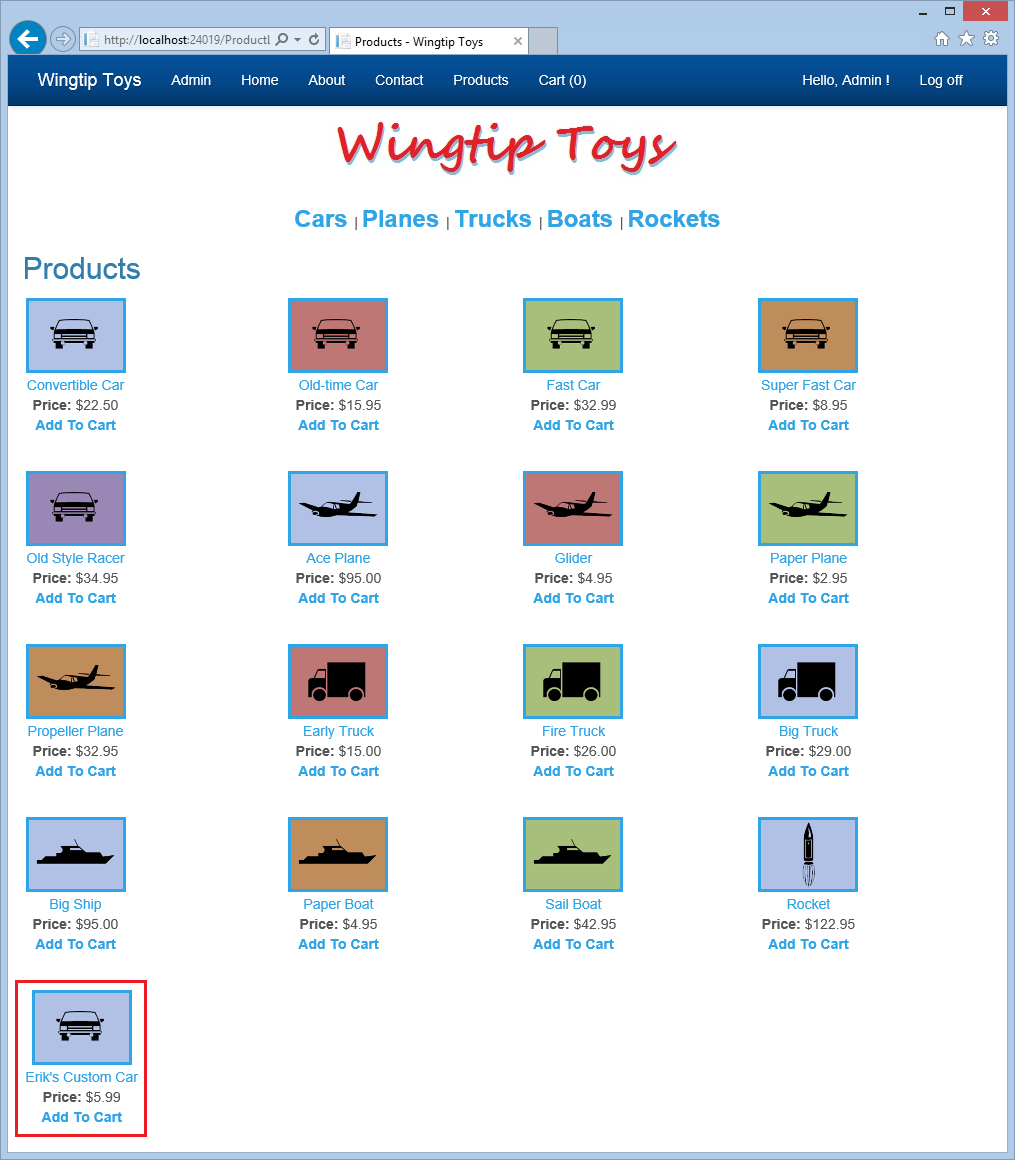
新增新產品的詳細資料,然後按一下 [ 新增產品 ] 按鈕。
從頂端導覽功能表中選取 [產品 ],以檢視您新增的新產品。
按一下管理員連結以返回系統管理頁面。
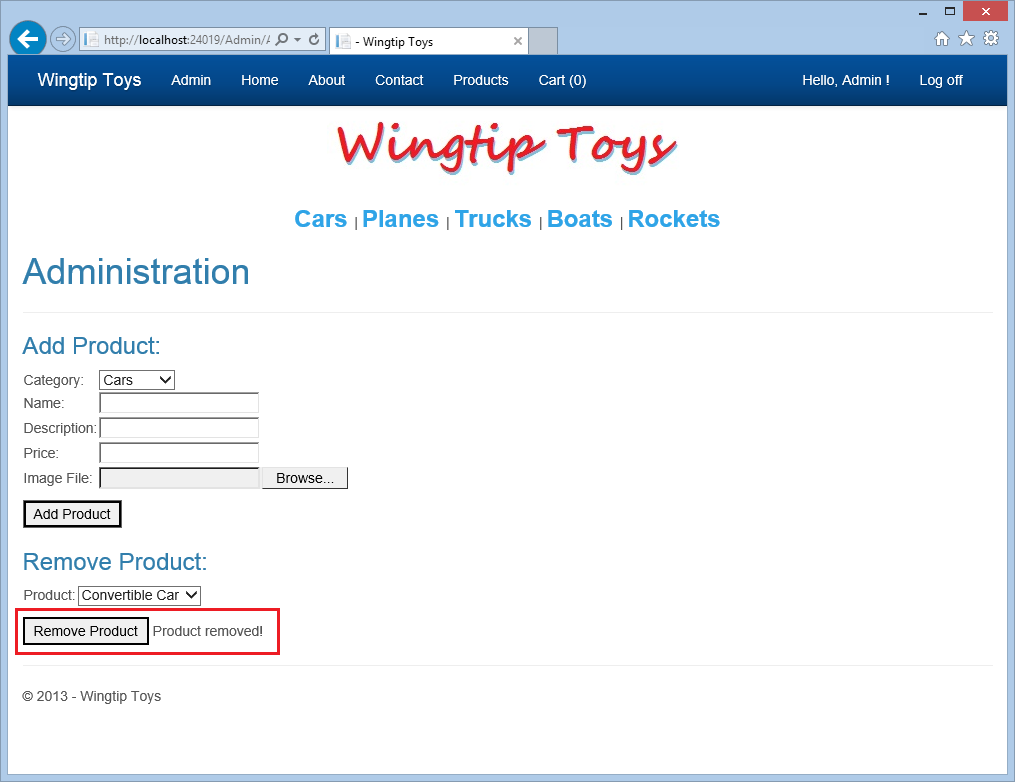
在頁面的 [移除產品 ] 區段中,選取您在 DropDownListBox中新增的新產品。
按一下 [ 移除產品 ] 按鈕,即可從應用程式中移除新產品。
從頂端導覽功能表中選取 [ 產品 ],以確認產品已移除。
按一下 [登出 ] 以存在系統管理模式。
請注意,頂端流覽窗格不再顯示管理員功能表項目。
總結
在本教學課程中,您已新增自訂角色和屬於自訂角色的使用者、限制系統管理資料夾和頁面的存取權,並為屬於自訂角色的使用者提供導覽。 您使用模型系結來填入 DropDownList 控制項的資料。 您已實作 FileUpload 控制項和驗證控制項。 此外,您已瞭解如何從資料庫新增和移除產品。 在下一個教學課程中,您將瞭解如何實作 ASP.NET 路由。
其他資源
Web.config - authorization 元素
ASP.NET 身分識別
將具有成員資格、OAuth 和SQL Database的安全 ASP.NET Web Forms應用程式部署至 Azure 網站
Microsoft Azure - 免費試用
意見反應
即將登場:在 2024 年,我們將逐步淘汰 GitHub 問題作為內容的意見反應機制,並將它取代為新的意見反應系統。 如需詳細資訊,請參閱:https://aka.ms/ContentUserFeedback。
提交並檢視相關的意見反應