使用 Azure Marketplace 映射建立 Azure Stack HCI VM 映射
適用於:Azure Stack HCI 版本 23H2
本文說明如何使用來自 Azure Marketplace 的來源映像,為 Azure Stack HCI 建立虛擬機 (VM) 映射。 您可以使用 Azure 入口網站 或 Azure CLI 建立 VM 映射,然後使用這些 VM 映射在 Azure Stack HCI 上建立 Arc VM。
必要條件
開始之前,請確定已完成下列必要條件。
請務必檢閱並 完成必要條件。
您可以存取已部署的 Azure Stack HCI 系統、具有 Arc 資源網橋和自定義位置。
- 如果使用用戶端連線到 Azure Stack HCI 叢集,請參閱 透過 Azure CLI 用戶端連線到 Azure Stack HCI。
從 Azure Marketplace 新增 VM 映像
您可以從 Azure Marketplace 映射開始建立 VM 映射,然後使用此映射在 Azure Stack HCI 叢集上部署 VM。
請遵循下列步驟,使用 Azure CLI 建立 VM 映射。
登入並設定訂用帳戶
線上到 Azure Stack HCI 系統上的伺服器。
登入。 輸入:
az login --use-device-code設定您的訂用帳戶。
az account set --subscription <Subscription ID>
設定一些參數
為您的訂用帳戶、資源群組、位置、映像的OS類型設定參數。 將中的
< >參數取代為適當的值。$subscription = "<Subscription ID>" $resource_group = "<Resource group>" $customLocationName = "<Custom location name>" $customLocationID /subscriptions/<Subscription ID>/resourcegroups/$resource_group/providers/microsoft.extendedlocation/customlocations/$customLocationName $location = "<Location for your Azure Stack HCI cluster>" $osType = "<OS of source image>"下表會說明這些參數:
參數 Description subscription與您的 Azure Stack HCI 叢集相關聯的訂用帳戶。 resource-group您與此映像相關聯的 Azure Stack HCI 叢集資源群組。 locationAzure Stack HCI 叢集的位置。 例如,這可能是 eastus。os-type與來源映像相關聯的操作系統。 這可以是 Windows 或 Linux。 以下是範例輸出:
PS C:\Users\azcli> $subscription = "<Subscription ID>"
PS C:\Users\azcli> $resource_group = "myhci-rg"
PS C:\Users\azcli> $customLocationName = "myhci-cl"
PS C:\Users\azcli> $location = "eastus"
PS C:\Users\azcli> $ostype = "Windows"
從 Marketplace 映射建立 VM 映像
選取要部署 VM 映像的自訂位置。 自定義位置應對應至 Azure Stack HCI 叢集的自定義位置。 取得 Azure Stack HCI 叢集的自定義位置識別碼。 執行以下命令:
$customLocationID=(az customlocation show --resource-group $resource_group --name "<custom location name for Azure Stack HCI cluster>" --query id -o tsv)從指定的市集映像開始建立 VM 映像。 請務必指定 Marketplace 映像的供應專案、發行者、SKU 和版本。 使用下表來尋找可用的市集映像及其屬性值:
名稱 Publisher 供應項目 SKU 版本號碼 Windows 11 企業版 多會話 + Microsoft 365 Apps 版本 21H2- Gen2 microsoftwindowsdesktop office-365 win10-21h2-avd-m365-g2 19044.3570.231010 Windows 10 企業版 多會話版本 21H2 + Microsoft 365 Apps- Gen2 microsoftwindowsdesktop office-365 win11-21h2-avd-m365 22000.2538.231010 Windows 10 企業版 多會話版本 21H2- Gen2 microsoftwindowsdesktop windows-10 win10-21h2-avd-g2 19044.3570.231001 Windows 11 企業版 多會話版本 21H2- Gen2 microsoftwindowsdesktop windows-11 win11-21h2-avd 22000.2538.231001 Windows 11 企業版 多會話版本 22H2 - Gen2 microsoftwindowsdesktop windows-11 win11-22h2-avd 22621.2428.231001 Windows 11 版本 22H2 Enterprise 多重會話 + Microsoft 365 Apps (Preview) - Gen2 microsoftwindowsdesktop windows11preview win11-22h2-avd-m365 22621.382.220810 Windows Server 2022 Datacenter:Azure Edition - Gen2 microsoftwindowsserver windowsserver 2022-datacenter-azure-edition 20348.2031.231006 Windows Server 2022 Datacenter:Azure Edition Core - Gen2 microsoftwindowsserver windowsserver 2022-datacenter-azure-edition-core 20348.2031.231006 Windows Server 2022 Datacenter:Azure Edition Hotpatch - Gen2 microsoftwindowsserver windowsserver 2022-datacenter-azure-edition-hotpatch 20348.2031.231006 az stack-hci-vm image create --subscription $subscription --resource-group $resource_group --custom-location $customLocationID --location $location --name "<VM image name>" --os-type $ostype --offer "windowsserver" --publisher "<Publisher name>" --sku "<SKU>" --version "<Version number>" --storage-path-id $storagepathidVM 映射的部署作業隨即啟動。
在此範例中,記憶體路徑是使用
--storage-path-id旗標指定,並確保工作負載數據 (包括 VM、VM 映射、非 OS 數據磁碟) 放在指定的記憶體路徑中。如果未指定旗標,工作負載數據會自動放在高可用性記憶體路徑中。
映射部署需要幾分鐘的時間才能完成。 下載映像所花費的時間取決於 Marketplace 映像的大小和可供下載的網路頻寬。
以下是範例輸出:
PS C:\Users\azcli> $customLocationID=(az customlocation show --resource-group $resource_group --name "myhci-cl" --query id -o tsv)
PS C:\Users\azcli> $customLocationID
/subscriptions/<Subscription ID>/resourcegroups/myhci-rg/providers/microsoft.extendedlocation/customlocations/myhci-cl
PS C:\Users\azcli> az stack-hci-vm image create --subscription $subscription --resource-group $resource_group --custom-location $customLocationID --location $location --name "myhci-marketplaceimage" --os-type $ostype --offer "windowsserver" --publisher "microsoftwindowsserver" --sku "2022-datacenter-azure-edition-core" --version "20348.2031.231006" --storage-path-id $storagepathid
{
  "extendedLocation": {
    "name": "/subscriptions/<Subscription ID>/resourceGroups/myhci-rg/providers/Microsoft.ExtendedLocation/customLocations/myhci-cl",
    "type": "CustomLocation"
  },
  "id": "/subscriptions/<Subscription ID>/resourceGroups/myhci-rg/providers/Microsoft.AzureStackHCI/marketplacegalleryimages/myhci-marketplaceimage",
  "location": "eastus",
  "name": "myhci-marketplaceimage",
  "properties": {
    "identifier": {
      "offer": "windowsserver",
      "publisher": "microsoftwindowsserver",
      "sku": "2022-datacenter-azure-edition-core"
    },
    "imagePath": null,
    "osType": "Windows",
    "provisioningState": "Succeeded",
    "status": {
      "downloadStatus": {
        "downloadSizeInMB": 6750
      },
      "progressPercentage": 98,
      "provisioningStatus": {
        "operationId": "13be90e0-a780-45bf-a84a-ae91b6e5e468*A380D53083FF6B0A3A157ED7DFD00D33F6B3D40D5559D11AEAED6AD68F7F1A4A",
        "status": "Succeeded"
      }
    },
    "storagepathId": "/subscriptions/<Subscription ID>/resourceGroups/myhci-rg/providers/Microsoft.AzureStackHCI/storagecontainers/myhci-storagepath",
    "version": {
      "name": "20348.2031.231006",
      "properties": {
        "storageProfile": {
          "osDiskImage": {
            "sizeInMB": 130050
          }
        }
      }
    }
  },
  "resourceGroup": "myhci-rg",
  "systemData": {
    "createdAt": "2023-10-27T21:43:15.920502+00:00",
    "createdBy": "guspinto@contoso.com",
    "createdByType": "User",
    "lastModifiedAt": "2023-10-27T22:06:15.092321+00:00",
    "lastModifiedBy": "319f651f-7ddb-4fc6-9857-7aef9250bd05",
    "lastModifiedByType": "Application"
  },
  "tags": null,
  "type": "microsoft.azurestackhci/marketplacegalleryimages"
}

PS C:\Users\azcli>
列出 VM 映像
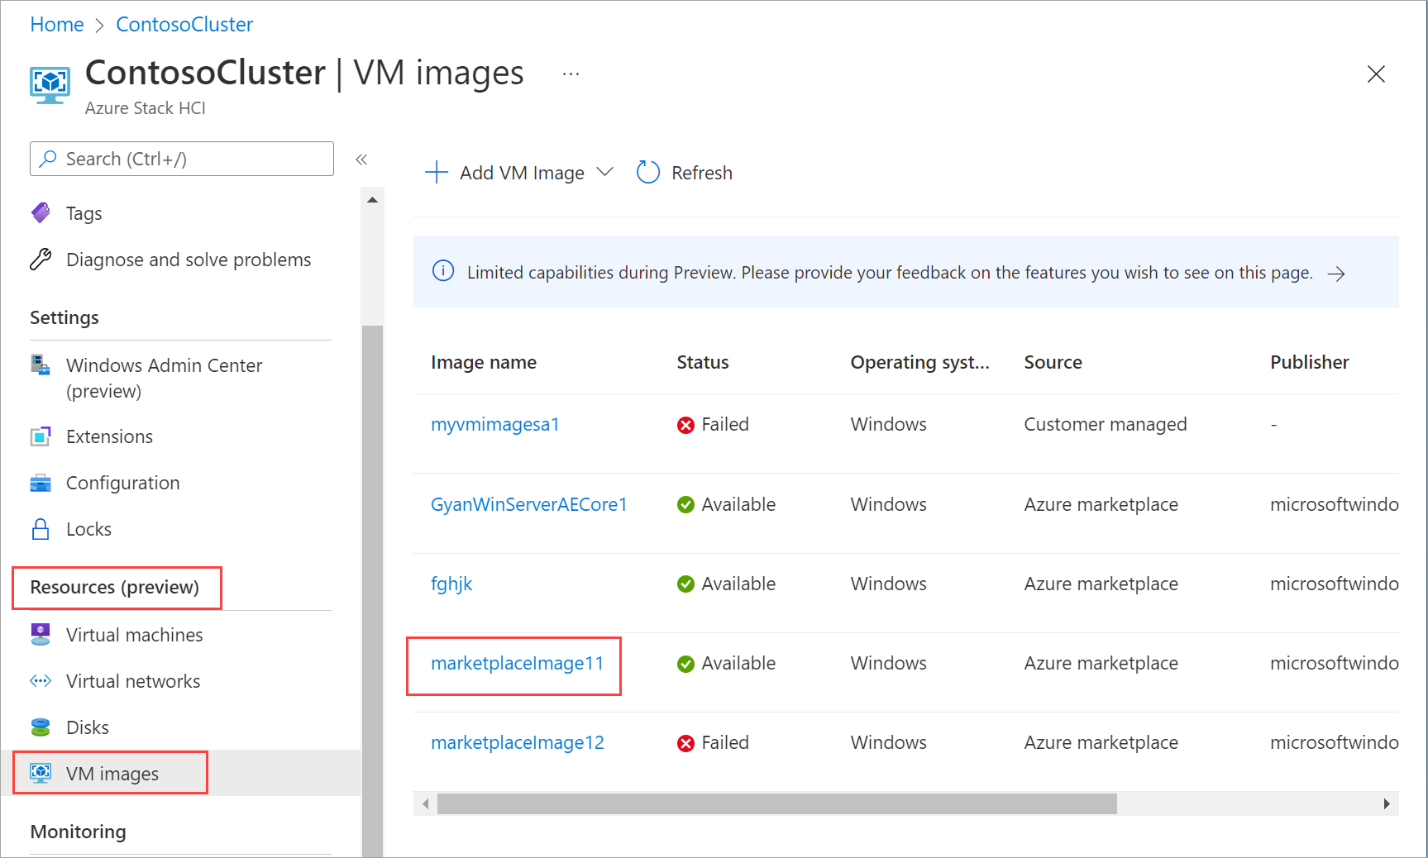
您必須檢視 VM 映射清單,以選擇要管理的映像。
請遵循下列步驟,使用 Azure CLI 列出 VM 映射。
以系統管理員身分執行 PowerShell。
設定部分參數。
$subscription = "<Subscription ID associated with your cluster>"
$resource_group = "<Resource group name for your cluster>"
列出與叢集相關聯的所有 VM 映像。 執行以下命令:
az stack-hci-vm image list --subscription $subscription --resource-group $resource_group根據所使用的命令,會列出與 Azure Stack HCI 叢集相關聯的對應映像集。
- 如果您只指定訂用帳戶,命令會列出訂用帳戶中的所有映像。
- 如果您同時指定訂用帳戶和資源群組,命令會列出資源群組中的所有映像。
這些映像包括:
- 來自市集映像的 VM 映像。
- 位於 Azure 記憶體帳戶中的自訂映像,或位於叢集或連線至叢集的用戶端上的本機共用中。
以下是範例輸出。
PS C:\Users\azcli> az stack-hci-vm image list --subscription "<Subscription ID>" --resource-group "myhci-rg"
Command group 'stack-hci-vm' is experimental and under development. Reference and support levels: https://aka.ms/CLI_refstatus
[
  {
    "extendedLocation": {
      "name": "/subscriptions/<Subscription ID>/resourcegroups/myhci-rg/providers/microsoft.extendedlocation/customlocations/myhci-cl",
      "type": "CustomLocation"
    },
    "id": "/subscriptions/<Subscription ID>/resourceGroups/myhci-rg/providers/microsoft.azurestackhci/marketplacegalleryimages/w
inServer2022Az-01",
    "location": "eastus",
    "name": "winServer2022Az-01",
    "properties": {
      "hyperVGeneration": "V2",
      "identifier": {
        "offer": "windowsserver",
        "publisher": "microsoftwindowsserver",
        "sku": "2022-datacenter-azure-edition-core"
      },
      "imagePath": null,
      "osType": "Windows",
      "provisioningState": "Succeeded",
      "status": {
        "downloadStatus": {
          "downloadSizeInMB": 6710
        },
        "progressPercentage": 100,
        "provisioningStatus": {
          "operationId": "19742d69-4a00-4086-8f17-4dc1f7ee6681*E1E9889F0D1840B93150BD74D428EAE483CB67B0904F9A198C161AD471F670ED",
          "status": "Succeeded"
        }
      },
      "storagepathId": null,
      "version": {
        "name": "20348.2031.231006",
        "properties": {
          "storageProfile": {
            "osDiskImage": {
              "sizeInMB": 130050
            }
          }
        }
      }
    },
    "resourceGroup": "myhci-rg",
    "systemData": {
      "createdAt": "2023-10-30T21:44:53.020512+00:00",
      "createdBy": "guspinto@contoso.com",
      "createdByType": "User",
      "lastModifiedAt": "2023-10-30T22:08:25.495995+00:00",
      "lastModifiedBy": "319f651f-7ddb-4fc6-9857-7aef9250bd05",
      "lastModifiedByType": "Application"
    },
    "tags": {},
    "type": "microsoft.azurestackhci/marketplacegalleryimages"
  }
]
PS C:\Users\azcli>
檢視 VM 映像屬性
您可能想要先檢視 VM 映像的屬性,再使用映像來建立 VM。 請遵循下列步驟來檢視影像屬性:
請遵循下列步驟,使用 Azure CLI 來檢視映像的屬性:
以系統管理員身分執行 PowerShell。
設定下列參數。
$subscription = "<Subscription ID>"
$resource_group = "<Cluster resource group>"
$mktplaceImage = "<Marketplace image name>"
您可以透過兩種不同的方式檢視影像屬性:指定識別碼或指定名稱和資源群組。 指定 Marketplace 映射識別符時,請執行下列步驟:
設定下列參數。
$mktplaceImageID = "/subscriptions/<Subscription ID>/resourceGroups/myhci-rg/providers/Microsoft.AzureStackHCI/galleryimages/myhci-marketplaceimage"執行下列命令以檢視屬性。
az stack-hci-vm image show --ids $mktplaceImageID以下是此指令的範例輸出:
PS C:\Users\azcli> az stack-hci-vm image show --ids $mktplaceImageID
Command group 'stack-hci-vm' is experimental and under development. Reference and support levels: https://aka.ms/CLI_refstatus
{
  "extendedLocation": {
    "name": "/subscriptions/<Subscription ID>/resourcegroups/myhci-rg/providers/microsoft.extendedlocation/customlocations/myhci-cl",
    "type": "CustomLocation"
  },
  "id": "/subscriptions/<Subscription ID>/resourceGroups/myhci-rg/providers/Microsoft.AzureStackHCI/galleryimages/myhci-marketplaceimage",
  "location": "eastus",
  "name": "myhci-marketplaceimage",
  "properties": {
    "containerName": null,
    "hyperVGeneration": null,
    "identifier": null,
    "imagePath": null,
    "osType": "Windows",
    "provisioningState": "Succeeded",
    "status": null,
    "version": null
  },
  "resourceGroup": "myhci-rg",
  "systemData": {
    "createdAt": "2022-08-05T20:52:38.579764+00:00",
    "createdBy": "guspinto@microsoft.com",
    "createdByType": "User",
    "lastModifiedAt": "2022-08-05T20:52:38.579764+00:00",
    "lastModifiedBy": "guspinto@microsoft.com",
    "lastModifiedByType": "User"
  },
  "tags": null,
  "type": "microsoft.azurestackhci/galleryimages"
}
PS C:\Users\azcli>
更新 VM 映像
當 Azure Marketplace 有新的更新映射可用時,Azure Stack HCI 叢集上的 VM 映射會變成過時且應該更新。 更新作業不是映像的就地更新。 相反地,您可以看到更新映像可用的 VM 映像,然後選取要更新的映像。 更新之後,建立 VM 映射作業會使用新的更新映像。
若要更新 VM 映射,請使用 Azure 入口網站 中的下列步驟。
若要查看是否有可用的更新,請從清單檢視中選取 VM 映射。
在 [ 概觀 ] 刀鋒視窗中,您會看到一個橫幅,其中顯示可供下載的新 VM 映射,如果有的話。 若要更新至新的影像,請選取 箭號圖示。
檢閱影像詳細數據,然後選取 [ 檢閱並建立]。 根據預設,新映像會使用與上一個映像相同的資源群組和實例詳細數據。
新映像的名稱會根據上一個映像的名稱遞增。 例如,名為 winServer2022-01 的現有映射會有名為 winServer2022-02 的更新映像。
若要完成作業,請選取 [ 建立]。
建立新的 VM 映射之後,請使用新的映像建立 VM,並確認 VM 正常運作。 驗證之後,您可以刪除舊的 VM 映像。
注意
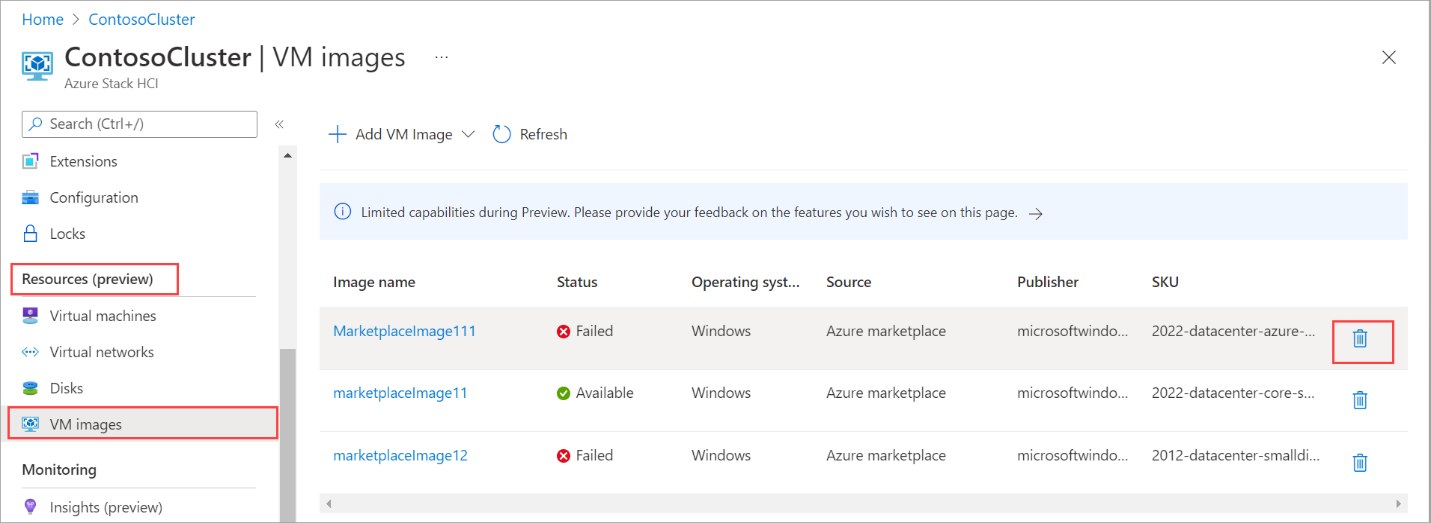
在此版本中,如果與該映像相關聯的 VM 正在執行,您就無法刪除 VM 映像。 停止 VM,然後刪除 VM 映像。
刪除 VM 映像
如果下載因某些原因而失敗,或不再需要映像,您可能會想要刪除 VM 映射。 請遵循下列步驟來刪除 VM 映像。
以系統管理員身分執行 PowerShell。
設定下列參數。
$subscription = "<Subscription ID>"
$resource_group = "<Cluster resource group>"
$galleryImageName = "<Gallery image name>"
拿掉現有的 VM 映像。 執行以下命令:
az stack-hci-vm image delete --subscription $subscription --resource-group $resource_group --name $mktplaceImage --yes
您可以刪除映像兩種方式:
- 指定名稱和資源群組。
- 指定標識碼。
刪除映射之後,您可以檢查映像是否已移除。 以下是藉由指定名稱和資源群組來刪除影像時的範例輸出。
PS C:\Users\azcli> $subscription = "<Subscription ID>"
PS C:\Users\azcli> $resource_group = "myhci-rg"
PS C:\Users\azcli> $mktplaceImage = "myhci-marketplaceimage"
PS C:\Users\azcli> az stack-hci-vm image delete --name $mktplaceImage --resource-group $resource_group
Command group 'stack-hci-vm' is experimental and under development. Reference and support levels: https://aka.ms/CLI_refstatus
Are you sure you want to perform this operation? (y/n): y
PS C:\Users\azcli> az stack-hci-vm image show --name $mktplaceImage --resource-group $resource_group
Command group 'stack-hci-vm' is experimental and under development. Reference and support levels: https://aka.ms/CLI_refstatus
ResourceNotFound: The Resource 'Microsoft.AzureStackHCI/marketplacegalleryimages/myhci-marketplaceimage' under resource group 'myhci-rg' was not found. For more details please go to https://aka.ms/ARMResourceNotFoundFix
PS C:\Users\azcli>
下一步
意見反應
即將登場:在 2024 年,我們將逐步淘汰 GitHub 問題作為內容的意見反應機制,並將它取代為新的意見反應系統。 如需詳細資訊,請參閱:https://aka.ms/ContentUserFeedback。
提交並檢視相關的意見反應
![Azure Stack HCI 叢集資源中 [概觀] 頁面的螢幕快照,其中顯示已連線的 Azure Arc。](../../includes/media/hci-vm-image-prerequisites-marketplace/azure-arc-connected.png)
![顯示 [從 Azure Marketplace 新增 VM 映射] 選項的螢幕快照。](media/virtual-machine-image-azure-marketplace/add-image-from-azure-marketplace.png)
![[建立影像] 頁面的螢幕快照,其中醒目提示 [檢閱 + 建立] 按鈕。](media/virtual-machine-image-azure-marketplace/create-an-image.png)
![[建立影像] 頁面的螢幕快照,其中醒目提示 [建立] 按鈕。](media/virtual-machine-image-azure-marketplace/create-an-image-create.png)


![此螢幕快照顯示新 VM 映像的 [檢閱和建立] 對話框。](media/virtual-machine-image-azure-marketplace/review-and-create-image.png)
![此螢幕快照顯示新 VM 映像的 [建立映像] 對話框。](media/virtual-machine-image-azure-marketplace/create-image.png)

