開始使用適用於 .NET 的 Azure CDN 連結庫
您可以使用適用於 .NET 的 Azure CDN 連結庫,自動建立和管理 CDN 配置檔和端點。 本教學課程將逐步解說如何建立簡單的 .NET 控制台應用程式,以示範數個可用的作業。 本教學課程並非旨在詳細說明適用於 .NET 的 Azure CDN 連結庫的所有層面。
您需要 Visual Studio 2015 才能完成本教學課程。 Visual Studio Community 2015 免費可供下載。
提示
本 教學課程 中已完成的專案可在 MSDN 上下載。
必要條件
撰寫 CDN 管理程式碼之前,您必須進行一些準備,讓程式代碼能夠與 Azure Resource Manager 互動。 若要進行這項準備,您需要:
- 建立資源群組以包含在本教學課程中建立的CDN配置檔
- 設定 Microsoft Entra 識別碼以提供應用程式的驗證
- 將許可權套用至資源群組,讓只有來自 Microsoft Entra 租使用者的授權使用者才能與 CDN 配置檔互動
建立資源群組
登入 Azure 入口網站。
按一下 [建立資源]。
搜尋 [資源群組],然後在 [資源群組 ] 窗格中,單擊 [ 建立]。

為您的資源組 名 CdnConsoleTutorial。 選取您的訂用帳戶,然後選擇您附近的位置。 如果您想要的話,您可以按兩下 [ 釘選到儀錶板 ] 複選框,將資源群組釘選到入口網站中的儀錶板。 釘選可讓您更輕鬆地稍後找到。 選取項目之後,請按兩下 [ 建立]。
![[資源群組] 對話框的螢幕快照。](../includes/media/cdn-app-dev-prep/cdn-new-rg-2-include.png)
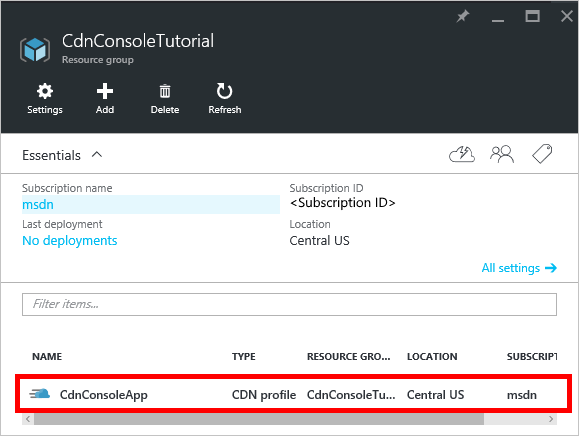
建立資源群組之後,如果您未將它釘選到儀錶板,您可以按兩下 [瀏覽],然後按兩下 [資源群組] 來找到它。 若要開啟它,請按兩下資源群組。 記下您的 訂用帳戶標識碼。 我們稍後需要它。
建立 Microsoft Entra 應用程式並套用許可權
使用 Microsoft Entra ID 進行應用程式驗證的方法有兩種:個別使用者或服務主體。 服務主體類似於 Windows 中的服務帳戶。 而不是授與特定用戶許可權來與 CDN 配置文件互動,而是將許可權授與服務主體。 服務主體通常用於自動化的非互動式進程。 雖然本教學課程正在撰寫互動式控制台應用程式,但我們仍將焦點放在服務主體方法上。
建立服務主體包含數個步驟,包括建立 Microsoft Entra 應用程式。 若要建立它,我們將 遵循本教學課程。
重要
請務必遵循連結教學課程中的所有步驟。 請務必如所述完成。 請務必記下您的租使用者標識碼、租使用者功能變數名稱(通常是 .onmicrosoft.com 網域,除非您已指定自定義網域)、用戶端標識符和客戶端驗證密鑰,因為我們稍後需要此資訊。 請小心保護用戶端 識別碼 和 客戶端驗證密鑰,因為任何人都可以使用這些認證來執行作業作為服務主體。
當您進入名為 [設定多租使用者應用程式] 的步驟時,請選取 [ 否]。
當您進入將應用程式指派給角色的步驟時,請使用稍早建立的資源群組 CdnConsoleTutorial,但不是讀取者角色,而是指派 CDN 配置文件參與者角色。 在您指派應用程式 資源群組上的CDN設定檔參與者 角色之後,請返回本教學課程。
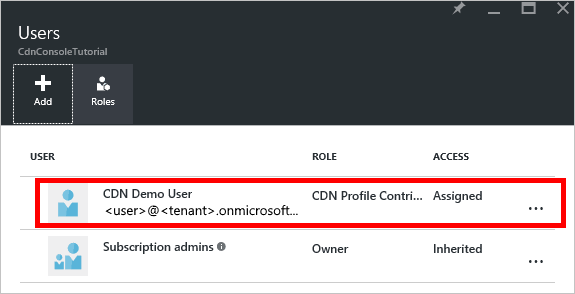
建立服務主體並指派 CDN 配置檔參與者 角色之後, 資源群組的 [使用者 ] 刀鋒視窗看起來應該類似下圖。
![[使用者] 刀鋒視窗](../includes/media/cdn-app-dev-prep/cdn-service-principal-include.png)
互動式用戶驗證
如果您寧願擁有互動式個別用戶驗證,而不是服務主體,程式與服務主體類似。 事實上,您必須遵循相同的程式,但進行一些次要變更。
重要
只有在您選擇使用個別用戶驗證,而不是服務主體時,才遵循這些後續步驟。
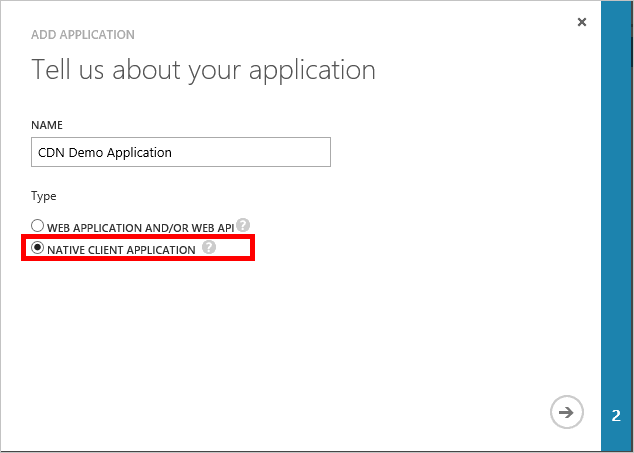
建立您的應用程式時,而不是 Web 應用程式,請選擇 [原生應用程式]。
在下一個頁面上,系統會提示您輸入 重新導向 URI。 URI 不會經過驗證,但請記住您輸入的內容。 您稍後需要它。
不需要建立 客戶端驗證金鑰。
我們將指派個別使用者或群組,而不是將服務主體指派給 CDN配置檔參與者 角色。 在此範例中,您可以看到我已將CDN示範使用者指派給CDN設定檔參與者角色。
建立專案並新增 NuGet 套件
既然我們已為 CDN 配置檔建立資源群組,並提供 Microsoft Entra 應用程式許可權來管理該群組內的 CDN 配置檔和端點,我們可以開始建立應用程式。
重要
Microsoft.IdentityModel.Clients.ActiveDirectory NuGet 套件和 Azure AD 驗證程式庫 (ADAL) 已被取代。 自 2020 年 6 月 30 日起,未新增任何新功能。 我們強烈建議您升級。 如需詳細資訊,請參閱 移轉指南。
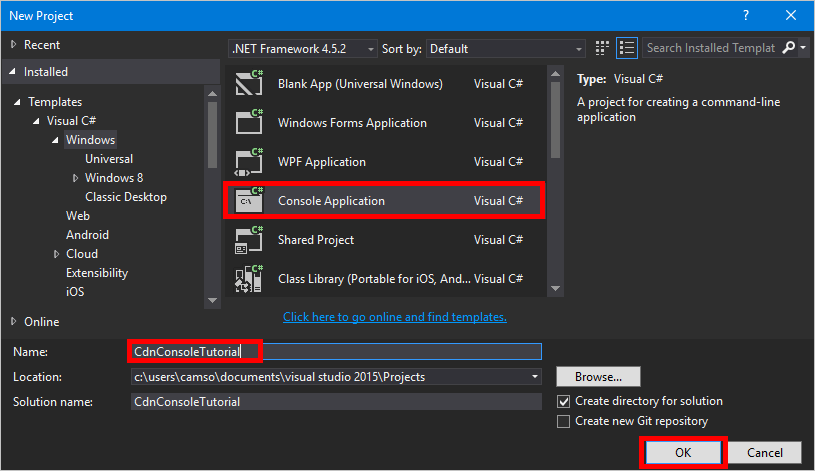
從 Visual Studio 2015 內,選取 [檔案]、[新增]、[專案...] 以開啟新的專案對話方塊。 展開 [Visual C#],然後選取 左側窗格中的 [Windows ]。 在中央窗格中選取 [控制台應用程式 ]。 為您的專案命名,然後選取 [ 確定]。
我們的專案將使用 NuGet 套件中包含的一些 Azure 連結庫。 讓我們將這些連結庫新增至專案。
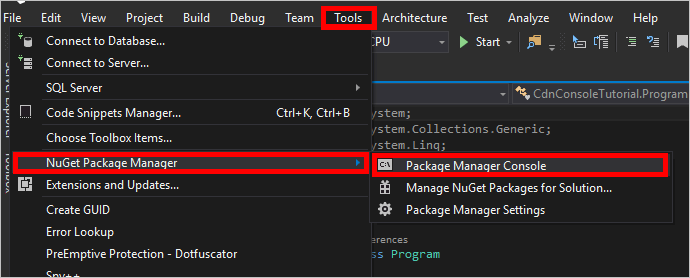
選取 [工具] 功能表[Nuget 封裝管理員],然後 封裝管理員 控制台。
在 封裝管理員 控制台中,執行下列命令來安裝 Active Directory 驗證連結庫 (ADAL):
Install-Package Microsoft.Identity.Client執行下列命令以安裝 Azure CDN 管理連結 庫:
Install-Package Microsoft.Azure.Management.Cdn
指示詞、常數、主要方法和協助程式方法
讓我們取得撰寫程式的基本結構。
回到 [Program.cs] 索引標籤,以下列命令取代
using頂端的 指示詞:using System; using System.Collections.Generic; using Microsoft.Azure.Management.Cdn; using Microsoft.Azure.Management.Cdn.Models; using Microsoft.Azure.Management.Resources; using Microsoft.Azure.Management.Resources.Models; using Microsoft.Identity.Client; using Microsoft.Rest;我們需要定義方法使用的一些常數。 在類別
Program中,但在方法之前Main,新增下列程式代碼區塊。 請務必視需要以您自己的值取代佔位符,包括角括弧>。<//Tenant app constants private const string clientID = "<YOUR CLIENT ID>"; private const string clientSecret = "<YOUR CLIENT AUTHENTICATION KEY>"; //Only for service principals private const string authority = "https://login.microsoftonline.com/<YOUR TENANT ID>/<YOUR TENANT DOMAIN NAME>"; //Application constants private const string subscriptionId = "<YOUR SUBSCRIPTION ID>"; private const string profileName = "CdnConsoleApp"; private const string endpointName = "<A UNIQUE NAME FOR YOUR CDN ENDPOINT>"; private const string resourceGroupName = "CdnConsoleTutorial"; private const string resourceLocation = "<YOUR PREFERRED AZURE LOCATION, SUCH AS Central US>";此外,在類別層級,定義這兩個變數。 我們稍後會使用這些變數來判斷我們的配置檔和端點是否已經存在。
static bool profileAlreadyExists = false; static bool endpointAlreadyExists = false;Main取代 方法,如下所示:static void Main(string[] args) { //Get a token AuthenticationResult authResult = GetAccessToken(); // Create CDN client CdnManagementClient cdn = new CdnManagementClient(new TokenCredentials(authResult.AccessToken)) { SubscriptionId = subscriptionId }; ListProfilesAndEndpoints(cdn); // Create CDN Profile CreateCdnProfile(cdn); // Create CDN Endpoint CreateCdnEndpoint(cdn); Console.WriteLine(); // Purge CDN Endpoint PromptPurgeCdnEndpoint(cdn); // Delete CDN Endpoint PromptDeleteCdnEndpoint(cdn); // Delete CDN Profile PromptDeleteCdnProfile(cdn); Console.WriteLine("Press Enter to end program."); Console.ReadLine(); }我們有些其他方法會提示用戶出現「是/否」的問題。 新增下列方法,使其更容易:
private static bool PromptUser(string Question)
{
    Console.Write(Question + " (Y/N): ");
    var response = Console.ReadKey();
    Console.WriteLine();
    if (response.Key == ConsoleKey.Y)
    {
        return true;
    }
    else if (response.Key == ConsoleKey.N)
    {
        return false;
    }
    else
    {
        // They pressed something other than Y or N.  Let's ask them again.
        return PromptUser(Question);
    }
}
現在已撰寫程式的基本結構,我們應該建立 方法所 Main 呼叫的方法。
驗證
我們必須先驗證服務主體並取得驗證令牌,才能使用 Azure CDN 管理連結庫。 此方法會使用 Active Directory 驗證連結庫來擷取令牌。
private static AuthenticationResult GetAccessToken()
{
    AuthenticationContext authContext = new AuthenticationContext(authority);
    ClientCredential credential = new ClientCredential(clientID, clientSecret);
    AuthenticationResult authResult =
        authContext.AcquireTokenAsync("https://management.core.windows.net/", credential).Result;

    return authResult;
}
如果您使用個別用戶驗證,則 GetAccessToken 方法看起來稍有不同。
重要
只有在您選擇具有個別用戶驗證,而不是服務主體時,才使用此程式碼範例。
private static AuthenticationResult GetAccessToken()
{
    AuthenticationContext authContext = new AuthenticationContext(authority);
    AuthenticationResult authResult = authContext.AcquireTokenAsync("https://management.core.windows.net/",
        clientID, new Uri("http://<redirect URI>"), new PlatformParameters(PromptBehavior.RefreshSession)).Result;

    return authResult;
}
請務必將 取代 <redirect URI> 為您在 Microsoft Entra ID 中註冊應用程式時輸入的重新導向 URI。
列出 CDN 設定檔和端點
現在我們已經準備好執行 CDN 作業。 我們方法做的第一件事是列出資源群組中的所有配置檔和端點,如果找到符合常數中指定的配置檔和端點名稱,請記下稍後的注意事項,以免嘗試建立重複專案。
private static void ListProfilesAndEndpoints(CdnManagementClient cdn)
{
    // List all the CDN profiles in this resource group
    var profileList = cdn.Profiles.ListByResourceGroup(resourceGroupName);
    foreach (Profile p in profileList)
    {
        Console.WriteLine("CDN profile {0}", p.Name);
        if (p.Name.Equals(profileName, StringComparison.OrdinalIgnoreCase))
        {
            // Hey, that's the name of the CDN profile we want to create!
            profileAlreadyExists = true;
        }

        //List all the CDN endpoints on this CDN profile
        Console.WriteLine("Endpoints:");
        var endpointList = cdn.Endpoints.ListByProfile(p.Name, resourceGroupName);
        foreach (Endpoint e in endpointList)
        {
            Console.WriteLine("-{0} ({1})", e.Name, e.HostName);
            if (e.Name.Equals(endpointName, StringComparison.OrdinalIgnoreCase))
            {
                // The unique endpoint name already exists.
                endpointAlreadyExists = true;
            }
        }
        Console.WriteLine();
    }
}
建立 CDN 設定檔和端點
接下來,我們會建立配置檔。
private static void CreateCdnProfile(CdnManagementClient cdn)
{
    if (profileAlreadyExists)
    {
        Console.WriteLine("Profile {0} already exists.", profileName);
    }
    else
    {
        Console.WriteLine("Creating profile {0}.", profileName);
        ProfileCreateParameters profileParms =
            new ProfileCreateParameters() { Location = resourceLocation, Sku = new Sku(SkuName.StandardVerizon) };
        cdn.Profiles.Create(profileName, profileParms, resourceGroupName);
    }
}
建立設定檔之後,我們將建立端點。
private static void CreateCdnEndpoint(CdnManagementClient cdn)
{
    if (endpointAlreadyExists)
    {
        Console.WriteLine("Profile {0} already exists.", profileName);
    }
    else
    {
        Console.WriteLine("Creating endpoint {0} on profile {1}.", endpointName, profileName);
        EndpointCreateParameters endpointParms =
            new EndpointCreateParameters()
            {
                Origins = new List<DeepCreatedOrigin>() { new DeepCreatedOrigin("Contoso", "www.contoso.com") },
                IsHttpAllowed = true,
                IsHttpsAllowed = true,
                Location = resourceLocation
            };
        cdn.Endpoints.Create(endpointName, endpointParms, profileName, resourceGroupName);
    }
}
注意
此範例會將名為 Contoso 的原點指派為主機名 www.contoso.com。 您應該將此變更為指向您自己來源的主機名。
清除端點
假設已建立端點,我們可能想要在程序中執行的一個常見工作就是清除端點中的內容。
private static void PromptPurgeCdnEndpoint(CdnManagementClient cdn)
{
    if (PromptUser(String.Format("Purge CDN endpoint {0}?", endpointName)))
    {
        Console.WriteLine("Purging endpoint. Please wait...");
        cdn.Endpoints.PurgeContent(resourceGroupName, profileName, endpointName, new List<string>() { "/*" });
        Console.WriteLine("Done.");
        Console.WriteLine();
    }
}
注意
在先前的範例中,字串 /* 表示我想清除端點路徑根目錄中的所有專案。 這相當於在 Azure 入口網站 的 [清除] 對話框中檢查 [全部清除]。 在方法中CreateCdnProfile,我使用程式代碼Sku = new Sku(SkuName.StandardVerizon)從 Edgio 配置檔建立我們的配置檔作為 Azure CDN,因此這會成功。
刪除 CDN 設定檔和端點
最後一個方法會刪除我們的端點和配置檔。
private static void PromptDeleteCdnEndpoint(CdnManagementClient cdn)
{
    if(PromptUser(String.Format("Delete CDN endpoint {0} on profile {1}?", endpointName, profileName)))
    {
        Console.WriteLine("Deleting endpoint. Please wait...");
        cdn.Endpoints.DeleteIfExists(endpointName, profileName, resourceGroupName);
        Console.WriteLine("Done.");
        Console.WriteLine();
    }
}

private static void PromptDeleteCdnProfile(CdnManagementClient cdn)
{
    if(PromptUser(String.Format("Delete CDN profile {0}?", profileName)))
    {
        Console.WriteLine("Deleting profile. Please wait...");
        cdn.Profiles.DeleteIfExists(profileName, resourceGroupName);
        Console.WriteLine("Done.");
        Console.WriteLine();
    }
}
執行程式
我們現在可以藉由按兩下 Visual Studio 中的 [開始 ] 按鈕來編譯和執行程式。

當程式到達上述提示時,您應該能夠回到 Azure 入口網站 中的資源群組,並查看配置檔是否已建立。
然後,我們可以確認提示以執行程序的其餘部分。

後續步驟
若要查看本逐步解說中已完成的專案, 請下載範例。
若要在適用於 .NET 的 Azure CDN 管理連結庫上尋找更多檔,請檢視 MSDN 上的參考。
使用 PowerShell 管理 CDN 資源。