在已啟用 Azure Stack Edge Pro GPU 的 Azure Arc 上部署已啟用 Redis 的 PHP Guestbook 無狀態應用程式
適用于:  Azure Stack Edge Pro - GPU Azure Stack Edge Pro 2 Azure Stack Edge Pro R Azure Stack Edge Mini R
本文說明如何使用 Kubernetes 和 Azure Arc 來建置和部署簡單的多層式 Web 應用程式。此範例包含下列元件:
- 用來儲存
guestbook專案的單一實例 Redis 主圖形 - 多個複寫的 Redis 實例以提供讀取
- 多個 Web 前端實例
部署是使用 Azure Stack Edge Pro 裝置上已啟用 Azure Arc 的 Kubernetes 叢集上的 GitOps 來完成。
此程式適用于已檢閱 Azure Stack Edge Pro 裝置 上 Kubernetes 工作負載的人員,並熟悉什麼是已啟用 Azure Arc 的 Kubernetes (預覽) 概念 。
注意
本文包含「從屬」一詞的參考,Microsoft 已不再使用該字詞。 從軟體中移除該字詞時,我們也會將其從本文中移除。
必要條件
在部署無狀態應用程式之前,請確定您已在裝置上完成下列必要條件,以及您將用來存取裝置的用戶端:
針對裝置
您有 1 節點 Azure Stack Edge Pro 裝置的登入認證。
您已在裝置上現有的 Kubernetes 叢集上啟用 Azure Arc,並在Azure 入口網站中有對應的 Azure Arc 資源。 如需詳細步驟,請參閱 在 Azure Stack Edge Pro 裝置 上啟用 Azure Arc。
針對存取裝置的用戶端
您有將用來存取 Azure Stack Edge Pro 裝置的 Windows 用戶端系統。
用戶端正在執行 Windows PowerShell 5.0 或更新版本。 若要下載最新版本的 Windows PowerShell,請移至 安裝 Windows PowerShell 。
您也可以有任何其他用戶端搭配 支援的作業系統 。 本文說明使用 Windows 用戶端時的程式。
您已完成在 Azure Stack Edge Pro 裝置 上存取 Kubernetes 叢集中所述 的程式。 您已經:
安裝在
kubectl用戶端上。請確定
kubectl用戶端版本已從 Azure Stack Edge Pro 裝置上執行的 Kubernetes 主要版本扭曲超過一個版本。- 使用
kubectl version來檢查用戶端上執行的 kubectl 版本。 記下完整版本。 - 在 Azure Stack Edge Pro 裝置的本機 UI 中,移至 [ 概觀 ],並記下 Kubernetes 軟體號碼。
- 請確認這兩個版本是否與支援的 Kubernetes 版本所提供的對應相容。
- 使用
您有可用來 執行 Azure Arc 部署 的 GitOps 組態。 在此範例中,您將使用下列
yaml檔案在 Azure Stack Edge Pro 裝置上部署。frontend-deployment.yamlfrontend-service.yamlredis-master-deployment.yamlredis-master-service.yamlredis-slave-deployment.yamlredis-slave-service.yaml
部署組態
請遵循下列步驟來設定 Azure Arc 資源,以透過Azure 入口網站部署 GitOps 組態:
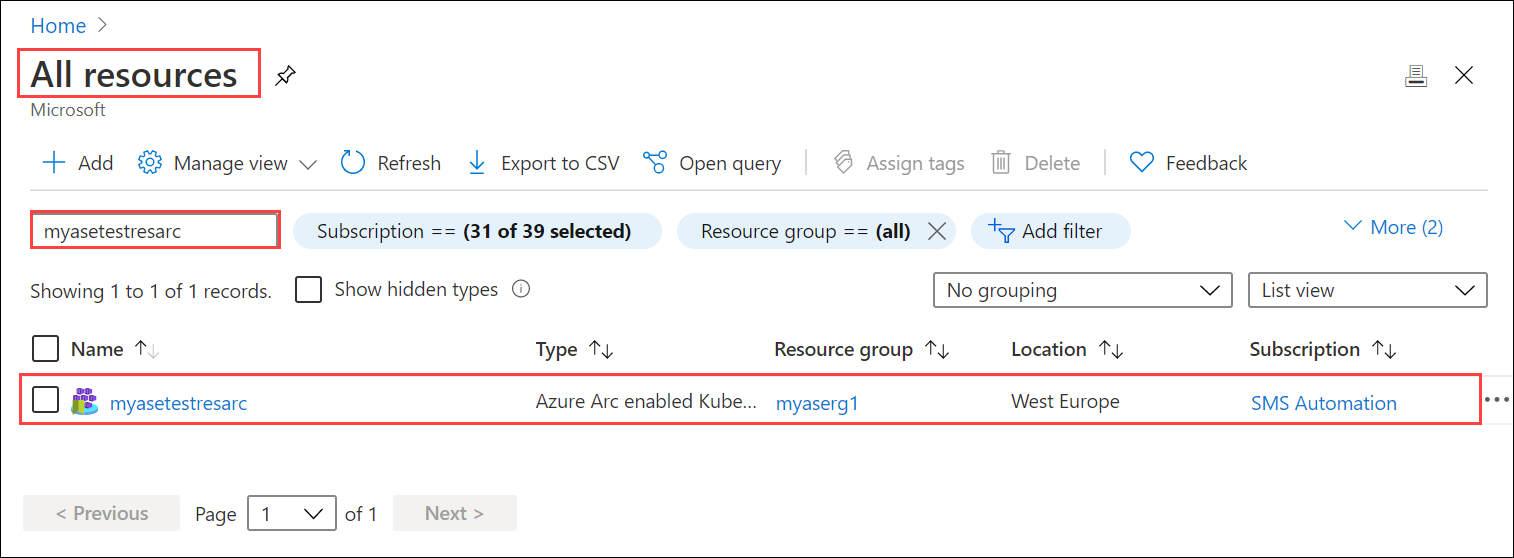
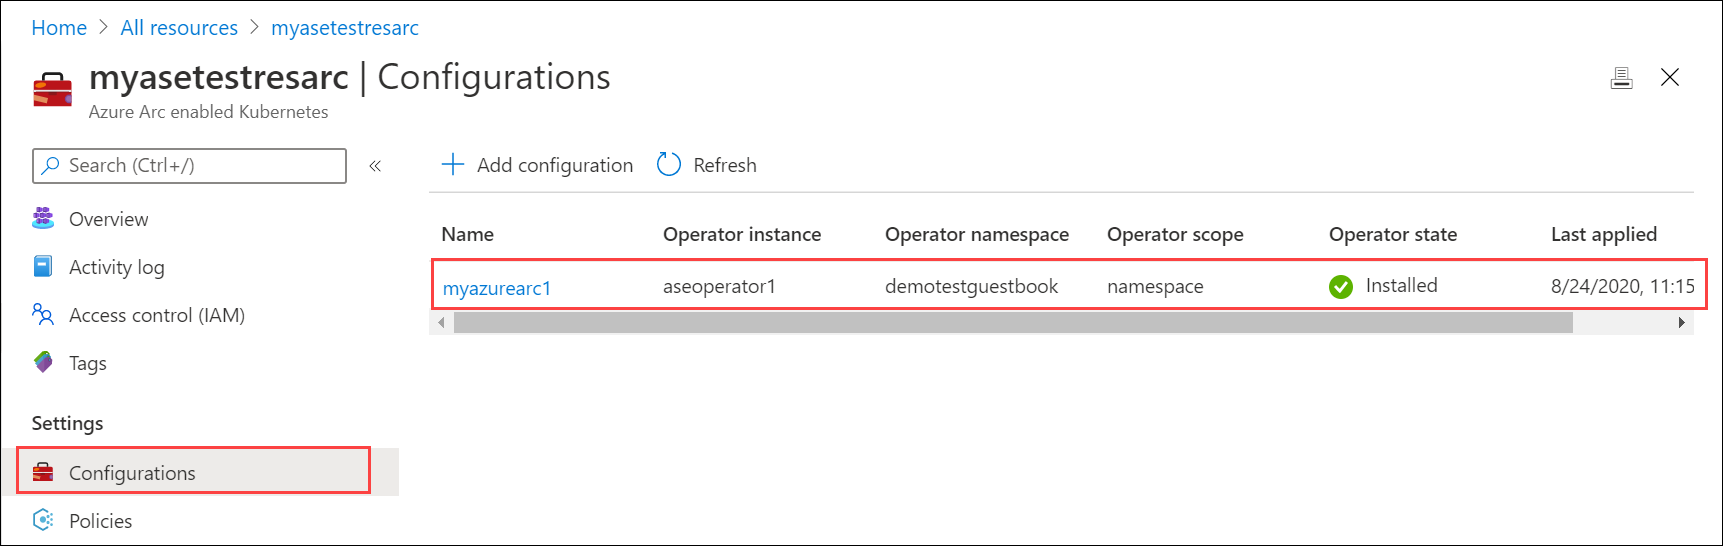
在您的Azure 入口網站中,移至您在裝置上的 Kubernetes 叢集上啟用 Azure Arc 時所建立的 Azure Arc 資源。
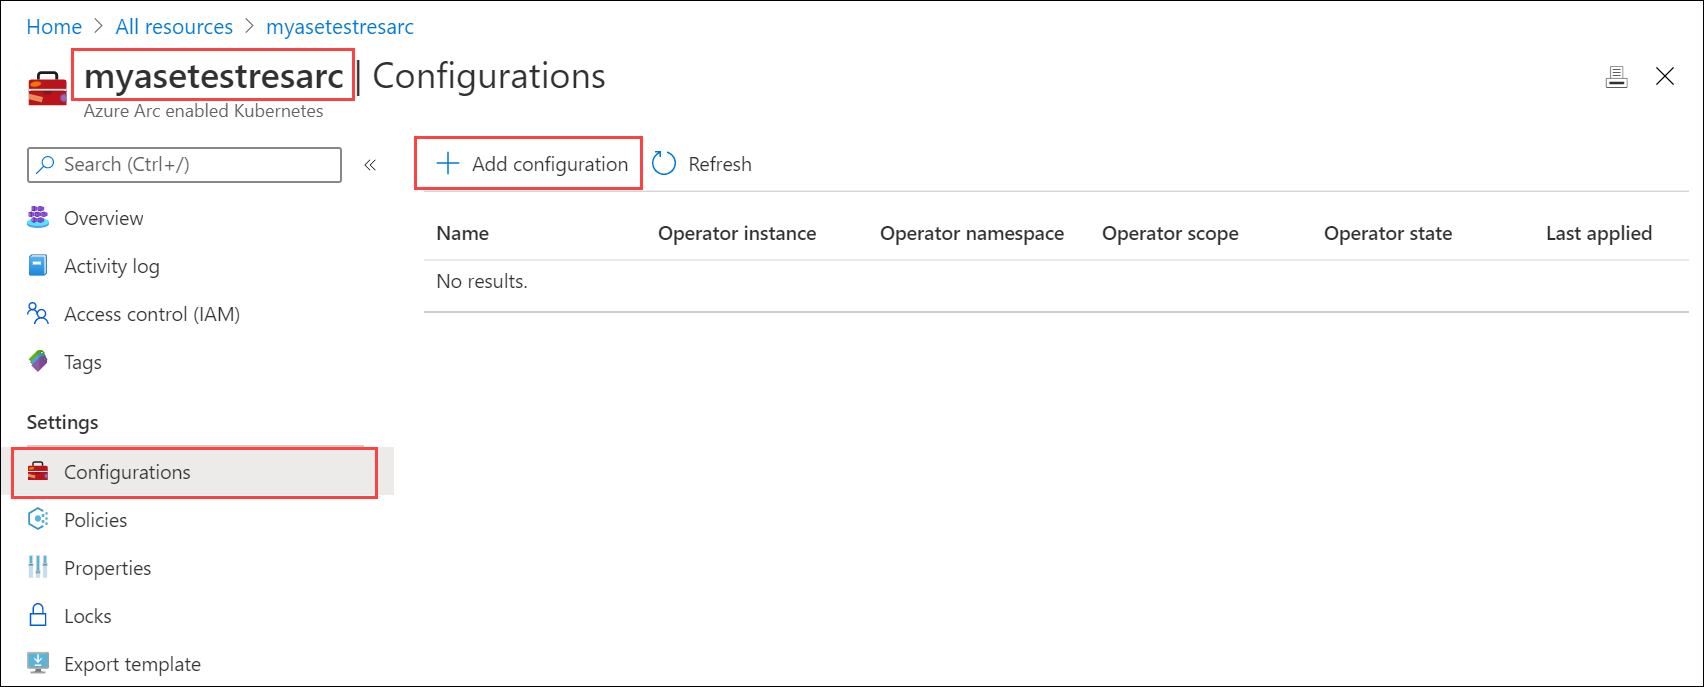
移至 [ 組態 ],然後選取 [+ 新增組態 ]。
指定 Flux 第 1 版擴充功能 。
在 [新增 GitOps 組態 ] 中,輸入欄位的適當值,然後選取 [ 新增 ]。
參數 描述 設定名稱 組態資源的名稱。 運算子實例名稱 用來識別特定組態之運算子的實例名稱。 Name 是最多 253 個字元的字串,必須是小寫、英數位元、連字號和句號。 運算子命名空間 設定為 demotestguestbook ,以符合部署 yaml中指定的命名空間。
欄位會定義運算子安裝所在的命名空間。 Name 是最多 253 個字元的字串,必須是小寫、英數位元、連字號和句號。存放庫 URL
Git 存放庫http://github.com/username/repo的路徑,或git://github.com/username/repoGitOps 組態所在的格式。運算子範圍 選取 [命名空間 ]。
此參數會定義運算子安裝所在的範圍。 選取 [命名空間],以在部署 yaml 檔案中指定的命名空間中安裝操作員。運算子類型 保留預設值。
此參數會指定運算子的類型 - 根據預設,設定為 flux。運算子參數 保留空白。
此參數包含要傳遞至 flux 運算子的參數。Helm 保留此核取方塊 未 核取。
如果您要執行以圖表為基礎的部署,請啟用此選項。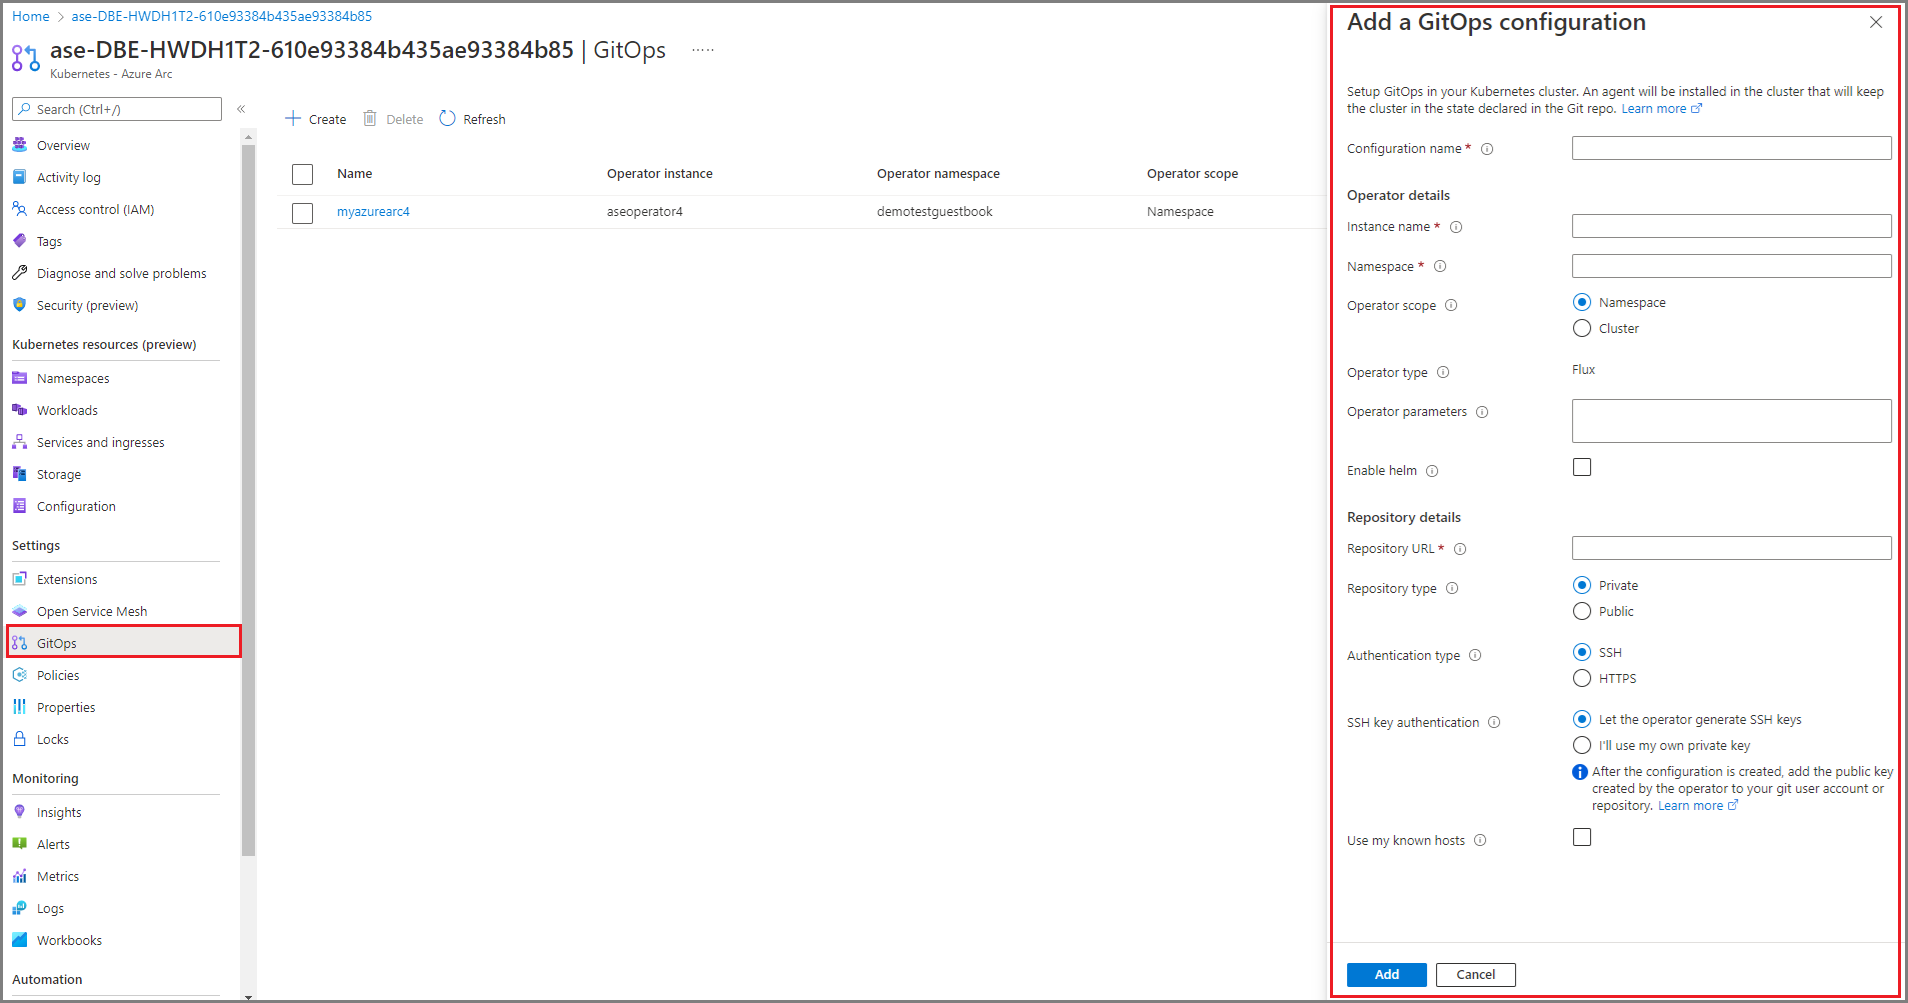
組態部署隨即啟動, 而操作員狀態 會顯示為 [擱置 ]。
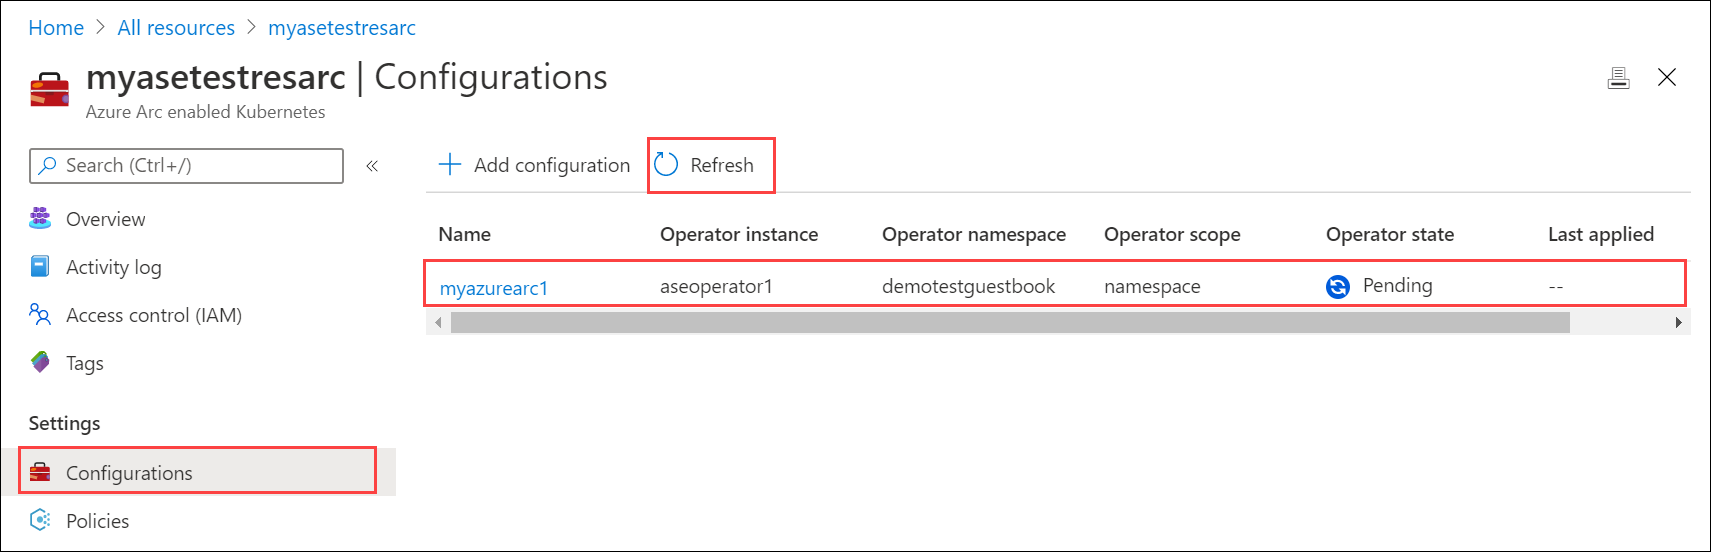
部署需要幾分鐘的時間。 部署完成時, [操作員] 狀態 會顯示為 [已安裝 ]。
驗證部署
透過 GitOps 組態的部署會 demotestguestbook 建立命名空間,如位於 git 存放庫中的部署 yaml 檔案中所指定。
套用 GitOps 組態之後, 連線至裝置 的 PowerShell 介面。
執行下列命令,列出在對應至部署之
demotestguestbook命名空間中執行的 Pod。kubectl get pods -n <your-namespace>以下是範例輸出。
[10.128.44.240]: PS>kubectl get pods -n demotestguestbook
NAME                            READY   STATUS    RESTARTS   AGE
aseoperator1-5569658644-cqtb5   1/1     Running   0          91m
frontend-6cb7f8bd65-4xb4f       1/1     Running   0          91m
frontend-6cb7f8bd65-q9cxj       1/1     Running   0          91m
frontend-6cb7f8bd65-xpzs6       1/1     Running   0          91m
memcached-86bdf9f56b-5l2fq      1/1     Running   0          91m
redis-master-7db7f6579f-2z29w   1/1     Running   0          91m
redis-slave-7664787fbc-lgr2n    1/1     Running   0          91m
redis-slave-7664787fbc-vlvzn    1/1     Running   0          91m
[10.128.44.240]: PS>
在此範例中,前端服務已部署為 type:LoadBalancer。 您必須尋找此服務的 IP 位址,才能檢視
guestbook。 執行下列命令。kubectl get service -n <your-namespace>[10.128.44.240]: PS>kubectl get service -n demotestguestbook NAME TYPE CLUSTER-IP EXTERNAL-IP PORT(S) AGE frontend LoadBalancer 10.96.79.38 10.128.44.245 80:31238/TCP 85m memcached ClusterIP 10.102.47.75 <none> 11211/TCP 85m redis-master ClusterIP 10.104.32.99 <none> 6379/TCP 85m redis-slave ClusterIP 10.104.215.146 <none> 6379/TCP 85m [10.128.44.240]: PS>的前端服務
type:LoadBalancer具有外部 IP 位址。 此 IP 來自您在裝置上設定計算網路設定時為外部服務指定的 IP 位址範圍。 使用此 IP 位址檢視位於 URL 的guestbook:https://<external-IP-address>。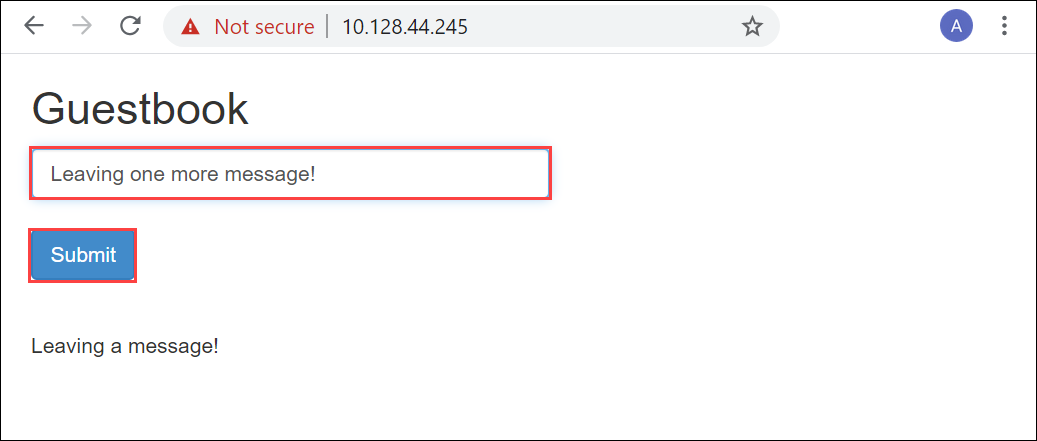
刪除部署
若要刪除部署,您可以從Azure 入口網站刪除組態。 刪除組態將會刪除已建立的物件,包括部署和服務。
- 在Azure 入口網站中,移至 Azure Arc 資源 > 設定。
- 找出您想要刪除的組態。 選取 ...以叫用操作功能表,然後選取 [ 刪除 ]。
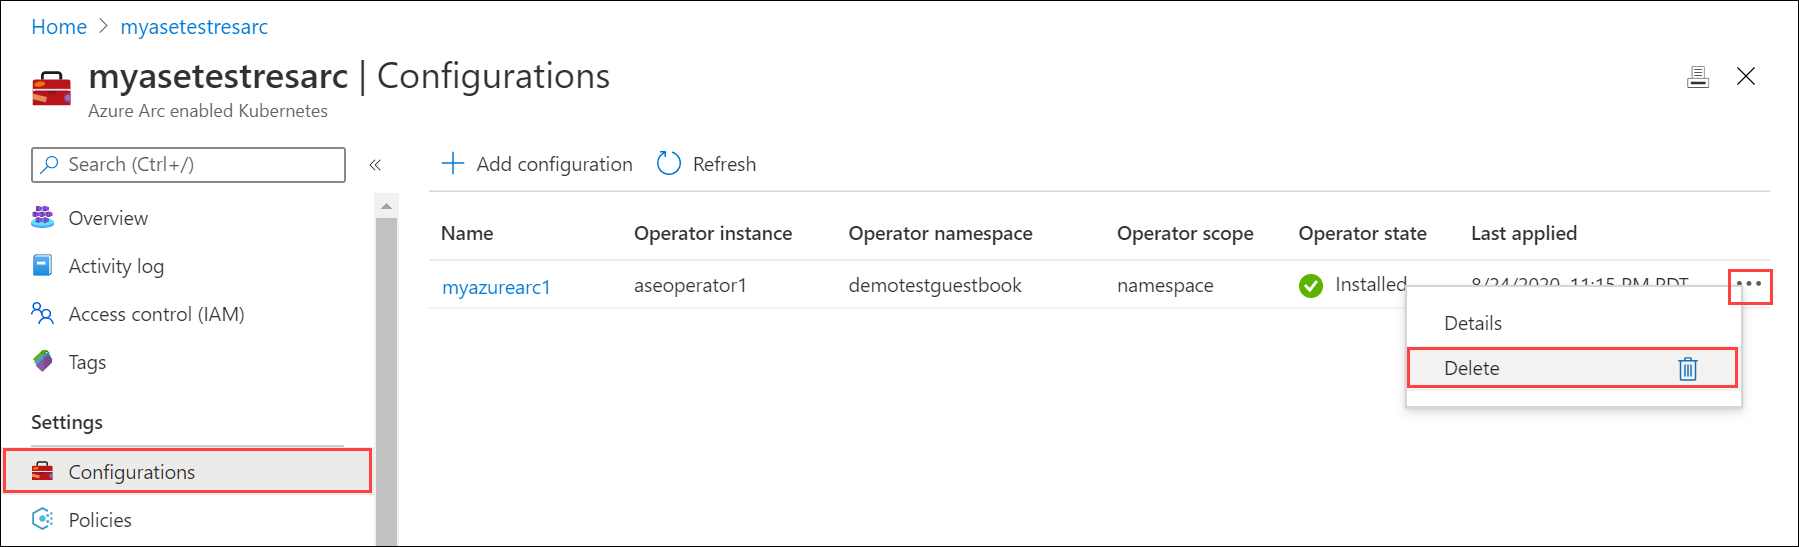
可能需要幾分鐘的時間才能刪除組態。