快速入門:在 Python 中使用 Azure Cache for Redis
在本文中,您會將 Azure Cache for Redis 納入 Python 應用程式中,以存取可從 Azure 內任何應用程式存取的安全專用快取。
跳至 GitHub 上的程式碼
如果您想要直接跳到程序代碼,請參閱 GitHub 上的 Python 快速入門 。
必要條件
- Azure 訂用帳戶 - 免費建立一個訂用帳戶
- Python 3
- 針對macOS或Linux,請從 python.org 下載。
- 針對 Windows 11,請使用 Windows 市集。
建立 Azure Cache for Redis 執行個體
若要建立快取,請登入 Azure 入口網站,然後選取 [建立資源]。

在 [新增] 頁面上,選取 [資料庫],然後選取 [Azure Cache for Redis]。

在 [ 新增 Redis 快 取] 頁面上,設定新快取的設定。
設定 選擇值 描述 訂用帳戶 下拉式清單並選取您的訂用帳戶。 用來建立這個新 Azure Cache for Redis 實例的訂用帳戶。 資源群組 下拉式清單並選取資源群組,或選取 [ 新建 ],然後輸入新的資源組名。 要在其中建立快取和其他資源的資源群組名稱。 藉由將所有應用程式資源放在一個資源群組中,您可以輕鬆地一起管理或刪除它們。 DNS 名稱 輸入唯一名稱。 快取名稱必須是介於 1 到 63 個字元之間的字串,只包含數位、字母或連字元。 名稱必須以數位或字母開頭和結尾,且不能包含連續連字元。 快取實例的主機名是 <DNS name.redis.cache.windows.net>。 地點 下拉式清單並選取位置。 選取靠近使用快取之其他服務的區域。 快取類型 下拉式清單並選取階層。 階層會決定快取可用的大小、效能和功能。 如需詳細資訊,請參閱 Azure Cache for Redis 概觀。 選取 [ 網络] 索引 標籤,或選取頁面底部的 [ 網络] 按鈕。
在 [ 網络] 索引標籤中 ,選取您的連線方法。
選取 [ 下一步:進階 ] 索引標籤,或選取 頁面底部的 [下一步:進階 ] 按鈕,以查看 [ 進階 ] 索引卷標。

- 針對 [基本] 或 [標準快取],切換非 TLS 埠的選取範圍。 如果您要啟用 Microsoft Entra Authentication,也可以選取 。
- 針對 進階版 快取,請設定非 TLS 埠、叢集、受控識別和數據持續性的設定。 如果您要啟用 Microsoft Entra Authentication,也可以選取 。
選取 [ 下一步:標記 ] 索引標籤,或選取頁面底部的 [ 下一步:標記 ] 按鈕。
或者,如果您想要分類資源,請在 [ 標記 ] 索引標籤中輸入名稱和值。
選取 [檢閱 + 建立]。 系統會帶您前往 Azure 驗證設定的 [檢閱 + 建立] 索引標籤。
綠色 [驗證通過的訊息] 出現之後,選取 [ 建立]。
快取需要一段時間才能建立。 您可以在 Azure Cache for Redis 概觀 頁面上監視進度。 當 [狀態] 顯示為 [執行中] 時,快取已準備好使用。
從 Azure 入口網站 擷取主機名、埠和存取密鑰
若要連線 Azure Cache for Redis 伺服器,快取用戶端需要快取的主機名、埠和密鑰。 有些用戶端可能會以稍微不同的名稱來參考這些專案。 您可以從 Azure 入口網站 取得主機名、埠和金鑰。
若要取得存取金鑰,請從快取左側導覽中 選取 [存取密鑰]。

若要取得主機名和埠,請從快取左側導覽中選取 [ 屬性]。 主機名的格式為 DNS name.redis.cache.windows.net>。<

安裝 redis-py
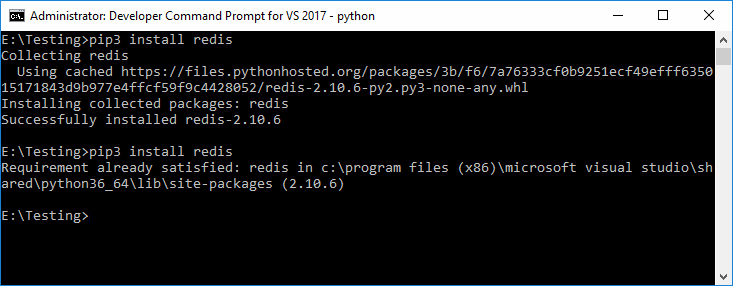
Redis-py 是 Azure Cache for Redis 的 Python 介面。 使用 Python 套件工具 pip,從命令提示字元安裝 redis-py 套件。
下列範例用於 pip3 Python 3,從 管理員 istrator 命令提示字元安裝 redis-py Windows 11。
讀取和寫入快取
從命令行執行 Python,並使用下列程式代碼測試您的快取。 將和 <Your Access Key> 取代<Your Host Name>為您 Azure Cache for Redis 實例的值。 您的主機名稱格式 <DNS name>.redis.cache.windows.net為 。
>>> import redis
>>> r = redis.StrictRedis(host='<Your Host Name>',
        port=6380, db=0, password='<Your Access Key>', ssl=True)
>>> r.set('foo', 'bar')
True
>>> r.get('foo')
b'bar'
重要
針對 Azure Cache for Redis 3.0 版或更高版本,會強制執行 TLS/SSL 憑證檢查。 ssl_ca_certs 聯機到 Azure Cache for Redis 時必須明確設定。 針對 RedHat Linux, ssl_ca_certs 位於憑證模組中 /etc/pki/tls/certs/ca-bundle.crt 。
建立 Python 範例應用程式
建立新的文字檔、新增下列文稿,並將檔案儲存為 PythonApplication1.py。 將和 <Your Access Key> 取代<Your Host Name>為您 Azure Cache for Redis 實例的值。 您的主機名稱格式 <DNS name>.redis.cache.windows.net為 。
import redis

myHostname = "<Your Host Name>"
myPassword = "<Your Access Key>"

r = redis.StrictRedis(host=myHostname, port=6380,
                      password=myPassword, ssl=True)

result = r.ping()
print("Ping returned : " + str(result))

result = r.set("Message", "Hello!, The cache is working with Python!")
print("SET Message returned : " + str(result))

result = r.get("Message")
print("GET Message returned : " + result.decode("utf-8"))

result = r.client_list()
print("CLIENT LIST returned : ")
for c in result:
    print(f"id : {c['id']}, addr : {c['addr']}")
使用 Python 執行 PythonApplication1.py 。 您應該會看到類似下列範例的結果:

清除資源
如果您已完成本快速入門中建立的 Azure 資源群組和資源,您可以將其刪除,以避免產生費用。
重要
刪除資源群組是無法復原的,而且資源群組及其中的所有資源都會永久刪除。 如果您在想要保留的現有資源群組中建立 Azure Cache for Redis 實例,您可以從快取 [概觀] 頁面選取 [刪除],只刪除快取。
若要刪除資源群組及其 Azure 實例的 Redis 快取:
從 Azure 入口網站 搜尋並選取 [資源群組]。
在 [ 依名稱 篩選] 文本框中,輸入包含快取實例的資源群組名稱,然後從搜尋結果中選取它。
在您的資源群組頁面上,選取 [ 刪除資源群組]。
輸入資源群組名稱,然後選取 [刪除]。
