在本教學課程中,您將建立具有 Windows Forms 使用者介面 (UI) 的簡單 C# 應用程式。
首先,您將建立 C# 應用程式專案。 在您新增任何項目之前,專案類型會隨附您需要的所有範本檔案。
開啟 Visual Studio。
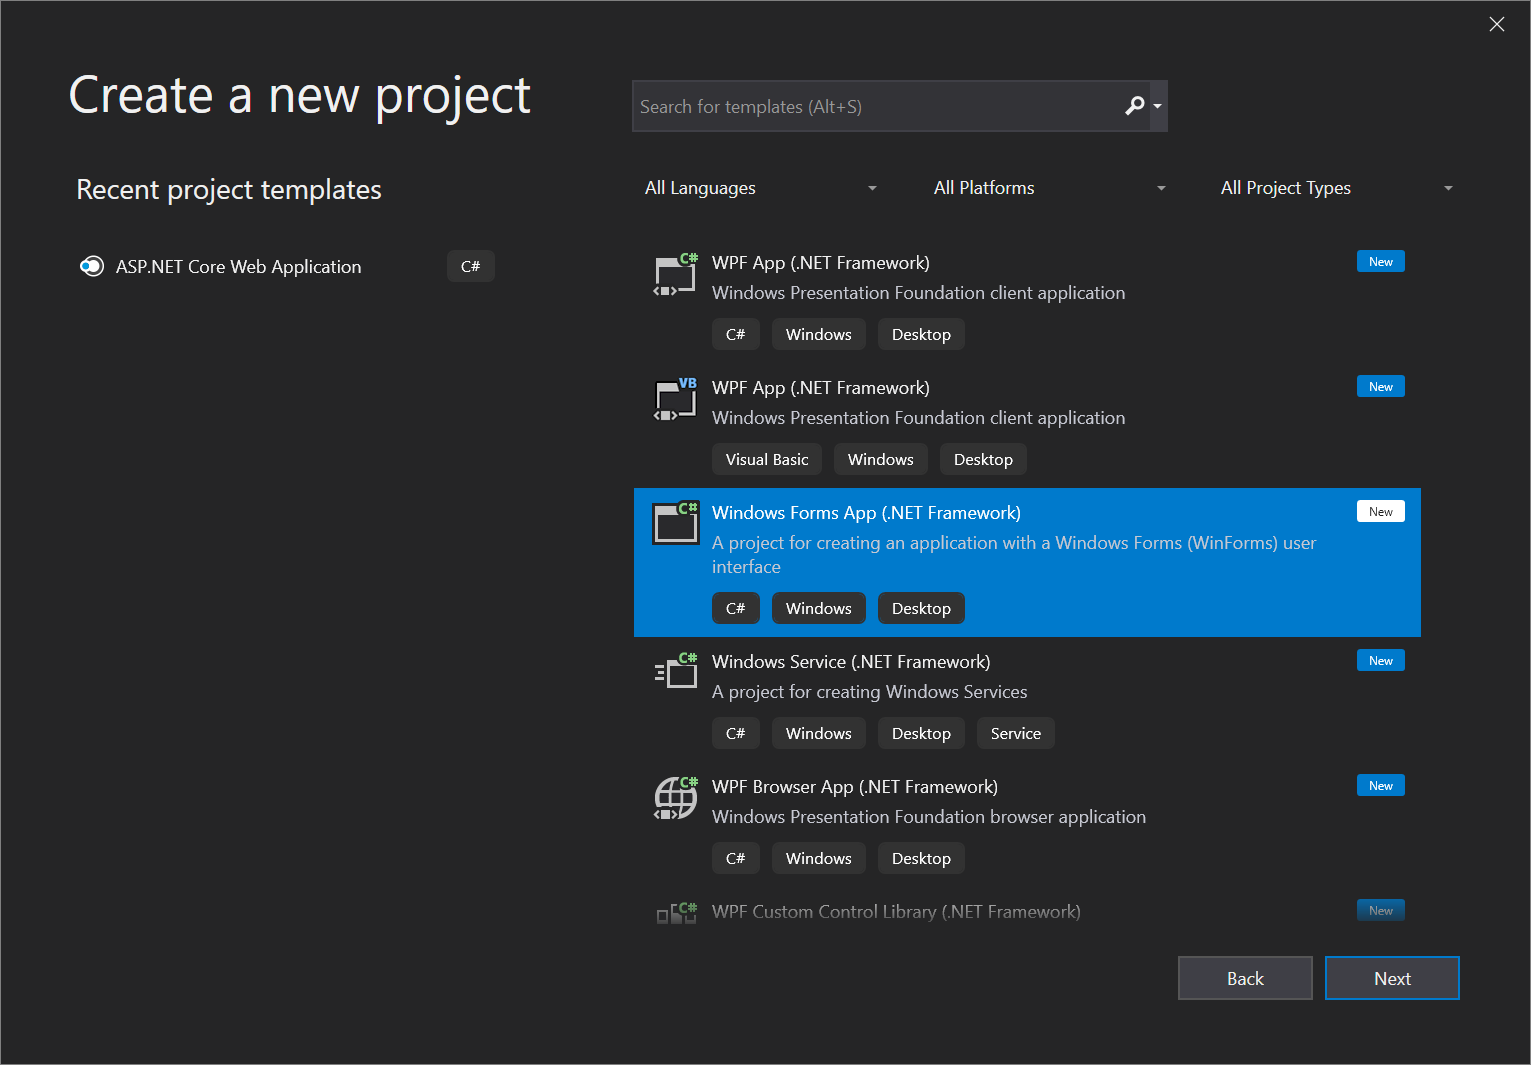
在開始視窗中,選擇 [建立新專案]。

在 [建立新專案] 視窗中,選擇 C# 的 [Windows Forms 應用程式 (.NET Framework)] 範本。
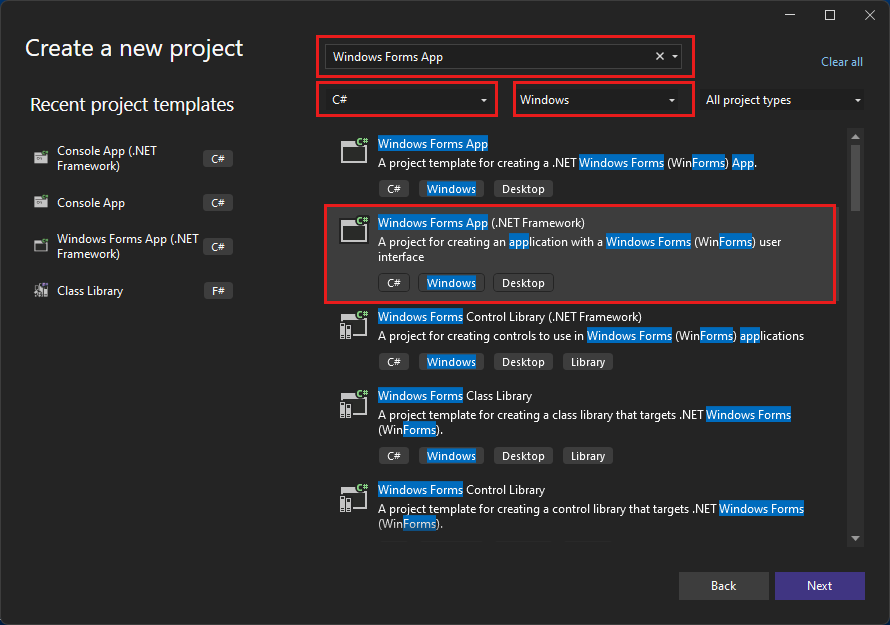
(如果您想要,可以縮小搜尋範圍,快速取得您想要的範本。例如,在搜尋方塊中輸入或鍵入 Windows Forms 應用程式。接下來,從語言清單中選擇 C#,然後從平台清單中選擇 Windows。)
注意
如果您未看到 [Windows Forms 應用程式 (.NET Framework)] 範本,您可以從 [建立新專案] 視窗中安裝。 在 [找不到你要尋找的項目嗎?] 訊息中,選擇 [安裝更多工具和功能] 連結。

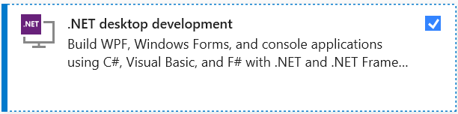
接著,在 Visual Studio 安裝程式中選擇 [.NET 桌面開發] 工作負載。
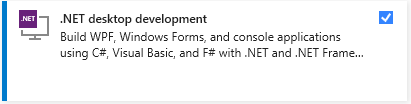
接著,選擇Visual Studio 安裝程式中的 [修改] 按鈕。 系統可能會提示您儲存工作,若收到提示,請依提示執行。 接下來,選擇 [繼續] 以安裝工作負載。 然後,返回至「建立專案」程序中的步驟 2。
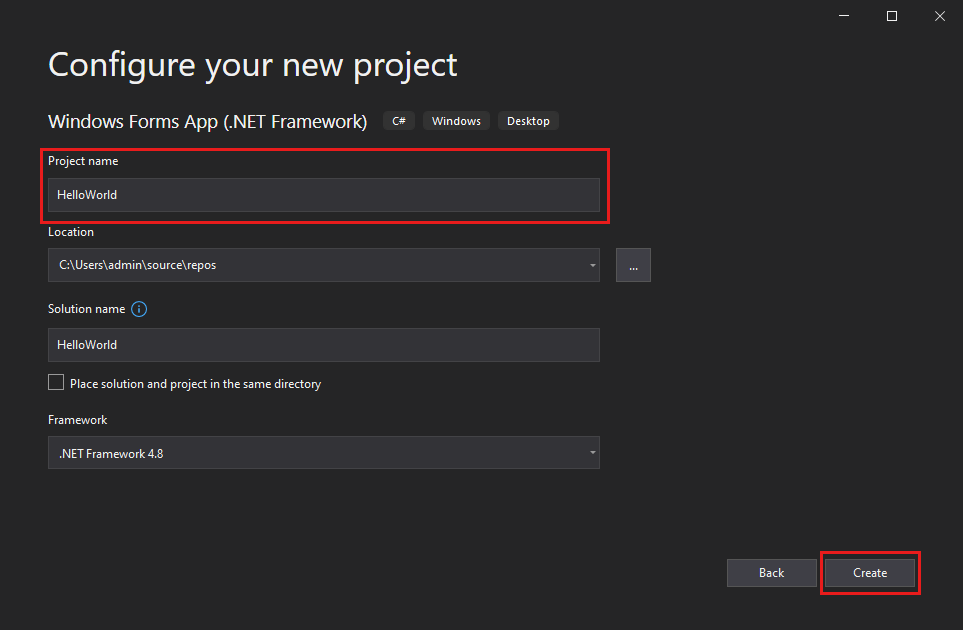
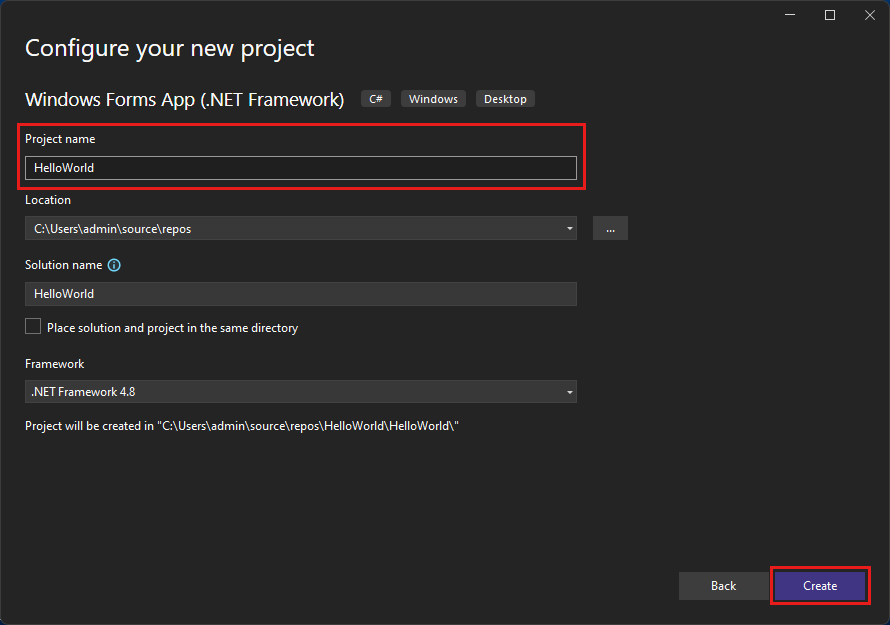
在 [設定您的新專案] 視窗的 [專案名稱] 方塊中鍵入或輸入 HelloWorld。 接著,選擇 [建立]。
Visual Studio 會隨即開啟您的新專案。
開啟 Visual Studio。
在 [開始] 視窗上,選取 [建立新專案]。

在 [建立新專案] 視窗中,選取 C# 的 [Windows Forms 應用程式 (.NET Framework)] 範本。
(如果您想要,可以縮小搜尋範圍,快速取得您想要的範本。例如,在搜尋方塊中輸入或鍵入 Windows Forms 應用程式。接下來,從 [語言] 清單中選取 [C#],然後從 [平台] 清單中選取 [Windows]。)
注意
如果您未看到 [Windows Forms 應用程式 (.NET Framework)] 範本,您可以從 [建立新專案] 視窗中安裝。 在 [找不到你要尋找的項目嗎?] 訊息中,選取 [安裝更多工具和功能] 連結。
接著,在 Visual Studio 安裝程式中選取 [.NET 桌面開發] 工作負載。
接著,選取 Visual Studio 安裝程式中的 [修改] 按鈕。 系統可能會提示您儲存工作,若收到提示,請依提示執行。 接下來,選取 [繼續] 以安裝工作負載。 然後,返回至「建立專案」程序中的步驟 2。
在 [設定您的新專案] 視窗的 [專案名稱] 方塊中鍵入或輸入 HelloWorld。 然後,選取 [建立]。
Visual Studio 會隨即開啟您的新專案。
在您選取 C# 專案範本並且為檔案命名之後,Visual Studio 會為您開啟表單。 表單是 Windows 使用者介面。 我們將控制項新增至表單來建立 "Hello World" 應用程式,然後執行應用程式。
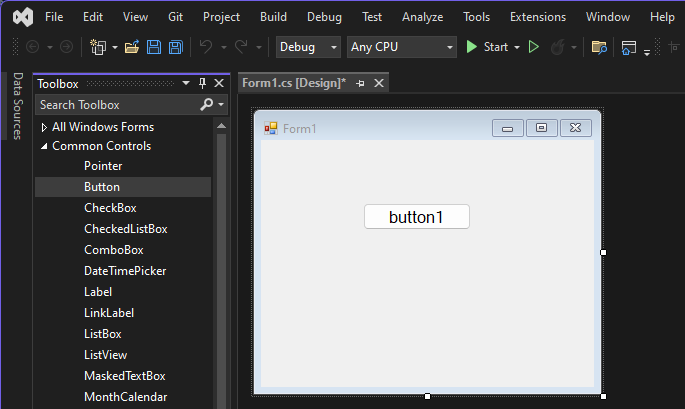
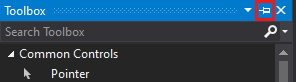
選取 [工具箱] 以開啟 [工具箱] 飛出視窗。
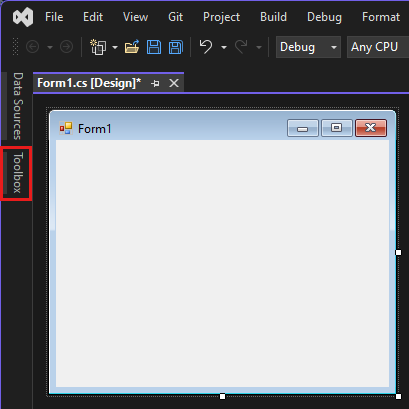
(如果未顯示 [工具箱] 快顯選項,您可以從功能表列開啟。若要這麼做,選取 [檢視]>[工具箱]。或按 Ctrl+Alt+X)。
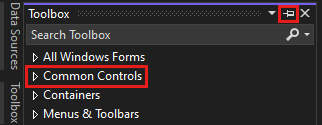
展開 [通用控制項],然後選取 [釘選] 圖示以固定 [工具箱] 視窗。
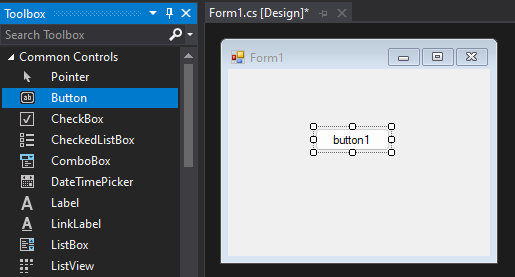
選取 [按鈕] 控制項,然後將它拖曳至表單。
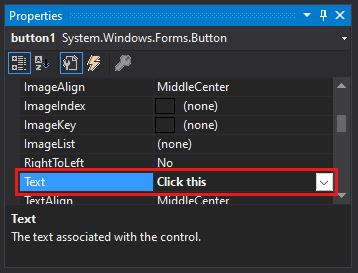
在 [屬性] 視窗中,找出 [文字],將名稱從 button1 變更為 Click this,然後按 Enter 鍵。

(如果未顯示 [屬性] 視窗,您可以從功能表列開啟。若要這麼做,請選取 [檢視]>[屬性視窗]。或按 F4 鍵)。
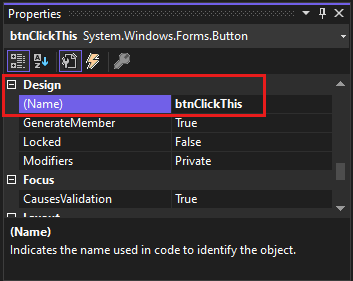
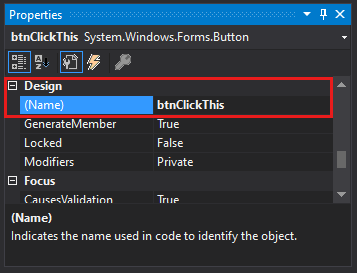
在 [屬性] 視窗的 [設計] 區段中,將名稱從 button1 變更為 btnClickThis,然後按 Enter 鍵。
注意
如果您在 [屬性] 視窗中將清單按字母順序排列,則 [button1] 會改為出現在 (DataBindings) 區段中。
既然我們已新增可建立動作的按鈕控制項,讓我們新增可將文字傳送至其中的標籤控制項。
從 [工具箱] 視窗中選取 [標籤] 控制項,然後將它拖放至表單的 [按一下這裡] 按鈕下方。
在 [屬性] 視窗的 [設計] 區段或 [(DataBindings)] 區段中,將名稱 label1 變更為 lblHelloWorld,然後按 Enter 鍵。
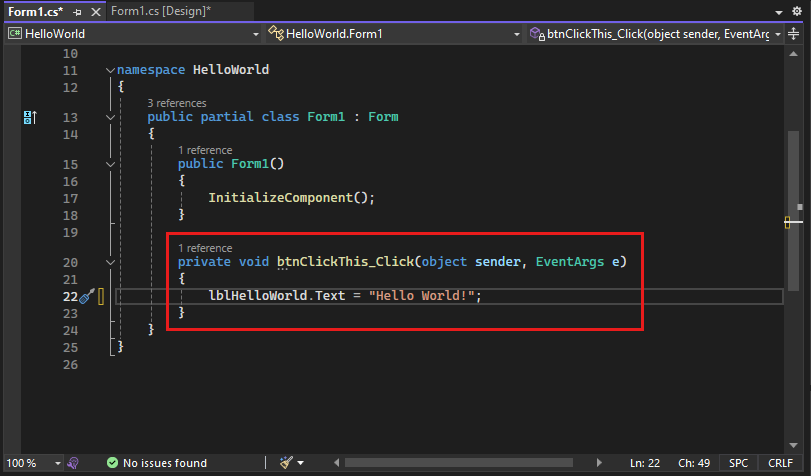
在 [Form1.cs [Design]] 視窗中,按兩下 [Click this] 按鈕以開啟 [Form1.cs] 視窗。
(或者,您可以在 [方案總管] 中展開 Form1.cs,然後選擇 Form1。)
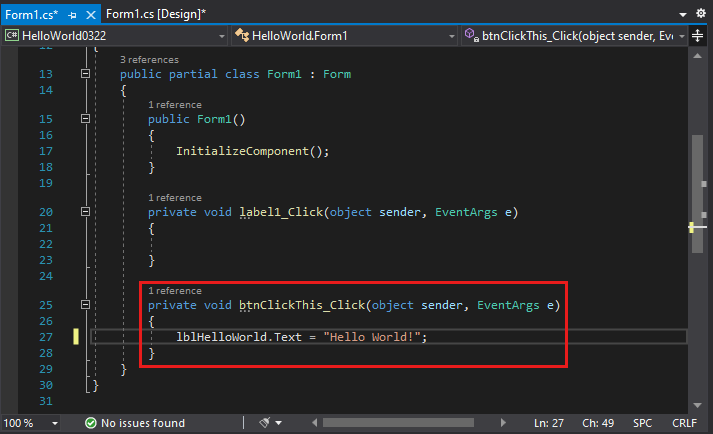
在 [Form1.cs] 視窗中,於 private void 行之後,輸入或鍵入 lblHelloWorld.Text = "Hello World!";,如下列螢幕擷取畫面所示:
選取 [啟動] 按鈕,以執行應用程式。

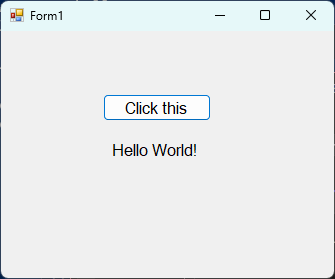
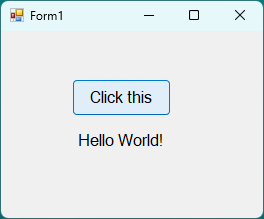
會發生數種情況。 在 Visual Studio IDE 中,會開啟 [診斷工具] 視窗和 [輸出] 視窗。 但在 IDE 外部,會出現 Form1 對話方塊。 其中包含您的 [Click this] 按鈕,以及顯示 label1 的文字。
選取 [Form1] 對話方塊中的 [Click this] 按鈕。 請注意,label1 文字會變更為 Hello World!。
關閉 [Form1] 對話方塊以停止執行應用程式。
在您選取 C# 專案範本並且為檔案命名之後,Visual Studio 會為您開啟表單。 表單是 Windows 使用者介面。 我們將控制項新增至表單來建立 "Hello World" 應用程式,然後執行應用程式。
選擇 [工具箱] 以開啟 [工具箱] 飛出視窗。

(如果未顯示 [工具箱] 快顯選項,您可以從功能表列開啟。若要這麼做,選取 [檢視]>[工具箱]。或按 Ctrl+Alt+X)。
選擇 [釘選] 圖示以固定 [工具箱] 視窗。
選擇 [按鈕] 控制項,然後將它拖曳至表單。
在 [屬性] 視窗中,找出 [文字],將名稱從 Button1 變更為 Click this,然後按 Enter 鍵。
(如果未顯示 [屬性] 視窗,您可以從功能表列開啟。若要這麼做,請選擇 [檢視]>[屬性視窗]。或按 F4 鍵)。
在 [屬性] 視窗的 [設計] 區段中,將名稱從 Button1 變更為 btnClickThis,然後按 Enter 鍵。
注意
如果您在 [屬性] 視窗中將清單按字母順序排列,則 [Button1] 會改為出現在 (DataBindings) 區段中。
既然我們已新增可建立動作的按鈕控制項,讓我們新增可將文字傳送至其中的標籤控制項。
從 [工具箱] 視窗中選取 [標籤] 控制項,然後將它拖放至表單的 [按一下這裡] 按鈕下方。
在 [屬性] 視窗的 [設計] 區段或 [(DataBindings)] 區段中,將名稱 Label1 變更為 lblHelloWorld,然後按 Enter 鍵。
在 [Form1.cs [Design]] 視窗中,按兩下 [Click this] 按鈕以開啟 [Form1.cs] 視窗。
(或者,您可以在 [方案總管] 中展開 Form1.cs,然後從 Form1.cs 的右鍵功能表選擇 [檢視程式碼] (或按 F7)。)
在 [Form1.cs] 視窗中,於 private void 行之後,輸入或鍵入 lblHelloWorld.Text = "Hello World!";,如下列螢幕擷取畫面所示:
選擇 [啟動] 按鈕,以執行應用程式。

會發生數種情況。 在 Visual Studio IDE 中,會開啟 [診斷工具] 視窗和 [輸出] 視窗。 但在 IDE 外部,會出現 Form1 對話方塊。 其中包含您的 [按一下這裡] 按鈕,以及顯示 Label1 的文字。
選擇 [Form1] 對話方塊中的 [Click this] 按鈕。 請注意,Label1 文字會變更為 Hello World!。
關閉 [Form1] 對話方塊以停止執行應用程式。
恭喜您完成此教學課程。 若要深入了解,請繼續進行下列教學課程: