在 Windows 用戶端中設定 VPN 裝置通道
適用於:Windows Server 2022、Windows Server 2019、Windows 10、Windows 11
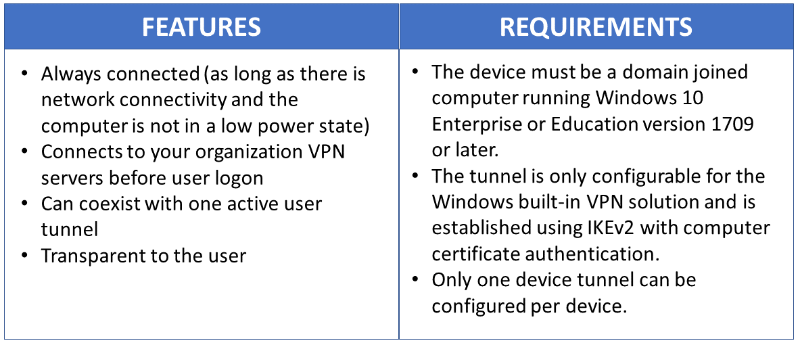
Always On VPN 可讓您為裝置或電腦建立專用 VPN 設定檔。 Always On VPN 連線包含兩種類型的通道:
在使用者登入裝置之前,裝置通道會連線到指定的 VPN 伺服器。 登入前連線案例和裝置管理用途會使用裝置通道。
使用者通道僅在使用者登入裝置後才會連線。 使用者通道可讓使用者透過 VPN 伺服器存取組織資源。
使用者通道僅在使用者登入裝置或電腦後進行連線,而裝置通道則可讓 VPN 在使用者登入之前建立連線。 裝置通道和使用者通道皆可以使用其 VPN 設定檔獨立運行,並可同時連線,且可以視需要使用不同驗證方法和其他 VPN 設定檔。 使用者通道支援 SSTP 和 IKEv2,裝置通道僅支援 IKEv2,不支援 SSTP 後援。
使用者通道受支援於已加入網域、已加入非網域 (工作群組) 或已加入 Microsoft Entra ID 的裝置,以允許企業和 BYOD 案例。 它適用於所有 Windows 版本,而平台功能可透過 UWP VPN 外掛程式支援的方式提供給協力廠商。
裝置通道只能在執行 Windows 10 企業版或教育版 1709 或更新版本的已加入網域裝置上進行設定。 不支援裝置通道的協力廠商控制。 如果系統上只使用裝置通道,您可以設定名稱解析原則資料表 (NRPT)。 如果系統上使用使用者通道和裝置通道,則您只能在使用者通道上使用名稱解析原則表格 (NRPT)。
裝置通道不支援強制通道。 您必須將其設定為分割通道。 |
必要條件
您必須為 VPN 連線啟用電腦憑證驗證,並定義用來驗證連入 VPN 連線的根憑證授權單位。
$VPNRootCertAuthority = "Common Name of trusted root certification authority"
$RootCACert = (Get-ChildItem -Path cert:LocalMachine\root | Where-Object {$_.Subject -Like "*$VPNRootCertAuthority*" })
Set-VpnAuthProtocol -UserAuthProtocolAccepted Certificate, EAP -RootCertificateNameToAccept $RootCACert -PassThru
VPN 裝置通道設定
下列範例設定檔 XML 為僅需透過裝置通道啟動用戶端提取的案例提供良好的指引。 利用流量篩選器將裝置通道限制為僅管理流量。 此設定適用於 Windows Update、一般群組原則 (GP) 和 Microsoft Endpoint Configuration Manager 更新方案,以及無需快取憑證首次登入的 VPN 連線或密碼重設方案。
針對伺服器起始的推送案例,例如 Windows 遠端系統管理 (WinRM)、遠端 GPUpdate 和遠端 Configuration Manager 更新方案 – 您必須允許裝置通道上的輸入流量,因此無法使用流量篩選器。 如果在裝置通道設定檔中開啟流量篩選器,則裝置通道將拒絕輸入流量。 未來版本會移除此項限制。
範例 VPN profileXML
以下是 VPN profileXML 範例。
<VPNProfile>
  <NativeProfile>
<Servers>vpn.contoso.com</Servers>
<NativeProtocolType>IKEv2</NativeProtocolType>
<Authentication>
  <MachineMethod>Certificate</MachineMethod>
</Authentication>
<RoutingPolicyType>SplitTunnel</RoutingPolicyType>
 <!-- disable the addition of a class based route for the assigned IP address on the VPN interface -->
<DisableClassBasedDefaultRoute>true</DisableClassBasedDefaultRoute>
  </NativeProfile>
  <!-- use host routes(/32) to prevent routing conflicts -->
  <Route>
<Address>10.10.0.2</Address>
<PrefixSize>32</PrefixSize>
  </Route>
  <Route>
<Address>10.10.0.3</Address>
<PrefixSize>32</PrefixSize>
  </Route>
<!-- traffic filters for the routes specified above so that only this traffic can go over the device tunnel -->
  <TrafficFilter>
<RemoteAddressRanges>10.10.0.2, 10.10.0.3</RemoteAddressRanges>
  </TrafficFilter>
<!-- need to specify always on = true -->
  <AlwaysOn>true</AlwaysOn>
<!-- new node to specify that this is a device tunnel -->
 <DeviceTunnel>true</DeviceTunnel>
<!--new node to register client IP address in DNS to enable manage out -->
<RegisterDNS>true</RegisterDNS>
</VPNProfile>
根據每個特定部署方案的需要,可以使用裝置通道設定的另一個 VPN 功能是信任的網路偵測。
 <!-- inside/outside detection -->
  <TrustedNetworkDetection>corp.contoso.com</TrustedNetworkDetection>
部署與測試
您可以使用 Windows PowerShell 指令碼和 Windows Management Instrumentation (WMI) 橋接器來設定裝置通道。 Always On VPN 裝置通道必須在 LOCAL SYSTEM 帳戶內容中設定。 如要達成此目的,必須使用 PsExec,這是 Sysinternals 公用程式套件中包含的 PsTools 之一。
如需如何部署每個裝置 (.\Device) 與每位使用者 (.\User) 設定檔的指導方針,請參閱搭配 WMI Bridge Provider 使用 PowerShell 指令碼。
執行下列 Windows PowerShell 命令,確認您是否已成功部署裝置設定檔:
Get-VpnConnection -AllUserConnection
輸出會顯示裝置上部署的全裝置 VPN 設定檔清單。
Windows PowerShell 指令碼範例
您可以使用以下 Windows PowerShell 指令碼來協助建立自己的指令碼,以建立設定檔。
Param(
[string]$xmlFilePath,
[string]$ProfileName
)
$a = Test-Path $xmlFilePath
echo $a
$ProfileXML = Get-Content $xmlFilePath
echo $XML
$ProfileNameEscaped = $ProfileName -replace ' ', '%20'
$Version = 201606090004
$ProfileXML = $ProfileXML -replace '<', '<'
$ProfileXML = $ProfileXML -replace '>', '>'
$ProfileXML = $ProfileXML -replace '"', '"'
$nodeCSPURI = './Vendor/MSFT/VPNv2'
$namespaceName = "root\cimv2\mdm\dmmap"
$className = "MDM_VPNv2_01"
$session = New-CimSession
try
{
$newInstance = New-Object Microsoft.Management.Infrastructure.CimInstance $className, $namespaceName
$property = [Microsoft.Management.Infrastructure.CimProperty]::Create("ParentID", "$nodeCSPURI", 'String', 'Key')
$newInstance.CimInstanceProperties.Add($property)
$property = [Microsoft.Management.Infrastructure.CimProperty]::Create("InstanceID", "$ProfileNameEscaped", 'String', 'Key')
$newInstance.CimInstanceProperties.Add($property)
$property = [Microsoft.Management.Infrastructure.CimProperty]::Create("ProfileXML", "$ProfileXML", 'String', 'Property')
$newInstance.CimInstanceProperties.Add($property)
$session.CreateInstance($namespaceName, $newInstance)
$Message = "Created $ProfileName profile."
Write-Host "$Message"
}
catch [Exception]
{
$Message = "Unable to create $ProfileName profile: $_"
Write-Host "$Message"
exit
}
$Message = "Complete."
Write-Host "$Message"
其他資源
以下是可協助您部署 VPN 的其他資源。
VPN 用戶端設定資源
以下是 VPN 用戶端設定資源。
遠端存取伺服器閘道資源
以下是遠端存取伺服器 (RAS) 閘道資源。
重要
搭配 Microsoft RAS 閘道使用裝置通道時,您必須將 RRAS 伺服器設定為支援 IKEv2 電腦憑證驗證,方法是啟用允許 IKEv2 的電腦憑證驗證驗證方法,如這裡所述。 啟用此設定後,強烈建議使用 Set-VpnAuthProtocol PowerShell cmdlet 以及 RootCertificateNameToAccept 可選參數,以確保 RRAS IKEv2 連線只允許鏈結至明確定義內部/私人根憑證授權單位的 VPN 用戶端憑證。 或者,應修改 RRAS 伺服器上的受信任的根憑證授權單位存放區,以確保它不包含公共憑證授權單位,如此處所述。 其他 VPN 閘道可能也需要考慮類似的方法。