建立和使用應用程式服務
重要
本主題中的程式代碼清單僅限 C#。 有關 C++/WinRT 以及 C# 中的應用程式服務範例應用,請參閱應用服務範例應用程式。
應用程式服務是向其他 UWP 應用程式提供服務的 UWP 應用程式。 它們類似於裝置上的 Web 服務。 應用程式服務在主控 App 中以背景工作方式執行,並且可以將其服務提供給其他 App。 例如,應用程式服務可能會提供其他 App 可以使用的條碼掃描器服務。 或者,企業應用程式套件有常見的拼字檢查應用程式服務,可供套件中的其他應用程式使用。 應用程式服務可讓您建立應用程式可以在相同裝置上呼叫的無 UI 服務,並從遠端裝置上的 Windows 10 版本 1607 開始。
從 Windows 10 版本 1607 開始,您可以建立與主應用程式相同程序中執行的應用程式服務。 本文重點介紹如何建立和使用在單獨的背景程序中執行的應用程式服務。 如需在與提供者相同的程序中執行應用程式服務的詳細資訊,請參閱 將應用程式服務轉換成與其主應用程式相同的程序中執行。
建立新的應用服務提供者專案
在本手冊中,為了簡單起見,我們將在一個方案中建立所有專案。
在 Visual Studio 2015 或更高版本中,建立一個新的 UWP 應用程式專案並將其命名為 AppServiceProvider。
- 選擇檔案>新>專案...
- 在 [建立新專案] 對話方塊中,選取空白應用程式 (通用 Windows) C#。 這會是讓 App Service 可供其他 UWP app 使用的應用程式。
- 按一下下一步,然後將項目命名為 AppServiceProvider,為其選擇一個位置,然後按一下建立。
當要求為專案選擇目標版本和最低版本時,至少選擇 10.0.14393。 如果要使用新的 SupportsMultipleInstances 屬性,則必須使用 Visual Studio 2017 或 Visual Studio 2019,且目標版本為 10.0.15063 (Windows 10 Creators Update) 或更高版本。
將 App Service 延伸模組新增至 Package.appxmanifest
在 AppServiceProvider 專案中,在文本編輯器中開啟 Package.appxmanifest 檔案:
- 以滑鼠右鍵按一下方案總管中的專案。
- 選擇打開方式。
- 選擇 XML (文字) 編輯器。
在 <Application> 元素內加入以下 AppService 延伸模組。 此範例會公告 com.microsoft.inventory 服務,以及此應用程式識別為應用程式服務提供者的內容。 實際服務會實作為背景工作。 App Service 專案會將服務公開給其他應用程式。 我們建議針對服務名稱使用反向域名樣式。
請注意,xmlns:uap4 命名空間前綴和 uap4:SupportsMultipleInstances 屬性僅在您面向 Windows SDK 版本 10.0.15063 或更高版本時才有效。 如果您是以舊版 SDK 為目標,則可以安全地移除它們。
注意
有關 C++/WinRT 以及 C# 中的應用程式服務範例應用,請參閱應用服務範例應用程式。
<Package
    ...
    xmlns:uap3="http://schemas.microsoft.com/appx/manifest/uap/windows10/3"
    xmlns:uap4="http://schemas.microsoft.com/appx/manifest/uap/windows10/4"
    ...
    <Applications>
        <Application Id="AppServiceProvider.App"
          Executable="$targetnametoken$.exe"
          EntryPoint="AppServiceProvider.App">
          ...
          <Extensions>
            <uap:Extension Category="windows.appService" EntryPoint="MyAppService.Inventory">
              <uap3:AppService Name="com.microsoft.inventory" uap4:SupportsMultipleInstances="true"/>
            </uap:Extension>
          </Extensions>
          ...
        </Application>
    </Applications>
Category 屬性會將此應用程式識別為應用程式服務提供者。
EntryPoint 屬性會識別實作服務的命名空間限定類別,接下來我們將實作該服務。
SupportsMultipleInstances 屬性表示每次呼叫應用程式服務時,都應該在新的程序中執行。 這不是必需的,但如果您需要該功能並且目標是 10.0.15063 SDK (Windows 10 創作者更新) 或更高版本,則可以使用該功能。 它也應該以 uap4 命名空間開頭。
建立應用程式服務
應用程式服務可以實作為背景工作。 這可讓前景應用程式在另一個應用程式中叫用應用程式服務。 若要建立應用程式服務作為背景工作,請將新的 Windows 執行時間元件項目新增至名為 MyAppService 的解決方案 (檔案>新增>專案)。 在新增專案對話方塊中,選擇已安裝的 >Visual C#> Windows 執行階段元 (通用 Windows)。
在 AppServiceProvider 專案中,新增對新 MyAppService 專案的專案到專案參考 (在方案總管中,以滑鼠右鍵按一下 AppServiceProvider 專案 >Add>Reference>Projects>Solution,選擇 MyAppService>OK)。 此步驟很重要,因為如果您未新增參考,應用程式服務將不會在執行時間連線。
在 MyAppService 專案中,將下列 using 語句加入 Class1.cs 的頂部:
using Windows.ApplicationModel.AppService;
using Windows.ApplicationModel.Background;
using Windows.Foundation.Collections;
將 Class1.cs 重新命名為 Inventory.cs,並將 Class1 的存根程式碼替換為名為 Inventory 的新背景工作類別:
public sealed class Inventory : IBackgroundTask
{
    private BackgroundTaskDeferral backgroundTaskDeferral;
    private AppServiceConnection appServiceconnection;
    private String[] inventoryItems = new string[] { "Robot vacuum", "Chair" };
    private double[] inventoryPrices = new double[] { 129.99, 88.99 };

    public void Run(IBackgroundTaskInstance taskInstance)
    {
        // Get a deferral so that the service isn't terminated.
        this.backgroundTaskDeferral = taskInstance.GetDeferral();

        // Associate a cancellation handler with the background task.
        taskInstance.Canceled += OnTaskCanceled;

        // Retrieve the app service connection and set up a listener for incoming app service requests.
        var details = taskInstance.TriggerDetails as AppServiceTriggerDetails;
        appServiceconnection = details.AppServiceConnection;
        appServiceconnection.RequestReceived += OnRequestReceived;
    }

    private async void OnRequestReceived(AppServiceConnection sender, AppServiceRequestReceivedEventArgs args)
    {
        // This function is called when the app service receives a request.
    }

    private void OnTaskCanceled(IBackgroundTaskInstance sender, BackgroundTaskCancellationReason reason)
    {
        if (this.backgroundTaskDeferral != null)
        {
            // Complete the service deferral.
            this.backgroundTaskDeferral.Complete();
        }
    }
}
此類是應用程式服務執行其工作的地方。
Run 會在建立背景工作時呼叫。 因為背景工作會在 Run 完成之後終止,所以程式代碼會取出延遲,讓背景工作隨時提供要求。 作為背景工作實現的應用服務將在收到呼叫後保持活動狀態約 30 秒,除非在該時間視窗內再次呼叫它或取消延遲。如果應用程式服務與呼叫者在同一程序中實現,則應用程式服務的生命週期與呼叫者的生命週期相關。
應用程式服務的生命週期取決於呼叫者:
- 如果呼叫者位於前景,則應用程式服務生命週期與呼叫者相同。
- 如果呼叫者在背景,應用程式服務將有 30 秒的時間運作。 取消延遲可額外增加一次 5 秒。
取消工作時會呼叫 OnTaskCanceled。 當用戶端應用程式處置 AppServiceConnection、客戶端應用程式暫停、作業系統關閉或睡眠或作業系統耗盡執行工作的資源時,工作將被取消。
撰寫應用程式服務的程序代碼
OnRequestReceived 是 App Service 程序代碼的所在位置。 以此範例中的程序代碼取代 MyAppServiceInventory.cs 中的 stub OnRequestReceived。 此程式碼會取得庫存商品的索引,並將其與命令字串一起傳遞給服務以擷取指定庫存商品的名稱和價格。 對於您自己的項目,請新增錯誤處理程式碼。
private async void OnRequestReceived(AppServiceConnection sender, AppServiceRequestReceivedEventArgs args)
{
    // Get a deferral because we use an awaitable API below to respond to the message
    // and we don't want this call to get canceled while we are waiting.
    var messageDeferral = args.GetDeferral();

    ValueSet message = args.Request.Message;
    ValueSet returnData = new ValueSet();

    string command = message["Command"] as string;
    int? inventoryIndex = message["ID"] as int?;

    if (inventoryIndex.HasValue &&
        inventoryIndex.Value >= 0 &&
        inventoryIndex.Value < inventoryItems.GetLength(0))
    {
        switch (command)
        {
            case "Price":
            {
                returnData.Add("Result", inventoryPrices[inventoryIndex.Value]);
                returnData.Add("Status", "OK");
                break;
            }

            case "Item":
            {
                returnData.Add("Result", inventoryItems[inventoryIndex.Value]);
                returnData.Add("Status", "OK");
                break;
            }

            default:
            {
                returnData.Add("Status", "Fail: unknown command");
                break;
            }
        }
    }
    else
    {
        returnData.Add("Status", "Fail: Index out of range");
    }

    try
    {
        // Return the data to the caller.
        await args.Request.SendResponseAsync(returnData);
    }
    catch (Exception e)
    {
        // Your exception handling code here.
    }
    finally
    {
        // Complete the deferral so that the platform knows that we're done responding to the app service call.
        // Note for error handling: this must be called even if SendResponseAsync() throws an exception.
        messageDeferral.Complete();
    }
}
請注意,OnRequestReceived 是非同步的,因為我們在此範例中對 SendResponseAsync 進行了可等待的方法呼叫。
會採用延遲,讓服務可以在 OnRequestReceived 處理程式中使用非同步方法。 它會確保對 OnRequestReceived 的呼叫在處理訊息之後才會完成。 SendResponseAsync 會將結果傳送給呼叫端。 SendResponseAsync 不會發出呼叫完成的訊號。 這是延遲的完成,向 SendMessageAsync 發出訊號,即 OnRequestReceived 已完成。 對 SendResponse Async 的呼叫包裝在 try/finally 區塊中,因為即使 SendResponse Async 引發異常,您也必須完成延遲。
應用程式服務會使用 ValueSet 物件來交換資訊。 您可以傳遞的資料大小僅受系統資源的限制。 ValueSet 中沒有預先定義的索引鍵可供您使用。 您必須確定將使用哪些金鑰值來定義應用程式服務的協定。 呼叫端必須考慮到該通訊協定。 在此範例中,我們選擇了一個名為 Command 的鍵,該鍵的值指示我們是否希望應用程式服務提供庫存商品的名稱或其價格。 清查名稱的索引會儲存在 ID 金鑰底下。 傳回值會儲存在 Result 金鑰下。
AppServiceClosedStatus 枚舉傳回給呼叫者以指示對應用服務的呼叫是成功還是失敗。 應用服務的呼叫可能會失敗的一個範例是,如果作業系統因超出其資源而中止服務端點。 您可以透過 ValueSet 傳回其他錯誤資訊。 在此範例中,我們使用名為 Status 的金鑰,將更詳細的錯誤資訊傳回給呼叫端。
對 SendResponse Async 的呼叫將 ValueSet 傳回給呼叫者。
部署服務應用程式並取得套件系列名稱
必須先部署應用程式服務提供程式,然後才能從客戶端呼叫它。 您可以透過在 Visual Studio 中選擇建置>部署解決方案來部署它。
您還需要應用程式服務提供者的套件系列名稱才能呼叫它。 您可以透過在設計器檢視中開啟 AppServiceProvider 專案的 Package.appxmanifest 檔案 (在方案總管中按兩下它) 來取得它。 選擇套件索引標籤,複製套件系列名稱旁邊的值,然後將其貼上到記事本等位置。
撰寫用戶端以呼叫應用程式服務
使用檔案> 新增>專案,將新的空白 Windows 通用應用程式專案新增至方案。 在新增專案對話方塊中,選擇已安裝的 >Visual C#> 空白應用程式 (通用 Windows) 並將其命名為 ClientApp。
在 ClientApp 專案中,將以下 using 語句加入 MainPage.xaml.cs 的頂部:
using Windows.ApplicationModel.AppService;將一個名為 textBox 的文字方塊和一個按鈕加入 MainPage.xaml。
為名為 button_Click 的按鈕新增按鈕點擊處理程序,並將關鍵字 async 新增至按鈕處理程序的簽章。
以下列程式代碼取代按鈕點選處理程式的存根。 請務必包含
inventoryService欄位宣告。private AppServiceConnection inventoryService; private async void button_Click(object sender, RoutedEventArgs e) { // Add the connection. if (this.inventoryService == null) { this.inventoryService = new AppServiceConnection(); // Here, we use the app service name defined in the app service // provider's Package.appxmanifest file in the <Extension> section. this.inventoryService.AppServiceName = "com.microsoft.inventory"; // Use Windows.ApplicationModel.Package.Current.Id.FamilyName // within the app service provider to get this value. this.inventoryService.PackageFamilyName = "Replace with the package family name"; var status = await this.inventoryService.OpenAsync(); if (status != AppServiceConnectionStatus.Success) { textBox.Text= "Failed to connect"; this.inventoryService = null; return; } } // Call the service. int idx = int.Parse(textBox.Text); var message = new ValueSet(); message.Add("Command", "Item"); message.Add("ID", idx); AppServiceResponse response = await this.inventoryService.SendMessageAsync(message); string result = ""; if (response.Status == AppServiceResponseStatus.Success) { // Get the data that the service sent to us. if (response.Message["Status"] as string == "OK") { result = response.Message["Result"] as string; } } message.Clear(); message.Add("Command", "Price"); message.Add("ID", idx); response = await this.inventoryService.SendMessageAsync(message); if (response.Status == AppServiceResponseStatus.Success) { // Get the data that the service sent to us. if (response.Message["Status"] as string == "OK") { result += " : Price = " + response.Message["Result"] as string; } } textBox.Text = result; }將
this.inventoryService.PackageFamilyName = "Replace with the package family name";行中的套件系列名稱替換為您在上面部署服務應用程式並取得套件系列名稱中取得的 AppServiceProvider 專案的套件系列名稱。注意
請務必貼上字串常值,而不是將它放入變數中。 如果您使用變數,它將無法運作。
該程式碼首先建立與應用程式服務的連線。 在您處置
this.inventoryService之前,連線將保持開啟狀態。 App Service 名稱必須符合AppServiceName您新增至 AppServiceProvider 專案 Package.appxmanifest 檔案的項目屬性。 在此範例中,它是<uap3:AppService Name="com.microsoft.inventory"/>。建立名為
message的 ValueSet,以指定我們想要傳送至 App Service 的命令。 範例應用服務需要一個命令來指示要執行兩個操作中的哪一個。 我們從客戶端應用程式中的文字方塊中取得索引,然後使用Item命令呼叫服務來取得項目的描述。 然後,我們會使用Price命令進行呼叫,以取得專案的價格。 按鈕文字會設定為結果。由於 AppServiceResponseStatus 僅指示作業系統是否能夠將呼叫連接到應用程式服務,因此我們檢查從應用程式服務收到的 ValueSet 中的
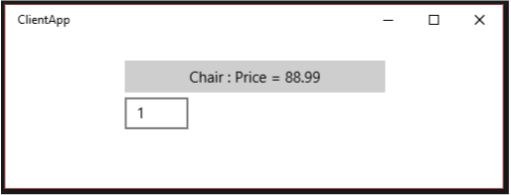
Status金鑰,以確保它能夠滿足請求。將 ClientApp 專案設定為啟動專案 (在方案總管>中以滑鼠右鍵按一下它設定為啟動專案) 並執行解決方案。 在文字框中輸入數位 1,然後按下按鈕。 您應該從服務中得到「椅子:價格 = 88.99」。
如果 App Service 呼叫失敗,請檢查 ClientApp 專案中的下列專案:
- 驗證指派給清單服務連線的套件系列名稱是否與 AppServiceProvider 應用程式的套件系列名稱相符。 使用 查看 button_Click 中的
this.inventoryService.PackageFamilyName = "...";行。 - 在 button_Click 中,驗證指派給庫存服務連線的應用程式服務名稱是否與 AppServiceProvider 的 Package.appxmanifest 檔案中的應用程式服務名稱相符。 請參閱:
this.inventoryService.AppServiceName = "com.microsoft.inventory";。 - 確保 AppServiceProvider 應用程式已部署。 (在方案總管中,請右鍵點擊解決方案並選擇部署解決方案)。
對應用程式服務進行偵錯
- 請確定解決方案在偵錯之前已部署,因為必須先部署應用程式服務提供者應用程式,才能呼叫服務。 (在 Visual Studio 中,建置>部署解決方案)。
- 在方案總管中,右鍵點選 AppServiceProvider 專案並選擇屬性。 在偵錯索引標籤,將啟動動作更改為不啟動,但在啟動時偵錯我的程式碼。 (請注意,如果您使用 C++ 來實作應用程式服務提供程序,則可以在偵錯索引標籤中將啟動應用程式變更為否)。
- 在 MyAppService 專案的 Inventory.cs 檔案中,在 OnRequestReceived 中設定斷點。
- 將 AppServiceProvider 專案設定為啟動項目,按 F5。
- 從開始功能表 (而不是從 Visual Studio) 啟動 ClientApp。
- 在文字框中輸入數位 1,然後按下按鈕。 偵錯工具將在應用程式服務中的斷點上的應用程式服務呼叫中停止。
偵錯客戶端
- 請依照上一步中的說明偵錯呼叫應用服務的客戶端。
- 從開始功能表啟動 ClientApp。
- 將偵錯工具附加到 ClientApp.exe 程序 (而不是 ApplicationFrameHost.exe 程序)。 (在 Visual Studio 中,選擇偵錯>連結至流程...)
- 在 ClientApp 專案中,在 button_Click 中設定斷點。
- 現在,當您在 ClientApp 的文字方塊中輸入數字 1 並按一下按鈕時,用戶端和應用程式服務中的斷點都會被命中。
一般應用服務故障排除
如果您在嘗試連線到應用程式服務後遇到 AppUnavailable 狀態,請檢查下列各項:
- 確保應用程式服務提供者項目和應用服務項目已部署。 兩者都需要在執行客戶端之前部署,否則客戶端將無法連接到任何內容。 您可以使用 Build>Deploy 解決方案從 Visual Studio 進行部署。
- 在方案總管中,確保您的應用程式服務提供者專案具有實現應用程式服務的專案的專案到專案引用。
- 驗證該
<Extensions>條目及其子元素是否已新增至屬於應用程式服務提供者專案的 Package.appxmanifest 文件,如上面將應用程式服務延伸模組新增至 Package.appxmanifest 中指定的。 - 確保呼叫應用程式服務提供者的用戶端中的 AppServiceConnection.AppServiceName 字串與應用程式服務提供者專案的 Package.appxmanifest 檔案中指定的
<uap3:AppService Name="..." />字串相符。 - 確保 AppServiceConnection.PackageFamilyName 與上面將應用程式服務延伸模組新增至 Package.appxmanifest 中指定的應用程式服務提供者元件的套件系列名稱相符
- 對於程序外應用程式服務 (例如本範例中的服務),請驗證
EntryPoint應用程式服務提供者專案的 Package.appxmanifest 檔案的<uap:Extension ...>元素中指定的名稱與在應用程式服務中實作 IBackgroundTask 的公共類別的命名空間和類別名稱相符專案。
針對偵錯進行疑難排解
如果偵錯工具未在應用程式服務提供者或應用程式服務項目中的斷點處停止,請檢查以下各項:
- 確保應用程式服務提供者項目和應用服務項目已部署。 執行用戶端之前,必須先部署這兩者。 您可以使用 Build>Deploy 解決方案從 Visual Studio 部署它們。
- 確保將要偵錯的項目設定為啟動項目,並且該項目的偵錯屬性設定為按 F5 時不執行該項目。 右鍵點擊該項目,然後按一下屬性,然後按一下偵錯 (或在 C++ 中偵錯)。 在 C# 中,將啟動動作變更為不啟動,但在啟動時偵錯我的程式碼。 在 C++ 中,將啟動應用程式設定為否。
備註
此範例介紹如何建立作為背景工作執行的應用服務並從另一個應用程式呼叫它。 要注意的重點是:
- 建立一個背景工作來託管應用程式服務。
- 將
windows.appService延伸模組新增至應用程式服務供應商的 Package.appxmanifest 檔案。 - 取得應用程式服務提供者的套件系列名稱,以便我們可以從客戶端應用程式連接到它。
- 將專案到專案的參考從應用服務提供者項目新增至應用程式服務項目。
- 使用 Windows.ApplicationModel.AppService.AppServiceConnection 呼叫服務。
MyAppService 的完整程序代碼
using System;
using Windows.ApplicationModel.AppService;
using Windows.ApplicationModel.Background;
using Windows.Foundation.Collections;

namespace MyAppService
{
    public sealed class Inventory : IBackgroundTask
    {
        private BackgroundTaskDeferral backgroundTaskDeferral;
        private AppServiceConnection appServiceconnection;
        private String[] inventoryItems = new string[] { "Robot vacuum", "Chair" };
        private double[] inventoryPrices = new double[] { 129.99, 88.99 };

        public void Run(IBackgroundTaskInstance taskInstance)
        {
            // Get a deferral so that the service isn't terminated.
            this.backgroundTaskDeferral = taskInstance.GetDeferral();

            // Associate a cancellation handler with the background task.
            taskInstance.Canceled += OnTaskCanceled;

            // Retrieve the app service connection and set up a listener for incoming app service requests.
            var details = taskInstance.TriggerDetails as AppServiceTriggerDetails;
            appServiceconnection = details.AppServiceConnection;
            appServiceconnection.RequestReceived += OnRequestReceived;
        }

        private async void OnRequestReceived(AppServiceConnection sender, AppServiceRequestReceivedEventArgs args)
        {
            // Get a deferral because we use an awaitable API below to respond to the message
            // and we don't want this call to get canceled while we are waiting.
            var messageDeferral = args.GetDeferral();

            ValueSet message = args.Request.Message;
            ValueSet returnData = new ValueSet();

            string command = message["Command"] as string;
            int? inventoryIndex = message["ID"] as int?;

            if (inventoryIndex.HasValue &&
                 inventoryIndex.Value >= 0 &&
                 inventoryIndex.Value < inventoryItems.GetLength(0))
            {
                switch (command)
                {
                    case "Price":
                        {
                            returnData.Add("Result", inventoryPrices[inventoryIndex.Value]);
                            returnData.Add("Status", "OK");
                            break;
                        }

                    case "Item":
                        {
                            returnData.Add("Result", inventoryItems[inventoryIndex.Value]);
                            returnData.Add("Status", "OK");
                            break;
                        }

                    default:
                        {
                            returnData.Add("Status", "Fail: unknown command");
                            break;
                        }
                }
            }
            else
            {
                returnData.Add("Status", "Fail: Index out of range");
            }

            // Return the data to the caller.
            await args.Request.SendResponseAsync(returnData);

            // Complete the deferral so that the platform knows that we're done responding to the app service call.
            // Note for error handling: this must be called even if SendResponseAsync() throws an exception.
            messageDeferral.Complete();
        }


        private void OnTaskCanceled(IBackgroundTaskInstance sender, BackgroundTaskCancellationReason reason)
        {
            if (this.backgroundTaskDeferral != null)
            {
                // Complete the service deferral.
                this.backgroundTaskDeferral.Complete();
            }
        }
    }
}
相關主題
意見反應
即將登場:在 2024 年,我們將逐步淘汰 GitHub 問題作為內容的意見反應機制,並將它取代為新的意見反應系統。 如需詳細資訊,請參閱:https://aka.ms/ContentUserFeedback。
提交並檢視相關的意見反應