Hello, iOS – 快速入門
警告
iOS 設計工具在 Visual Studio 2019 16.8 版和 Visual Studio 2019 for Mac 8.8 版中已被取代,並在 Visual Studio 2019 16.9 版和 Visual Studio for Mac 8.9 版中移除。 建置 iOS 使用者介面的建議方式是直接在執行 Xcode 介面產生器的 Mac 上。 如需詳細資訊,請參閱 使用 Xcode 設計使用者介面。
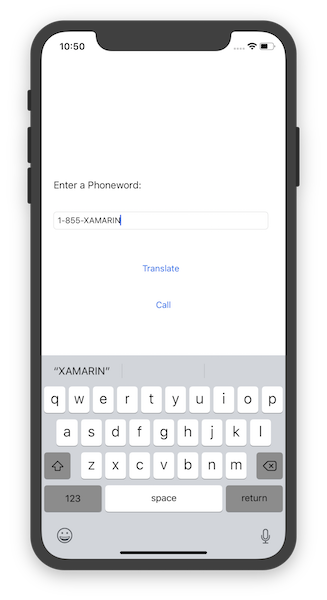
本指南說明如何建立可將使用者輸入的英數字元電話號碼轉譯成數字電話號碼,然後再撥打該號碼的應用程式。 最終的應用程式看起來如下:

需求
使用 Xamarin 進行 iOS 開發需要:
- 執行 macOS High Sierra (10.13) 或更新版本的 Mac。
- 從 App Store 安裝的最新版 Xcode 和 iOS SDK。
Xamarin.iOS 可與下列設定搭配運作:
- Windows 10 上的最新版 Visual Studio 2019 或 Visual Studio 2017 Community、Professional 或 Enterprise,並且已與符合上述規格的 Mac 組建主機配對。
Xamarin.iOS Windows 安裝指南會提供逐步安裝指示。
開始使用之前,請下載 Xamarin 應用程式圖示集。
Visual Studio for Mac 逐步解說
本逐步解說將說明如何建立名為 Phoneword 且可將英數字元電話號碼轉譯成數字電話號碼的應用程式。
從 [Applications] 資料夾或 [Spotlight],啟動 Visual Studio for Mac:
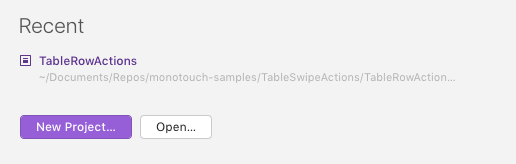
在啟動畫面上,按一下 [新增專案] 以建立新 Xamarin.iOS 方案:
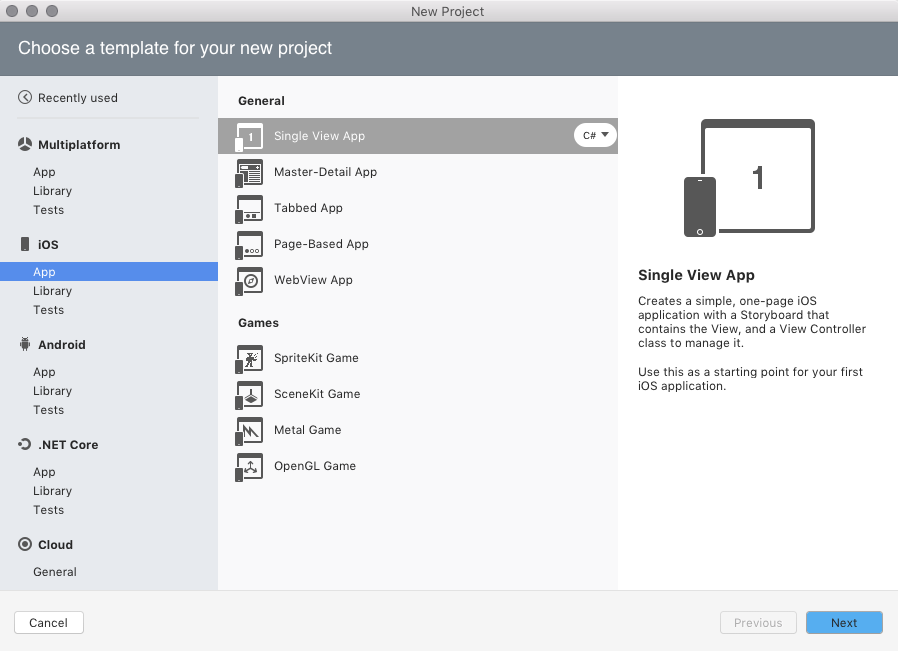
從 [ 新增解決方案] 對話框中,選擇 [iOS > 應用程式 > 單一檢視應用程式 ] 範本,確保已選取 C# 。 按一下 [下一步]:
設定應用程式。 在 [名稱] 中指定
Phoneword_iOS,並將其他選項維持為預設值。 按一下 [下一步]: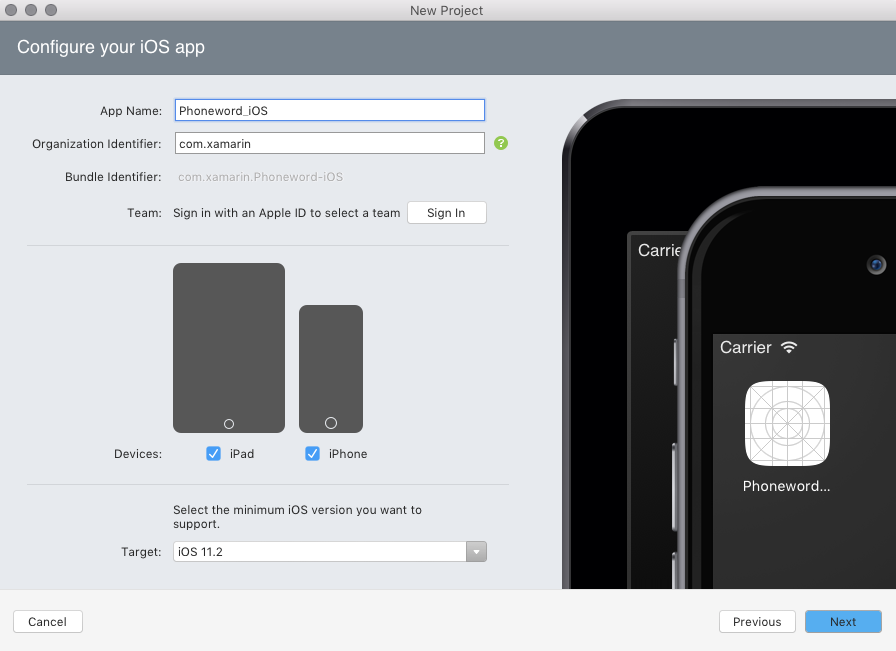
讓專案和方案名稱依原樣保留。 在此處選擇專案的位置,或將其保留為預設值:
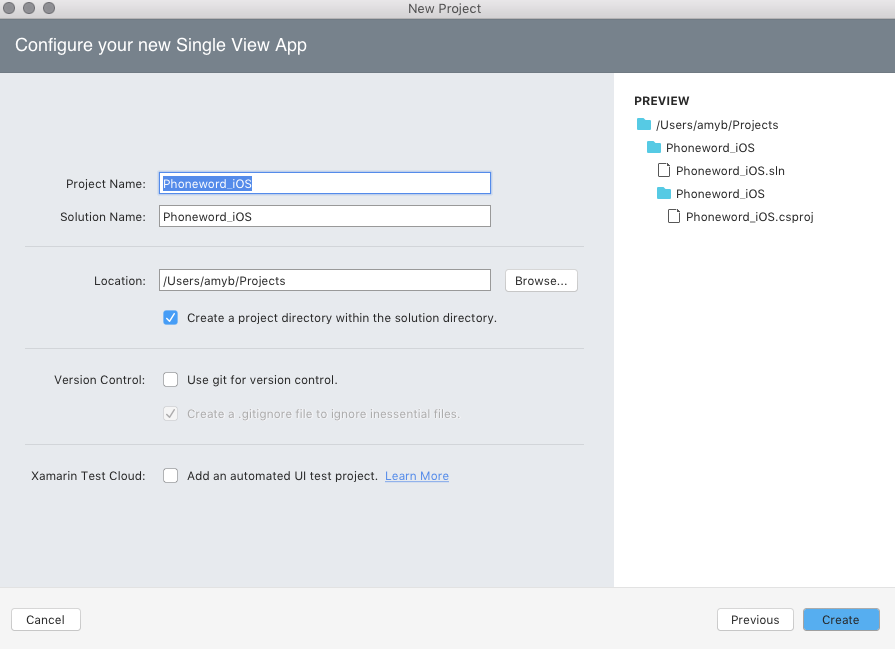
按一下 [建立] 以產生方案。
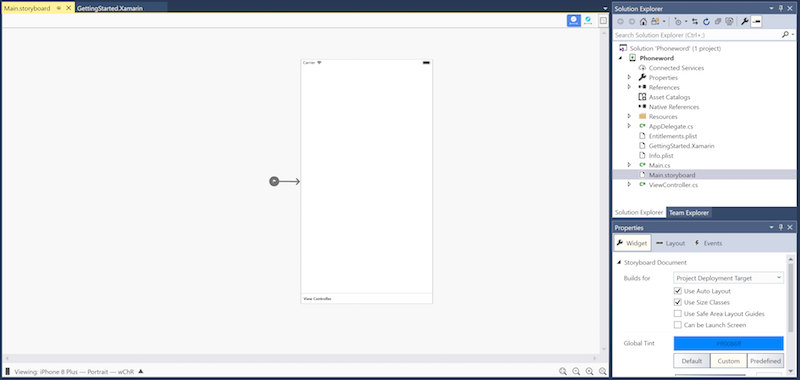
在 Solution Pad 中按兩下 Main.storyboard 檔案加以開啟。 請確定您使用 Visual Studio iOS 設計工具開啟檔案(以滑鼠右鍵按兩下分鏡腳本,然後選取 [ 使用 > iOS 設計工具開啟]。 這提供以視覺化方式建立 UI 的方式:

請注意,預設會啟用大小類別。 若要深入了解它們,請參閱整合的分鏡腳本指南。
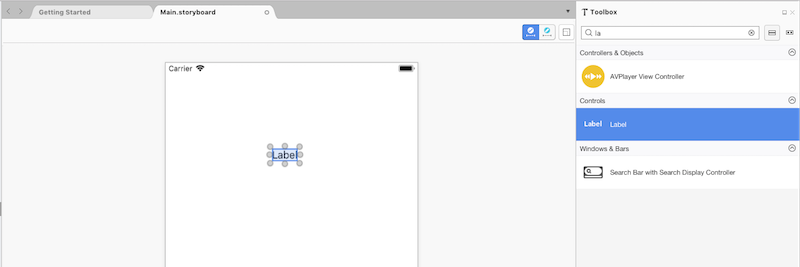
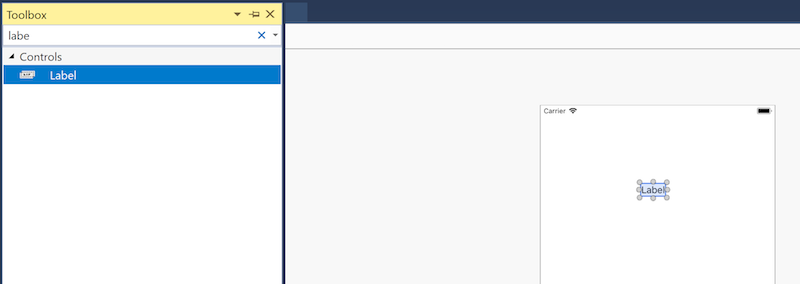
在 [Toolbox Pad] 中,在搜尋列中輸入「標籤」,然後將標籤拖曳至設計介面 (中央區域):
注意
您可以隨時瀏覽至 [檢視>面板] 來顯示 [屬性面板] 或 [工具箱]。
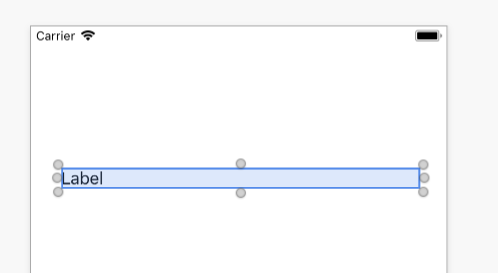
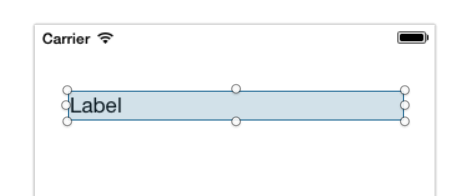
捕捉「拖曳控制項」的控點 (控制項周圍的圓形),然後將標籤加寬:
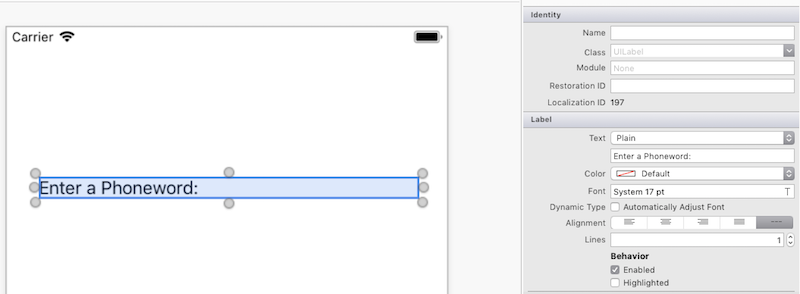
利用設計介面上選取的標籤,使用 Properties Pad 來將標籤的文字屬性變更為 "Enter a Phoneword:"
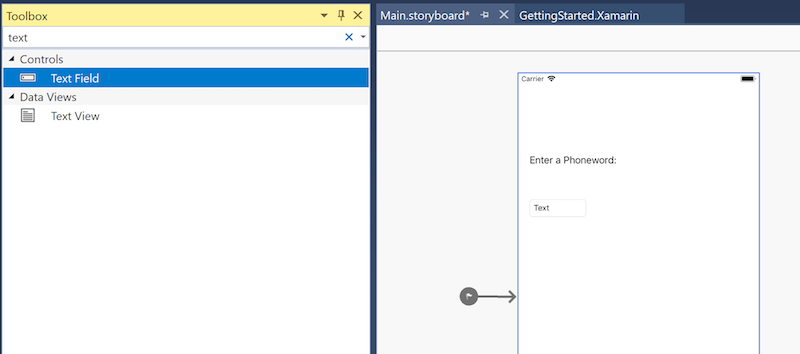
在工具箱內搜尋「文字欄位」,然後將文字欄位從工具箱拖曳至設計介面,並放置於標籤下方。 調整寬度,直到文字欄位與標籤等寬為止:
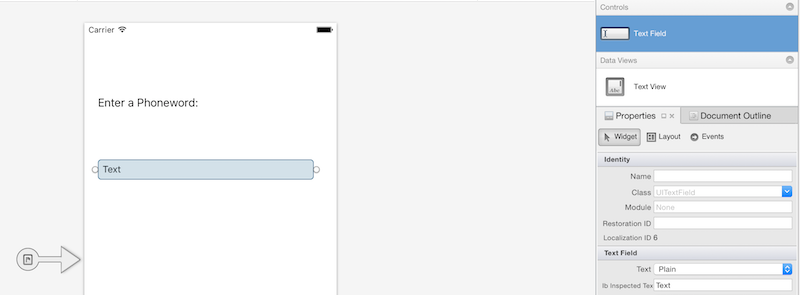
在於設計介面上選取 [文字欄位] 的情況下,將 [文字欄位] 的 [名稱] 屬性 (位於 Properties Pad 的 [身分識別] 區段) 變更為
PhoneNumberText並將 [文字] 屬性變更為 "1-855-XAMARIN":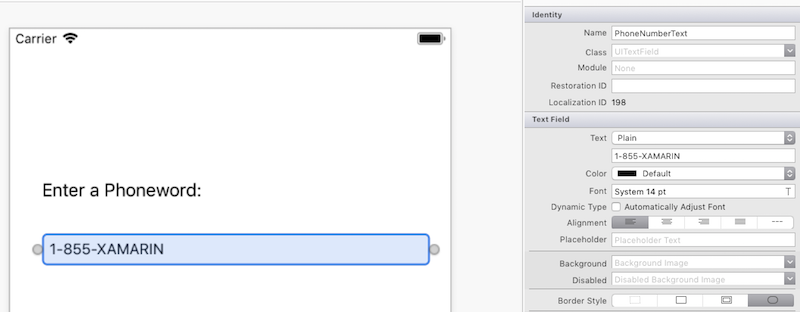
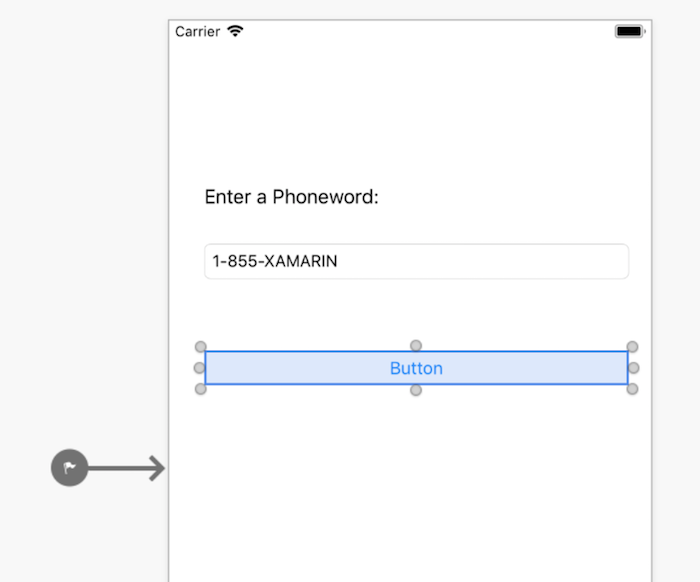
將按鈕從工具箱拖曳至設計介面,並放置於文字欄位下方。 調整寬度,使按鈕與文字欄位和標籤等寬:
利用設計介面上選取的按鈕,在 Properties Pad 的 [身分識別] 區段中,將名稱屬性變更為
TranslateButton。 將標題屬性變更為 "Translate":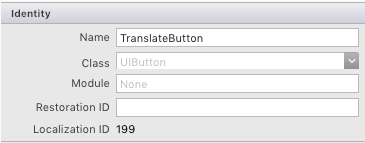
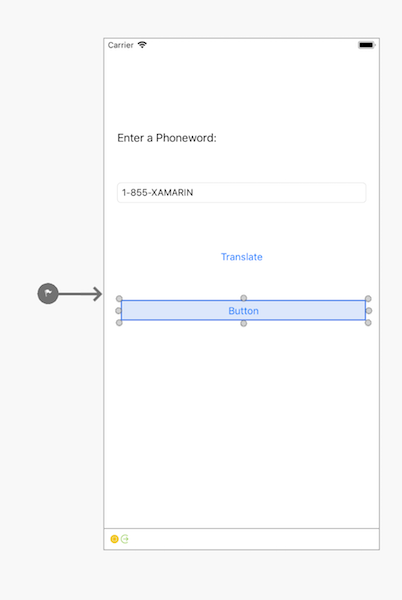
重複執行前兩個步驟,然後將按鈕從工具箱拖曳至設計介面,並放置於第一個按鈕下方。 調整寬度,使按鈕與第一個按鈕等寬:

利用設計介面上選取的第二個按鈕,在 Properties Pad 的 [身分識別] 區段中,將名稱屬性變更為
CallButton。 將標題屬性變更為 "Call":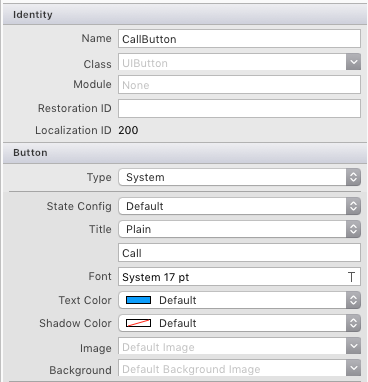
流覽至 [檔案 > 儲存 ] 或按 ⌘ + s 來儲存變更。
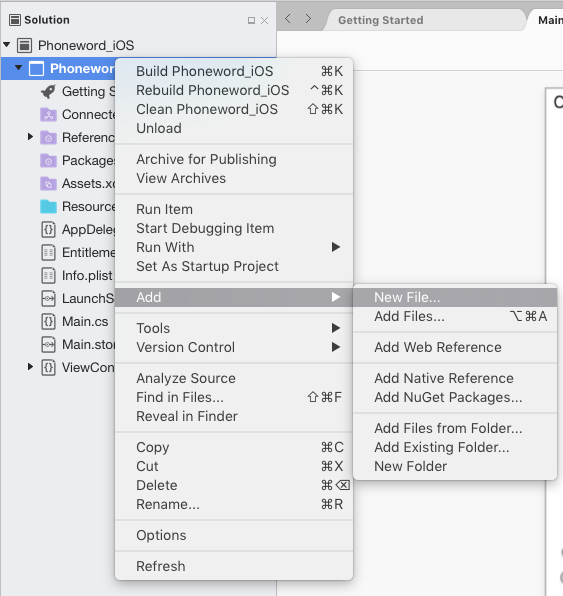
您必須將某些邏輯新增至應用程式,才能將電話號碼從英數字元轉譯為數字。 以滑鼠右鍵按兩下 Solution Pad 中的 [電話 word_iOS 專案],然後選擇 [新增>檔案...],或按 ⌘ + n,將新檔案新增至專案:
在 [新增檔案] 對話框中,選取 [一般>空白類別],並將新檔案
PhoneTranslator命名為 :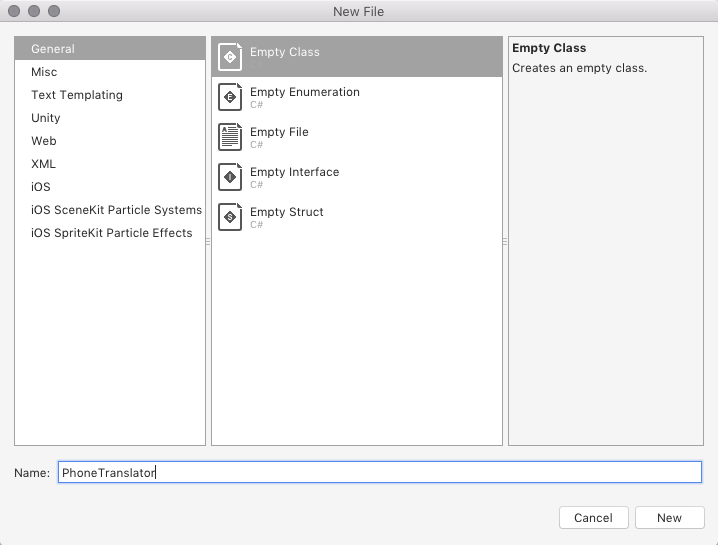
這會建立新的空白 C# 類別。 移除所有範本程式碼,並使用下列程式碼來取代:
using System.Text;
using System;

namespace Phoneword_iOS
{
    public static class PhoneTranslator
    {
        public static string ToNumber(string raw)
        {
            if (string.IsNullOrWhiteSpace(raw)) {
                return "";
            } else {
                raw = raw.ToUpperInvariant();
            }

            var newNumber = new StringBuilder();
            foreach (var c in raw)
            {
                if (" -0123456789".Contains(c)) {
                    newNumber.Append(c);
                } else {
                    var result = TranslateToNumber(c);
                    if (result != null) {
                        newNumber.Append(result);
                    }
                }
                // otherwise we've skipped a non-numeric char
            }
            return newNumber.ToString();
        }

        static bool Contains (this string keyString, char c)
        {
            return keyString.IndexOf(c) >= 0;
        }

        static int? TranslateToNumber(char c)
        {
            if ("ABC".Contains(c)) {
                return 2;
            } else if ("DEF".Contains(c)) {
                return 3;
            } else if ("GHI".Contains(c)) {
                return 4;
            } else if ("JKL".Contains(c)) {
                return 5;
            } else if ("MNO".Contains(c)) {
                return 6;
            } else if ("PQRS".Contains(c)) {
                return 7;
            } else if ("TUV".Contains(c)) {
                return 8;
            } else if ("WXYZ".Contains(c)) {
                return 9;
            }
            return null;
        }
    }
}
儲存 PhoneTranslator.cs 檔案並將它關閉。
新增連接使用者介面的程式碼。 若要執行此作業,在 Solution Pad 中按兩下 ViewController.cs 加以開啟:

從連接
TranslateButton開始。 在 ViewController 類別中,尋找ViewDidLoad方法,並在base.ViewDidLoad()呼叫下方新增下列程式碼:string translatedNumber = ""; TranslateButton.TouchUpInside += (object sender, EventArgs e) => { // Convert the phone number with text to a number // using PhoneTranslator.cs translatedNumber = PhoneTranslator.ToNumber( PhoneNumberText.Text); // Dismiss the keyboard if text field was tapped PhoneNumberText.ResignFirstResponder (); if (translatedNumber == "") { CallButton.SetTitle ("Call ", UIControlState.Normal); CallButton.Enabled = false; } else { CallButton.SetTitle ("Call " + translatedNumber, UIControlState.Normal); CallButton.Enabled = true; } };如果檔案的命名空間不同,請包含
using Phoneword_iOS;。新增程式碼來回應按下第二個名為
CallButton之按鈕的使用者。 將下列程式碼放置於TranslateButton的程式碼底下,然後在檔案頂端新增using Foundation;:CallButton.TouchUpInside += (object sender, EventArgs e) => { // Use URL handler with tel: prefix to invoke Apple's Phone app... var url = new NSUrl ("tel:" + translatedNumber); // ...otherwise show an alert dialog if (!UIApplication.SharedApplication.OpenUrl (url)) { var alert = UIAlertController.Create ("Not supported", "Scheme 'tel:' is not supported on this device", UIAlertControllerStyle.Alert); alert.AddAction (UIAlertAction.Create ("Ok", UIAlertActionStyle.Default, null)); PresentViewController (alert, true, null); } };儲存變更,然後選擇 [全部建置]> 或按 ⌘ + B 來建置應用程式。如果應用程式編譯,則成功訊息會出現在IDE頂端:

如果發生錯誤,請完成上述步驟,並更正任何錯誤,直到應用程式建置成功為止。
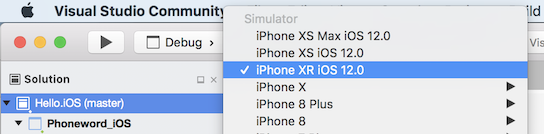
最後,在 iOS 模擬器中測試應用程式。 在 IDE 的左上角,從第一個下拉式清單中選擇 [偵錯],並從第二個下拉式清單中選擇 [iPhone XR iOS 12.0] (或其他可用的模擬器),然後按 [啟動] (類似 [播放] 按鈕的三角形按鈕):
注意
目前因為 Apple 的需求,可能必須擁有開發憑證或簽署身分識別,才可針對裝置或模擬器建置您的程式碼。 請依照裝置佈建指南中的步驟來設定此項。
這樣將會在 iOS 模擬器內啟動應用程式:
iOS 模擬器不支援撥打電話;將改為讓您在嘗試進行撥號時看到警示對話方塊:

Visual Studio 逐步解說
本逐步解說將說明如何建立名為 Phoneword 且可將英數字元電話號碼轉譯成數字電話號碼的應用程式。
注意
這個逐步解說會使用 Windows 10 虛擬機器上的 Visual Studio Enterprise 2017。 您的設定可以與之不同,只要符合上述需求即可,但請注意,某些螢幕擷取畫面看起來可能與您的設定不同。
注意
繼續進行本逐步解說之前,您必須已經從 Visual Studio 連線到您的 Mac。 這是因為 Xamarin.iOS 依賴 Apple 的工具來建置和啟動應用程式。 若要進行設定,請遵循與 Mac 配對指南中的步驟。
從 [開始] 功能表啟動 Visual Studio:

選取 [檔案>新專案...]>,以建立新的 Xamarin.iOS 方案... >Visual C# > i 電話 & iPad > iOS 應用程式 (Xamarin):
 project type")
在下一個出現的對話方塊中,選取 [單一檢視應用程式] 範本,然後按 [確定] 建立專案:

確認工具列中的 Xamarin Mac Agent 圖示為綠色。

如果它不是這樣,表示沒有任何連線連線到您的 Mac 組建主機,請依照設定指南中的步驟執行以連線。
在 [方案總管] 中按兩下 Main.storyboard 檔案,以在 iOS 設計工具中開啟該檔案:
開啟 [工具箱] 索引標籤,在搜尋列中輸入「標籤」,然後將標籤拖曳至設計介面 (中央區域):
接著,抓住「拖曳控制項」的控點,然後將標籤加寬:
利用設計介面上選取的標籤,使用屬性視窗來將標籤的文字屬性變更為 "Enter a Phoneword:"

注意
您隨時都可移至 [檢視] 功能表來顯示 [屬性] 或 [工具箱]。
在工具箱內搜尋「文字欄位」,然後將文字欄位從工具箱拖曳至設計介面,並放置於標籤下方。 調整寬度,直到文字欄位與標籤等寬為止:
利用設計介面上選取的文字欄位,在屬性 的 [身分識別] 區段中,將文字欄位的名稱屬性變更為
PhoneNumberText,並將文字屬性變更為 "1-855-XAMARIN":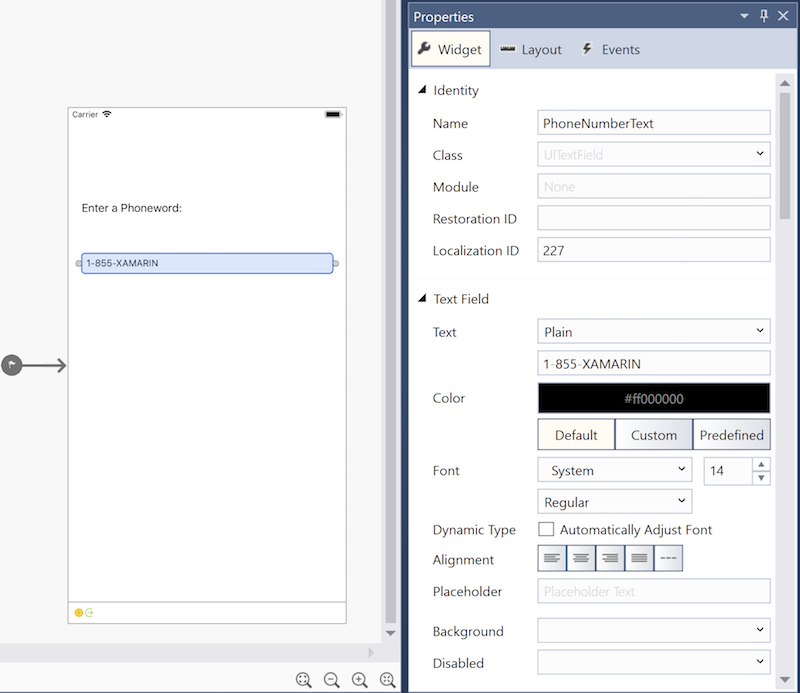
將按鈕從工具箱拖曳至設計介面,並放置於文字欄位下方。 調整寬度,使按鈕與文字欄位和標籤等寬:

利用設計介面上選取的按鈕,在屬性的 [身分識別] 區段中,將名稱屬性變更為
TranslateButton。 將標題屬性變更為 "Translate":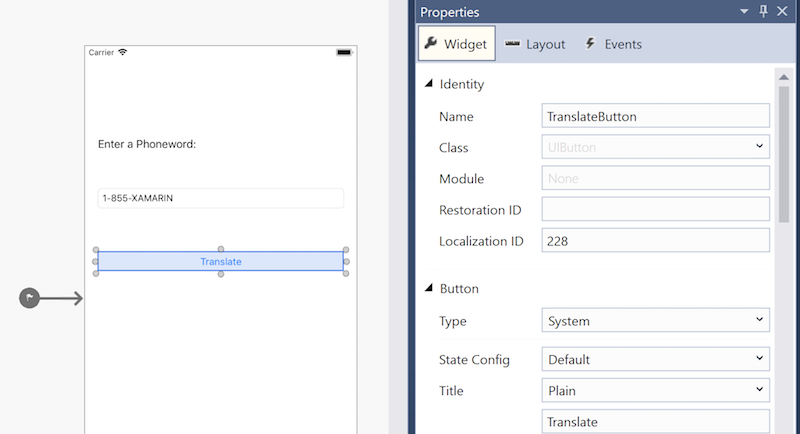
重複執行前兩個步驟,然後將按鈕從工具箱拖曳至設計介面,並放置於第一個按鈕下方。 調整寬度,使按鈕與第一個按鈕等寬:
利用設計介面上選取的第二個按鈕,在屬性的 [身分識別] 區段中,將名稱屬性變更為
CallButton。 將標題屬性變更為 "Call":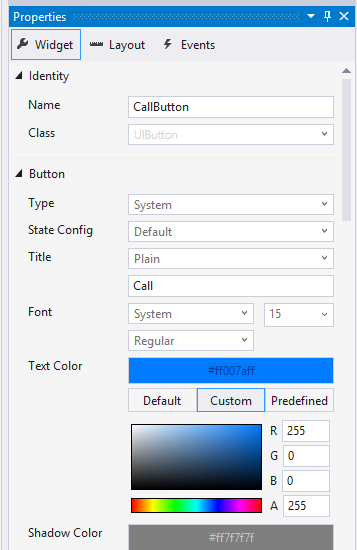
流覽至 [全部儲存盤案>] 或按 Ctrl + s 來儲存變更。
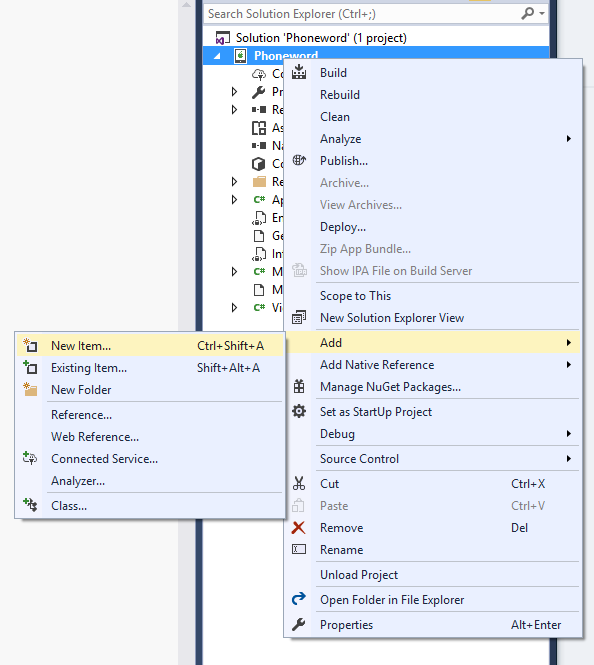
新增一些將電話號碼從英數字元轉譯為數字的程式碼。 若要這樣做,請先以滑鼠右鍵按兩下 方案總管 中的 電話 word Project,然後選擇 [新增>專案...],或按 Ctrl + Shift + A,將新檔案新增至 Project:
在 [ 新增專案 ] 對話框中(以滑鼠右鍵按兩下專案,選擇 [新增 > 專案...]),選取 [Apple > 類別 ],並將新檔案
PhoneTranslator命名為 :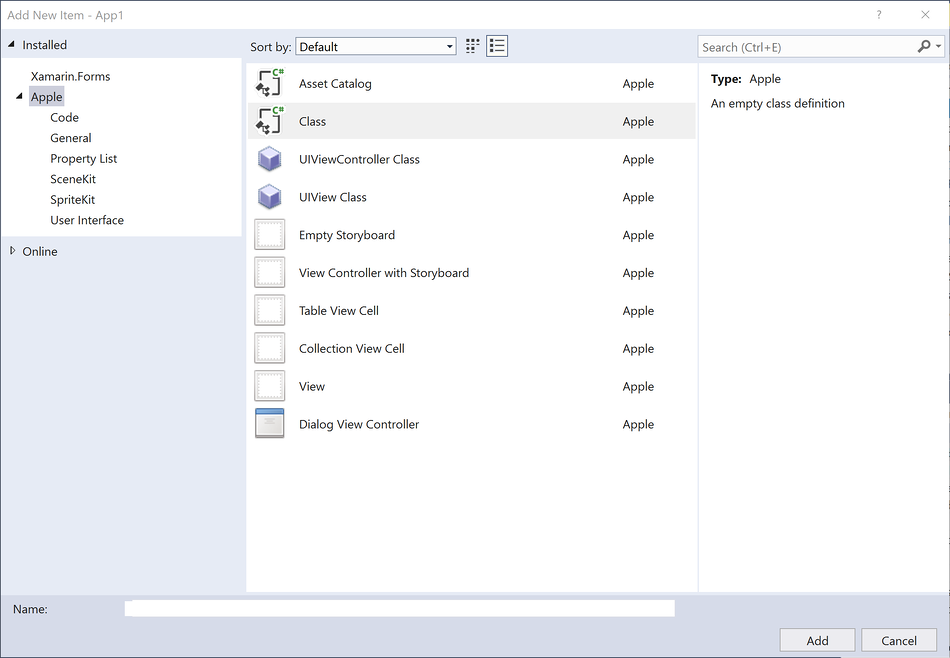
重要
確定您選取的是圖示中具有 C# 的「類別」範本。 否則您可能無法參考這個新類別。
這會建立新的 C# 類別。 移除所有範本程式碼,並使用下列程式碼來取代:
using System.Text;
using System;

namespace Phoneword
{
    public static class PhoneTranslator
    {
        public static string ToNumber(string raw)
        {
            if (string.IsNullOrWhiteSpace(raw)) {
                return "";
            } else {
                raw = raw.ToUpperInvariant();
            }

            var newNumber = new StringBuilder();
            foreach (var c in raw)
            {
                if (" -0123456789".Contains(c)) {
                    newNumber.Append(c);
                } else {
                    var result = TranslateToNumber(c);
                    if (result != null) {
                        newNumber.Append(result);
                    }
                }
                // otherwise we've skipped a non-numeric char
            }
            return newNumber.ToString();
        }

        static bool Contains (this string keyString, char c)
        {
            return keyString.IndexOf(c) >= 0;
        }

        static int? TranslateToNumber(char c)
        {
            if ("ABC".Contains(c)) {
                return 2;
            } else if ("DEF".Contains(c)) {
                return 3;
            } else if ("GHI".Contains(c)) {
                return 4;
            } else if ("JKL".Contains(c)) {
                return 5;
            } else if ("MNO".Contains(c)) {
                return 6;
            } else if ("PQRS".Contains(c)) {
                return 7;
            } else if ("TUV".Contains(c)) {
                return 8;
            } else if ("WXYZ".Contains(c)) {
                return 9;
            }
            return null;
        }
    }
}
儲存 PhoneTranslator.cs 檔案並將它關閉。
在 [方案總管] 中按兩下 ViewController.cs 加以開啟,如此就能新增該邏輯來處理與按鈕的互動:

從連接
TranslateButton開始。 在 ViewController 類別中,尋找ViewDidLoad方法。 將下列按鈕程式碼新增至ViewDidLoad內 (位於base.ViewDidLoad()呼叫下方):string translatedNumber = ""; TranslateButton.TouchUpInside += (object sender, EventArgs e) => { // Convert the phone number with text to a number // using PhoneTranslator.cs translatedNumber = PhoneTranslator.ToNumber(PhoneNumberText.Text); // Dismiss the keyboard if text field was tapped PhoneNumberText.ResignFirstResponder (); if (translatedNumber == "") { CallButton.SetTitle ("Call", UIControlState.Normal); CallButton.Enabled = false; } else { CallButton.SetTitle ("Call " + translatedNumber, UIControlState.Normal); CallButton.Enabled = true; } };如果檔案的命名空間不同,請包含
using Phoneword;。新增程式碼來回應按下第二個名為
CallButton之按鈕的使用者。 將下列程式碼放置於TranslateButton的程式碼底下,然後在檔案頂端新增using Foundation;:CallButton.TouchUpInside += (object sender, EventArgs e) => { var url = new NSUrl ("tel:" + translatedNumber); // Use URL handler with tel: prefix to invoke Apple's Phone app, // otherwise show an alert dialog if (!UIApplication.SharedApplication.OpenUrl (url)) { var alert = UIAlertController.Create ("Not supported", "Scheme 'tel:' is not supported on this device", UIAlertControllerStyle.Alert); alert.AddAction (UIAlertAction.Create ("Ok", UIAlertActionStyle.Default, null)); PresentViewController (alert, true, null); } };儲存變更,然後選擇 [建置方案] 或按 Ctrl + Shift + B 來建置應用程式。>如果應用程式編譯,則會在IDE底部顯示成功訊息:

如果發生錯誤,請完成上述步驟,並更正任何錯誤,直到應用程式建置成功為止。
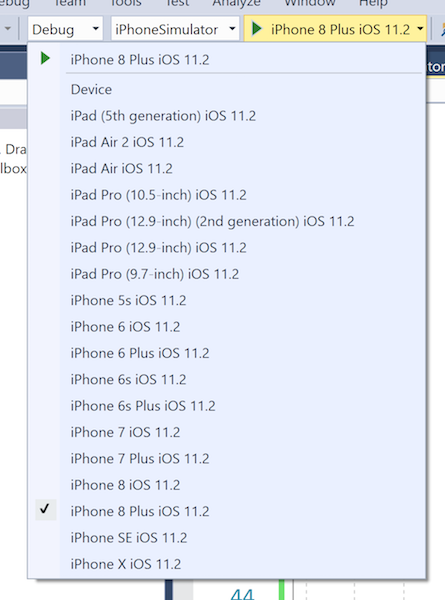
最後,在遠端 iOS 模擬器中測試應用程式。 在 IDE 工具列中,從下拉式功能表選擇 [偵錯] 和 [iPhone 8 Plus iOS x.x],然後按 [啟動] \(類似 [播放] 按鈕的綠色三角形\):
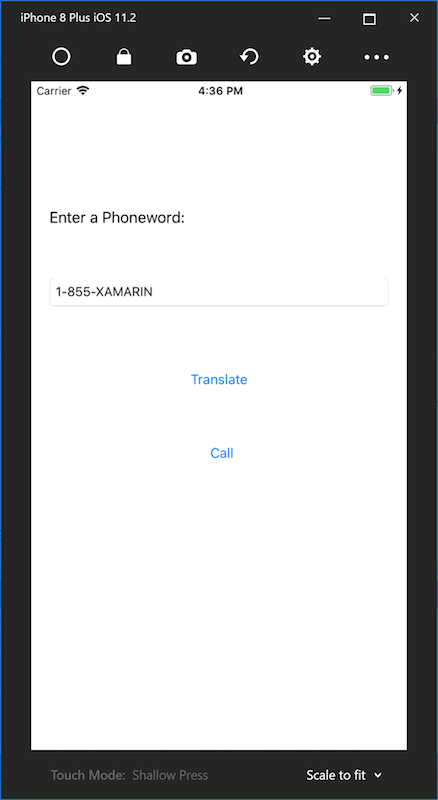
這樣將會在 iOS 模擬器內啟動應用程式:
iOS 模擬器不支援撥打電話;將改為在嘗試進行撥號時顯示警示對話方塊:

恭喜您完成第一個 Xamarin.iOS 應用程式!
現在可在 Hello, iOS 深度剖析中仔細分析本指南所示的工具與技能。
相關連結
- Xamarin 應用程式圖示和啟動影像 (範例)
- Hello, iOS (範例) \(英文\)
- iOS 人性化介面指導方針 \(英文\)