Create buttons with Unity cubes and MRTK scripts
The Mixed Reality Toolkit (MRTK) is equipped with 18 button prefabs that you can add to your mixed reality project. Although the button prefabs are configured with components such as scripts, you can further customize the prefabs to meet your specific needs. Furthermore, you can use the existing prefabs to create your own prefabs.
For this project, you'll create a button prefab that contains the following:
- A button that displays the player's name and photo.
- A card that appears when the button is pressed that displays the player's name and stats.
All button objects are created as the children of an empty GameObject. Consider this parent object as a container for all button objects. This structure provides organization for your prefab.
Now you'll use scripts provided by MRTK to create a button from scratch that displays the player's name and photo.
Important
To ensure that the objects you'll create don't conflict with the project scripts, name all objects as written in this module.
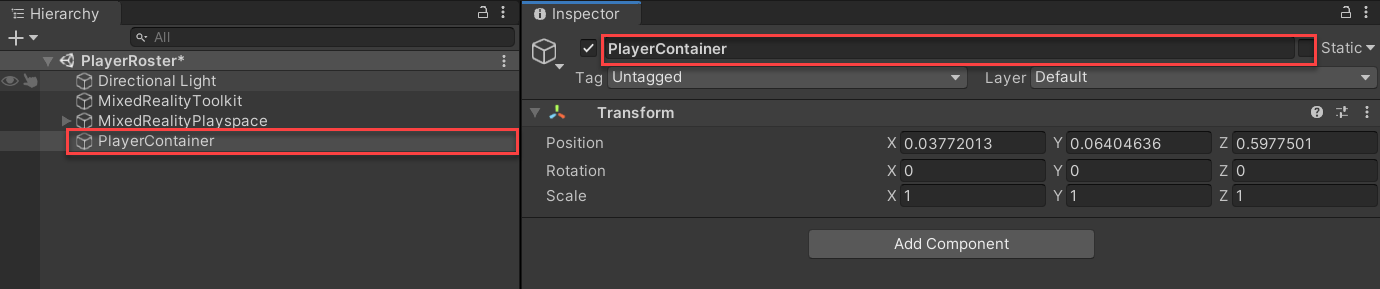
Create a container for the prefab
In the Hierarchy window, select the + icon, and select Create Empty.

In Hierarchy, select the GameObject. You see the GameObject properties in the Inspector window. In Inspector, rename the object PlayerContainer.
In the Inspector window, select the triple dots to the right of the Transform component. Then select Reset. This resets the position of the container to 0, 0, 0. (This position is considered to be the origin, or the middle of your head if you're wearing a headset.) Because the button objects will be created as children of
PlayerContainer, the child objects position will be relative to thePlayerContainerposition.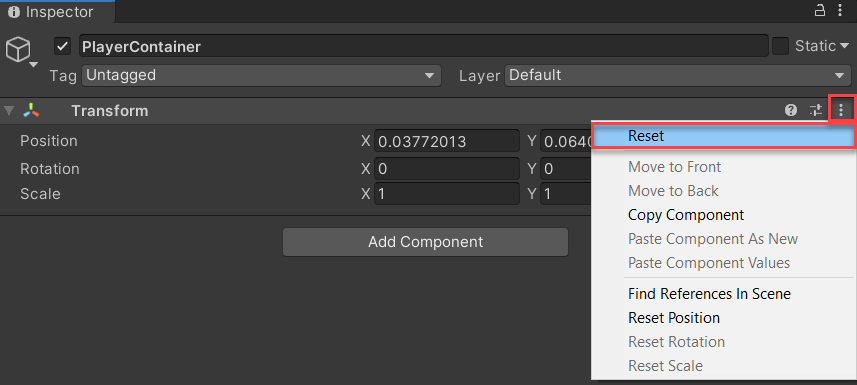
Now that you have an area for all of your players to go, you need to create buttons for each of them. Unity provides primitives that you can use in your projects as placeholders and prototypes for testing purposes. For this project, you'll use a cube primitive, and then add MRTK scripts to make the cube primitives clickable.
Create the cube primitive
The cube primitive will be a 3D object onto which you put a character's image, name, and player efficiency rating (PER) score. Then you make that cube interactive.
To create the cube primitive, follow these steps:
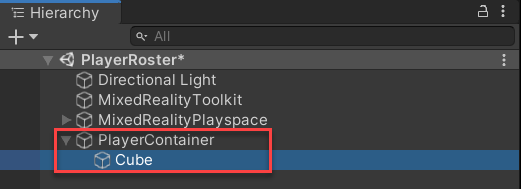
In the Hierarchy window, right-click the PlayerContainer object and select 3D Object > Cube. Ensure that the cube is created as a child of the PlayerContainer object.
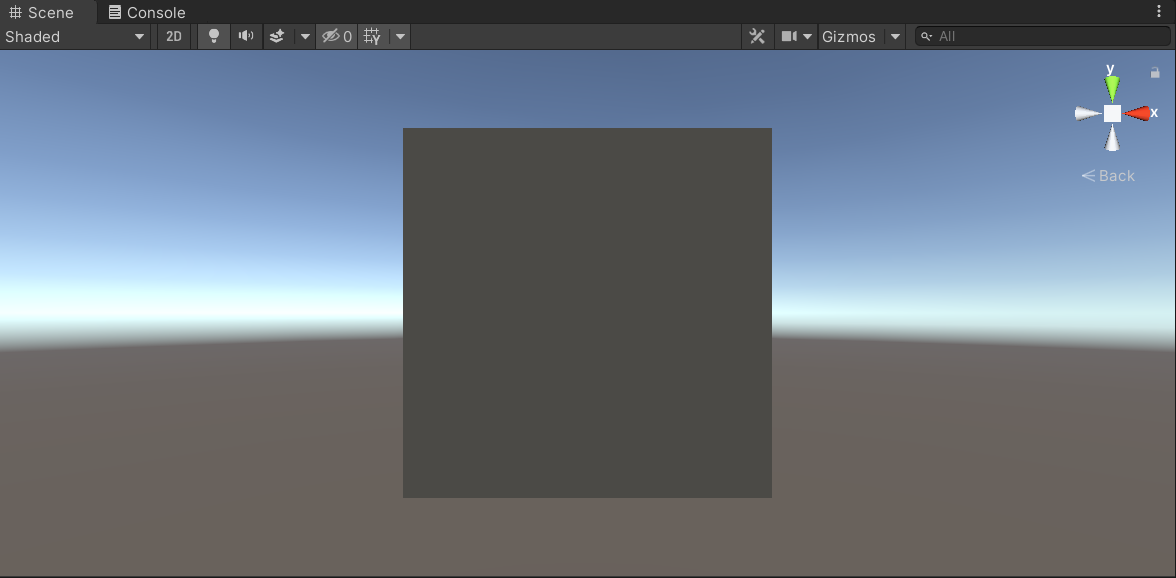
Notice that the cube is only visible in the Scene window, not the Game window. The Game window is a representation of what you would see if you were wearing or using a device. Currently, the cube's position is at origin, which is why it's not visible in the Game window. Furthermore, the cube is 1 meter on all sides, which is a relatively large size for the Game window. You'll later change the cube's distance and size.
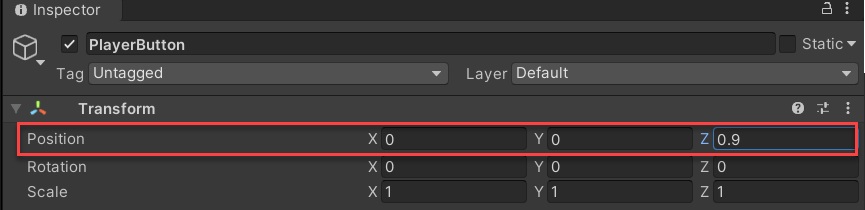
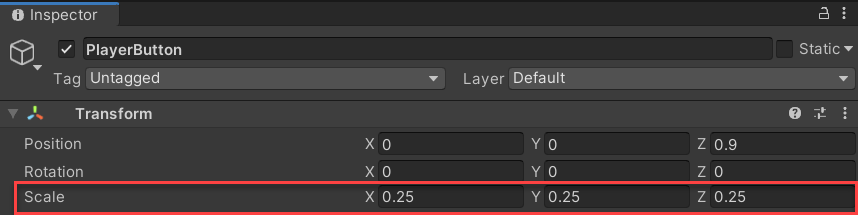
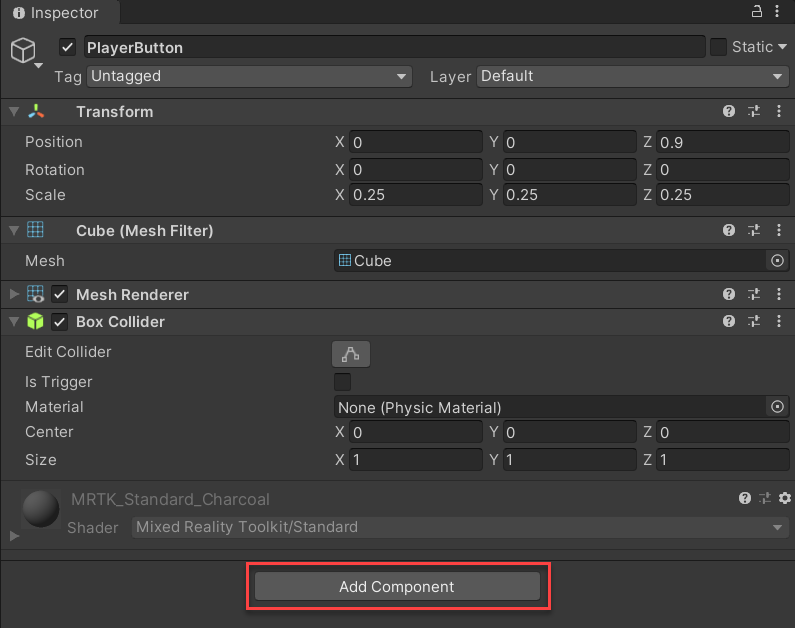
Select the Cube in the Hierarchy window. You see the cube properties in the Inspector window. In Inspector, rename the cube PlayerButton.
In Inspector, change the PlayerButton Position to 0, 0, 0.9. The Z-axis value controls the distance (or depth) of the object from your view. This setting positions the cube to a distance of 0.9 meters in front of you.
Change the Scale to .25, .25, .25. This changes the scale of the cube to .5 meters on each axis.
By default, the cube is a solid gray color. MRTK has shaders that you can use to change the cube's color (or material). In the Project window, enter MRTK_Standard_Charcoal into the search bar. Below the search bar, next to Search, select In Packages. This enables you to search in the Packages folder, which is where the MRTK shaders are located.

Select the MRTK_Standard_Charcoal shader, and drag the shader into the Inspector window for the PlayerButton object. The color of the cube changes to charcoal.
Add MRTK scripts to create buttons
MRTK has two scripts that are used to turn an object into a button:
- PressableButton.cs
- NearInteractionTouchable.cs
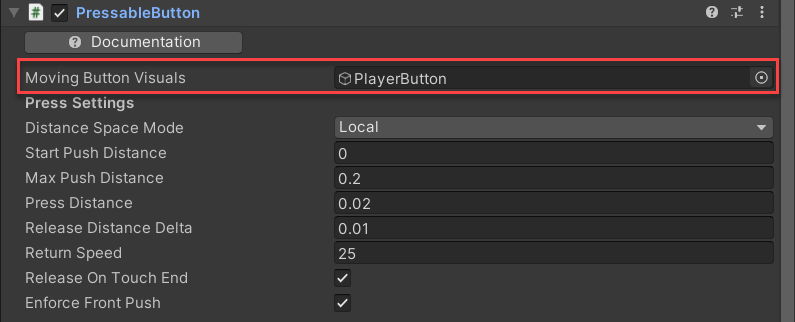
The PressableButton script contains properties for managing the button press, such as the press distance, return speed, and press events. The NearInteractionTouchable script contains properties for managing the touch interaction of the object.
For the button to function, you must add each script as components to the cube.
Select the PlayerButton object in the Hierarchy window. In the Inspector window, select Add Component.
In the Search window that appears, enter PressableButton, and select the PressableButton script.

Select Add Component again, and search for NearInteractionTouchable. Select the NearInteractionTouchable script to add as a component.
It's likely that the Touchable Collider bounds and center parameters for the
NearInteractionTouchablescript don't match the PlayerButton object's collider size and center. Colliders define the shape of the object for the purpose of physical collisions. In this case, a button press is a collision, because your hand presses (or collides) with the cube.To adjust the bounds and center, in the Touchable Collider properties, select both Fix Bounds and Fix Center.

For the object to be a button, you must assign the PlayerButton object in the PressableButton script. Within the PressableButton component, drag the PlayerButton object to the Moving Button Visuals property.
© 2021 Warner Bros. Ent. All Rights Reserved.