Quickstart: Use Azure Cache for Redis with Go
In this article, you learn how to build a REST API in Go that stores and retrieves user information backed by a HASH data structure in Azure Cache for Redis.
If you want to skip straight to the code, see the Go quickstart on GitHub.
- Azure subscription - create one for free
- Go (preferably version 1.13 or above)
- Git
- An HTTP client such curl
To create a cache, sign in to the Azure portal. On the portal menu, select Create a resource.

On the Get Started pane, enter Azure Cache for Redis in the search bar. In the search results, find Azure Cache for Redis, and then select Create.

On the New Redis Cache pane, on the Basics tab, configure the following settings for your cache:
Setting Action Description Subscription Select your Azure subscription. The subscription to use to create the new instance of Azure Cache for Redis. Resource group Select a resource group, or select Create new and enter a new resource group name. A name for the resource group in which to create your cache and other resources. By putting all your app resources in one resource group, you can easily manage or delete them together. DNS name Enter a unique name. The cache name must be a string of 1 to 63 characters that contains only numbers, letters, and hyphens. The name must start and end with a number or letter, and it can't contain consecutive hyphens. Your cache instance's host name is \<DNS name>.redis.cache.windows.net.Location Select a location. An Azure region that is near other services that use your cache. Cache SKU Select a SKU. The SKU determines the size, performance, and feature parameters that are available for the cache. For more information, see Azure Cache for Redis overview. Cache size Select a cache size. For more information, see Azure Cache for Redis overview. Select the Networking tab or select Next: Networking.
On the Networking tab, select a connectivity method to use for the cache.
Select the Advanced tab or select Next: Advanced.
On the Advanced pane, verify or select an authentication method based on the following information:

- By default, for a new Basic, Standard, or Premium cache, Microsoft Entra Authentication is enabled and Access Keys Authentication is disabled.
- For Basic or Standard caches, you can choose the selection for a non-TLS port.
- For Standard and Premium caches, you can choose to enable availability zones. You can't disable availability zones after the cache is created.
- For a Premium cache, configure the settings for non-TLS port, clustering, managed identity, and data persistence.
Important
For optimal security, we recommend that you use Microsoft Entra ID with managed identities to authorize requests against your cache if possible. Authorization by using Microsoft Entra ID and managed identities provides superior security and ease of use over shared access key authorization. For more information about using managed identities with your cache, see Use Microsoft Entra ID for cache authentication.
(Optional) Select the Tags tab or select Next: Tags.
(Optional) On the Tags tab, enter a tag name and value if you want to categorize your cache resource.
Select the Review + create button.
On the Review + create tab, Azure automatically validates your configuration.
After the green Validation passed message appears, select Create.
A new cache deployment occurs over several minutes. You can monitor the progress of the deployment on the Azure Cache for Redis Overview pane. When Status displays Running, the cache is ready to use.
To connect your Azure Cache for Redis server, the cache client needs the host name, ports, and a key for the cache. Some clients might refer to these items by slightly different names. You can get the host name, ports, and keys from the Azure portal.
To get the host name and ports for your cache, select Overview from the Resource menu. The host name is of the form
<DNS name>.redis.cache.windows.net.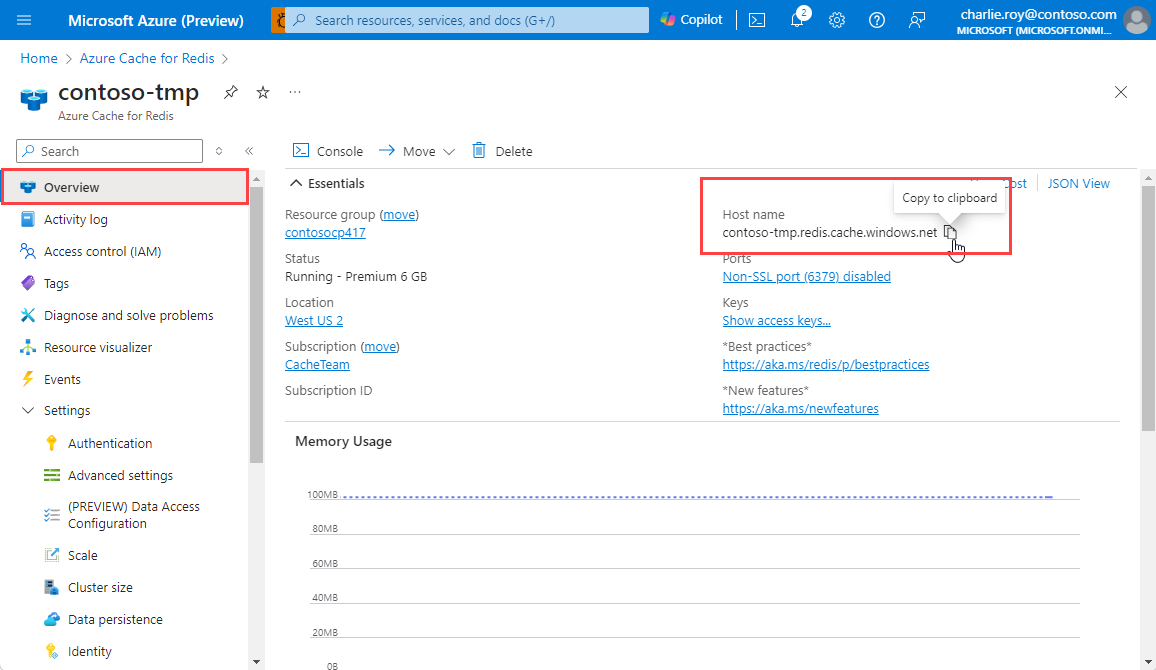
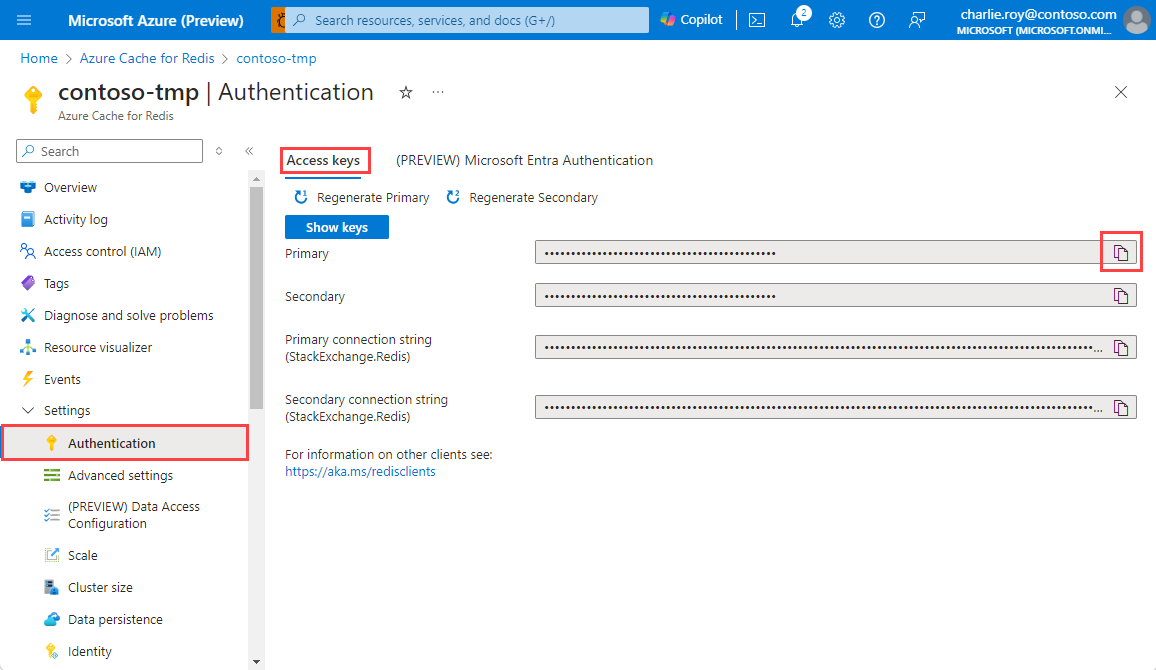
To get the access keys, select Authentication from the Resource menu. Then, select the Access keys tab.
If you're interested in learning how the code works, you can review the following snippets. Otherwise, feel free to skip ahead to Run the application.
The open source go-redis library is used to interact with Azure Cache for Redis.
The main function starts off by reading the host name and password (Access Key) for the Azure Cache for Redis instance.
func main() {
    redisHost := os.Getenv("REDIS_HOST")
    redisPassword := os.Getenv("REDIS_PASSWORD")
...
Then, we establish connection with Azure Cache for Redis. We use tls.Config--Azure Cache for Redis only accepts secure connections with [TLS 1.2 as the minimum required version]/azure-cache-for-redis/cache-remove-tls-10-11.md).
...
op := &redis.Options{Addr: redisHost, Password: redisPassword, TLSConfig: &tls.Config{MinVersion: tls.VersionTLS12}}
client := redis.NewClient(op)

ctx := context.Background()
err := client.Ping(ctx).Err()
if err != nil {
    log.Fatalf("failed to connect with redis instance at %s - %v", redisHost, err)
}
...
If the connection is successful, HTTP handlers are configured to handle POST and GET operations and the HTTP server is started.
Note
gorilla mux library is used for routing (although it's not strictly necessary and we could have gotten away by using the standard library for this sample application).
uh := userHandler{client: client}

router := mux.NewRouter()
router.HandleFunc("/users/", uh.createUser).Methods(http.MethodPost)
router.HandleFunc("/users/{userid}", uh.getUser).Methods(http.MethodGet)

log.Fatal(http.ListenAndServe(":8080", router))
userHandler struct encapsulates a redis.Client, which is used by the createUser, getUser methods - code for these methods isn't included for brevity.
createUser: accepts a JSON payload (containing user information) and saves it as aHASHin Azure Cache for Redis.getUser: fetches user info fromHASHor returns an HTTP404response if not found.
type userHandler struct {
    client *redis.Client
}
...

func (uh userHandler) createUser(rw http.ResponseWriter, r *http.Request) {
    // details omitted
}
...

func (uh userHandler) getUser(rw http.ResponseWriter, r *http.Request) {
    // details omitted
}
Start by cloning the application from GitHub.
Open a command prompt and create a new folder named
git-samples.md "C:\git-samples"Open a git terminal window, such as git bash. Use the
cdcommand to change to the new folder where you want to clone the sample app.cd "C:\git-samples"Run the following command to clone the sample repository. This command creates a copy of the sample app on your computer.
git clone https://github.com/Azure-Samples/azure-redis-cache-go-quickstart.git
The application accepts connectivity and credentials in the form of environment variables.
Fetch the Host name and Access Keys (available via Access Keys) for Azure Cache for Redis instance in the Azure portal
Set them to the respective environment variables:
set REDIS_HOST=<Host name>:<port> (e.g. <name of cache>.redis.cache.windows.net:6380)
set REDIS_PASSWORD=<Primary Access Key>
In the terminal window, change to the correct folder. For example:
cd "C:\git-samples\azure-redis-cache-go-quickstart"In the terminal, run the following command to start the application.
go run main.go
The HTTP server will start on port 8080.
Create a few user entries. The below example uses curl:
curl -i -X POST -d '{"id":"1","name":"foo1", "email":"foo1@baz.com"}' localhost:8080/users/
curl -i -X POST -d '{"id":"2","name":"foo2", "email":"foo2@baz.com"}' localhost:8080/users/
curl -i -X POST -d '{"id":"3","name":"foo3", "email":"foo3@baz.com"}' localhost:8080/users/
Fetch an existing user with its
id:curl -i localhost:8080/users/1You should get JSON response as such:
{
    "email": "foo1@bar",
    "id": "1",
    "name": "foo1"
}
If you try to fetch a user who doesn't exist, you get an HTTP
404. For example:curl -i localhost:8080/users/100 #response HTTP/1.1 404 Not Found Date: Fri, 08 Jan 2021 13:43:39 GMT Content-Length: 0
If you want to continue to use the resources you created in this article, keep the resource group.
Otherwise, if you're finished with the resources, you can delete the Azure resource group that you created to avoid charges.
Important
Deleting a resource group is irreversible. When you delete a resource group, all the resources in it are permanently deleted. Make sure that you do not accidentally delete the wrong resource group or resources. If you created the resources inside an existing resource group that contains resources you want to keep, you can delete each resource individually instead of deleting the resource group.
Sign in to the Azure portal, and then select Resource groups.
Select the resource group you want to delete.
If there are many resource groups, use the Filter for any field... box, type the name of your resource group you created for this article. Select the resource group in the results list.

Select Delete resource group.
You're asked to confirm the deletion of the resource group. Type the name of your resource group to confirm, and then select Delete.

After a few moments, the resource group and all of its resources are deleted.
In this quickstart, you learned how to get started using Go with Azure Cache for Redis. You configured and ran a simple REST API-based application to create and get user information backed by a Redis HASH data structure.