Quickstart: Deploy an Azure Linux Container Host for AKS cluster by using the Azure CLI
Get started with the Azure Linux Container Host by using the Azure CLI to deploy an Azure Linux Container Host for AKS cluster. After installing the prerequisites, you will create a resource group, create an AKS cluster, connect to the cluster, and run a sample multi-container application in the cluster.
Prerequisites
-
If you don't have an Azure subscription, create an Azure free account before you begin.
Use the Bash environment in Azure Cloud Shell. For more information, see Azure Cloud Shell Quickstart - Bash.

If you prefer to run CLI reference commands locally, install the Azure CLI. If you're running on Windows or macOS, consider running Azure CLI in a Docker container. For more information, see How to run the Azure CLI in a Docker container.
If you're using a local installation, sign in to the Azure CLI by using the az login command. To finish the authentication process, follow the steps displayed in your terminal. For other sign-in options, see Sign in with the Azure CLI.
When you're prompted, install the Azure CLI extension on first use. For more information about extensions, see Use extensions with the Azure CLI.
Run az version to find the version and dependent libraries that are installed. To upgrade to the latest version, run az upgrade.
Create a resource group
An Azure resource group is a logical group in which Azure resources are deployed and managed. When creating a resource group, it is required to specify a location. This location is:
- The storage location of your resource group metadata.
- Where your resources will run in Azure if you don't specify another region when creating a resource.
To create a resource group named testAzureLinuxResourceGroup in the eastus region, follow this step:
Create a resource group using the az group create command.
az group create --name testAzureLinuxReourceGroup --location eastus
The following output resembles that your resource group was successfully created:
{
  "id": "/subscriptions/<guid>/resourceGroups/testAzureLinuxResourceGroup",
  "location": "eastus",
  "managedBy": null,
  "name": "testAzureLinuxResourceGroup",
  "properties": {
    "provisioningState": "Succeeded"
  },
  "tags": null
}
Note
The above example uses eastus, but Azure Linux Container Host clusters are available in all regions.
Create an Azure Linux Container Host cluster
Create an AKS cluster using the az aks create command with the --os-sku parameter to provision the AKS cluster with an Azure Linux image. The following example creates an Azure Linux cluster named testAzureLinuxCluster with one node:
az aks create --name testAzureLinuxCluster --resource-group testAzureLinuxResourceGroup --os-sku AzureLinux
After a few minutes, the command completes and returns JSON-formatted information about the cluster.
Connect to the cluster
To manage a Kubernetes cluster, use the Kubernetes command-line client, kubectl.
- Configure
kubectlto connect to your Kubernetes cluster using theaz aks get-credentialscommand.
az aks get-credentials --resource-group testAzureLinuxResourceGroup --name testAzureLinuxCluster
- Verify the connection to your cluster using the kubectl get command. The command returns a list of the pods.
kubectl get pods --all-namespaces
Deploy the application
A Kubernetes manifest file defines a cluster's desired state, such as which container images to run.
In this quickstart, you will use a manifest to create all objects needed to run the Azure Vote application. This manifest includes two Kubernetes deployments:
- The sample Azure Vote Python applications.
- A Redis instance.
Two Kubernetes Services are also created:
- An internal service for the Redis instance.
- An external service to access the Azure Vote application from the internet.
Create a file named
azure-vote.yamland copy in the following manifest.- If you use the Azure Cloud Shell, this file can be created using
code,vi, ornanoas if working on a virtual or physical system.
apiVersion: apps/v1
kind: Deployment
metadata:
  name: azure-vote-back
spec:
  replicas: 1
  selector:
    matchLabels:
      app: azure-vote-back
  template:
    metadata:
      labels:
        app: azure-vote-back
    spec:
      nodeSelector:
        "kubernetes.io/os": linux
      containers:
      - name: azure-vote-back
        image: mcr.microsoft.com/oss/bitnami/redis:6.0.8
        env:
        - name: ALLOW_EMPTY_PASSWORD
          value: "yes"
        resources:
          requests:
            cpu: 100m
            memory: 128Mi
          limits:
            cpu: 250m
            memory: 256Mi
        ports:
        - containerPort: 6379
          name: redis
---
apiVersion: v1
kind: Service
metadata:
  name: azure-vote-back
spec:
  ports:
  - port: 6379
  selector:
    app: azure-vote-back
---
apiVersion: apps/v1
kind: Deployment
metadata:
  name: azure-vote-front
spec:
  replicas: 1
  selector:
    matchLabels:
      app: azure-vote-front
  template:
    metadata:
      labels:
        app: azure-vote-front
    spec:
      nodeSelector:
        "kubernetes.io/os": linux
      containers:
      - name: azure-vote-front
        image: mcr.microsoft.com/azuredocs/azure-vote-front:v1
        resources:
          requests:
            cpu: 100m
            memory: 128Mi
          limits:
            cpu: 250m
            memory: 256Mi
        ports:
        - containerPort: 80
        env:
        - name: REDIS
          value: "azure-vote-back"
---
apiVersion: v1
kind: Service
metadata:
  name: azure-vote-front
spec:
  type: LoadBalancer
  ports:
  - port: 80
  selector:
    app: azure-vote-front
For a breakdown of YAML manifest files, see Deployments and YAML manifests.
- If you use the Azure Cloud Shell, this file can be created using
Deploy the application using the kubectl apply command and specify the name of your YAML manifest:
kubectl apply -f azure-vote.yamlThe following example resembles output showing the successfully created deployments and services:
deployment "azure-vote-back" created
service "azure-vote-back" created
deployment "azure-vote-front" created
service "azure-vote-front" created
Test the application
When the application runs, a Kubernetes service exposes the application front-end to the internet. This process can take a few minutes to complete.
Monitor progress using the kubectl get service command with the --watch argument.
kubectl get service azure-vote-front --watch
The EXTERNAL-IP output for the azure-vote-front service will initially show as pending.
NAME               TYPE           CLUSTER-IP   EXTERNAL-IP   PORT(S)        AGE
azure-vote-front   LoadBalancer   10.0.37.27   <pending>     80:30572/TCP   6s
Once the EXTERNAL-IP address changes from pending to an actual public IP address, use CTRL-C to stop the kubectl watch process. The following example output shows a valid public IP address assigned to the service:
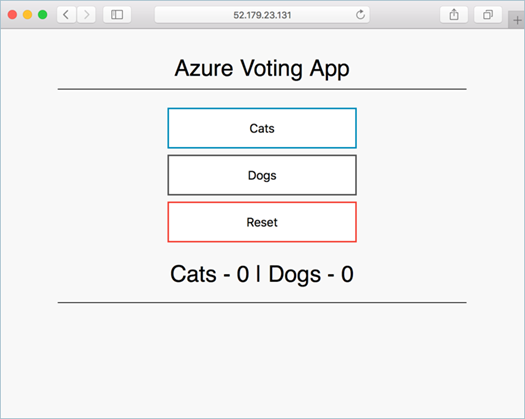
azure-vote-front LoadBalancer 10.0.37.27 52.179.23.131 80:30572/TCP 2m
To see the Azure Vote app in action, open a web browser to the external IP address of your service.
Delete the cluster
If you're not going to continue through the following tutorials, to avoid Azure charges clean up any unnecessary resources. Use the az group delete command to remove the resource group and all related resources.
az group delete --name testAzureLinuxCluster --yes --no-wait
Next steps
In this quickstart, you deployed an Azure Linux Container Host cluster. To learn more about the Azure Linux Container Host, and walk through a complete cluster deployment and management example, continue to the Azure Linux Container Host tutorial.
Feedback
Coming soon: Throughout 2024 we will be phasing out GitHub Issues as the feedback mechanism for content and replacing it with a new feedback system. For more information see: https://aka.ms/ContentUserFeedback.
Submit and view feedback for