Secure a daemon application
This article describes how to host daemon applications in a trusted and secure environment in Microsoft Azure Maps.
The following are examples of daemon applications:
- Azure Web Job
- Azure Function App
- Windows Service
- A running and reliable background service
View Azure Maps authentication details
To view your Azure Maps account authentication details in the Azure portal:
Sign in to the Azure portal.
Navigate to the Azure portal menu. Select All resources, and then select your Azure Maps account.
Under Settings in the left pane, select Authentication.


Three values are created when the Azure Maps account is created. They're used to support two types of authentication in Azure Maps:
- Microsoft Entra authentication: The
Client IDrepresents the account that is to be used for REST API requests. TheClient IDvalue should be stored in application configuration, and then it should be retrieved before making Azure Maps HTTP requests that use Microsoft Entra authentication. - Shared Key Authentication: The
Primary KeyandSecondary Keyare used as the subscription key for Shared Key authentication. Shared Key authentication relies on passing the key generated by the Azure Maps account with each request to Azure Maps. We recommend that you regularly regenerate your keys. To maintain current connections during regeneration, two keys are provided. One key can be in use, while regenerating the other. When you regenerate your keys, you must update any applications that access this account to use the new keys. For more information, see Authentication with Azure Maps
Important
For production applications, we recommend implementing Microsoft Entra ID and Azure role-based access control (Azure RBAC). For an overview of Microsoft Entra concepts, see Authentication with Azure Maps.
Scenario: Shared key authentication with Azure Key Vault
Applications that use Shared Key authentication, should store the keys in a secure store. This scenario describes how to safely store your application key as a secret in Azure Key Vault. Instead of storing the shared key in application configuration, the application can retrieve the shared key as an Azure Key Vault secret. To simplify key regeneration, we recommend that applications use one key at a time. Applications can then regenerate the unused key and deploy the regenerated key to Azure Key Vault while still maintaining current connections with one key. To understand how to configure Azure Key Vault, see Azure Key Vault developer guide.
Important
This scenario indirectly accesses Microsoft Entra ID through Azure Key Vault. However, we recommend that you use Microsoft Entra authentication directly. Using Microsoft Entra ID directly avoids the additional complexity and operational requirements of using shared key authentication and setting up Key Vault.
The following steps outline this process:
- Create an Azure Key Vault.
- Create an Microsoft Entra service principal by creating an App registration or managed identity. The created principal is responsible for accessing the Azure Key Vault.
- Assign the service principal access to Azure Key secrets
getpermission. For details about how to set permissions, see Assign a Key Vault access policy using the Azure portal. - Temporarily assign access to secrets
setpermission for you as the developer. - Set the shared key in the Key Vault secrets and reference the secret ID as configuration for the daemon application.
- Remove your secrets
setpermission. - To retrieve the shared key secret from Azure Key Vault, implement Microsoft Entra authentication in the daemon application.
- Create an Azure Maps REST API request with the shared key. Now, the daemon application can retrieve the shared key from the Key Vault.
Tip
If the app is hosted in the Azure environment, we recommend that you use a managed identity to reduce the cost and complexity of managing a secret for authentication. To learn how to set up a managed identity, see Tutorial: Use a managed identity to connect Key Vault to an Azure web app in .NET.
Scenario: Microsoft Entra role-based access control
After an Azure Maps account is created, the Azure Maps Client ID value is present in the Azure portal authentication details page. This value represents the account that is to be used for REST API requests. This value should be stored in application configuration and retrieved before making HTTP requests. The goal of the scenario is to enable the daemon application to authenticate to Microsoft Entra ID and call Azure Maps REST APIs.
Tip
To enable benefits of managed identity components, we recommend that you host on Azure Virtual Machines, Virtual Machine Scale Sets, or App Services.
Host a daemon on Azure resources
When running on Azure resources, you can configure Azure-managed identities to enable low cost, minimal credential management effort.
To enable application access to a managed identity, see Overview of managed identities.
Some managed identity benefits are:
- Azure system-managed X509 certificate public key cryptography authentication.
- Microsoft Entra security with X509 certificates instead of client secrets.
- Azure manages and renews all certificates associated with the Managed Identity resource.
- Credential operational management is simplified because managed identity removes the need for a secured secret store service, such as Azure Key Vault.
Host a daemon on non-Azure resources
Managed identities are only available when running on an Azure environment. As such, you must configure a service principal through a Microsoft Entra application registration for the daemon application.
Create new application registration
If you have already created your application registration, go to Assign delegated API permissions.
To create a new application registration:
Sign in to the Azure portal.
Select Microsoft Entra ID.
Under Manage in the left pane, select App registrations.
Select the + New registration tab.

Enter a Name, and then select a Support account type.
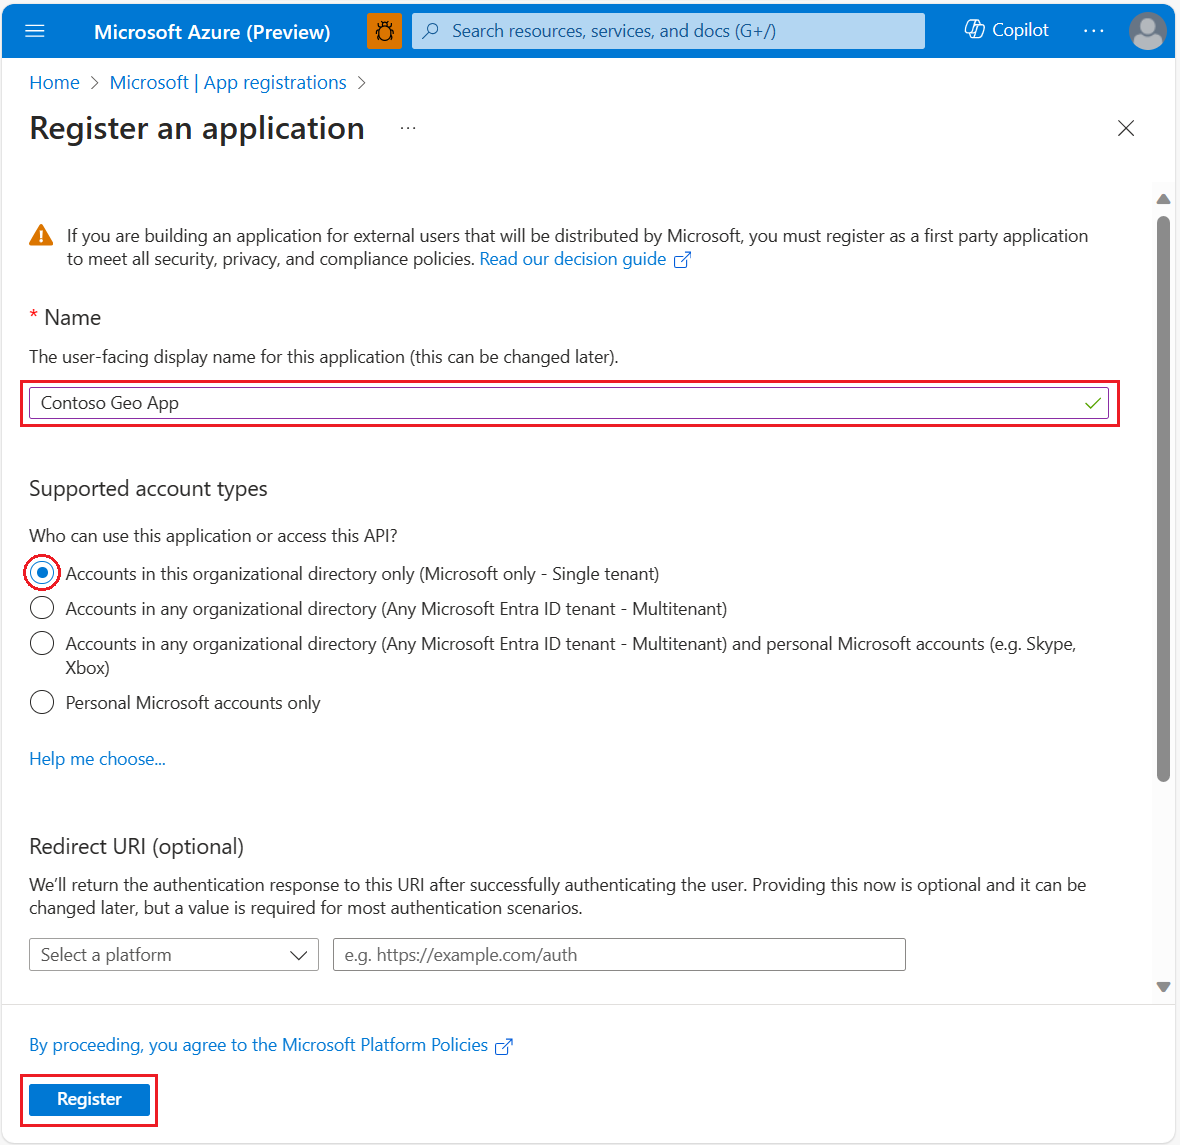
Select Register.

Assign delegated API permissions
To assign delegated API permissions to Azure Maps:
If you haven't done so already, sign in to the Azure portal.
Select Microsoft Entra ID.
Under Manage in the left pane, select App registrations.
Select your application.

Under Manage in the left pane, select API permissions.
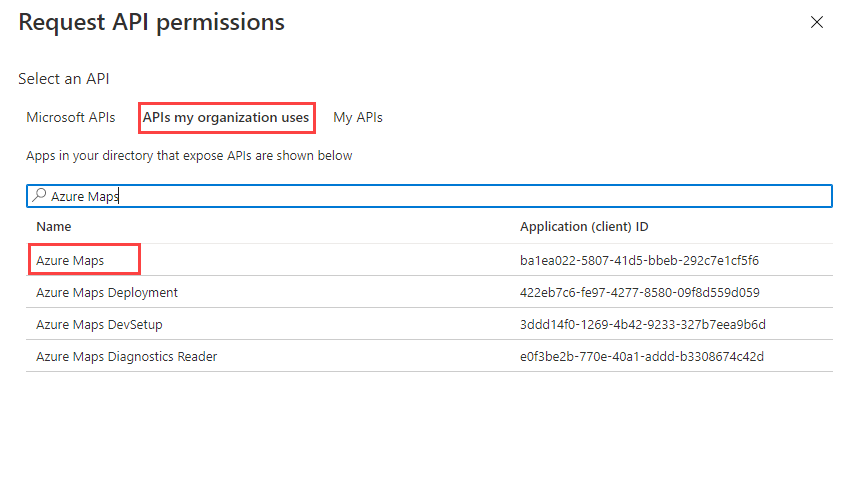
Select Add a permission.

Select the APIs my organization uses tab.
In the search box, enter Azure Maps.
Select Azure Maps.
Select the Access Azure Maps check box.
Select Add permissions.

Create a client secret or configure certificate
To implement server or application-based authentication into your application, you can choose one of two options:
- Upload a public key certificate.
- Create a client secret.
Upload a public key certificate
To upload a public key certificate:
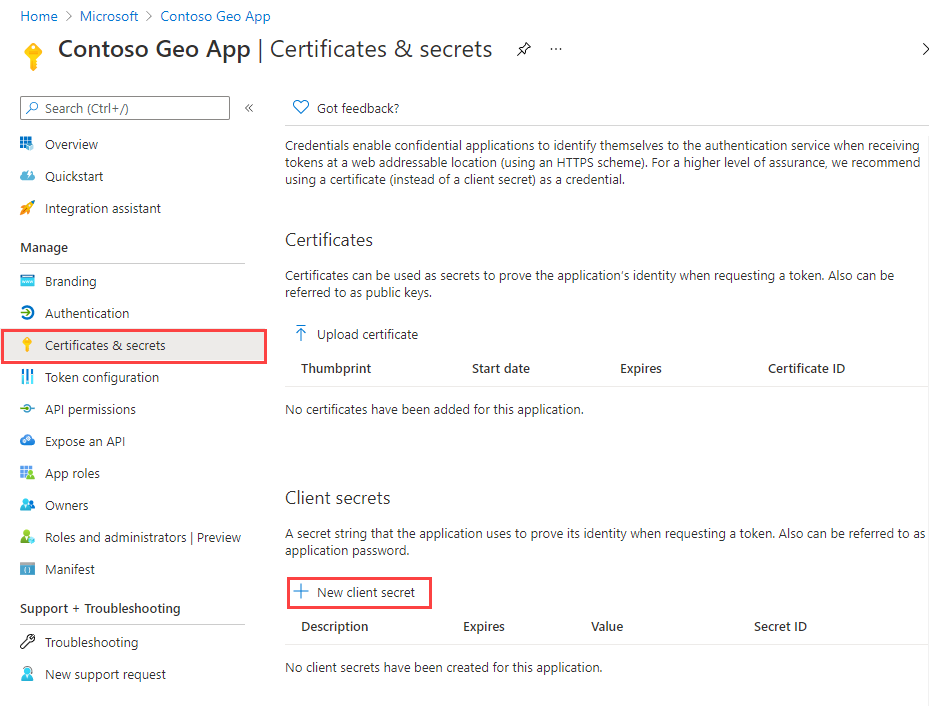
Under Manage in the left pane, select Certificates & secrets.
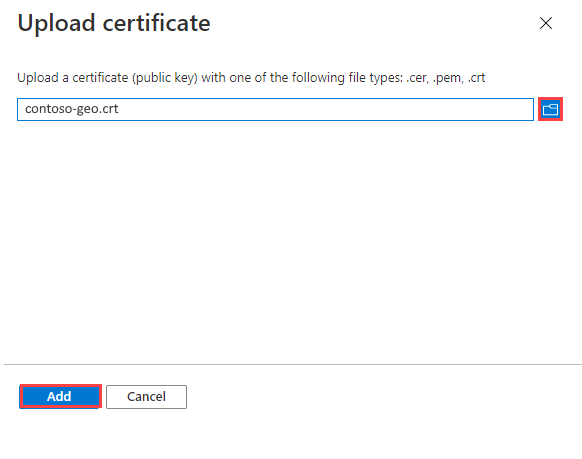
Select Upload certificate.

To the right of the text box, select the file icon.
Select a .crt, .cer, or .pem file, and then select Add.
Create a client secret
To create a client secret:
Under Manage in the left pane, select Certificates & secrets.
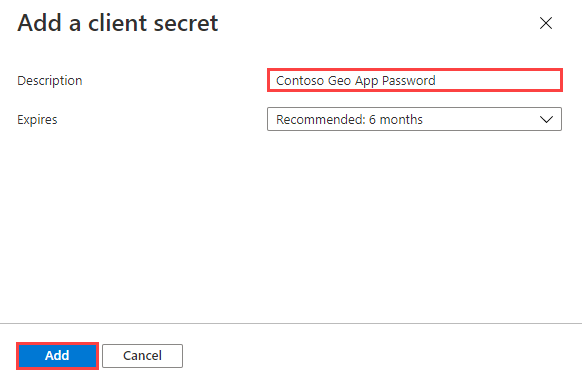
Select + New client secret.
Enter a description for the client secret.
Select Add.
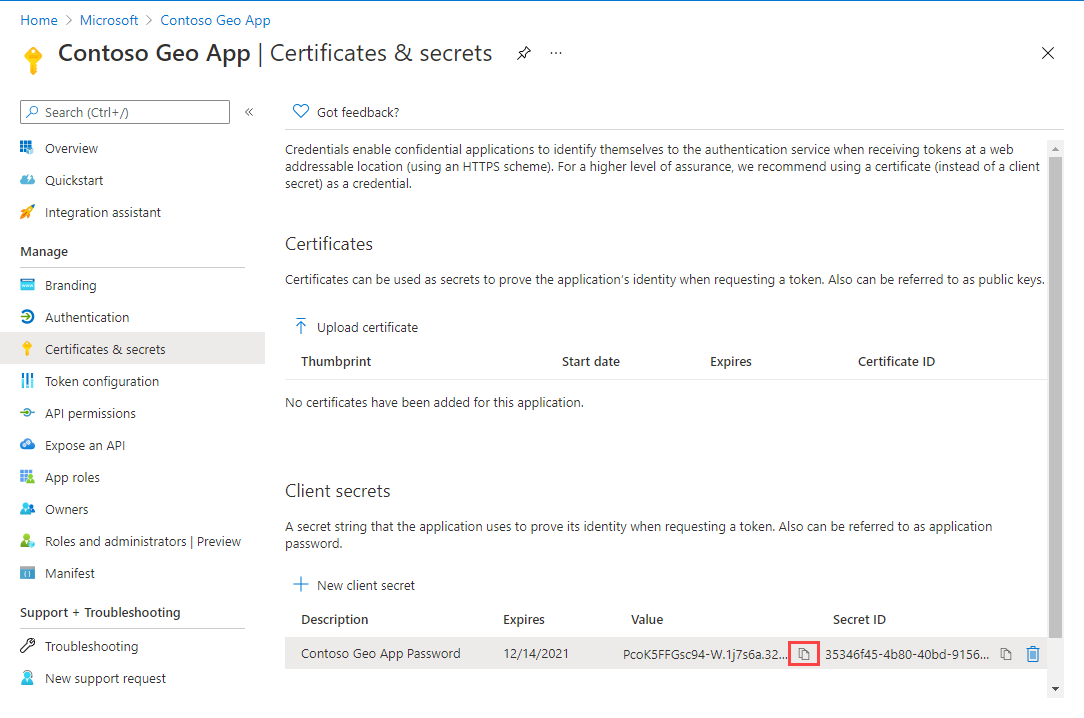
Copy the secret and store it securely in a service such as Azure Key Vault. Also, use the secret in the Request token with Managed Identity section of this article.
Important
To securely store the certificate or secret, see the Azure Key Vault Developer Guide. You'll use this secret to get tokens from Microsoft Entra ID.
Grant role-based access for users to Azure Maps
You can grant Azure role-based access control (Azure RBAC) by assigning a Microsoft Entra group or security principal to one or more Azure Maps role definitions.
To view the available Azure role definitions for Azure Maps, see View built-in Azure Maps role definitions.
For detailed steps about how to assign an available Azure Maps role to the created managed identity or the service principal, see Assign Azure roles using the Azure portal
To efficiently manage the Azure Maps app and resource access of a large amount of users, see Microsoft Entra groups.
Important
For users to be allowed to authenticate to an application, the users must first be created in Microsoft Entra ID. For more information, see Add or delete users using Microsoft Entra ID.
To learn about how to effectively manage a large directory for users, see Microsoft Entra ID.
Warning
Azure Maps built-in role definitions provide a very large authorization access to many Azure Maps REST APIs. To restrict APIs access to a minimum, see create a custom role definition and assign the system-assigned identity to the custom role definition. This enables the least privilege necessary for the application to access Azure Maps.
Request a token with managed identity
After a managed identity is configured for the hosting resource, you can use Azure SDK or REST API to acquire a token for Azure Maps. To learn how to acquire an access token, see Acquire an access token.
Request token with application registration
After you register your app and associate it with Azure Maps, you'll need to request an access token.
To acquire the access token:
If you haven't done so already, sign in to the Azure portal.
Select Microsoft Entra ID.
Under Manage in the left pane, select App registrations.
Select your application.
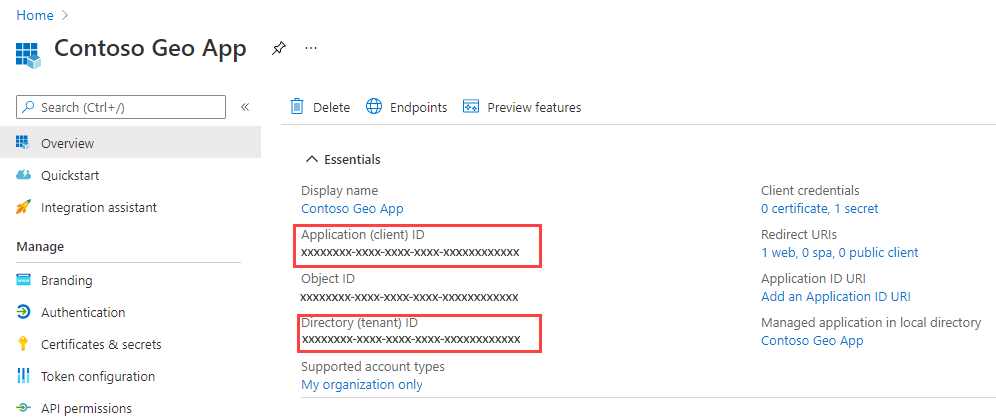
You should see the Overview page. Copy the Application (client) ID and the Directory (tenant) ID.
This article uses the Postman application to create the token request, but you can use a different API development environment.
In the Postman app, select New.
In the Create New window, select HTTP Request.
Enter a Request name for the request, such as POST Token Request.
Select the POST HTTP method.
Enter the following URL to address bar (replace
{Tenant-ID}with the Directory (Tenant) ID, the{Client-ID}with the Application (Client) ID, and{Client-Secret}with your client secret:https://login.microsoftonline.com/{Tenant-ID}/oauth2/v2.0/token?response_type=token&grant_type=client_credentials&client_id={Client-ID}&client_secret={Client-Secret}&scope=https://atlas.microsoft.com/.defaultSelect Send
You should see the following JSON response:
{
    "token_type": "Bearer",
    "expires_in": 86399,
    "ext_expires_in": 86399,
    "access_token": "eyJ0eXAiOiJKV1QiLCJhbGciOiJSUzI1NiIsIng1dCI6Im5PbzNaRHJPRFhFSzFq..."
}
For more information about authentication flow, see OAuth 2.0 client credentials flow on the Microsoft identity platform
Next steps
For more detailed examples:
Find the API usage metrics for your Azure Maps account:
Explore samples that show how to integrate Microsoft Entra ID with Azure Maps:
Feedback
Coming soon: Throughout 2024 we will be phasing out GitHub Issues as the feedback mechanism for content and replacing it with a new feedback system. For more information see: https://aka.ms/ContentUserFeedback.
Submit and view feedback for