Use packages from Maven Central
Azure DevOps Services | Azure DevOps Server 2022 - Azure DevOps Server 2019
Using Azure Artifacts upstream sources allows you to use a single feed for hosting both the packages you produce and packages from public registries such as Maven Central. When you add upstream sources to your feed, Azure Artifacts saves a copy of any package installed from upstream. This ensures continued accessibility for your development, even if a public registry suffers an outage. Additionally, Azure Artifacts supports various other Maven upstream sources, including the Google Maven Repository, Gradle Plugins, and JitPack.
Prerequisites
An Azure DevOps organization and a project. Create an organization or a project if you haven't already.
An Azure Artifacts feed.
Note
Maven snapshots are not supported with Maven upstream sources.
Enable upstream sources
If you don't have a feed already, follow these instructions to create one, and make sure that you check the upstream sources checkbox to enable them. If you already have a feed, move to the next step to add Maven Central as an upstream source.
Sign in to your Azure DevOps organization, and then navigate to your project.
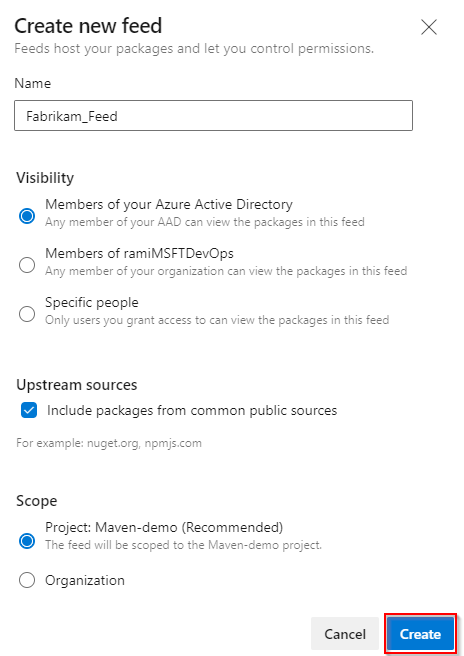
Select Artifacts, and then select Create Feed to create a new feed.
Enter a descriptive Name for your feed and define its Visibility (indicating who can view packages within the feed). Specify the Scope of your feed, and if you wish to include packages from public sources, mark the Upstream sources checkbox.
Select Create when you're done.
Note
By default, newly created feeds have their project's Build Service set to Feed and Upstream Reader (Collaborator).
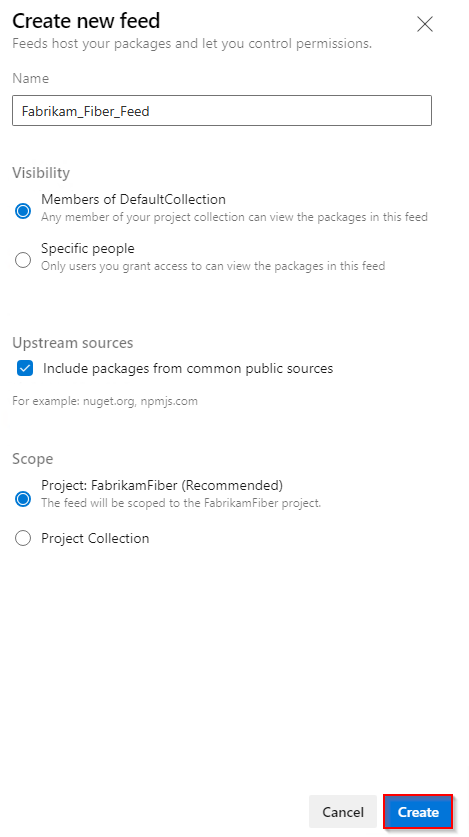
Sign in to your Azure DevOps server, and then navigate to your project.
Select Artifacts, and then select Create Feed to create a new feed.
Enter a descriptive Name for your feed and define its Visibility (indicating who can view packages within the feed). Specify the Scope of your feed, and if you wish to include packages from public sources, mark the Upstream sources checkbox.
Select Create when you're done.
Note
By default, newly created feeds have their project's Build Service set to Feed and Upstream Reader (Collaborator).
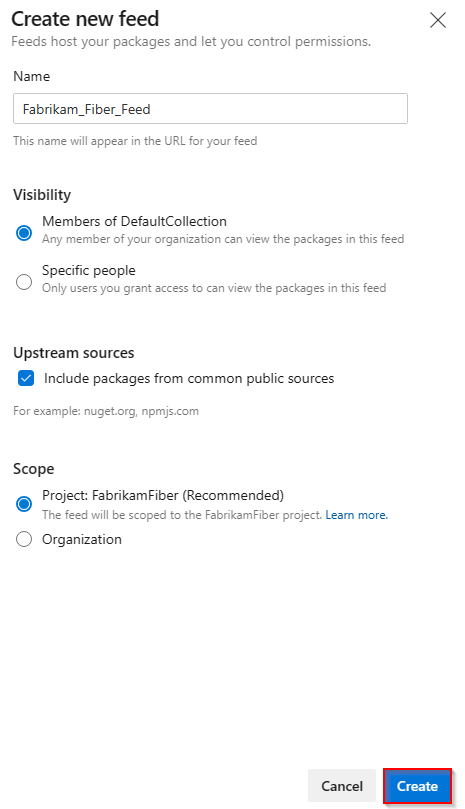
Select Create when you're done.
Note
By default, newly created feeds have their project's Build Service set to Feed and Upstream Reader (Collaborator).
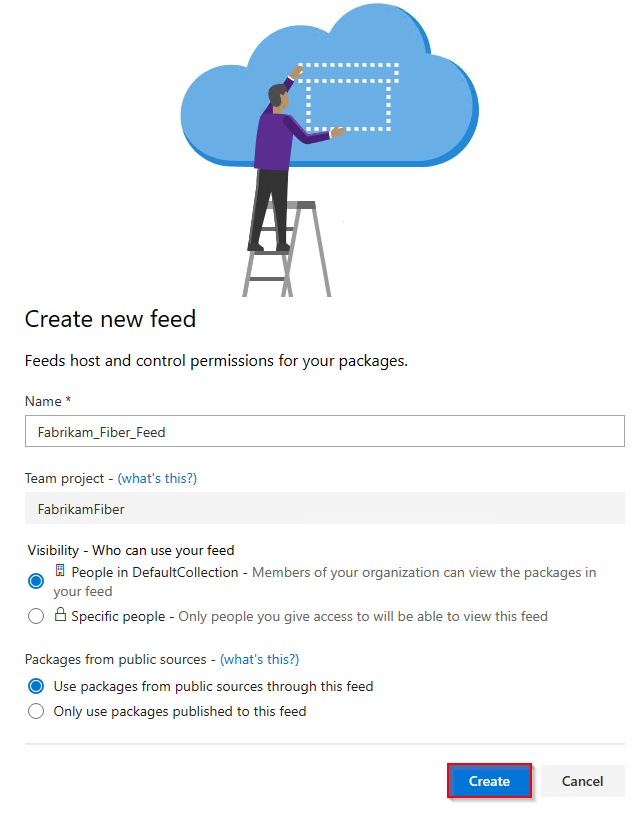
Sign in to your Azure DevOps server, and then navigate to your project.
Select Artifacts, and then select New feed.
Enter a descriptive Name for your feed and define its Visibility (indicating who can view packages within the feed). If you wish to include packages from public sources, select the Use packages from public sources through this feed option.
Select Create when you're done.
Note
By default, newly created feeds have their project's Build Service set to Feed and Upstream Reader (Collaborator).
Add Maven Central upstream
If you checked the upstream sources checkbox when creating your feed, Maven Central should already be added as an upstream source. If not, you can add it manually using the following steps:
Sign in to your Azure DevOps organization, and then navigate to your project.
Select Artifacts, and then select the
 in the top right corner to navigate to your Feed Settings.
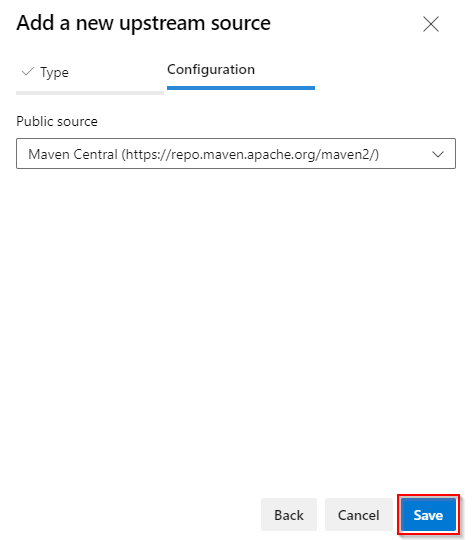
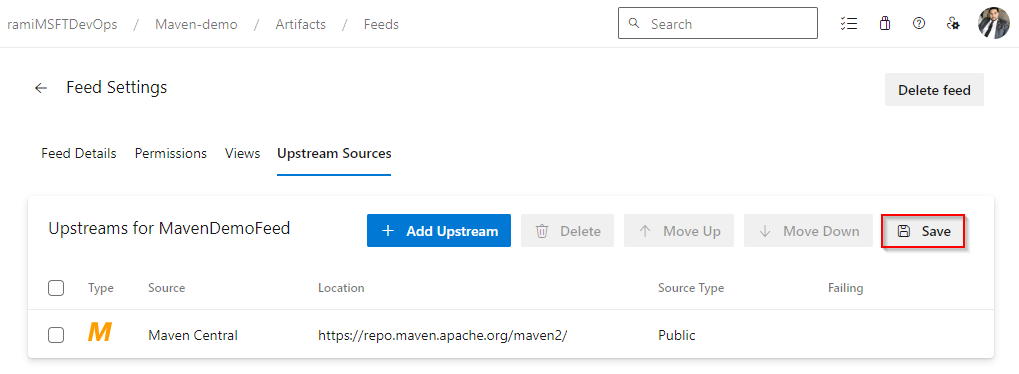
Select Upstream sources, and then select Add Upstream.
Select Public source, select Maven Central (https://repo.maven.apache.org/maven2/) from the dropdown menu, and then select Save when you're done.
Select Save in the top right corner to save your changes.
Save package from Maven Central
Before saving packages from Maven Central, make sure you have set up your project to connect to your feed. If you haven't done so already, follow the instruction in the project setup to set up your Maven project and connect to your feed.
In this example, we'll save the Kotlin Datetime Library from Maven Central.
Navigate to Maven Central at
https://mvnrepository.com/.Search for the Kotlin Datetime Library. Select the Kotlinx Datetime package, and then select the version you wish to install.
Copy the
<dependency>snippet from the Maven tab.<dependency> <groupId>org.jetbrains.kotlinx</groupId> <artifactId>kotlinx-datetime-jvm</artifactId> <version>0.4.1</version> <scope>runtime</scope> </dependency>Open your pom.xml file and paste the snippet inside your
<dependencies>tag, and then save your file.Run the following command from the same path as your pom.xml file to install your dependencies:
mvn install
Note
To save packages from upstreams, you must have the Feed and Upstream Reader (Collaborator) role or higher. See Manage Permissions for more details.
View saved packages
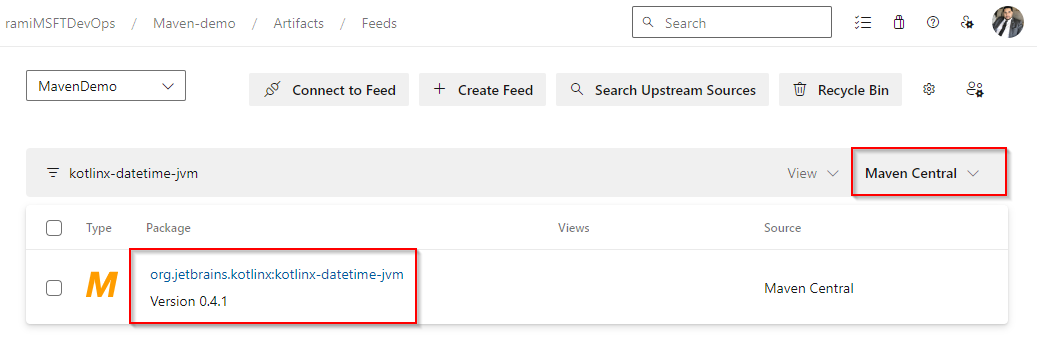
You can view the packages you saved from upstreams by selecting the Maven Central source from the dropdown menu.
Sign in to your Azure DevOps organization, and then navigate to your project.
Select Artifacts, and then select your feed from the dropdown menu.
Select Maven Central from the source dropdown menu to filter for packages from this upstream.
The Kotlinx Datetime package that we saved in the previous step, is now available in our feed. Azure Artifacts automatically saved a copy to our feed when we executed the mvn install command.
Tip
If Maven is not downloading all your dependencies, run the following command from the project directory to regenerate your project's files:
mvn eclipse:eclipse -DdownloadSources=true -DdownloadJavadocs=true
Related articles
Feedback
Coming soon: Throughout 2024 we will be phasing out GitHub Issues as the feedback mechanism for content and replacing it with a new feedback system. For more information see: https://aka.ms/ContentUserFeedback.
Submit and view feedback for