Manage rules for Azure Load Balancer using the Azure portal
Azure Load Balancer supports rules to configure traffic to the backend pool. In this article, you'll learn how to manage the rules for an Azure Load Balancer.
There are four types of rules:
Load-balancing rules - A load balancer rule is used to define how incoming traffic is distributed to all the instances within the backend pool. A load-balancing rule maps a given frontend IP configuration and port to multiple backend IP addresses and ports. An example would be a rule created on port 80 to load balance web traffic.
High availability ports - A load balancer rule configured with protocol - all and port - 0. These rules enable a single rule to load-balance all TCP and UDP traffic that arrive on all ports of an internal standard load balancer. The HA ports load-balancing rules help with scenarios, such as high availability and scale for network virtual appliances (NVAs) inside virtual networks. The feature can help when a large number of ports must be load-balanced.
Inbound NAT rule - An inbound NAT rule forwards incoming traffic sent to frontend IP address and port combination. The traffic is sent to a specific virtual machine or instance in the backend pool. Port forwarding is done by the same hash-based distribution as load balancing.
Outbound rule - An outbound rule configures outbound Network Address Translation (NAT) for all virtual machines or instances identified by the backend pool. This rule enables instances in the backend to communicate (outbound) to the internet or other endpoints.
Prerequisites
An Azure account with an active subscription. Create an account for free.
A standard public load balancer in your subscription. For more information on creating an Azure Load Balancer, see Quickstart: Create a public load balancer to load balance VMs using the Azure portal. The load balancer name for the examples in this article is myLoadBalancer.
A standard internal load balancer in your subscription. For more information on creating an Azure Load Balancer, see Quickstart: Create a internal load balancer to load balance VMs using the Azure portal. The load balancer name for the examples in this article is myLoadBalancer.
Load-balancing rules
In this section, you'll learn how to add and remove a load-balancing rule. A public load balancer is used in the examples.
Add a load-balancing rule
In this example, you'll create a rule to load balance port 80.
Sign in to the Azure portal.
In the search box at the top of the portal, enter Load balancer. Select Load balancers in the search results.
Select myLoadBalancer or your load balancer.
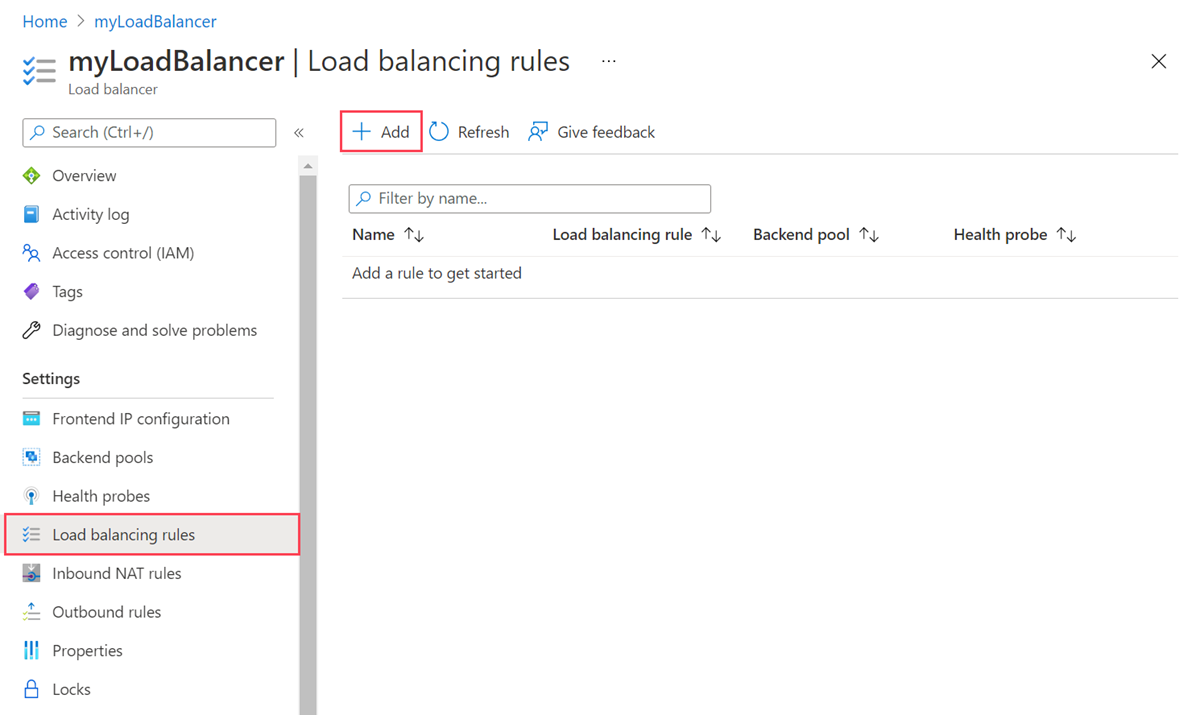
In the load balancer page, select Load balancing rules in Settings.
Select + Add in Load balancing rules to add a rule.
Enter or select the following information in Add load balancing rule.
Setting Value Name myHTTPRule IP Version Select IPv4 or IPv6. Frontend IP address Select the frontend IP address of the load balancer.
In this example, it's myFrontendIP.Protocol Leave the default of TCP. Port Enter 80. Backend port Enter 80. Backend pool Select the backend pool of the load balancer.
In this example, it's myBackendPool.Health probe Select Create new.
In Name, enter myHealthProbe.
Select HTTP in Protocol.
Leave the rest at the defaults or tailor to your requirements.
Select OK.Session persistence Select None or your required persistence.
For more information about distribution modes, see Azure Load Balancer distribution modes.Idle timeout (minutes) Leave the default of 4 or move the slider to your required idle timeout. TCP reset Select Enabled.
For more information on TCP reset, see Load Balancer TCP Reset and Idle Timeout.Floating IP Leave the default of Disabled or enable if your deployment requires floating IP.
For information on floating IP, see Azure Load Balancer Floating IP configuration.Outbound source network address translation (SNAT) Leave the default of (Recommended) Use outbound rules to provide backend pool members access to the internet.
For more information on outbound rules and (SNAT), see Outbound rules Azure Load Balancer and Using Source Network Address Translation (SNAT) for outbound connections.Select Add.

Remove a load-balancing rule
In this example, you'll remove a load-balancing rule.
Sign in to the Azure portal.
In the search box at the top of the portal, enter Load balancer. Select Load balancers in the search results.
Select myLoadBalancer or your load balancer.
In the load balancer page, select Load balancing rules in Settings.
Select the three dots next to the rule you want to remove.
Select Delete.

High availability ports
In this section, you'll learn how to add and remove a high availability ports rule. You'll use an internal load balancer in this example.
HA ports rules are supported on a standard internal load balancer.
Add high availability ports rule
In this example, you'll create a high availability ports rule.
Sign in to the Azure portal.
In the search box at the top of the portal, enter Load balancer. Select Load balancers in the search results.
Select myLoadBalancer or your load balancer.
In the load balancer page, select Load balancing rules in Settings.
Select + Add in Load balancing rules to add a rule.
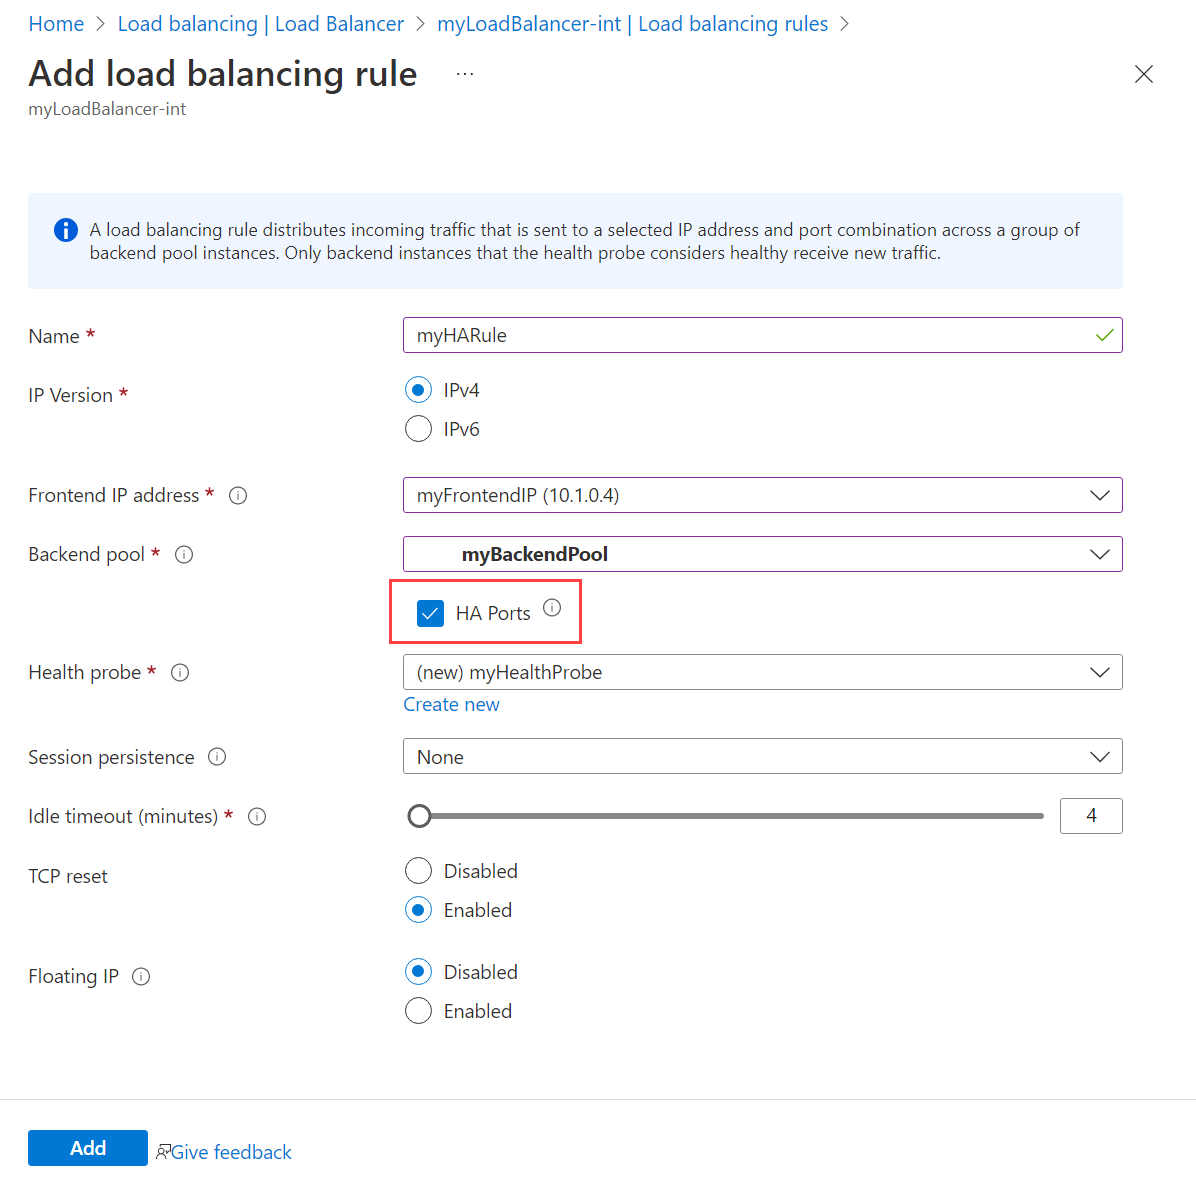
Enter or select the following information in Add load balancing rule.
Setting Value Name Enter myHARule. IP Version Select IPv4 or IPv6. Frontend IP address Select the frontend IP address of the load balancer.
In this example, it's myFrontendIP.
Select the box next to HA Ports.Backend pool Select the backend pool of the load balancer.
In this example, it's myBackendPool.Health probe Select Create new.
In Name, enter myHealthProbe.
Select TCP in Protocol.
Enter a TCP port in Port. In this example, it's port 80. Enter a port that meets your requirements.
Leave the rest at the defaults or tailor to your requirements.
Select OK.Session persistence Select None or your required persistence.
For more information about distribution modes, see Azure Load Balancer distribution modes.Idle timeout (minutes) Leave the default of 4 or move the slider to your required idle timeout. TCP reset Select Enabled.
For more information on TCP reset, see Load Balancer TCP Reset and Idle Timeout.Floating IP Leave the default of Disabled or enable if your deployment requires floating IP.
For information on floating IP, see Azure Load Balancer Floating IP configuration.For more information on HA ports rule configuration, see High availability ports overview.
Select Add.
Remove a high availability ports rule
In this example, you'll remove a load-balancing rule.
Sign in to the Azure portal.
In the search box at the top of the portal, enter Load balancer. Select Load balancers in the search results.
Select myLoadBalancer or your load balancer.
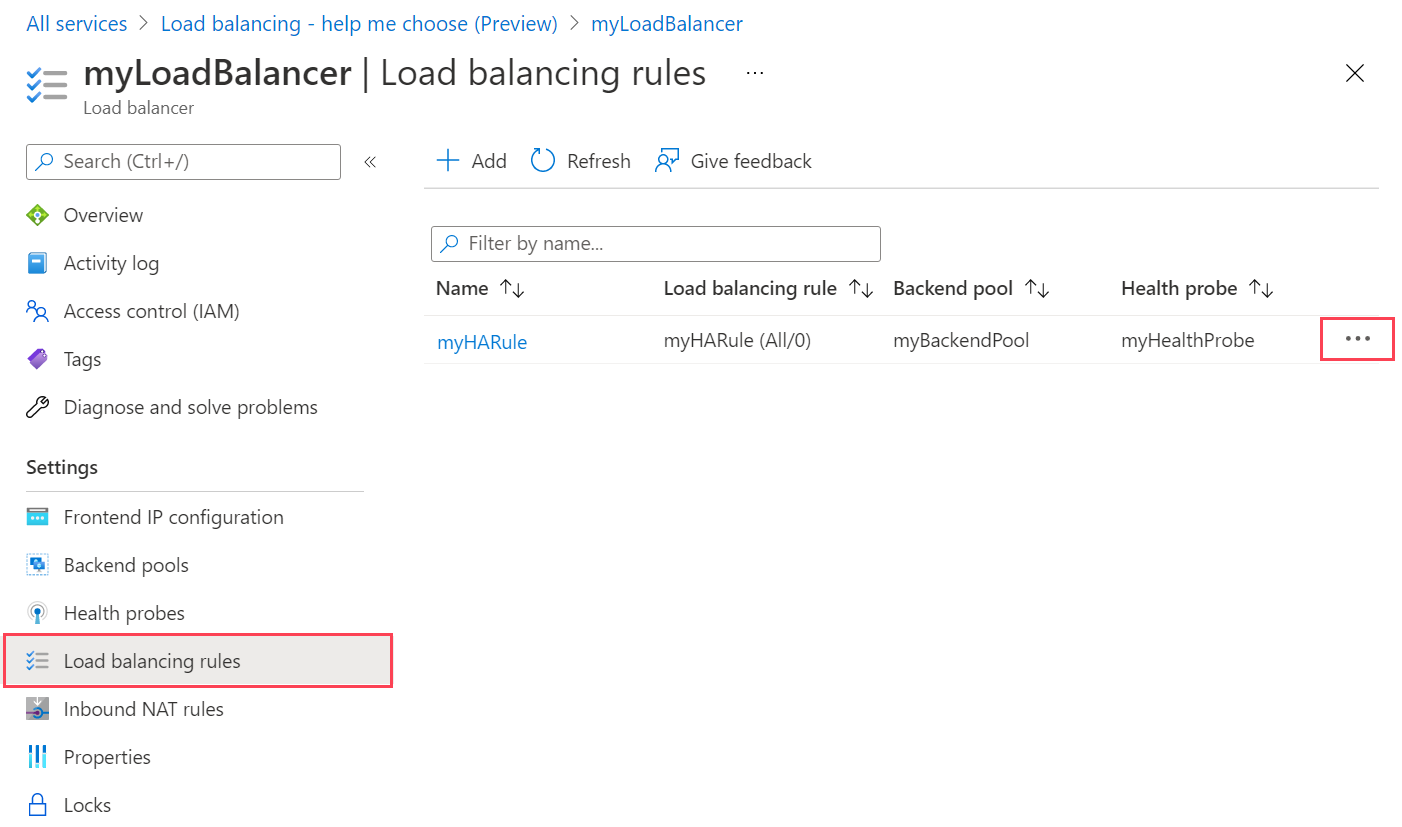
In the load balancer page, select Load balancing rules in Settings.
Select the three dots next to the rule you want to remove.
Select Delete.
Inbound NAT rule
Inbound NAT rules are used to route connections to a specific VM in the backend pool. For more information and a detailed tutorial on configuring and testing inbound NAT rules, see Tutorial: Configure port forwarding in Azure Load Balancer using the portal.
Outbound rule
You'll learn how to add and remove an outbound rule in this section. You'll use a public load balancer in this example.
Outbound rules are supported on standard public load balancers.
Add outbound rule
In this example, you'll create an outbound rule.
Sign in to the Azure portal.
In the search box at the top of the portal, enter Load balancer. Select Load balancers in the search results.
Select myLoadBalancer or your load balancer.
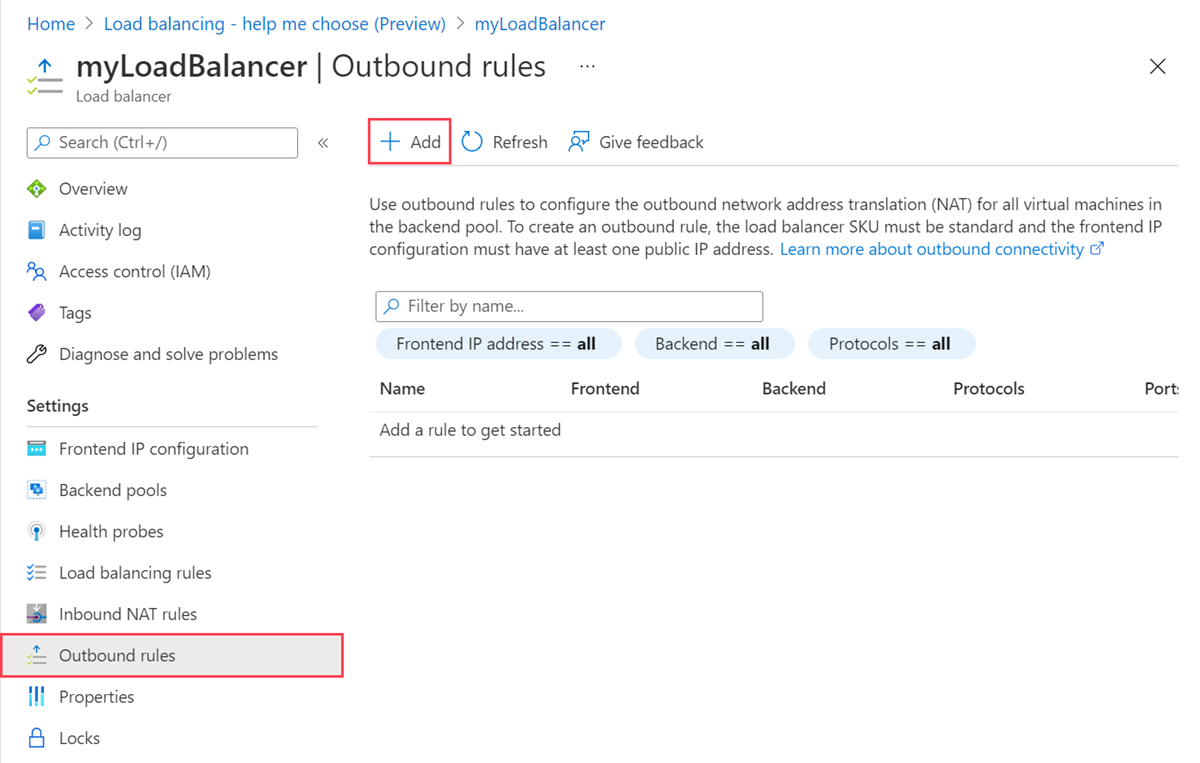
In the load balancer page, select Outbound rules in Settings.
Select + Add in Outbound rules to add a rule.
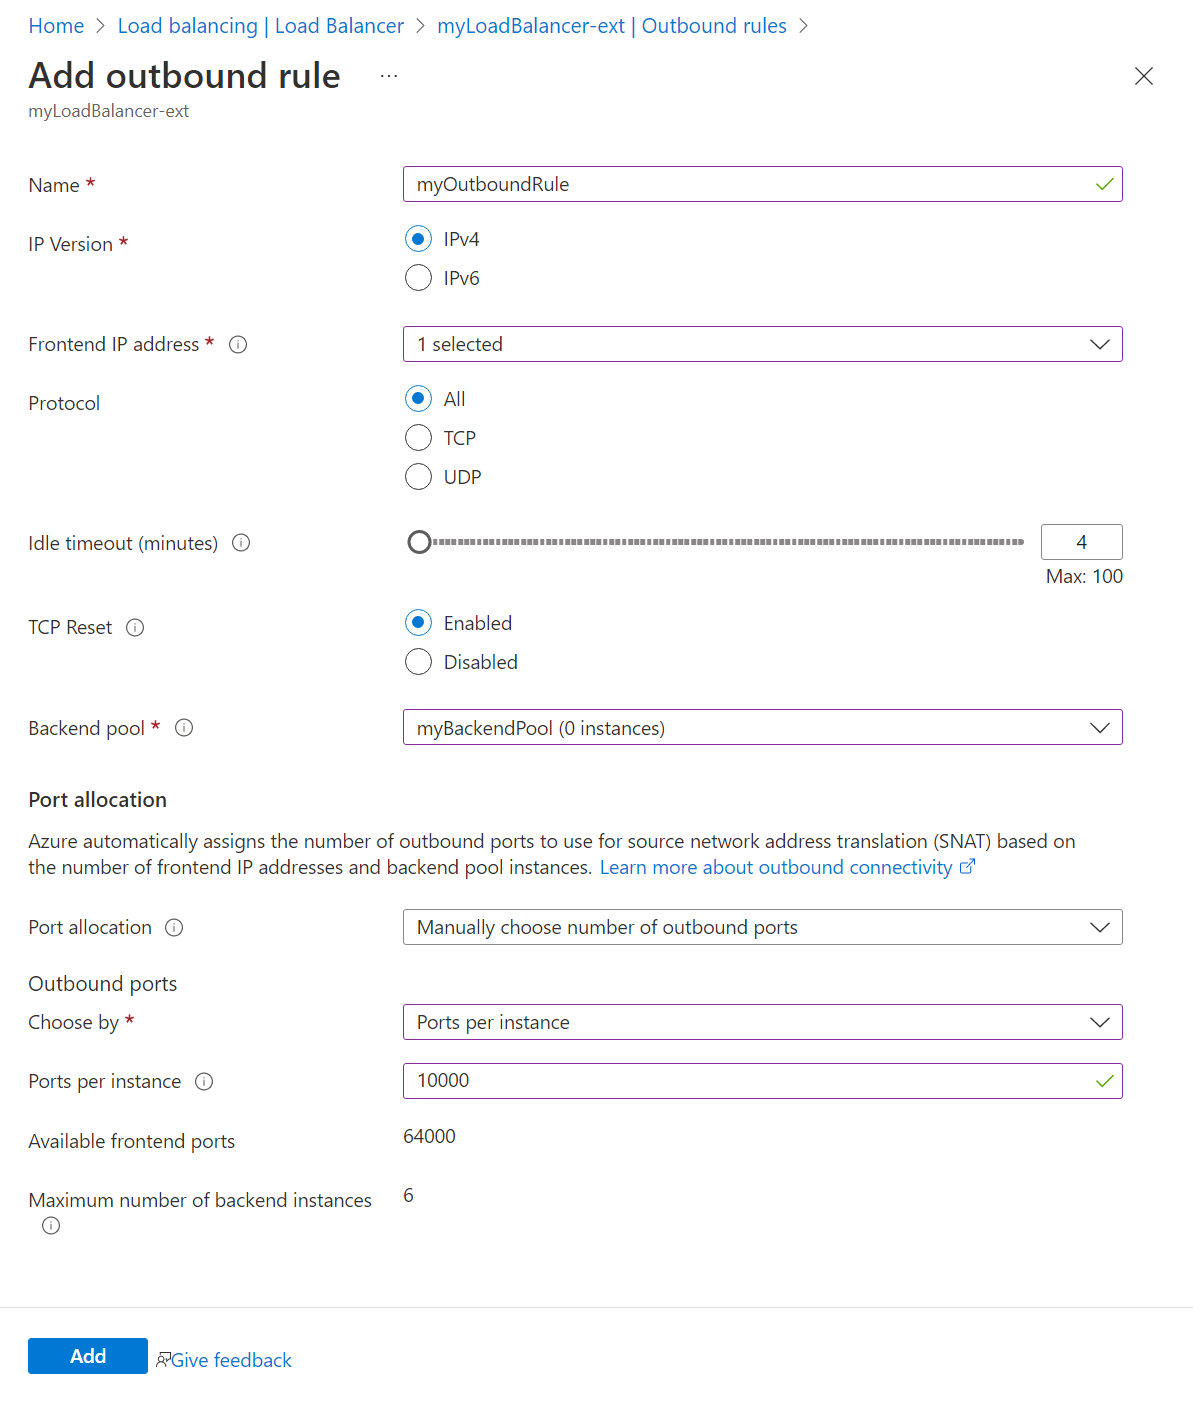
Enter or select the following information in Add outbound rule.
Setting Value Name Enter myOutboundRule. IP Version Select IPv4 or IPv6. Frontend IP address Select the frontend IP address of the load balancer.
In this example, it's myFrontendIP.Protocol Leave the default of All. Idle timeout (minutes) Leave the default of 4 or move the slider to meet your requirements. TCP Reset Leave the default of Enabled. Backend pool Select the backend pool of the load balancer.
In this example, it's myBackendPool.Port allocation Port allocation Select Manually choose number of outbound ports. Outbound ports Choose by Select Ports per instance. Ports per instance Enter 10000. Select Add.
Remove an outbound rule
In this example, you'll remove an outbound rule.
Sign in to the Azure portal.
In the search box at the top of the portal, enter Load balancer. Select Load balancers in the search results.
Select myLoadBalancer or your load balancer.
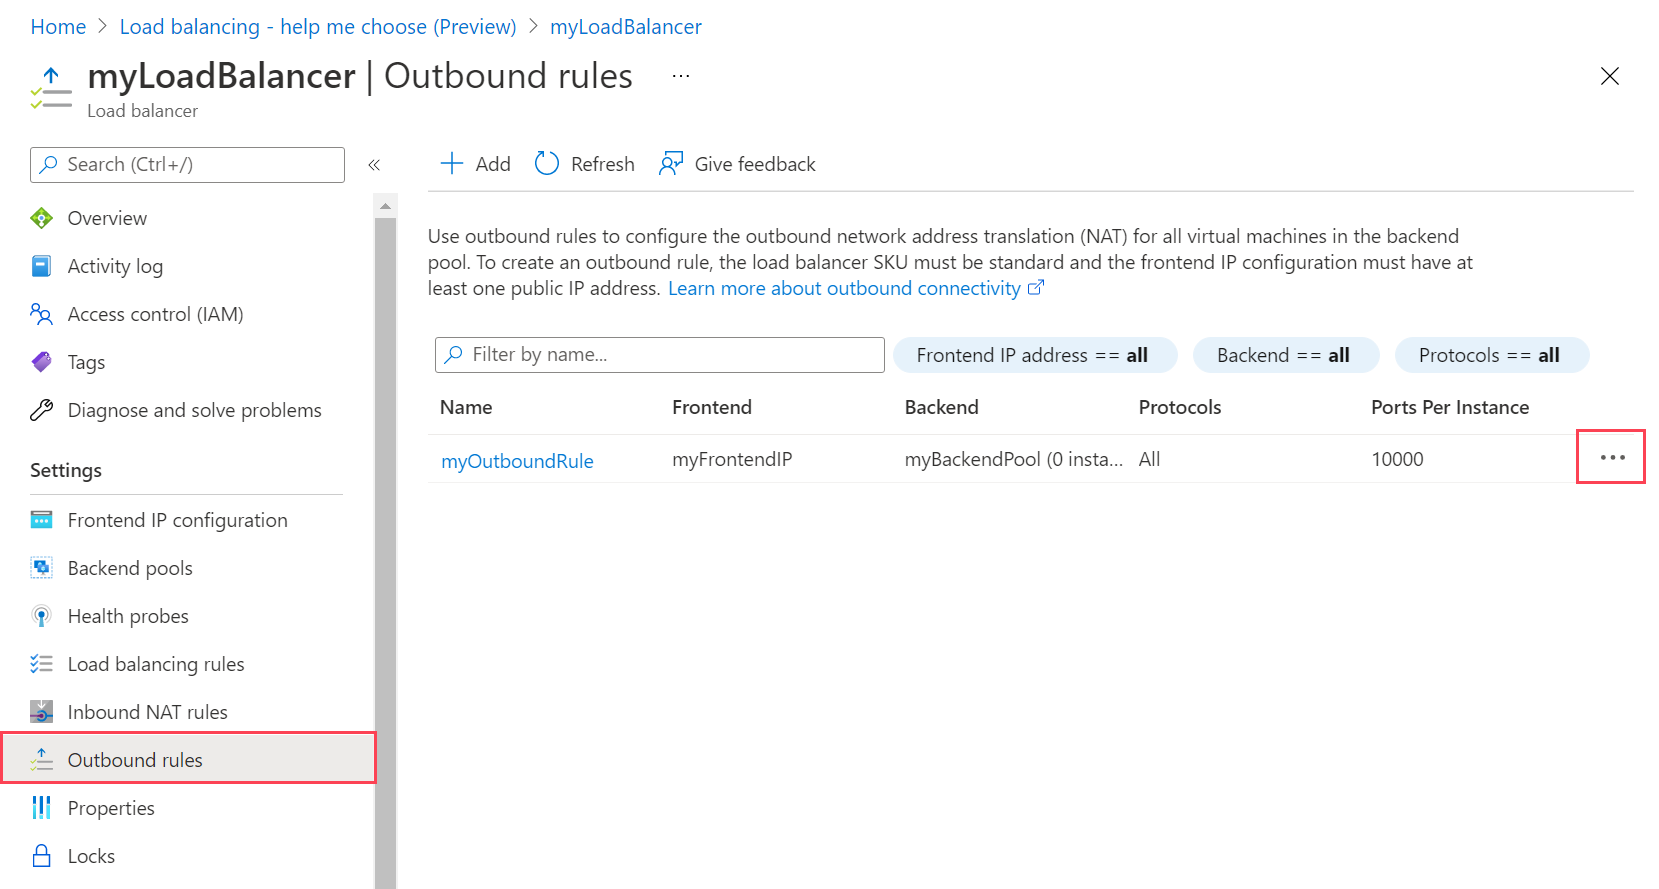
In the load balancer page, select Outbound rules in Settings.
Select the three dots next to the rule you want to remove.
Select Delete.
Next steps
In this article, you learned how to manage load-balancing rules for an Azure Load Balancer.
For more information about Azure Load Balancer, see:
Feedback
Coming soon: Throughout 2024 we will be phasing out GitHub Issues as the feedback mechanism for content and replacing it with a new feedback system. For more information see: https://aka.ms/ContentUserFeedback.
Submit and view feedback for