Relate alerts to incidents in Microsoft Sentinel
This article shows you how to relate alerts to your incidents in Microsoft Sentinel. This feature allows you to manually or automatically add alerts to, or remove them from, existing incidents as part of your investigation processes, refining the incident scope as the investigation unfolds.
Important
Incident expansion is currently in PREVIEW. The Azure Preview Supplemental Terms include additional legal terms that apply to Azure features that are in beta, preview, or otherwise not yet released into general availability.
Expand the scope and power of your incidents
One thing that this feature allows you to do is to include alerts from one data source in incidents generated by another data source. For example, you can add alerts from Microsoft Defender for Cloud, or from various third-party data sources, to incidents imported into Microsoft Sentinel from Microsoft Defender XDR.
This feature is built into the latest version of the Microsoft Sentinel API, which means that it's available to the Logic Apps connector for Microsoft Sentinel. So you can use playbooks to automatically add an alert to an incident if certain conditions are met.
You can also use this automation to add alerts to manually created incidents, to create custom correlations, or to define custom criteria for grouping alerts into incidents when they're created.
Limitations
Microsoft Sentinel imports both alerts and incidents from Microsoft Defender XDR. For the most part, you can treat these alerts and incidents like regular Microsoft Sentinel alerts and incidents.
However, you can only add Defender alerts to Defender incidents (or remove them) in the Defender portal, not in the Sentinel portal. If you try doing this in Microsoft Sentinel, you will get an error message. You can pivot to the incident in the Microsoft Defender Portal using the link in the Microsoft Sentinel incident. Don't worry, though - any changes you make to the incident in the Microsoft Defender Portal are synchronized with the parallel incident in Microsoft Sentinel, so you'll still see the added alerts in the incident in the Sentinel portal.
You can add Microsoft Defender XDR alerts to non-Defender incidents, and non-Defender alerts to Defender incidents, in the Microsoft Sentinel portal.
If you onboarded Microsoft Sentinel to the unified security operations portal, you can no longer add Microsoft Sentinel alerts to incidents, or remove Microsoft Sentinel alerts from incidents, in Microsoft Sentinel (in the Azure portal). You can do this only in the Microsoft Defender portal. For more information, see Capability differences between portals.
An incident can contain a maximum of 150 alerts. If you try to add an alert to an incident with 150 alerts in it, you will get an error message.
Add alerts using the entity timeline (Preview)
The entity timeline, as featured in the new incident experience (now in Preview), presents all the entities in a particular incident investigation. When an entity in the list is selected, a miniature entity page is displayed in a side panel.
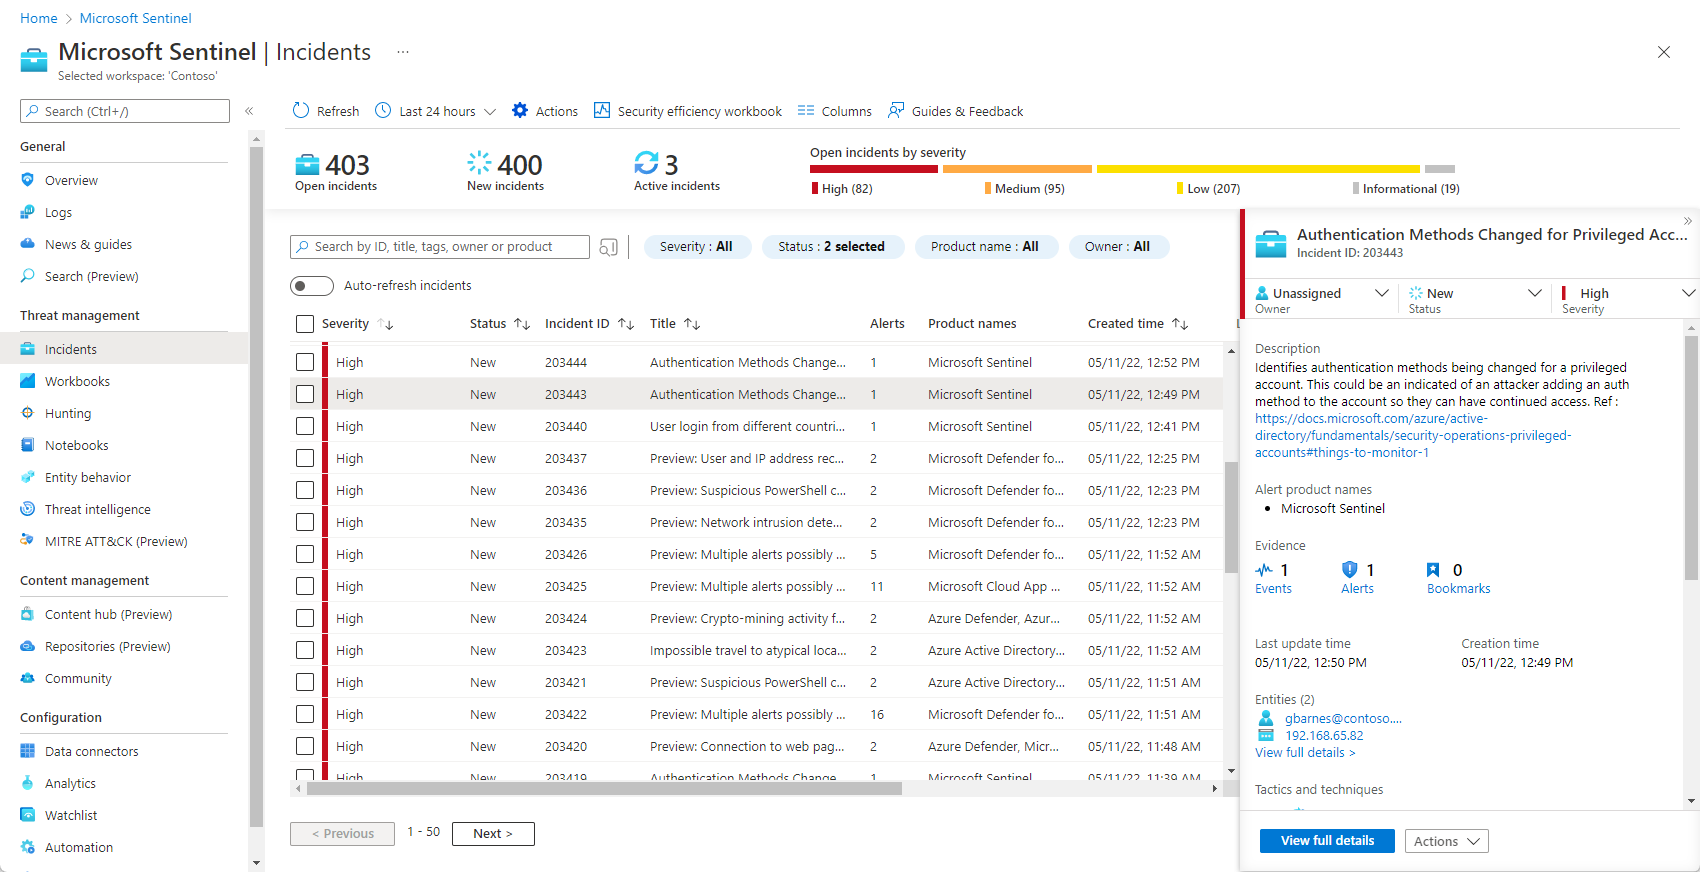
From the Microsoft Sentinel navigation menu, select Incidents.

Select an incident to investigate. In the incident details panel, select View full details.
In the incident page, select the Entities tab.

Select an entity from the list.
In the entity page side panel, select the Timeline card.
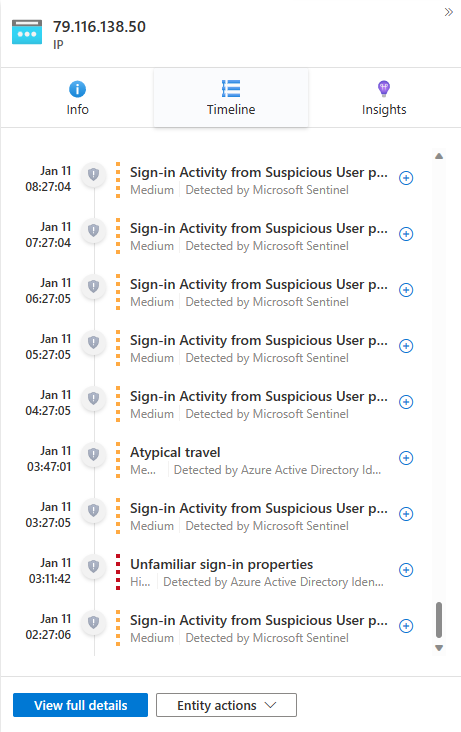
Select an alert external to the open incident. These are indicated by a grayed-out shield icon and a dotted-line color band representing the severity. Select the plus-sign icon on the right end of that alert.

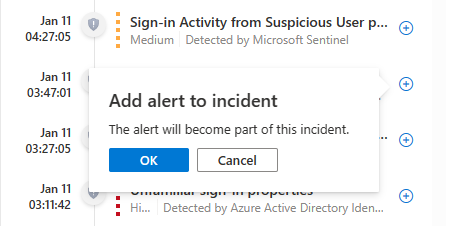
Confirm adding the alert to the incident by selecting OK. You'll receive a notification confirming the adding of the alert to the incident, or explaining why it was not added.


You'll see that the added alert now appears in the open incident's Timeline widget in the Overview tab, with a full-color shield icon and a solid-line color band like any other alert in the incident.
The added alert is now a full part of the incident, and any entities in the added alert (that weren't already part of the incident) have also become part of the incident. You can now explore those entities' timelines for their other alerts that are now eligible to be added to the incident.
Remove an alert from an incident
Alerts that were added to an incident—manually or automatically—can be removed from an incident as well.
From the Microsoft Sentinel navigation menu, select Incidents.
Select an incident to investigate. In the incident details panel, select View full details.
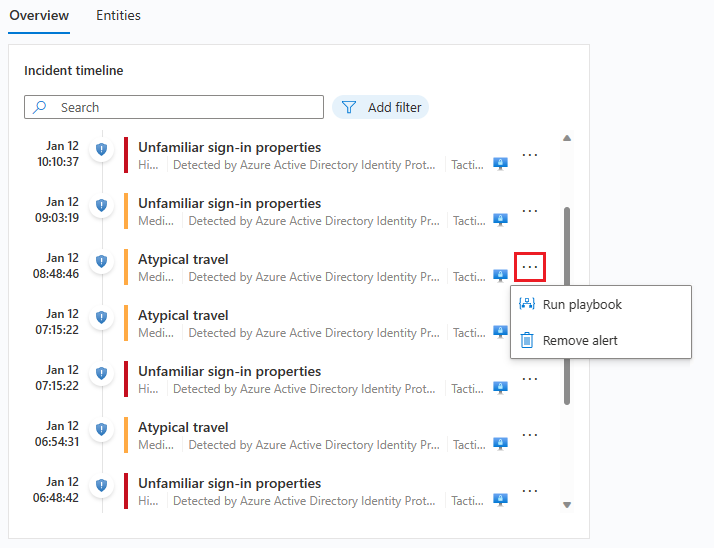
In the Overview tab, in the Incident timeline widget, select the three dots next to an alert you want to remove from the incident. From the pop-up menu, select Remove alert.
Add alerts using the investigation graph
The investigation graph is a visual, intuitive tool that presents connections and patterns and enables your analysts to ask the right questions and follow leads. You can use it to add alerts to and remove them from your incidents, broadening or narrowing the scope of your investigation.
From the Microsoft Sentinel navigation menu, select Incidents.
Select an incident to investigate. In the incident details panel, select the Actions button and choose Investigate from the pop-up menu. This will open the investigation graph.

Hover over any entity to reveal the list of exploration queries to its side. Select Related alerts.
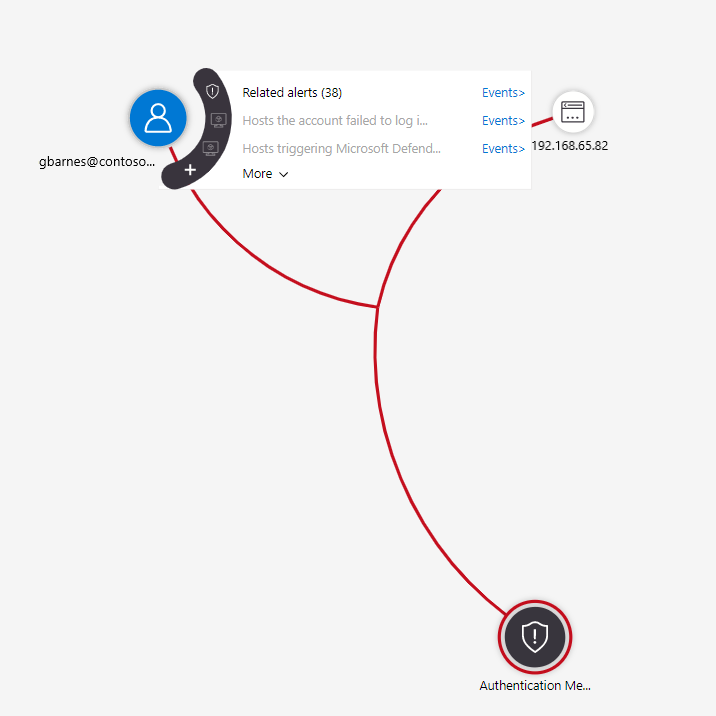
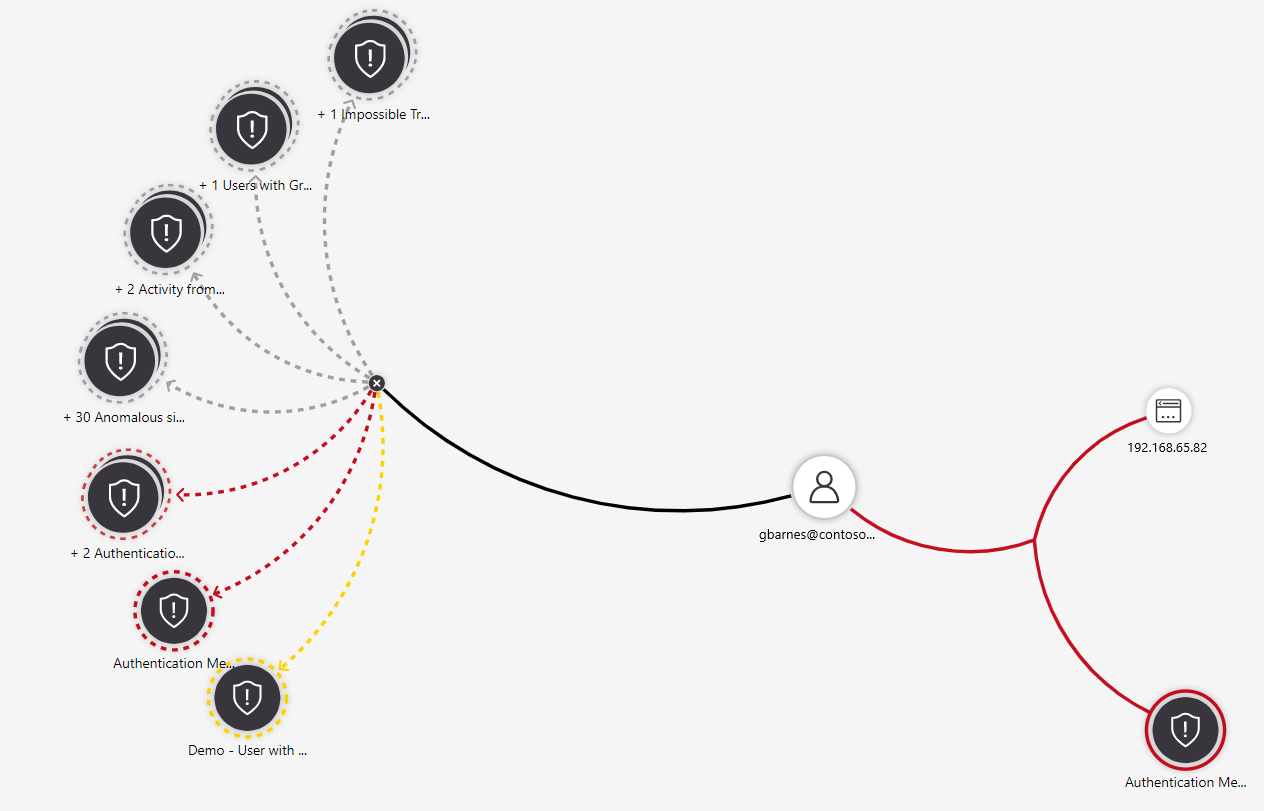
The related alerts will appear connected to the entity by dotted lines.
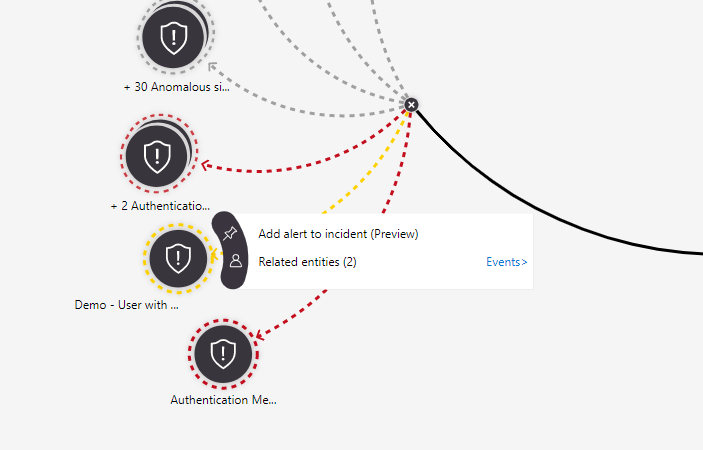
Hover over one of the related alerts until a menu pops out to its side. Select Add alert to incident (Preview).
The alert is added to the incident, and for all purposes is part of the incident, along with all its entities and details. You'll see two visual representations of this:
The line connecting it to the entity in the investigation graph has changed from dotted to solid, and connections to entities in the added alert have been added to the graph.

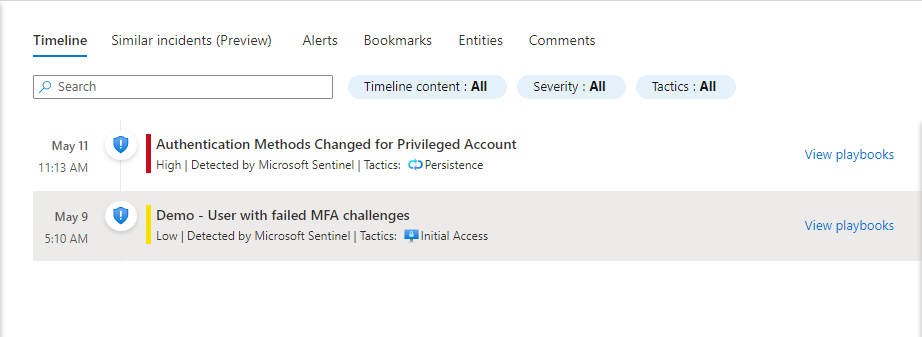
The alert now appears in this incident's timeline, together with the alerts that were already there.


Special situations
When adding an alert to an incident, depending on the circumstances, you might be asked to confirm your request or to choose between different options. The following are some examples of these situations, the choices you will be asked to make, and their implications.
The alert you want to add already belongs to another incident.
In this case you'll see a message telling you that the alert is part of another incident or incidents, and asking if you want to proceed. Select OK to add the alert or Cancel to leave things as they were.
Adding the alert to this incident will not remove it from any other incidents. Alerts can be related to more than one incident. If you want, you can remove the alert manually from the other incident(s) by following the link(s) in the message prompt above.
The alert you want to add belongs to another incident, and it's the only alert in the other incident.
This is different from the case above, since if the alert is alone in the other incident, tracking it in this incident could make the other incident irrelevant. So in this case, you'll see this dialog:
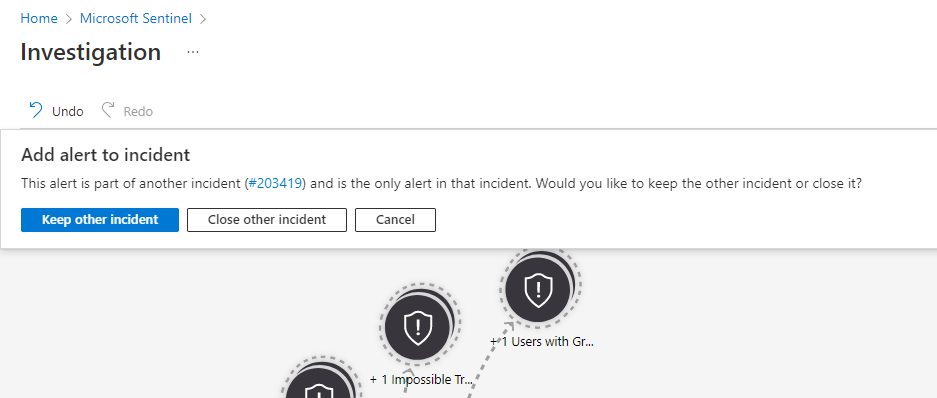
Keep other incident preserves the other incident as is, while also adding the alert to this one.
Close other incident adds the alert to this incident and closes the other incident, adding the closing reason "Undetermined" and the comment "Alert was added to another incident" with the open incident's number.
Cancel leaves the status quo. It makes no changes to either the open incident or any other referenced incident.
Which of these options you choose depends on your particular needs; we don't recommend one choice over the other.
Add/remove alerts using playbooks
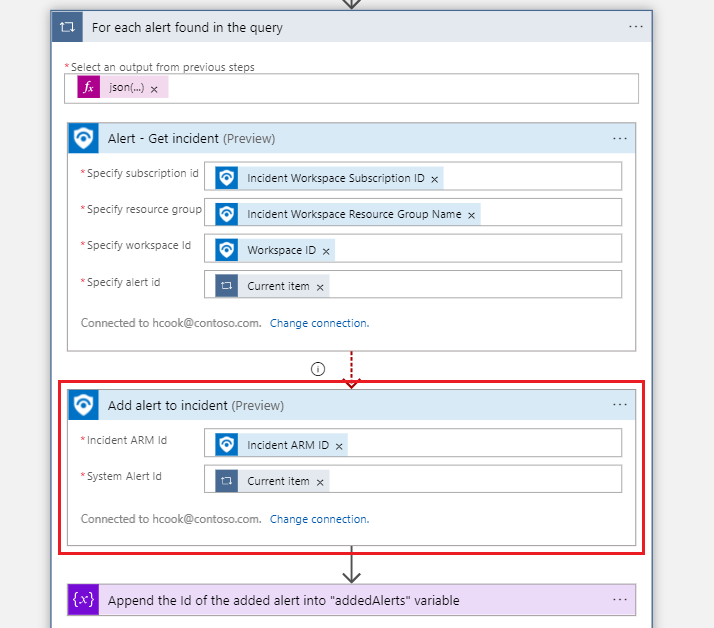
Adding and removing alerts to incidents are also available as Logic Apps actions in the Microsoft Sentinel connector, and therefore in Microsoft Sentinel playbooks. You need to supply the incident ARM ID and the system alert ID as parameters, and you can find them both in the playbook schema for both the alert and incident triggers.
Microsoft Sentinel supplies a sample playbook template in the templates gallery, that shows you how to work with this capability:

Here's how the Add alert to incident (Preview) action is used in this playbook, as an example for how you can use it elsewhere:
Add/remove alerts using the API
You're not limited to the portal to use this feature. It's also accessible through the Microsoft Sentinel API, through the Incident relations operation group. It allows you to get, create, update, and delete relationships between alerts and incidents.
Create a relationship
You add an alert to an incident by creating a relationship between them. Use the following endpoint to add an alert to an existing incident. After this request is made, the alert joins the incident and will be visible in the list of alerts in the incident in the portal.
PUT https://management.azure.com/subscriptions/{subscriptionId}/resourceGroups/{resourceGroupName}/providers/Microsoft.OperationalInsights/workspaces/{workspaceName}/providers/Microsoft.SecurityInsights/incidents/{incidentId}/relations/{relationName}?api-version=2022-07-01-preview
The request body looks like this:
{
    "properties": {
        "relatedResourceId": "/subscriptions/{subscriptionId}/resourceGroups/{resourceGroupName}/providers/Microsoft.OperationalInsights/workspaces/{workspaceName}/providers/Microsoft.SecurityInsights/entities/{systemAlertId}"
    }
}
Delete a relationship
You remove an alert from an incident by deleting the relationship between them. Use the following endpoint to remove an alert from an existing incident. After this request is made, the alert will no longer be connected to or appear in the incident.
DELETE https://management.azure.com/subscriptions/{subscriptionId}/resourceGroups/{resourceGroupName}/providers/Microsoft.OperationalInsights/workspaces/{workspaceName}/providers/Microsoft.SecurityInsights/incidents/{incidentId}/relations/{relationName}?api-version=2022-07-01-preview
List alert relationships
You can also list all the alerts that are related to a particular incident, with this endpoint and request:
GET https://management.azure.com/subscriptions/{subscriptionId}/resourceGroups/{resourceGroupName}/providers/Microsoft.OperationalInsights/workspaces/{workspaceName}/providers/Microsoft.SecurityInsights/incidents/{incidentId}/relations?api-version=2022-07-01-preview
Specific error codes
The general API documentation lists expected response codes for the Create, Delete, and List operations mentioned above. Error codes are only mentioned there as a general category. Here are the possible specific error codes and messages listed there under the category of "Other Status Codes":
| Code | Message |
|---|---|
| 400 Bad Request | Failed to create relation. Different relation type with name {relationName} already exists in incident {incidentIdentifier}. |
| 400 Bad Request | Failed to create relation. Alert {systemAlertId} already exists in incident {incidentIdentifier}. |
| 400 Bad Request | Failed to create relation. Related resource and incident should belong to the same workspace. |
| 400 Bad Request | Failed to create relation. Microsoft Defender XDR alerts cannot be added to Microsoft Defender XDR incidents. |
| 400 Bad Request | Failed to delete relation. Microsoft Defender XDR alerts cannot be removed from Microsoft Defender XDR incidents. |
| 404 Not found | Resource '{systemAlertId}' does not exist. |
| 404 Not found | Incident doesn’t exist. |
| 409 Conflict | Failed to create relation. Relation with name {relationName} already exists in incident {incidentIdentifier} to different alert {systemAlertId}. |
Next steps
In this article, you learned how to add alerts to incidents and remove them using the Microsoft Sentinel portal and API. For more information, see:
Feedback
Coming soon: Throughout 2024 we will be phasing out GitHub Issues as the feedback mechanism for content and replacing it with a new feedback system. For more information see: https://aka.ms/ContentUserFeedback.
Submit and view feedback for