Configure Azure Synapse Link for Azure SQL Database with network security
This article is a guide for configuring Azure Synapse Link for Azure SQL Database with network security. Before you begin, you should know how to create and start Azure Synapse Link for Azure SQL Database from Get started with Azure Synapse Link for Azure SQL Database.
Create a managed workspace virtual network without data exfiltration
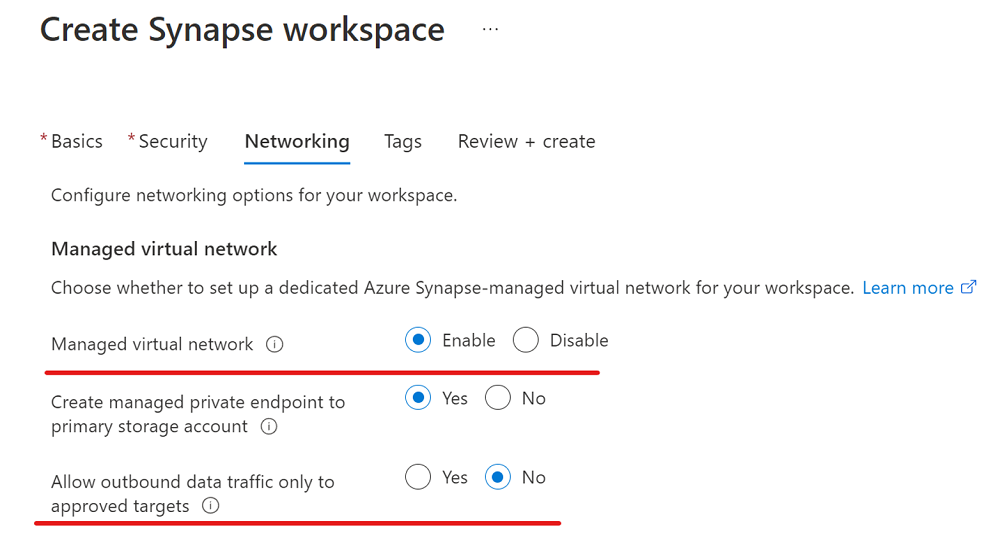
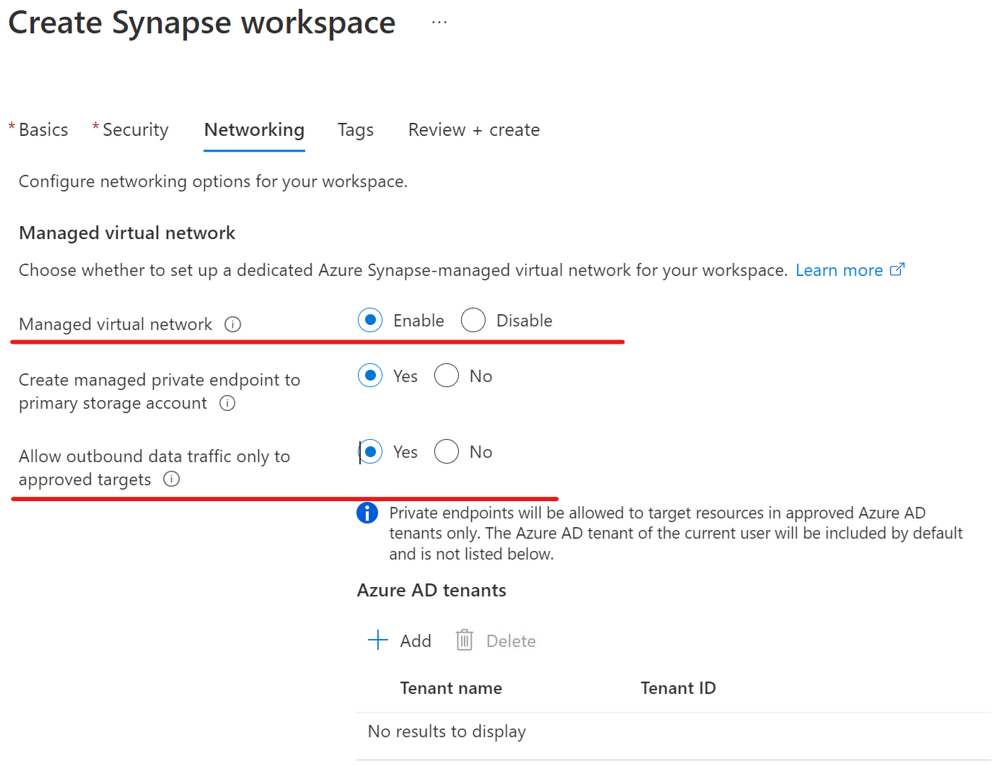
In this section, you create an Azure Synapse workspace with a managed virtual network enabled. For Managed virtual network, you'll select Enable, and for Allow outbound data traffic only to approved targets, you'll select No. For an overview, see Azure Synapse Analytics managed virtual network.
Sign in to the Azure portal.
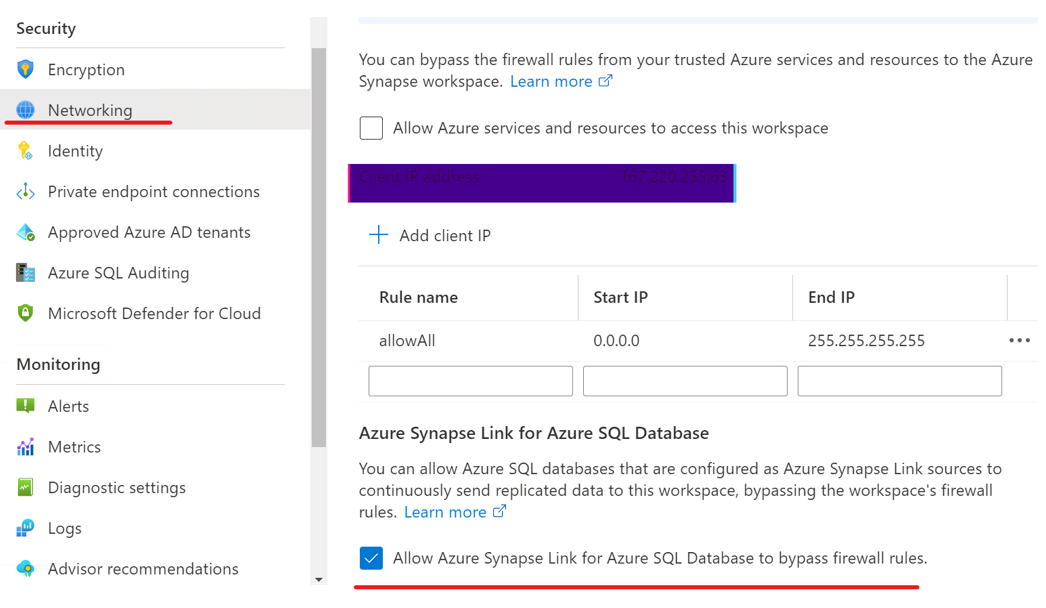
Go to your Azure Synapse workspace, select Networking, and then select the Allow Azure Synapse Link for Azure SQL Database to bypass firewall rules checkbox.
Open Synapse Studio, go to Manage, select Integration runtimes, and then select AutoResolvingIntegrationRuntime.
In the pop-up window, select the Virtual network tab, and then enable Interactive authoring.

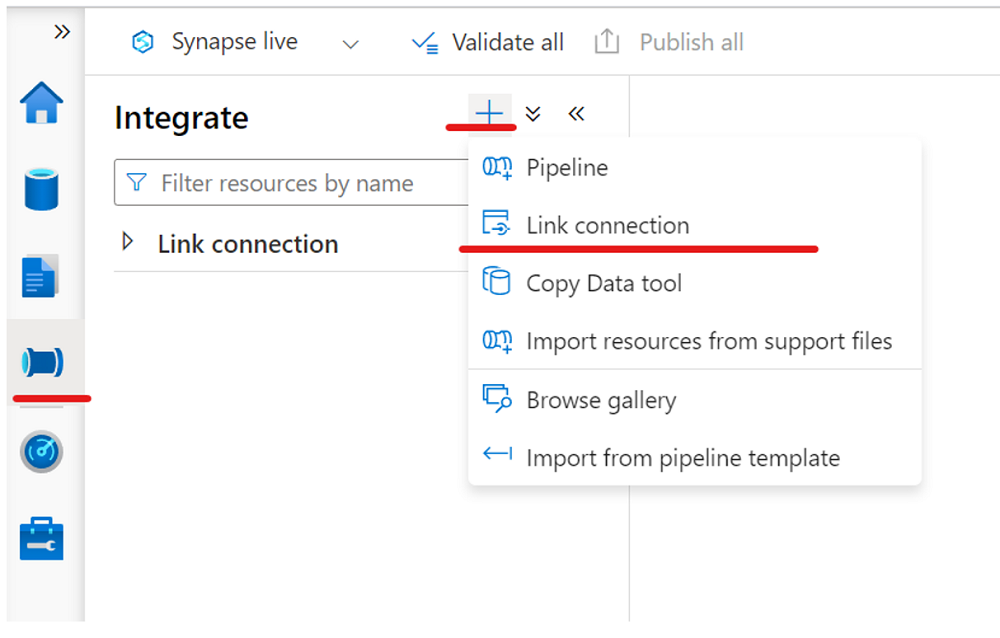
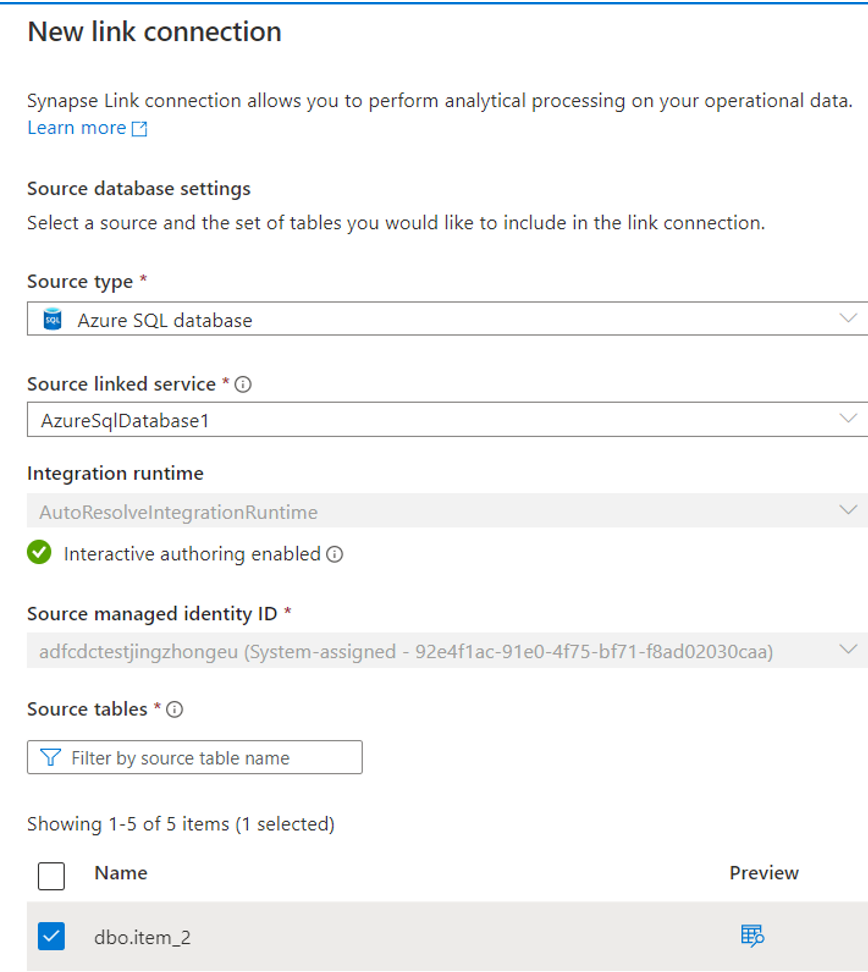
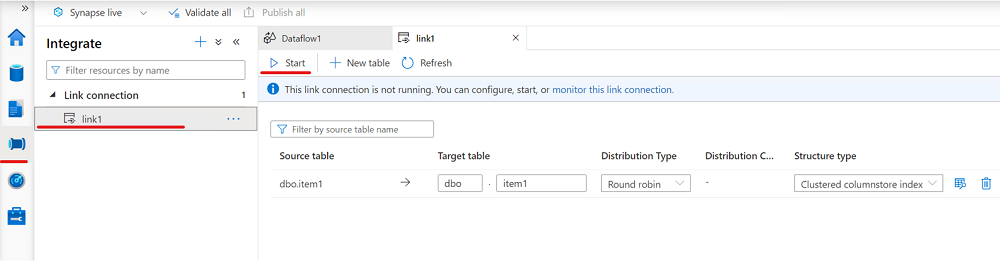
From the Integrate pane, create a link connection to replicate data from your Azure SQL database to an Azure Synapse SQL pool.
Start your link connection.
Create a managed workspace virtual network with data exfiltration
In this section, you create an Azure Synapse workspace with managed virtual network enabled. You'll enable Managed virtual network, and you'll select Yes to limit outbound traffic from the managed workspace virtual network to targets through managed private endpoints. For an overview, see Azure Synapse Analytics managed virtual network.
Sign in to the Azure portal.
Go to your Azure Synapse workspace, select Networking, and then select the Allow Azure Synapse Link for Azure SQL Database to bypass firewall rules checkbox.
Open Synapse Studio, go to Manage, select Integration runtimes, and then select AutoResolvingIntegrationRuntime.
In the pop-up window, select the Virtual network tab, and then enable Interactive authoring.
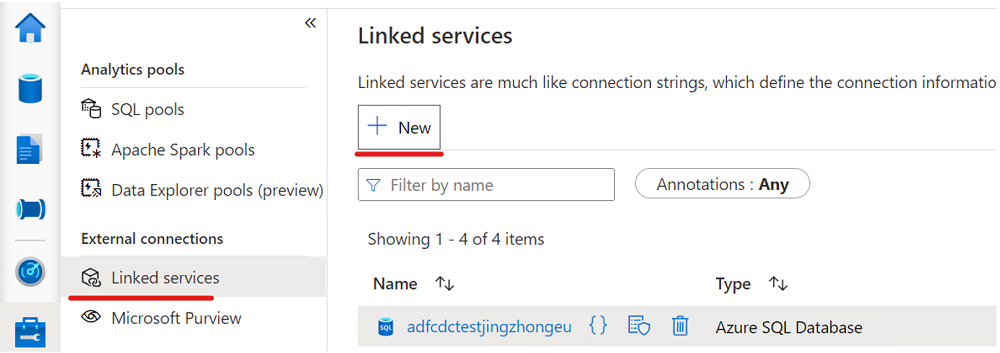
Create a linked service that connects to your Azure SQL database with a managed private endpoint enabled.
a. Create a linked service that connects to your Azure SQL database.
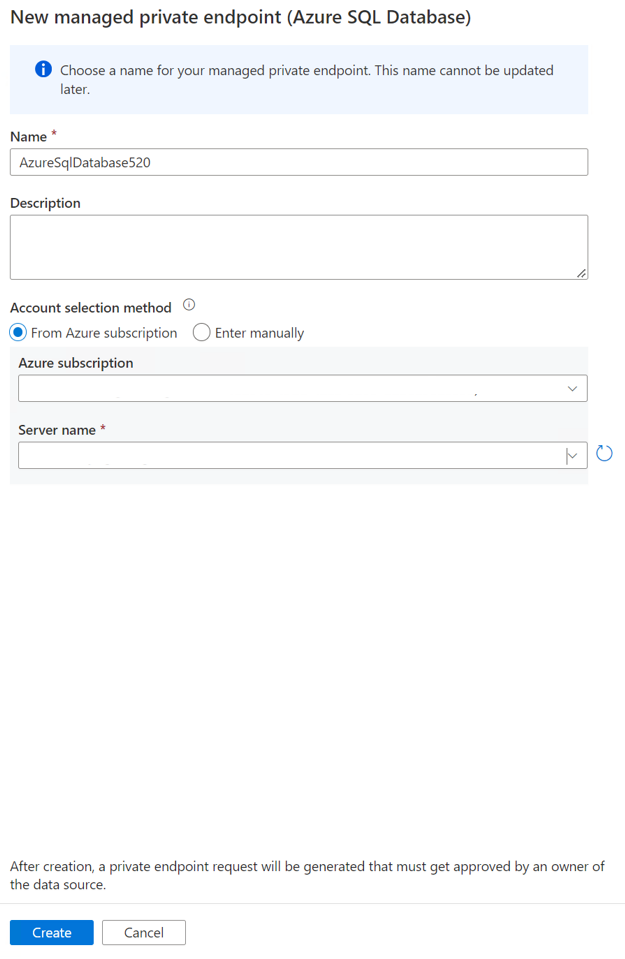
b. Create a managed private endpoint in a linked service for the Azure SQL database.

c. Complete the managed private endpoint creation in the linked service for the Azure SQL database.
d. Go to the Azure portal for your SQL Server instance that hosts an Azure SQL database as a source store, and then approve the private endpoint connections.

Now you can create a link connection from the Integrate pane to replicate data from your Azure SQL database to an Azure Synapse SQL pool.
Start your link connection.
Next steps
If you're using a database other than an Azure SQL database, see:
Feedback
Coming soon: Throughout 2024 we will be phasing out GitHub Issues as the feedback mechanism for content and replacing it with a new feedback system. For more information see: https://aka.ms/ContentUserFeedback.
Submit and view feedback for