Use a style to add emphasis to a hologram in the Guides HoloLens app
By adding styles in the Dynamics 365 Guides HoloLens app, you provide visual cues for your holograms. For example, add the Caution style to indicate caution or the Outline style to indicate something that the operator should pick up. As your operators get used to the visual language that styles provide, their learning process speeds up.
Add a style
Select a hologram that you've already placed in the real world.
Select the Edit Hologram (pencil) button.
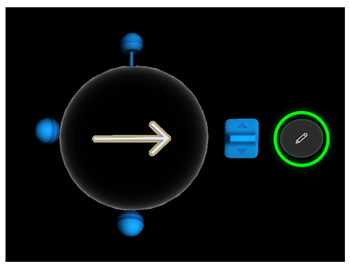
Select Styles.
Tip
On HoloLens 2, you can select the Styles command and subsequent menu items directly with your finger. For more information about how to manipulate holograms in HoloLens 2, go to Authoring and navigating gestures for HoloLens 2.
Select the style that you want to use.
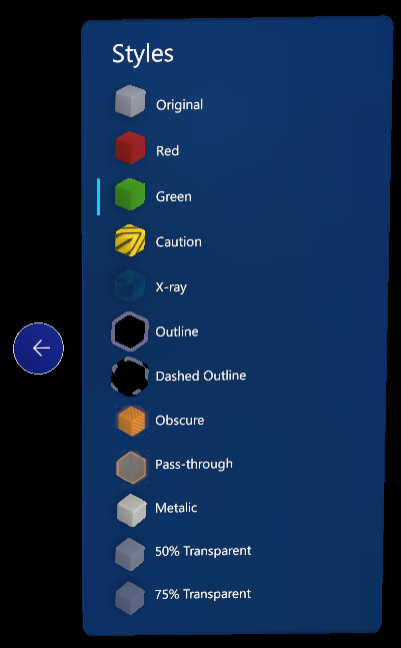
The following table describes the styles that are available in Guides and explains what to use them for.
| Style | Suggested use | How it appears to the operator |
|---|---|---|
| Original | Restore the original appearance. | Default appearance |
| Red | Show areas or things to avoid. | Red flashing |
| Green | Show areas or things to approach. | Green flashing |
| Caution | Warn about a safety or quality concern. | Yellow and black stripes |
| X-ray | Show things that occur inside something. | A pulse that appears through it |
| Outline | Tell the operator to pick something up. | Outline |
| Dashed outline | Show the operator where to place something. | Dotted line |
| Obscure | Cover sensitive objects to obscure the remote collaborators' view. | 90 percent bright white |
| Pass-through | Cut through holograms to view the real world behind them. | 100 percent transparent, including objects behind it |
| Metallic | Provide a realistic metal finish for an object. | Metallic |
| 50% transparent | Show something without obscuring the operator's view. | 50 percent transparent |
| 75% transparent | Layer one thing on top of another so that the operator can see through two layers. | 75 percent transparent |
Best practices for styles
- Use styles to reinforce actions.
- Be consistent in your use of styles. After operators learn the visual language of styles, they will start to understand what each style is intended to convey. Therefore, their learning process will become faster.
Obscure or highlight items in your space
Use the Obscure and Pass-through styles together to manage what is shared by your HoloLens camera during a call, when you record a video, or when you take pictures to share. Obscure applies a 90 percent bright white style to a 3D object. Therefore, it effectively obscures the real world in the shared view, both in front of and behind the 3D object. Pass-through makes a 3D object transparent for all holograms behind it, passing through holograms and showing the real world to the call participants. Together, these styles can help remote collaborators focus on specific real-world elements and obscure other real-world elements.
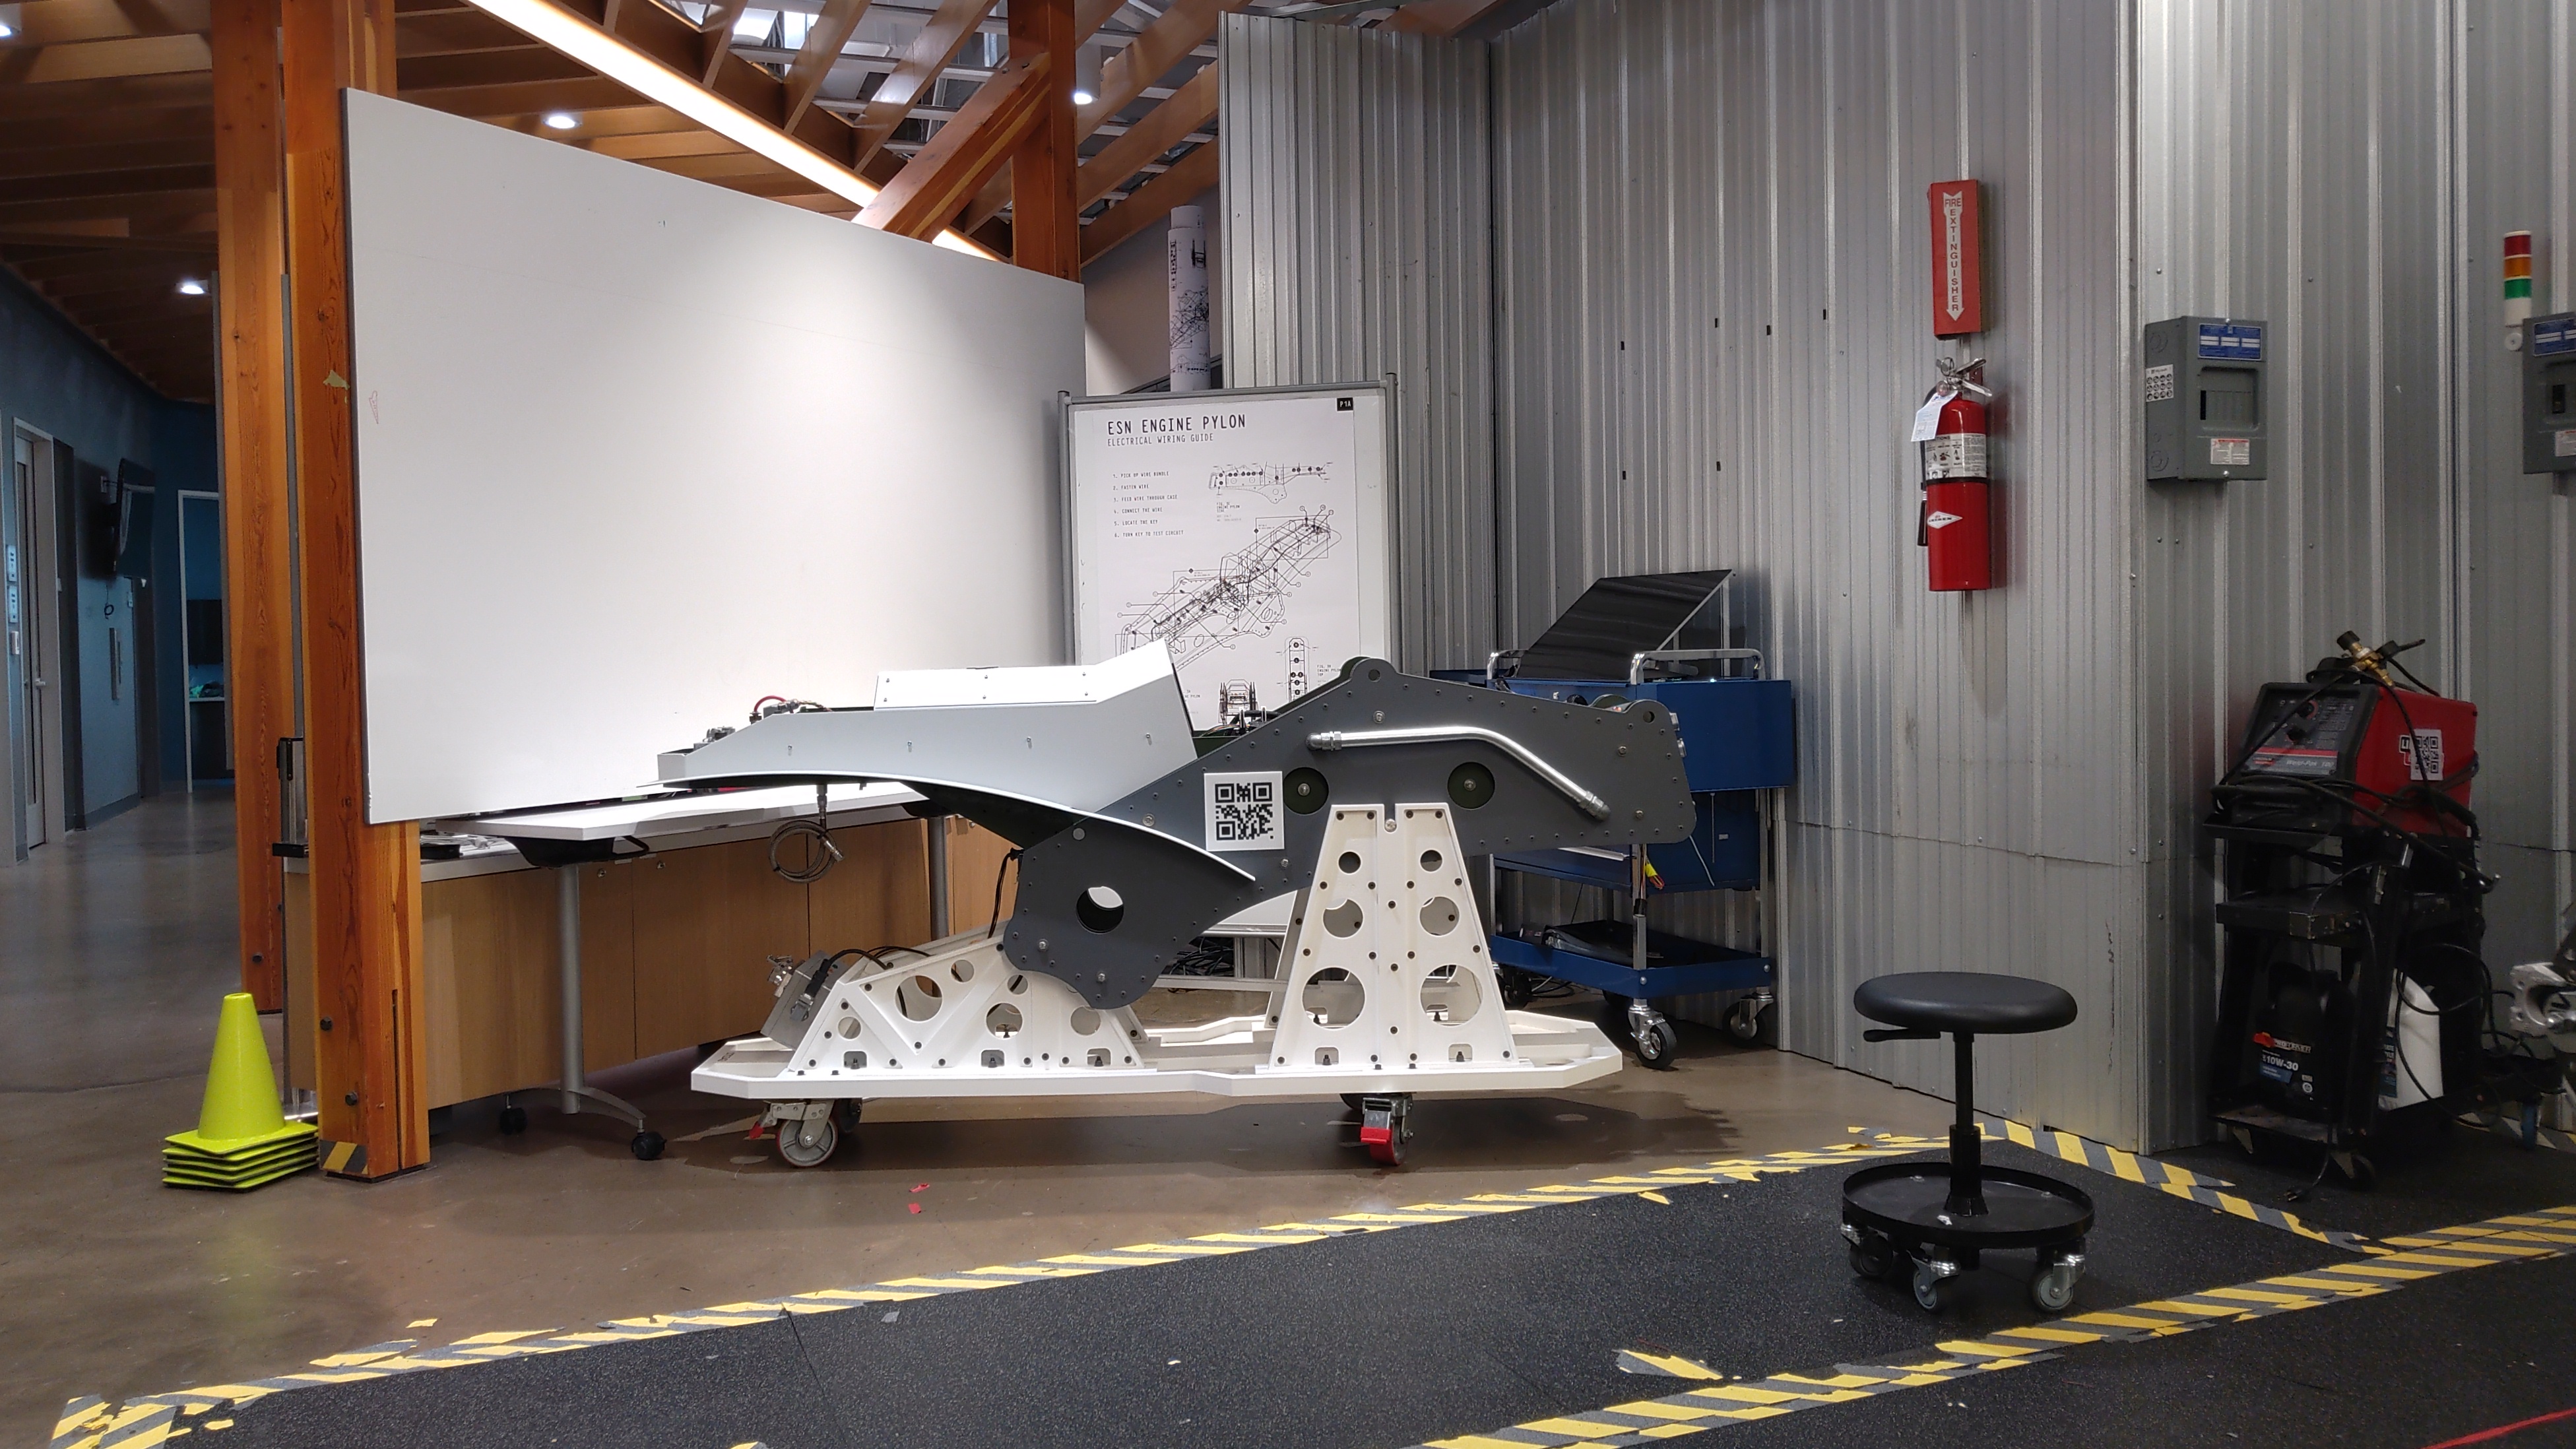
For example, as an author, you want to obscure a diagram that contains sensitive information. However, you want the airplane pylon that is in front of the diagram to always be visible during a call.
- Create a guide that has a single step.
- Place a 3D cube from the toolkit in front of the diagram.
- Add the Obscure style to the 3D object. Anything in front of the diagram will also be obscured.
- To make the airplane pylon always visible, place a 3D object of the pylon over the pylon image. Add the Pass-through style.
- Open the guide in operator mode, and go to the step before you make a call, take pictures, or record a video.
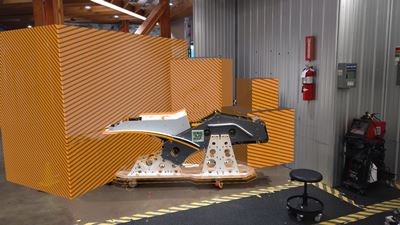
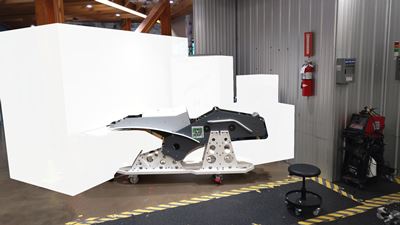
Author view
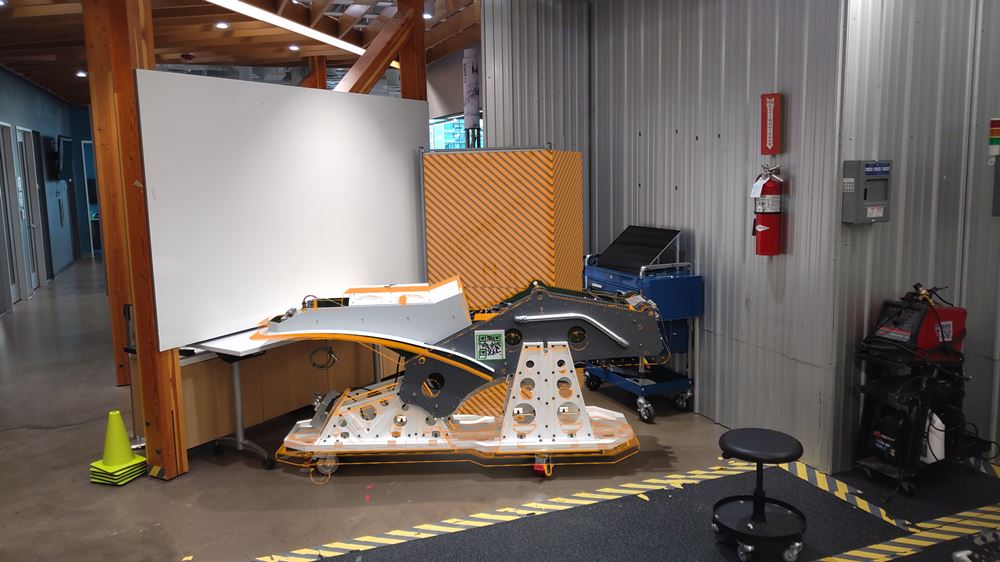
Operator view

The guide author has full control over what they obscure from view while they are on a Teams call or making mixed reality videos. To hide more environment elements, the author can assemble a collection of 3D cubes. In the following example, more 3D cubes were placed to obscure the large whiteboard, the computer, and the toolbox in addition to the diagram.
| Author view | Operator view |
|---|---|
 |
 |
Next steps
Обратна връзка
Очаквайте скоро: През цялата 2024 г. постепенно ще отстраняваме проблемите в GitHub като механизъм за обратна връзка за съдържание и ще го заменим с нова система за обратна връзка. За повече информация вижте: https://aka.ms/ContentUserFeedback.
Подаване и преглед на обратна връзка за