Tutorial: Train your first machine learning model (SDK v1, part 2 of 3)
APPLIES TO:  Python SDK azureml v1
This tutorial shows you how to train a machine learning model in Azure Machine Learning. This tutorial is part 2 of a two-part tutorial series.
In Part 1: Run "Hello world!" of the series, you learned how to use a control script to run a job in the cloud.
In this tutorial, you take the next step by submitting a script that trains a machine learning model. This example helps you understand how Azure Machine Learning eases consistent behavior between local debugging and remote runs.
In this tutorial, you:
- Create a training script.
- Use Conda to define an Azure Machine Learning environment.
- Create a control script.
- Understand Azure Machine Learning classes (
Environment,Run,Metrics). - Submit and run your training script.
- View your code output in the cloud.
- Log metrics to Azure Machine Learning.
- View your metrics in the cloud.
Prerequisites
- Completion of part 1 of the series.
Create training scripts
First you define the neural network architecture in a model.py file. All your training code goes into the src subdirectory, including model.py.
The training code is taken from this introductory example from PyTorch. The Azure Machine Learning concepts apply to any machine learning code, not just PyTorch.
Create a model.py file in the src subfolder. Copy this code into the file:
import torch.nn as nn
import torch.nn.functional as F


class Net(nn.Module):
    def __init__(self):
        super(Net, self).__init__()
        self.conv1 = nn.Conv2d(3, 6, 5)
        self.pool = nn.MaxPool2d(2, 2)
        self.conv2 = nn.Conv2d(6, 16, 5)
        self.fc1 = nn.Linear(16 * 5 * 5, 120)
        self.fc2 = nn.Linear(120, 84)
        self.fc3 = nn.Linear(84, 10)

    def forward(self, x):
        x = self.pool(F.relu(self.conv1(x)))
        x = self.pool(F.relu(self.conv2(x)))
        x = x.view(-1, 16 * 5 * 5)
        x = F.relu(self.fc1(x))
        x = F.relu(self.fc2(x))
        x = self.fc3(x)
        return x
On the toolbar, select Save to save the file. Close the tab if you wish.
Next, define the training script, also in the src subfolder. This script downloads the CIFAR10 dataset by using PyTorch
torchvision.datasetAPIs, sets up the network defined in model.py, and trains it for two epochs by using standard SGD and cross-entropy loss.Create a train.py script in the src subfolder:
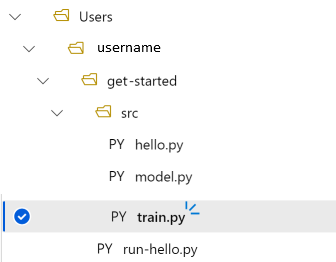
import torch
import torch.optim as optim
import torchvision
import torchvision.transforms as transforms

from model import Net

# download CIFAR 10 data
trainset = torchvision.datasets.CIFAR10(
    root="../data",
    train=True,
    download=True,
    transform=torchvision.transforms.ToTensor(),
)
trainloader = torch.utils.data.DataLoader(
    trainset, batch_size=4, shuffle=True, num_workers=2
)


if __name__ == "__main__":

    # define convolutional network
    net = Net()

    # set up pytorch loss /  optimizer
    criterion = torch.nn.CrossEntropyLoss()
    optimizer = optim.SGD(net.parameters(), lr=0.001, momentum=0.9)

    # train the network
    for epoch in range(2):

        running_loss = 0.0
        for i, data in enumerate(trainloader, 0):
            # unpack the data
            inputs, labels = data

            # zero the parameter gradients
            optimizer.zero_grad()

            # forward + backward + optimize
            outputs = net(inputs)
            loss = criterion(outputs, labels)
            loss.backward()
            optimizer.step()

            # print statistics
            running_loss += loss.item()
            if i % 2000 == 1999:
                loss = running_loss / 2000
                print(f"epoch={epoch + 1}, batch={i + 1:5}: loss {loss:.2f}")
                running_loss = 0.0

    print("Finished Training")
You now have the following folder structure:
Test locally
Select Save and run script in terminal to run the train.py script directly on the compute instance.
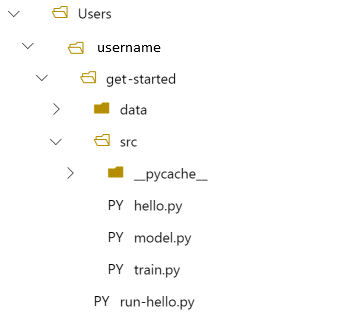
After the script completes, select Refresh above the file folders. You see the new data folder called get-started/data Expand this folder to view the downloaded data.
Create a Python environment
Azure Machine Learning provides the concept of an environment to represent a reproducible, versioned Python environment for running experiments. It's easy to create an environment from a local Conda or pip environment.
First you create a file with the package dependencies.
Create a new file in the get-started folder called
pytorch-env.yml:name: pytorch-env channels: - defaults - pytorch dependencies: - python=3.7 - pytorch - torchvisionOn the toolbar, select Save to save the file. Close the tab if you wish.
Create the control script
The difference between the following control script and the one that you used to submit "Hello world!" is that you add a couple of extra lines to set the environment.
Create a new Python file in the get-started folder called run-pytorch.py:
# run-pytorch.py
from azureml.core import Workspace
from azureml.core import Experiment
from azureml.core import Environment
from azureml.core import ScriptRunConfig
if __name__ == "__main__":
ws = Workspace.from_config()
experiment = Experiment(workspace=ws, name='day1-experiment-train')
config = ScriptRunConfig(source_directory='./src',
script='train.py',
compute_target='cpu-cluster')
# set up pytorch environment
env = Environment.from_conda_specification(
name='pytorch-env',
file_path='pytorch-env.yml'
)
config.run_config.environment = env
run = experiment.submit(config)
aml_url = run.get_portal_url()
print(aml_url)
Tip
If you used a different name when you created your compute cluster, make sure to adjust the name in the code compute_target='cpu-cluster' as well.
Understand the code changes
env = ...
References the dependency file you created above.
config.run_config.environment = env
Adds the environment to ScriptRunConfig.
Submit the run to Azure Machine Learning
Select Save and run script in terminal to run the run-pytorch.py script.
You see a link in the terminal window that opens. Select the link to view the job.
Note
You may see some warnings starting with Failure while loading azureml_run_type_providers.... You can ignore these warnings. Use the link at the bottom of these warnings to view your output.
View the output
- In the page that opens, you see the job status. The first time you run this script, Azure Machine Learning builds a new Docker image from your PyTorch environment. The whole job might take around 10 minutes to complete. This image will be reused in future jobs to make them run much quicker.
- You can see view Docker build logs in the Azure Machine Learning studio. to view the build logs:
- Select the Outputs + logs tab.
- Select azureml-logs folder.
- Select 20_image_build_log.txt.
- When the status of the job is Completed, select Output + logs.
- Select user_logs, then std_log.txt to view the output of your job.
Downloading https://www.cs.toronto.edu/~kriz/cifar-10-python.tar.gz to ../data/cifar-10-python.tar.gz
Extracting ../data/cifar-10-python.tar.gz to ../data
epoch=1, batch= 2000: loss 2.19
epoch=1, batch= 4000: loss 1.82
epoch=1, batch= 6000: loss 1.66
...
epoch=2, batch= 8000: loss 1.51
epoch=2, batch=10000: loss 1.49
epoch=2, batch=12000: loss 1.46
Finished Training
If you see an error Your total snapshot size exceeds the limit, the data folder is located in the source_directory value used in ScriptRunConfig.
Select the ... at the end of the folder, then select Move to move data to the get-started folder.
Log training metrics
Now that you have a model training in Azure Machine Learning, start tracking some performance metrics.
The current training script prints metrics to the terminal. Azure Machine Learning provides a mechanism for logging metrics with more functionality. By adding a few lines of code, you gain the ability to visualize metrics in the studio and to compare metrics between multiple jobs.
Modify train.py to include logging
Modify your train.py script to include two more lines of code:
import torch import torch.optim as optim import torchvision import torchvision.transforms as transforms from model import Net from azureml.core import Run # ADDITIONAL CODE: get run from the current context run = Run.get_context() # download CIFAR 10 data trainset = torchvision.datasets.CIFAR10( root='./data', train=True, download=True, transform=torchvision.transforms.ToTensor() ) trainloader = torch.utils.data.DataLoader( trainset, batch_size=4, shuffle=True, num_workers=2 ) if __name__ == "__main__": # define convolutional network net = Net() # set up pytorch loss / optimizer criterion = torch.nn.CrossEntropyLoss() optimizer = optim.SGD(net.parameters(), lr=0.001, momentum=0.9) # train the network for epoch in range(2): running_loss = 0.0 for i, data in enumerate(trainloader, 0): # unpack the data inputs, labels = data # zero the parameter gradients optimizer.zero_grad() # forward + backward + optimize outputs = net(inputs) loss = criterion(outputs, labels) loss.backward() optimizer.step() # print statistics running_loss += loss.item() if i % 2000 == 1999: loss = running_loss / 2000 # ADDITIONAL CODE: log loss metric to AML run.log('loss', loss) print(f'epoch={epoch + 1}, batch={i + 1:5}: loss {loss:.2f}') running_loss = 0.0 print('Finished Training')Save this file, then close the tab if you wish.
Understand the additional two lines of code
In train.py, you access the run object from within the training script itself by using the Run.get_context() method and use it to log metrics:
# ADDITIONAL CODE: get run from the current context
run = Run.get_context()
...
# ADDITIONAL CODE: log loss metric to AML
run.log('loss', loss)
Metrics in Azure Machine Learning are:
- Organized by experiment and run, so it's easy to keep track of and compare metrics.
- Equipped with a UI so you can visualize training performance in the studio.
- Designed to scale, so you keep these benefits even as you run hundreds of experiments.
Update the Conda environment file
The train.py script just took a new dependency on azureml.core. Update pytorch-env.yml to reflect this change:
name: pytorch-env
channels:
    - defaults
    - pytorch
dependencies:
    - python=3.7
    - pytorch
    - torchvision
- pip
- pip:
- azureml-sdk
Make sure you save this file before you submit the run.
Submit the run to Azure Machine Learning
Select the tab for the run-pytorch.py script, then select Save and run script in terminal to rerun the run-pytorch.py script. Make sure you save your changes to pytorch-env.yml first.
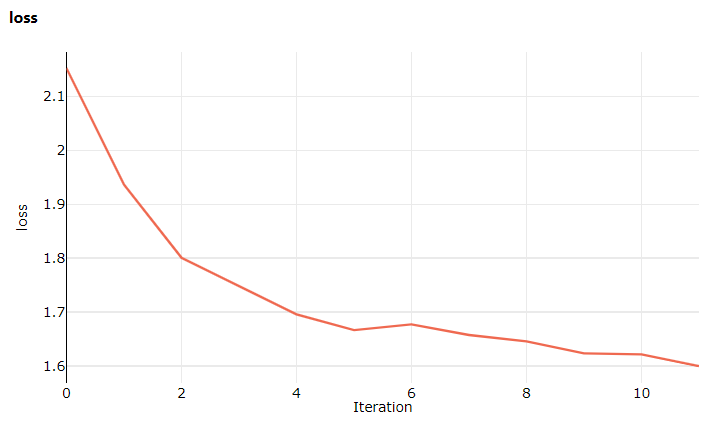
This time when you visit the studio, go to the Metrics tab where you can now see live updates on the model training loss! It may take a 1 to 2 minutes before the training begins.
Clean up resources
If you plan to continue now to another tutorial, or to start your own training jobs, skip to Related resources.
Stop compute instance
If you're not going to use it now, stop the compute instance:
- In the studio, on the left, select Compute.
- In the top tabs, select Compute instances
- Select the compute instance in the list.
- On the top toolbar, select Stop.
Delete all resources
Important
The resources that you created can be used as prerequisites to other Azure Machine Learning tutorials and how-to articles.
If you don't plan to use any of the resources that you created, delete them so you don't incur any charges:
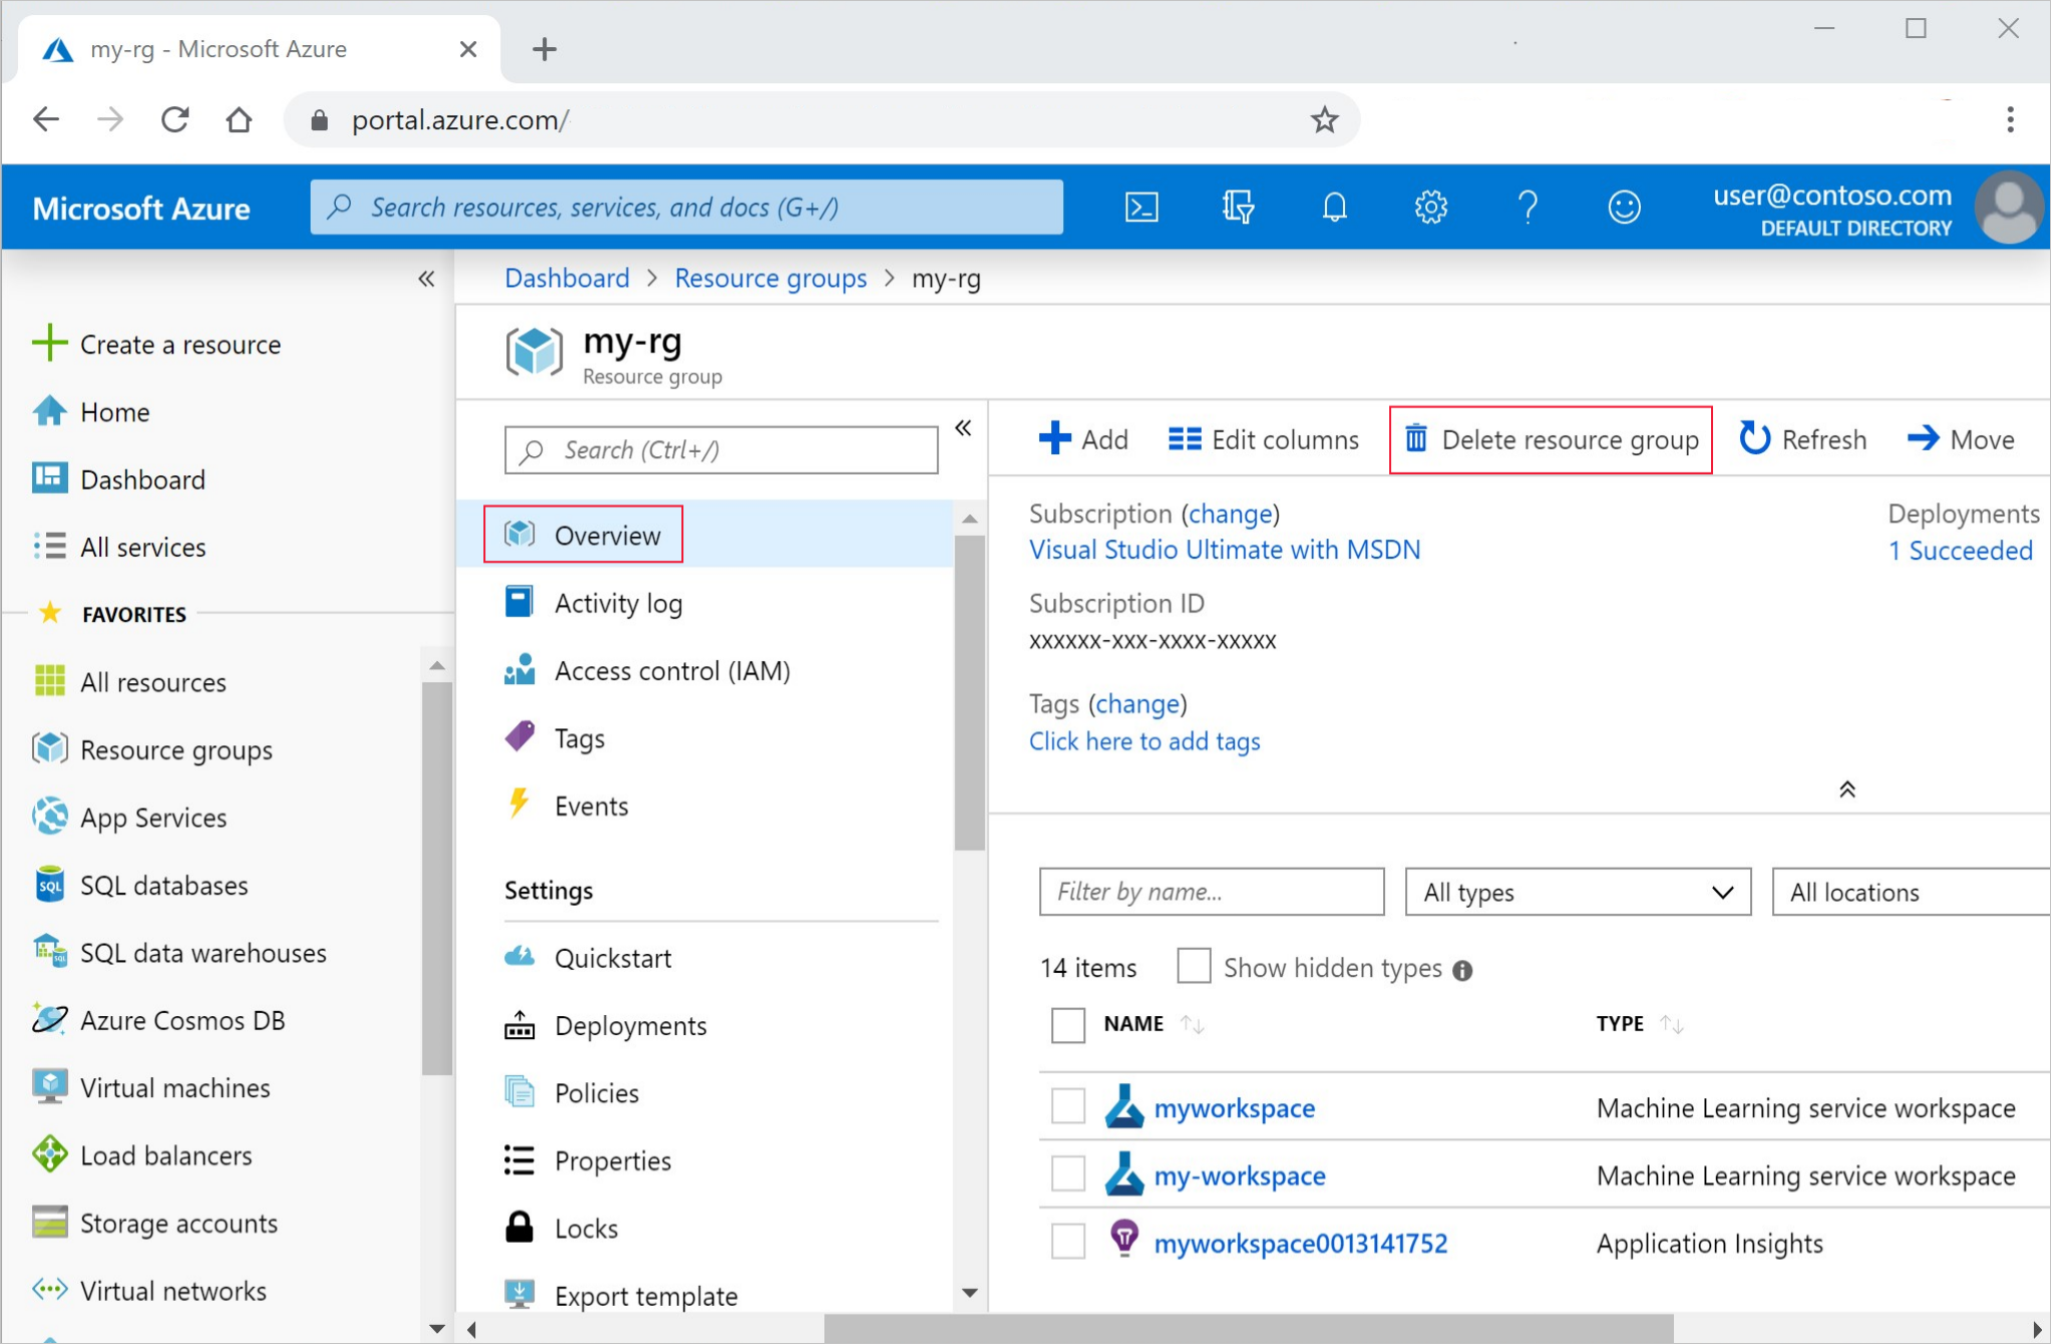
In the Azure portal, select Resource groups on the far left.
From the list, select the resource group that you created.
Select Delete resource group.
Enter the resource group name. Then select Delete.
You can also keep the resource group but delete a single workspace. Display the workspace properties and select Delete.
Related resources
In this session, you upgraded from a basic "Hello world!" script to a more realistic training script that required a specific Python environment to run. You saw how to use curated Azure Machine Learning environments. Finally, you saw how in a few lines of code you can log metrics to Azure Machine Learning.
There are other ways to create Azure Machine Learning environments, including from a pip requirements.txt file or from an existing local Conda environment.
Povratne informacije
Uskoro: tokom 2024. postepeno ćemo ukidati probleme s uslugom GitHub kao mehanizam povratnih informacija za sadržaj i zamijeniti ga novim sistemom povratnih informacija. Za više informacija, pogledajte https://aka.ms/ContentUserFeedback.
Pošalјite i prikažite povratne informacije za