Masking for Mobile Apps
Choose what Clarity can track on your app by masking or unmasking it. Masking is essential when your app might capture users' data that you don't want Clarity to store. The masking ensures that it's never uploaded to Clarity.
Clarity masks sensitive content on your app by default. Clarity doesn't capture this masked content.
Important
- Content in the input boxes is masked in all modes and can't be customized.
- Masking changes might take up to an hour to appear. They can't be retroactively applied.
How to mask and unmask content?
Note
Only a project's admin can mask and unmask content. Members who are not admins can't edit the masking mode, add, or delete masked elements.
You can set Masking for Clarity in two ways:
- Masking modes: Masking modes are applied to your entire app (native and webviews).
- Masking by elements: You can choose to mask certain elements by IDs, by Class, or for entire Screens/Activities.
Masking modes
You can easily select one of the three masking modes. By default, the masking mode is set to Balanced.
Go to Settings > Masking.
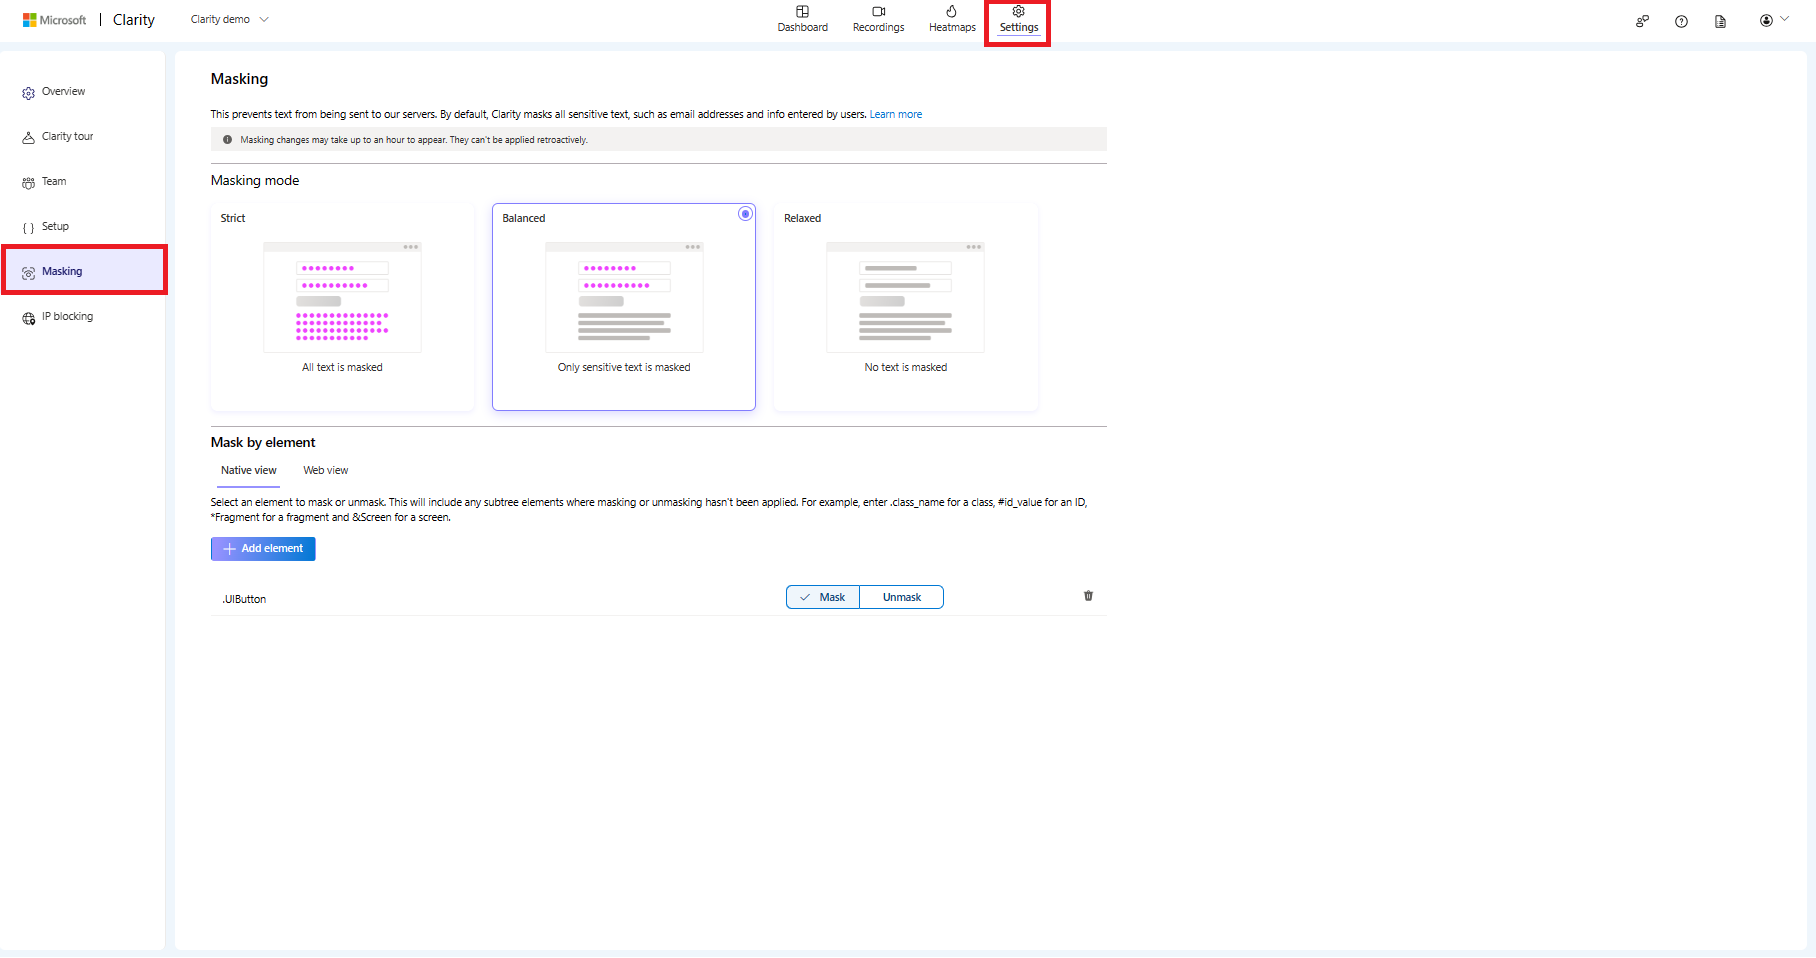
Under Masking mode, select a masking mode.
Strict: All text and images are masked. You can exclude some screens by adding them to unmasked elements.
Balanced: Only sensitive text is masked. We classify all input box content, numbers, and email addresses as sensitive text unless you add a screen to the list of masked activities.
To mask a certain view instance in an unmasked screen, use theClarity.maskView API.Relaxed: only text fields or inputs are masked. Screen elements that might contain personal data aren't masked by default and require explicit masking.
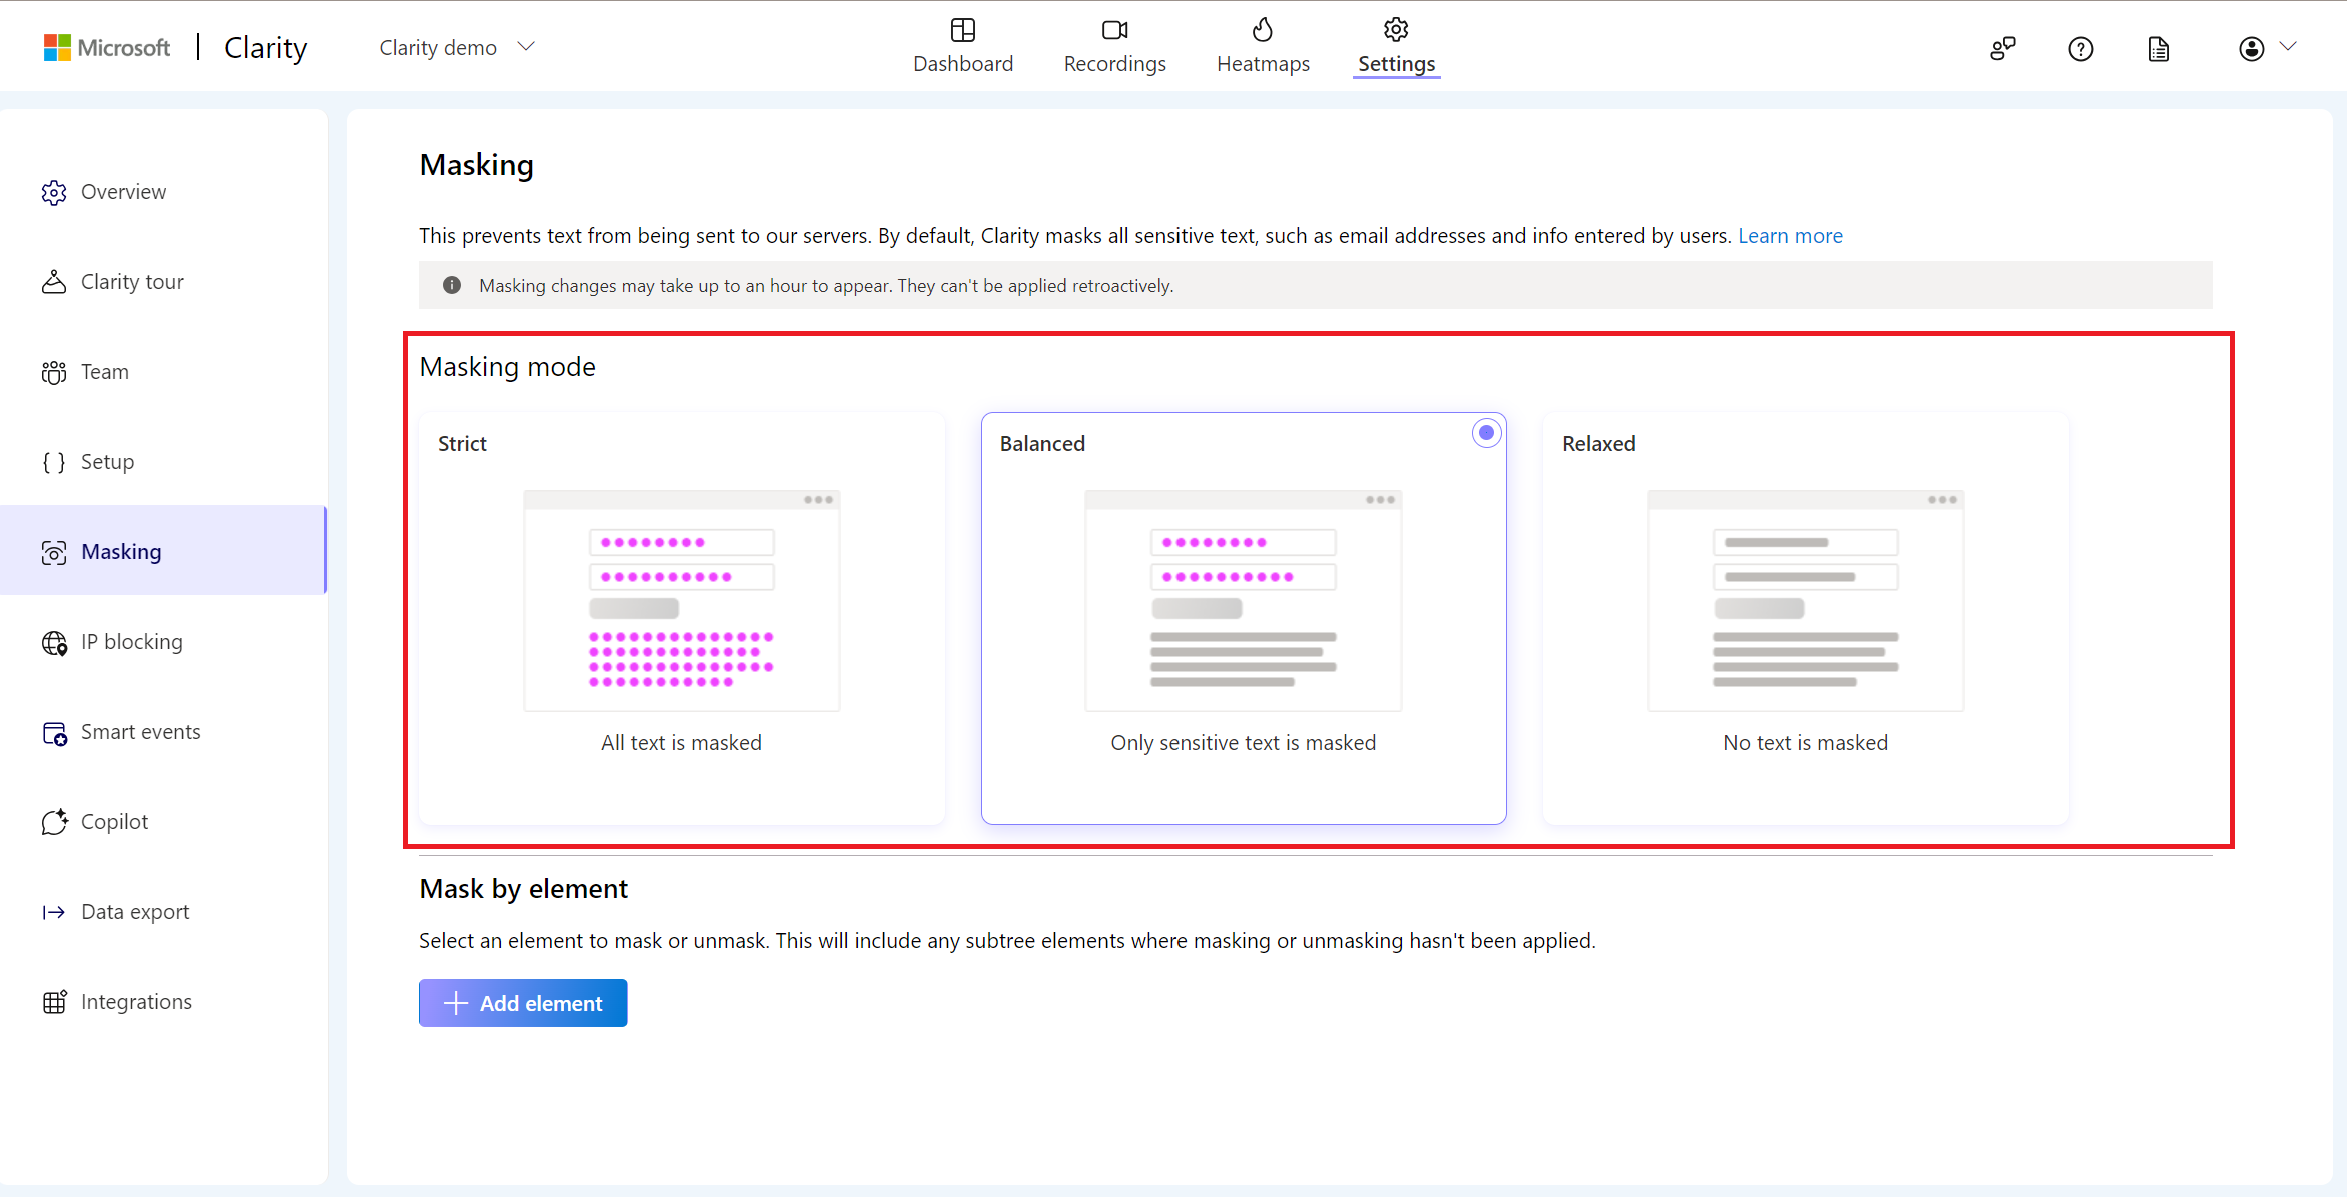
Upon selecting a masking mode, you can view a message as 'Masking mode set' on top of the screen.

Mask by element
You can also select specific elements to override the overall masking mode of your app.
Native elements
Important
If you would like to mask certain screens or classes (types) make sure these elements are non-obfuscated in the Proguard rules.
The native elements rules get applied to the views of native Android applications and React Native applications.
Tip
If you still have to obfuscate your code, you can (un)mask using the Clarity tag approach.
You can use a CSS-selectors-like syntax to mask/unmask native elements:
.class_namefor a class or a Clarity tag.#id_valuefor an ID.&screenfor a screen/activity.*fragmentfor a fragment.
The table specifies the masking rules that can be applied to each framework.
| Platform | Masking by ID #id |
Masking by Class/Tag .class_name |
Masking by Screen &screen |
Masking by Fragment *fragment |
|---|---|---|---|---|
| Native android | ✓ | ✓ | ✓ | ✓ |
| React native | ✓ Note: Use the testID view property to set the IDs for masking. |
✗ | ✗ | ✗ |
Examples
- To mask/unmask all the
TextViewinstances, add.TextView. to the native elements list and, mark it as mask/unmask.Make sure that theTextViewclass isn't obfuscated; otherwise, the rule has no effect. - To mask/unmask a view using the Clarity tag, you can specify the tag by assigning it to the view as:
view.setTag(R.id.clarity_tag, "clarity_mask")and add.clarity_maskrule to the native elements list. - To mask/unmask a view with ID
clarityView, add#clarityViewto the native elements list and mark it as mask/unmask. - To mask/unmask a React Native element, specify its testID:
<Text testID="maskedText">Masked text</Text>, and add#maskedTextto the native elements list. - To mask/unmask an activity called
MainActivity, add&MainActivityto the native elements list, and mark it as mask/unmask. Make sure that theMainActivityclass isn't obfuscated; otherwise, the rule has no effect. - To mask/unmask a fragment called
ClarityFragment, add*ClarityFragmentto the native elements list, and mark it as mask/unmask. Make sure that theClarityFragmentclass isn't obfuscated; otherwise, the rule has no effect.
WebView elements
You can use standard CSS selectors to apply masking rules. The masking rules apply to web elements inside the Cordova/Ionic web views.
These rules are also applied to web views in native and React Native applications.
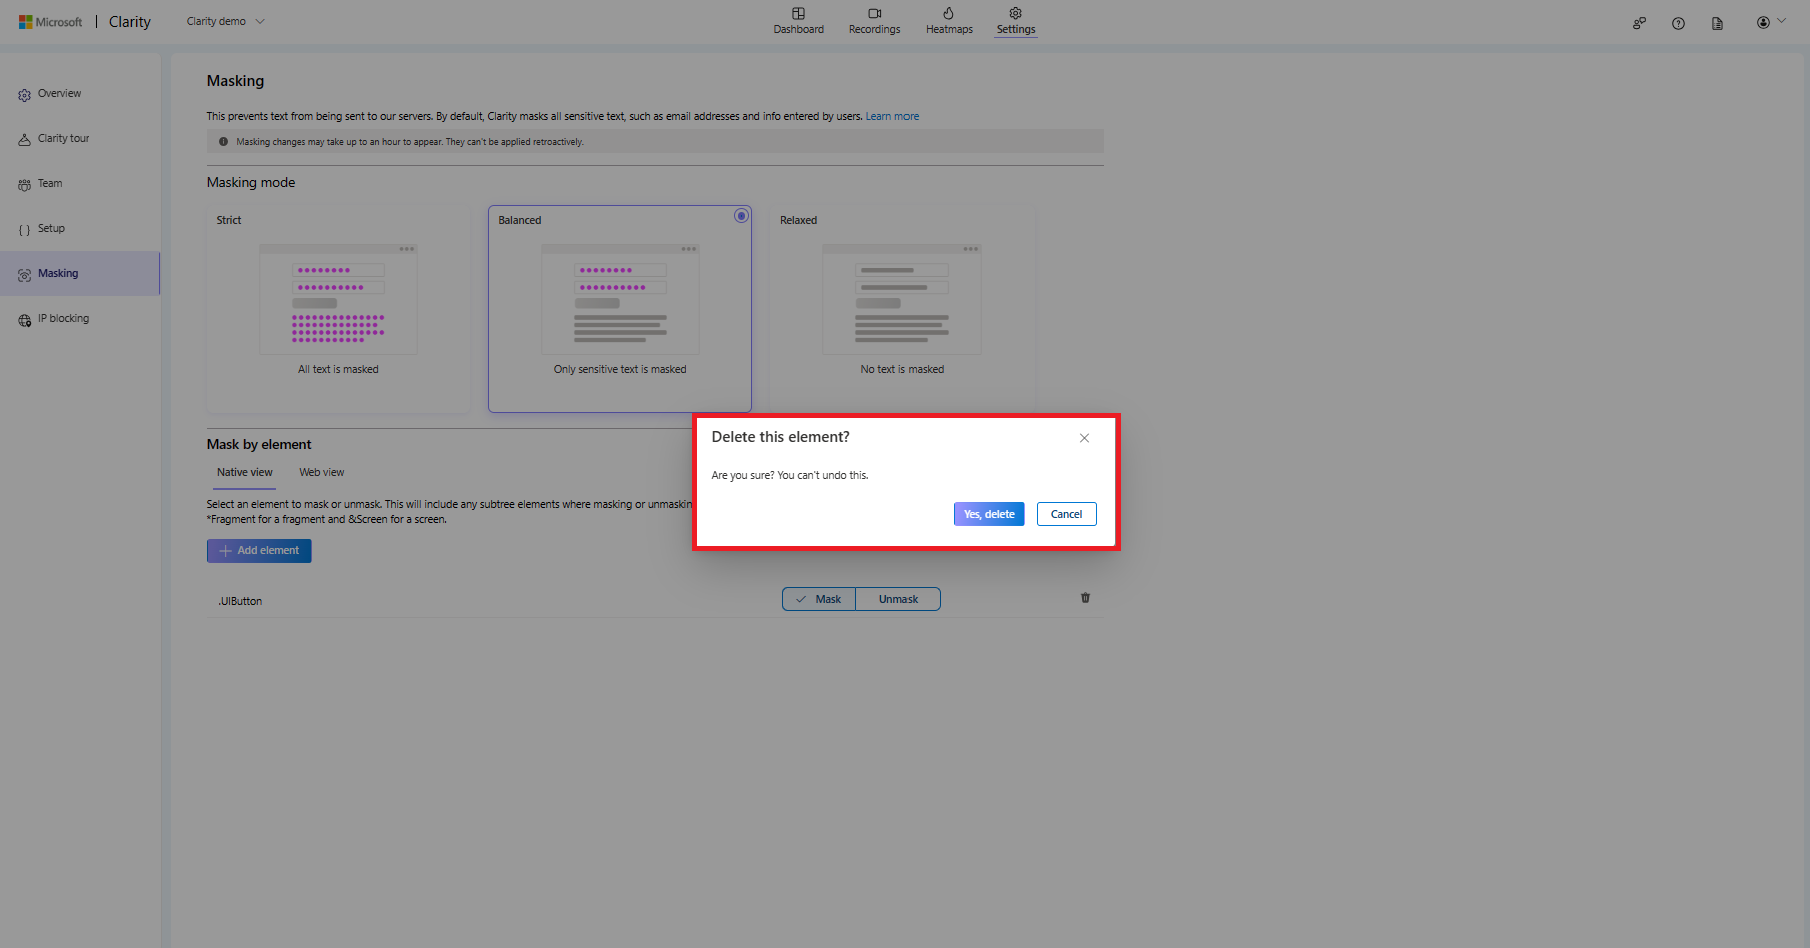
In order to add masking by element rules, follow these steps:
Go to Settings > Masking.
Under Mask by element, select Add element.

Enter the selector for the element to be masked and select Confirm.
As you add the elements, switch between masking and unmasking.

You can delete an element by selecting the Delete icon and confirm Yes, delete on pop-up window.
FAQ
For more answers, refer to FAQ.
Visit Clarity
:::column-end:::