Quickstart: Add feature flags to an Azure Functions app
In this quickstart, you create an Azure Functions C# code project and use feature flags in it. You use the feature management from Azure App Configuration to centrally store all your feature flags and control their states.
The .NET Feature Management libraries extend the framework with feature flag support. These libraries are built on top of the .NET configuration system. They integrate with App Configuration through its .NET configuration provider.
Note
This article currently only supports C# in-process function apps that run on .NET 6.
Prerequisites
- An Azure account with an active subscription. Create one for free.
- An App Configuration store. Create a store.
- Visual Studio 2019 with the Azure development workload.
Add a feature flag
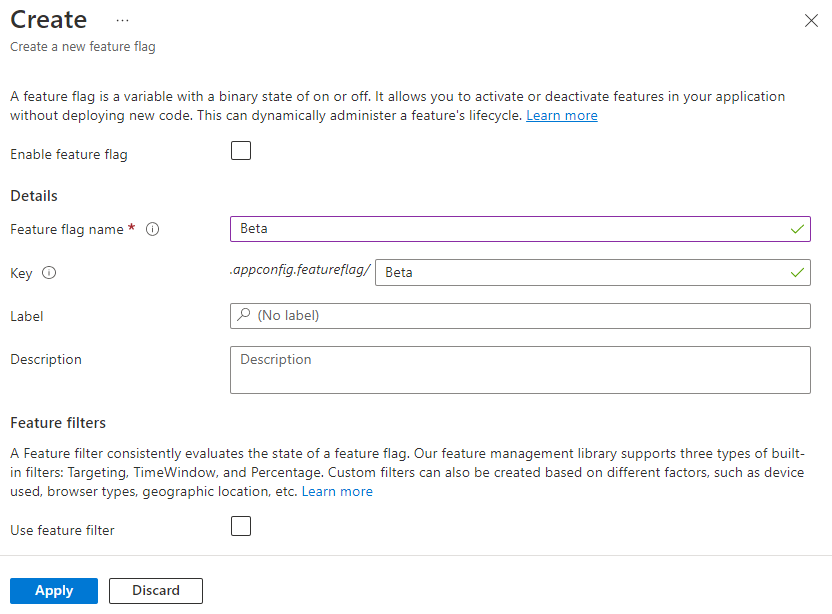
Add a feature flag called Beta to the App Configuration store and leave Label and Description with their default values. For more information about how to add feature flags to a store using the Azure portal or the CLI, go to Create a feature flag.
Create a Functions project
The Azure Functions project template in Visual Studio creates a C# class library project that you can publish to a function app in Azure. You can use a function app to group functions as a logical unit for easier management, deployment, scaling, and sharing of resources.
From the Visual Studio menu, select File > New > Project.
In Create a new project, enter functions in the search box, choose the Azure Functions template, and then select Next.
In Configure your new project, enter a Project name for your project, and then select Create. The function app name must be valid as a C# namespace, so don't use underscores, hyphens, or any other nonalphanumeric characters.
For the Create a new Azure Functions application settings, use the values in the following table:
Setting Value Description .NET version .NET 6 This value creates a function project that runs in-process with version 4.x of the Azure Functions runtime. For more information, see Azure Functions runtime versions overview. Function template HTTP trigger This value creates a function triggered by an HTTP request. Storage account (AzureWebJobsStorage) Storage emulator Because a function app in Azure requires a storage account, one is assigned or created when you publish your project to Azure. An HTTP trigger doesn't use an Azure Storage account connection string; all other trigger types require a valid Azure Storage account connection string. Authorization level Anonymous The created function can be triggered by any client without providing a key. This authorization setting makes it easy to test your new function. For more information about keys and authorization, see Authorization keys and HTTP and webhook bindings. 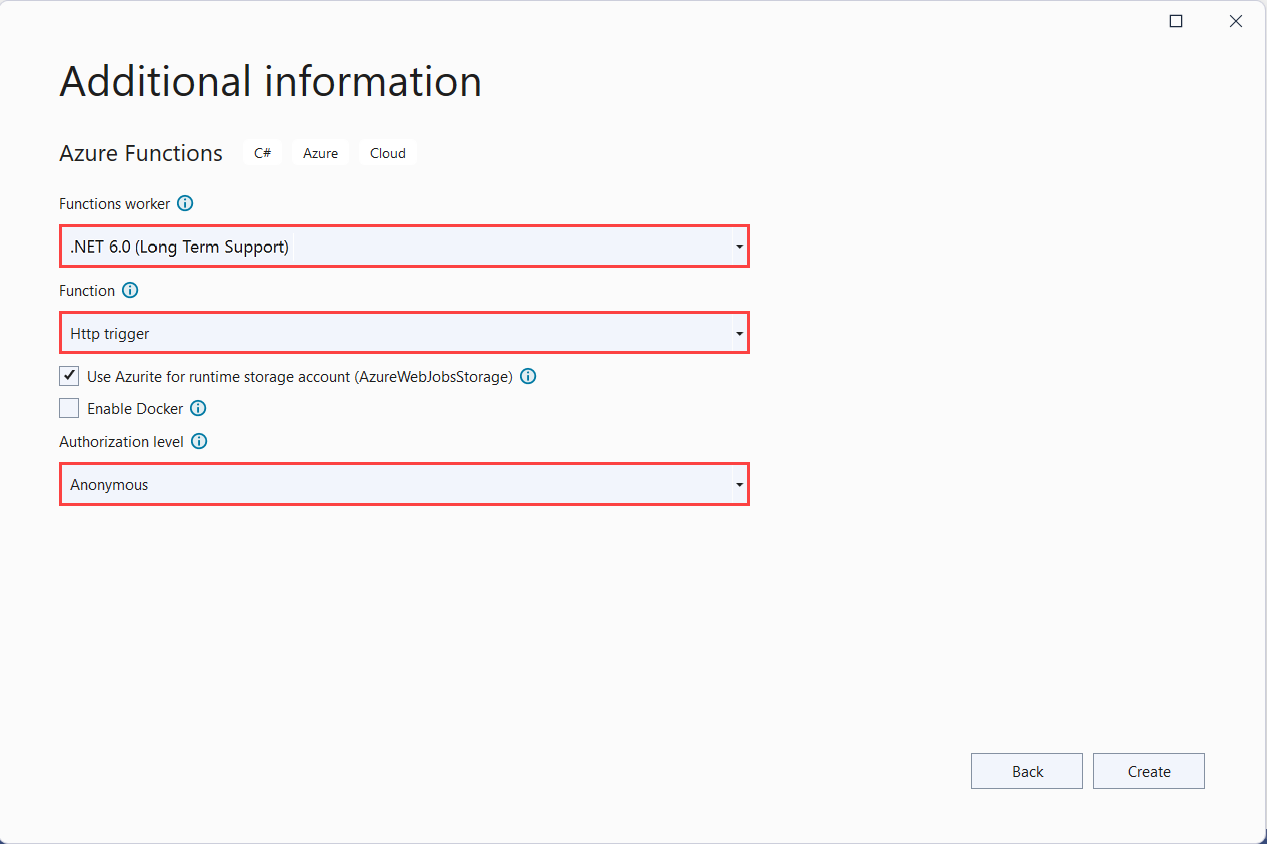
Make sure you set the Authorization level to Anonymous. If you choose the default level of Function, you're required to present the function key in requests to access your function endpoint.
Select Create to create the function project and HTTP trigger function.
Connect to an App Configuration store
This project will use dependency injection in .NET Azure Functions. It adds Azure App Configuration as an extra configuration source where your feature flags are stored.
Right-click your project, and select Manage NuGet Packages. On the Browse tab, search for and add following NuGet packages to your project.
- Microsoft.Extensions.Configuration.AzureAppConfiguration version 4.1.0 or later
- Microsoft.FeatureManagement version 2.2.0 or later
- Microsoft.Azure.Functions.Extensions version 1.1.0 or later
Add a new file, Startup.cs, with the following code. It defines a class named
Startupthat implements theFunctionsStartupabstract class. An assembly attribute is used to specify the type name used during Azure Functions startup.using System; using Microsoft.Azure.Functions.Extensions.DependencyInjection; using Microsoft.Extensions.Configuration; using Microsoft.FeatureManagement; [assembly: FunctionsStartup(typeof(FunctionApp.Startup))] namespace FunctionApp { class Startup : FunctionsStartup { public override void ConfigureAppConfiguration(IFunctionsConfigurationBuilder builder) { } public override void Configure(IFunctionsHostBuilder builder) { } } }Update the
ConfigureAppConfigurationmethod, and add Azure App Configuration provider as an extra configuration source by callingAddAzureAppConfiguration().The
UseFeatureFlags()method tells the provider to load feature flags. All feature flags have a default cache expiration of 30 seconds before rechecking for changes. The expiration interval can be updated by setting theFeatureFlagsOptions.CacheExpirationIntervalproperty passed to theUseFeatureFlagsmethod.public override void ConfigureAppConfiguration(IFunctionsConfigurationBuilder builder) { builder.ConfigurationBuilder.AddAzureAppConfiguration(options => { options.Connect(Environment.GetEnvironmentVariable("ConnectionString")) .Select("_") .UseFeatureFlags(); }); }Tip
If you don't want any configuration other than feature flags to be loaded to your application, you can call
Select("_")to only load a nonexisting dummy key"_". By default, all configuration key-values in your App Configuration store will be loaded if noSelectmethod is called.Update the
Configuremethod to make Azure App Configuration services and feature manager available through dependency injection.public override void Configure(IFunctionsHostBuilder builder) { builder.Services.AddAzureAppConfiguration(); builder.Services.AddFeatureManagement(); }Open Function1.cs, and add the following namespaces.
using System.Linq;
using Microsoft.FeatureManagement;
using Microsoft.Extensions.Configuration.AzureAppConfiguration;
Add a constructor used to obtain instances of
_featureManagerSnapshotandIConfigurationRefresherProviderthrough dependency injection. From theIConfigurationRefresherProvider, you can obtain the instance ofIConfigurationRefresher.private readonly IFeatureManagerSnapshot _featureManagerSnapshot; private readonly IConfigurationRefresher _configurationRefresher; public Function1(IFeatureManagerSnapshot featureManagerSnapshot, IConfigurationRefresherProvider refresherProvider) { _featureManagerSnapshot = featureManagerSnapshot; _configurationRefresher = refresherProvider.Refreshers.First(); }Update the
Runmethod to change the value of the displayed message depending on the state of the feature flag.The
TryRefreshAsyncmethod is called at the beginning of the Functions call to refresh feature flags. It will be a no-op if the cache expiration time window isn't reached. Remove theawaitoperator if you prefer the feature flags to be refreshed without blocking the current Functions call. In that case, later Functions calls will get updated value.[FunctionName("Function1")] public async Task<IActionResult> Run( [HttpTrigger(AuthorizationLevel.Anonymous, "get", "post", Route = null)] HttpRequest req, ILogger log) { log.LogInformation("C# HTTP trigger function processed a request."); await _configurationRefresher.TryRefreshAsync(); string message = await _featureManagerSnapshot.IsEnabledAsync("Beta") ? "The Feature Flag 'Beta' is turned ON" : "The Feature Flag 'Beta' is turned OFF"; return (ActionResult)new OkObjectResult(message); }
Test the function locally
Set an environment variable named ConnectionString, where the value is the connection string you retrieved earlier in your App Configuration store under Access Keys. If you use the Windows command prompt, run the following command and restart the command prompt to allow the change to take effect:
setx ConnectionString "connection-string-of-your-app-configuration-store"If you use Windows PowerShell, run the following command:
$Env:ConnectionString = "connection-string-of-your-app-configuration-store"If you use macOS or Linux, run the following command:
export ConnectionString='connection-string-of-your-app-configuration-store'Press F5 to test your function. If prompted, accept the request from Visual Studio to download and install Azure Functions Core (CLI) tools. You might also need to enable a firewall exception so that the tools can handle HTTP requests.
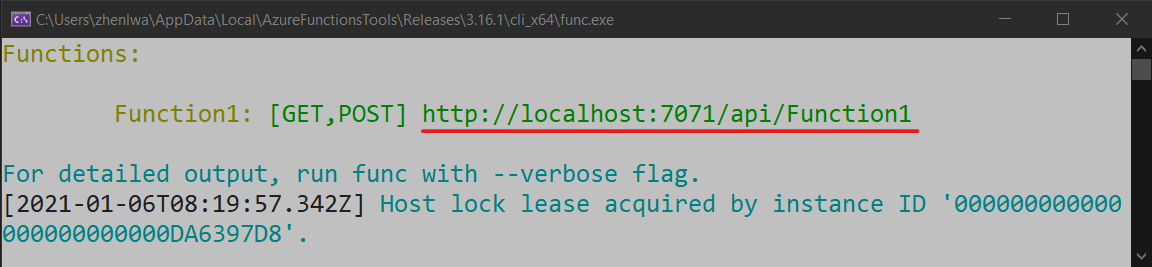
Copy the URL of your function from the Azure Functions runtime output.
Paste the URL for the HTTP request into your browser's address bar. The following image shows the response indicating that the feature flag
Betais disabled.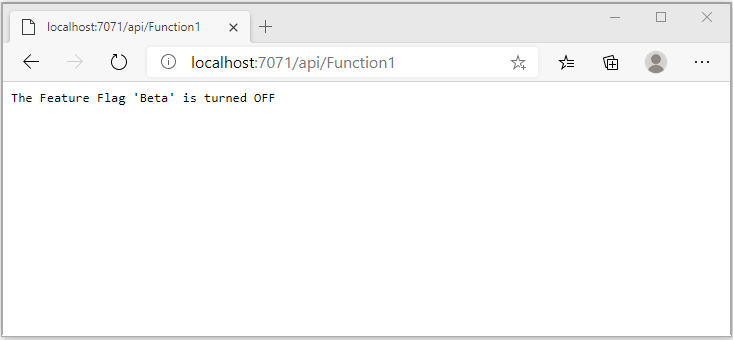
Sign in to the Azure portal. Select All resources, and select the App Configuration store that you created.
Select Feature manager, and change the state of the Beta key to On.
Refresh the browser a few times. When the refresh interval time window passes, the page will change to indicate the feature flag
Betais turned on, as shown in the image below.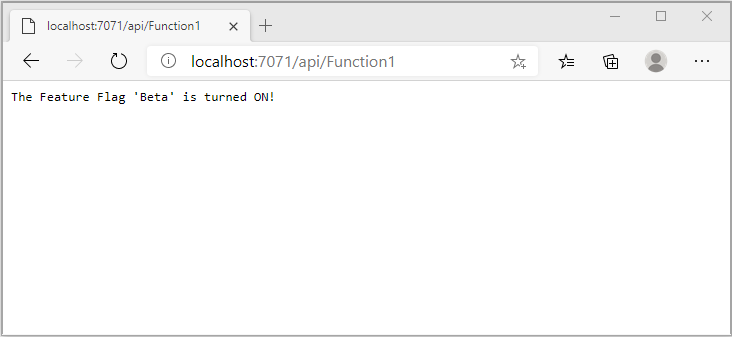
Note
The example code used in this tutorial can be downloaded from the Azure App Configuration GitHub repo.
Clean up resources
If you don't want to continue using the resources created in this article, delete the resource group you created here to avoid charges.
Important
Deleting a resource group is irreversible. The resource group and all the resources in it are permanently deleted. Ensure that you don't accidentally delete the wrong resource group or resources. If you created the resources for this article inside a resource group that contains other resources you want to keep, delete each resource individually from its respective pane instead of deleting the resource group.
- Sign in to the Azure portal, and select Resource groups.
- In the Filter by name box, enter the name of your resource group.
- In the result list, select the resource group name to see an overview.
- Select Delete resource group.
- You're asked to confirm the deletion of the resource group. Enter the name of your resource group to confirm, and select Delete.
After a few moments, the resource group and all its resources are deleted.
Next steps
In this quickstart, you created a feature flag and used it with an Azure Functions app via the Microsoft.FeatureManagement library.
Feedback
Kommer snart: I hele 2024 udfaser vi GitHub-problemer som feedbackmekanisme for indhold og erstatter det med et nyt feedbacksystem. Du kan få flere oplysninger under: https://aka.ms/ContentUserFeedback.
Indsend og få vist feedback om