Get started
This article covers how to get started using the packages provided as part of the Windows Community Toolkit project.
Adding the NuGet package(s)
The toolkit is available as a set of NuGet packages that can be added to any existing or new project using Visual Studio.
Open an existing project, or create a new project for the framework you're working with:
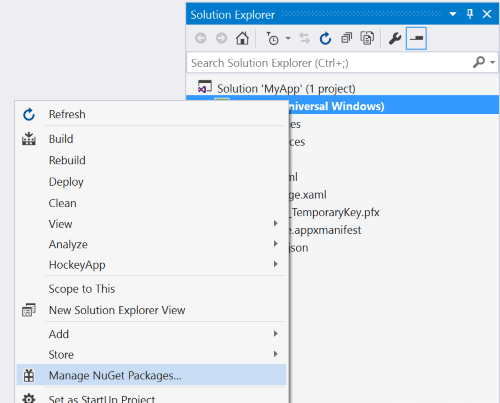
In the Solution Explorer panel, right click on your project name and select Manage NuGet Packages.
For UWP/WinUI2 or Uno.UI based projects, search for CommunityToolkit.Uwp, and choose the desired NuGet Package from the list.
For Windows App SDK/WinUI3 or Uno.WinUI based projects, search for CommunityToolkit.WinUI instead.

Choose the components that are most appropriate for your needs from the list and install.
You can see the available component packages listed on the left-hand table-of-contents.
Regardless of the package/framework you're using, namespaces will begin with
CommunityToolkit.WinUI.
Other Resources
Download the Windows Community Toolkit Gallery from the Windows store to see the controls in an actual app.
Visit the Windows Community Toolkit Github Repository to see the current source code, what is coming next, and clone the repository. Community contributions are welcome! If you have an idea for a new feature, check out Windows Community Toolkit Labs for the latest experiments and process for proposing new features.
Windows Community Toolkit
Feedback
Coming soon: Throughout 2024 we will be phasing out GitHub Issues as the feedback mechanism for content and replacing it with a new feedback system. For more information see: https://aka.ms/ContentUserFeedback.
Submit and view feedback for
