Set up and create agreements
You can view all purchase agreements on the Purchase agreements list page and all sales agreements on the Sales agreements list page. These list pages store data such as the dates and amounts of the agreements, and the payment terms. All agreements are grouped into agreement classifications.
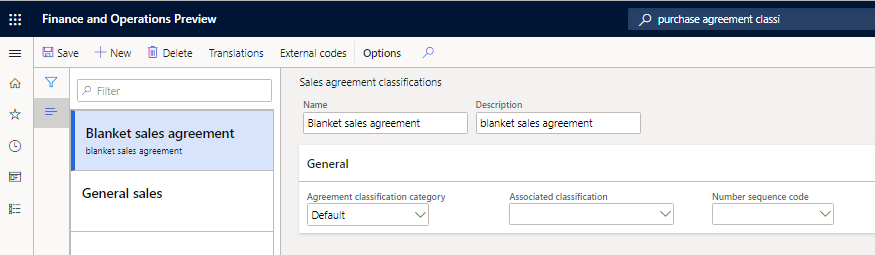
Create sales agreement classifications
- Go to Sales and marketing > Setup > Sales agreements > Sales agreement classifications or Accounts receivable > Setup > Sales agreement classifications.
- Create a sales agreement classification.
- On the General FastTab, in the Associated classification field, select the agreement classification group that is associated with the agreement classification.
- In the Number sequence code field, select the code for the number sequence that should be used to number agreements that belong to the agreement classification.
- Select Save.
Note
You can't delete an agreement classification that is used for existing agreements.
Create purchase agreement classifications
- Go to Procurement and sourcing > Setup > Purchase agreement classification.
- Specify the details as described in the previous section of this article, Create sales agreement classifications.

Create a sales agreement
For more information about how to create sales agreements, see Enter sales agreements.
Go to Accounts receivable > Orders > Sales agreements or Sales and marketing > Sales agreements > Sales agreements.
On the Action Pane, select New to create a sales agreement.
In the Create sales agreement dialog box, on the Customer FastTab, specify the following details:
- In the Customer account field, select a customer account.
- In the Document section, in the Sales agreement classification field, select the sales agreement classification that the agreement belongs to.
On the General FastTab, in the Document section, the Sales agreement ID field is set based on the number sequence that is specified for the agreement classification.
Select OK.

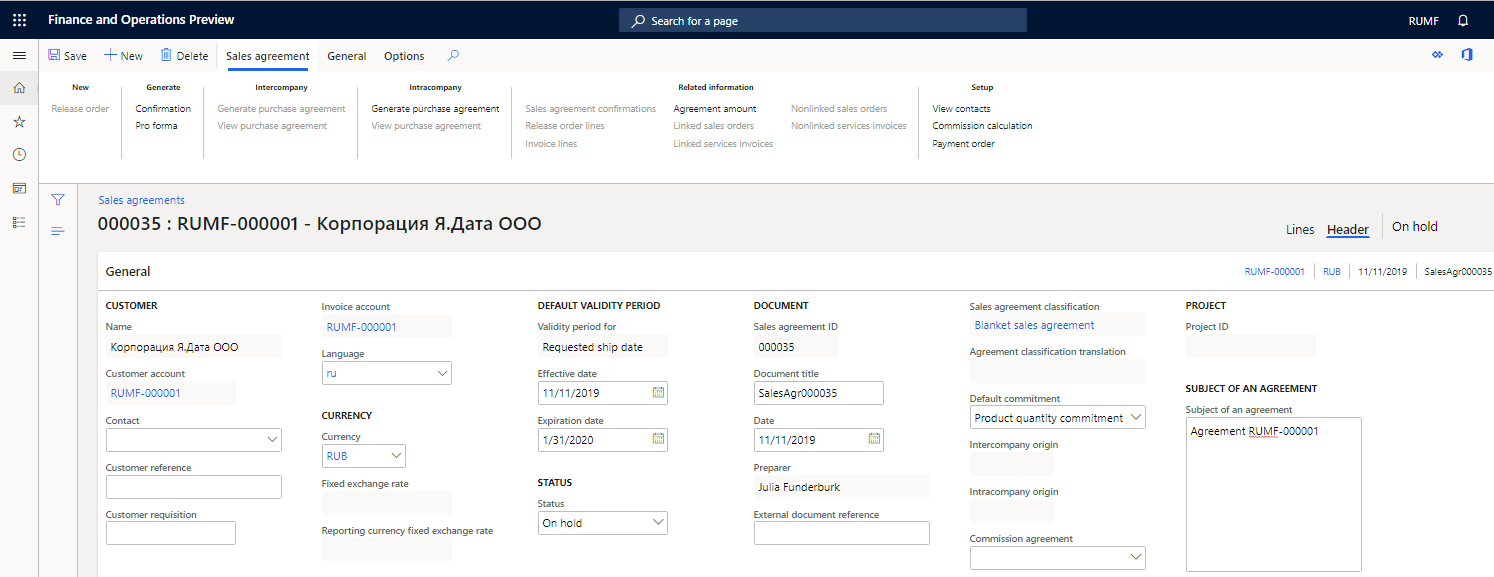
On the Sales agreements page, on the Sales agreement header FastTab, specify the following details:
- In the Currency field, specify the currency for the agreement.
- In the Effective date field, specify the effective date for the agreement.
- In the Expiration date field, specify the expiration date for the agreement.
- In the Status field, select the status of the agreement: On-hold, Effective, or Closed.
Note
Transactions can be posted only for agreements that have a status of Effective.

Switch to the Header view, and then, on the General FastTab, follow these steps:
In the Document section, specify the following details:
- In the Document title field, specify the title for the agreement.
- In the Date field, specify the date of the agreement.
In the Subject of an agreement section, in the Subject of an agreement field, enter a comment or notes about the agreement.
On the Financial FastTab, follow these steps:
- In the Agreement sum section, in the Agreement sum field, specify the sum of the agreement.
- In the Credit section, in the Credit limit field, specify the credit limit for the agreement. The credit limit is comprehensively checked for all counterparty agreements and for the total counterparty limit.
Note
When you settle invoices with payments that belong to different agreements, limit control is done according to the agreement that the payment is assigned to.
If you cancel the settlement of invoices and payments that belong to different agreements, limit control is done according to the agreement that the invoice is assigned to.
When you settle invoices with payments that don't indicate that they belong to the agreement, limit control is done by the counterparty.
When you settle invoices that don't indicate that they belong to the agreement with payments that belong to the agreement, limit control is done according to the agreement that the payment is assigned to.
If you cancel the settlement of invoices that don't indicate that they belong to the agreement and payments that belong to the agreement, limit control is done by a contractor. Invoices that have an open balance and don't indicate an agreement are included.
In the Posting profile section, specify the following details:
In the Posting profile field, if you specify an agreement for transactions, you can select the counterparty posting profile that should be used when transactions are posted.
In the Posting profile with prepayment journal voucher field, you can select a separate posting profile that should be used when a prepayment is registered for the agreement. If you don't set this field, a default value is taken from the Accounts receivable parameters page.

On the Terms FastTab, in the Payment section, set the fields for payment terms. In the Payment day field, select a calendar of payment days.
On the Contact information FastTab, specify contact information for the agreement.

On the Financial dimensions FastTab, specify financial dimensions. When you specify an agreement in a document, the financial dimensions of the agreement are entered into the document dimension.
Select Save.
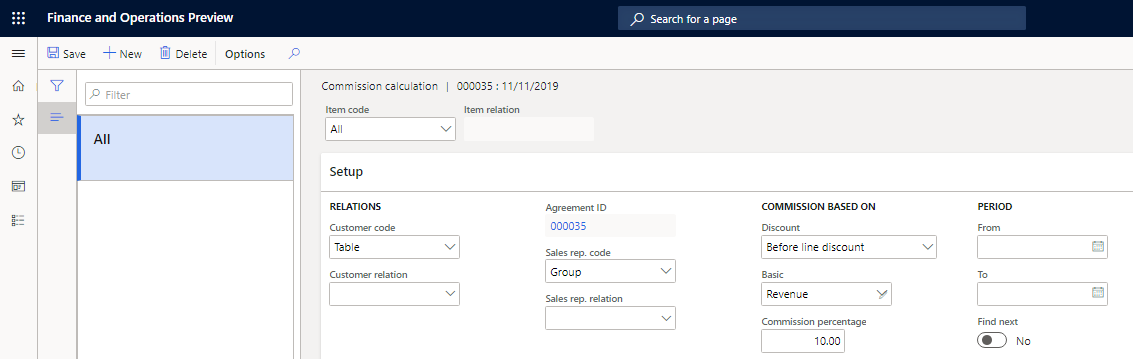
Set up a commission
- On the Sales agreements page, select the agreement that you want to set up a commission for.
- On the Sales agreement tab, in the Setup section, select Commission calculation.
- On the Commission calculation page, set up a commission for the selected agreement. For more information about how to set up commissions, see Register sales commissions.
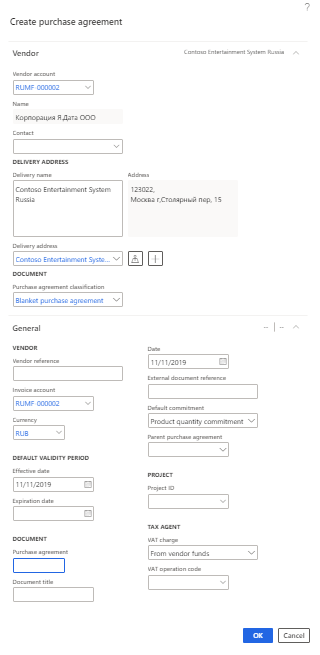
Create a purchase agreement
For more information about how to create purchase agreements, see Create a purchase agreement.
Go to Accounts payable > Purchase orders > Purchase agreements or Procurement and sourcing > Purchase agreements > Purchase agreements.
On the Action Pane, select New to create an agreement.
In the Create purchase agreement dialog box, on the Vendor FastTab, specify the following details:
- In the Vendor account field, select a vendor account.
- In the Document section, in the Purchase agreement classification field, select the purchase agreement classification that the agreement belongs to.
On the General FastTab, in the Document section, the Purchase agreement field is set based on the number sequence that is specified for the agreement classification.
Select OK.
On the Purchase agreements page, specify the details as described in the Create a sales agreement section earlier in this article.
Set up agreement dimension control for settlements
You can set up dimension control for settlements. For more information, see Set up dimension control for settlements To do settlement in the context of agreements, follow these steps.
- Go to General ledger > Ledger setup > General ledger parameters.
- On the Agreements tab, set the Disable agreement dimension control option to No.
Find more details in the following topics:
Feedback
Coming soon: Throughout 2024 we will be phasing out GitHub Issues as the feedback mechanism for content and replacing it with a new feedback system. For more information see: https://aka.ms/ContentUserFeedback.
Submit and view feedback for