Request time off
Important
The functionality noted in this article is currently available for customers on the stand-alone Dynamics 365 Human Resources. Some or all of the functionality will be available as part of a future release on the Finance infrastructure after Finance release 10.0.26.
Applies to these Dynamics 365 apps:
Human Resources
You can submit requests for time off, view your vacation and leave balances, and see the status of your leave requests in Dynamics 365 Human Resources.
Request time off
In the Employee self service workspace, select Request time off in the Time Off Balances tile.
Enter information for Leave type, Reason code, Start date, and End date.
Under Dates, select the dates for your leave request.
If you need to submit any supporting documentation, select Upload under Attachments.
Enter information in Comment, if needed.
Select Submit when you're ready to submit your request. Otherwise, select Save draft.
Employees who submit a new leave request can select different leave types to construct their leave request. However, all leave types that are selected as part of a single leave request should have the same leave unit. Employees can view the leave unit for each leave type on the Request time off page.
Add an attachment to an existing request
When updating an existing time off request, you can add an attachment. You can also see all the related requests for a specific date.
View leave balances
In the Employee self service workspace, select More (...) in the Time Off Balances tile.
Select Balances.
View leave request status
In the Employee self service workspace, select More (...) in the Time Off Balances tile.
To view your approved time off requests, select Approved time off. To view your pending time off requests, select Time off requests.
Cancel time off requests
Note
Cancel time off is available when the feature Leave request workflow experience enhancements is enabled in the Feature management workspace.
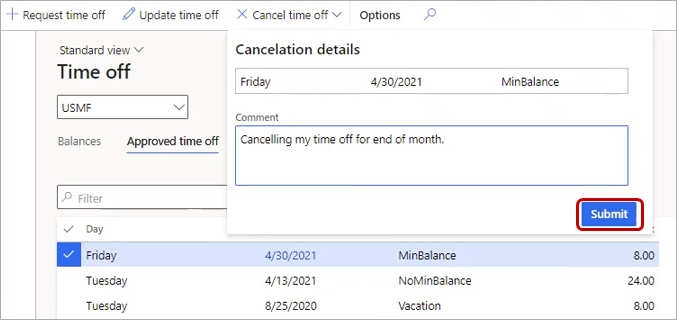
In the Employee self service workspace, select View time off in the Time Off Balances tile.
On the Time off page, select one or more time off requests to cancel.
Select the Cancel time off button.
In the Cancellation details pane, enter a comment and then select Submit.
Attachments can't be mandated for cancellation of a time off leave request.
Note
If an attachment is mandated for updating a time off leave request and Update time off is selected to cancel a leave, when the Amount is 0, an attachment must be uploaded. If attachments are not required, use the Cancel time off option.
See also
Feedback
Coming soon: Throughout 2024 we will be phasing out GitHub Issues as the feedback mechanism for content and replacing it with a new feedback system. For more information see: https://aka.ms/ContentUserFeedback.
Submit and view feedback for