Create a Trino cluster in the Azure portal (Preview)
Important
This feature is currently in preview. The Supplemental Terms of Use for Microsoft Azure Previews include more legal terms that apply to Azure features that are in beta, in preview, or otherwise not yet released into general availability. For information about this specific preview, see Azure HDInsight on AKS preview information. For questions or feature suggestions, please submit a request on AskHDInsight with the details and follow us for more updates on Azure HDInsight Community.
This article describes the steps to create a Trino cluster with HDInsight on AKS by using the Azure portal.
Prerequisites
Complete the prerequisites in the following sections:
Important
For creating a cluster in new cluster pool, assign AKS agentpool MSI "Managed Identity Operator" role on the user-assigned managed identity created as part of resource prerequisite.
AKS agentpool managed identity gets created during cluster pool creation. You can identify the AKS agentpool managed identity by (your clusterpool name)-agentpool. Follow these steps to assign the role.
Create a Trino cluster
Once the cluster pool deployment completes, continue to use the Azure portal to create a Trino cluster.
In the Azure portal, type HDInsight cluster pools/HDInsight and select Azure HDInsight on AKS cluster pools to go to the cluster pools page. On the HDInsight on AKS cluster pools page, select the cluster pool in which you want to add a new Trino cluster.

On the specific cluster pool page, click + New cluster at the top left and then provide the following information:
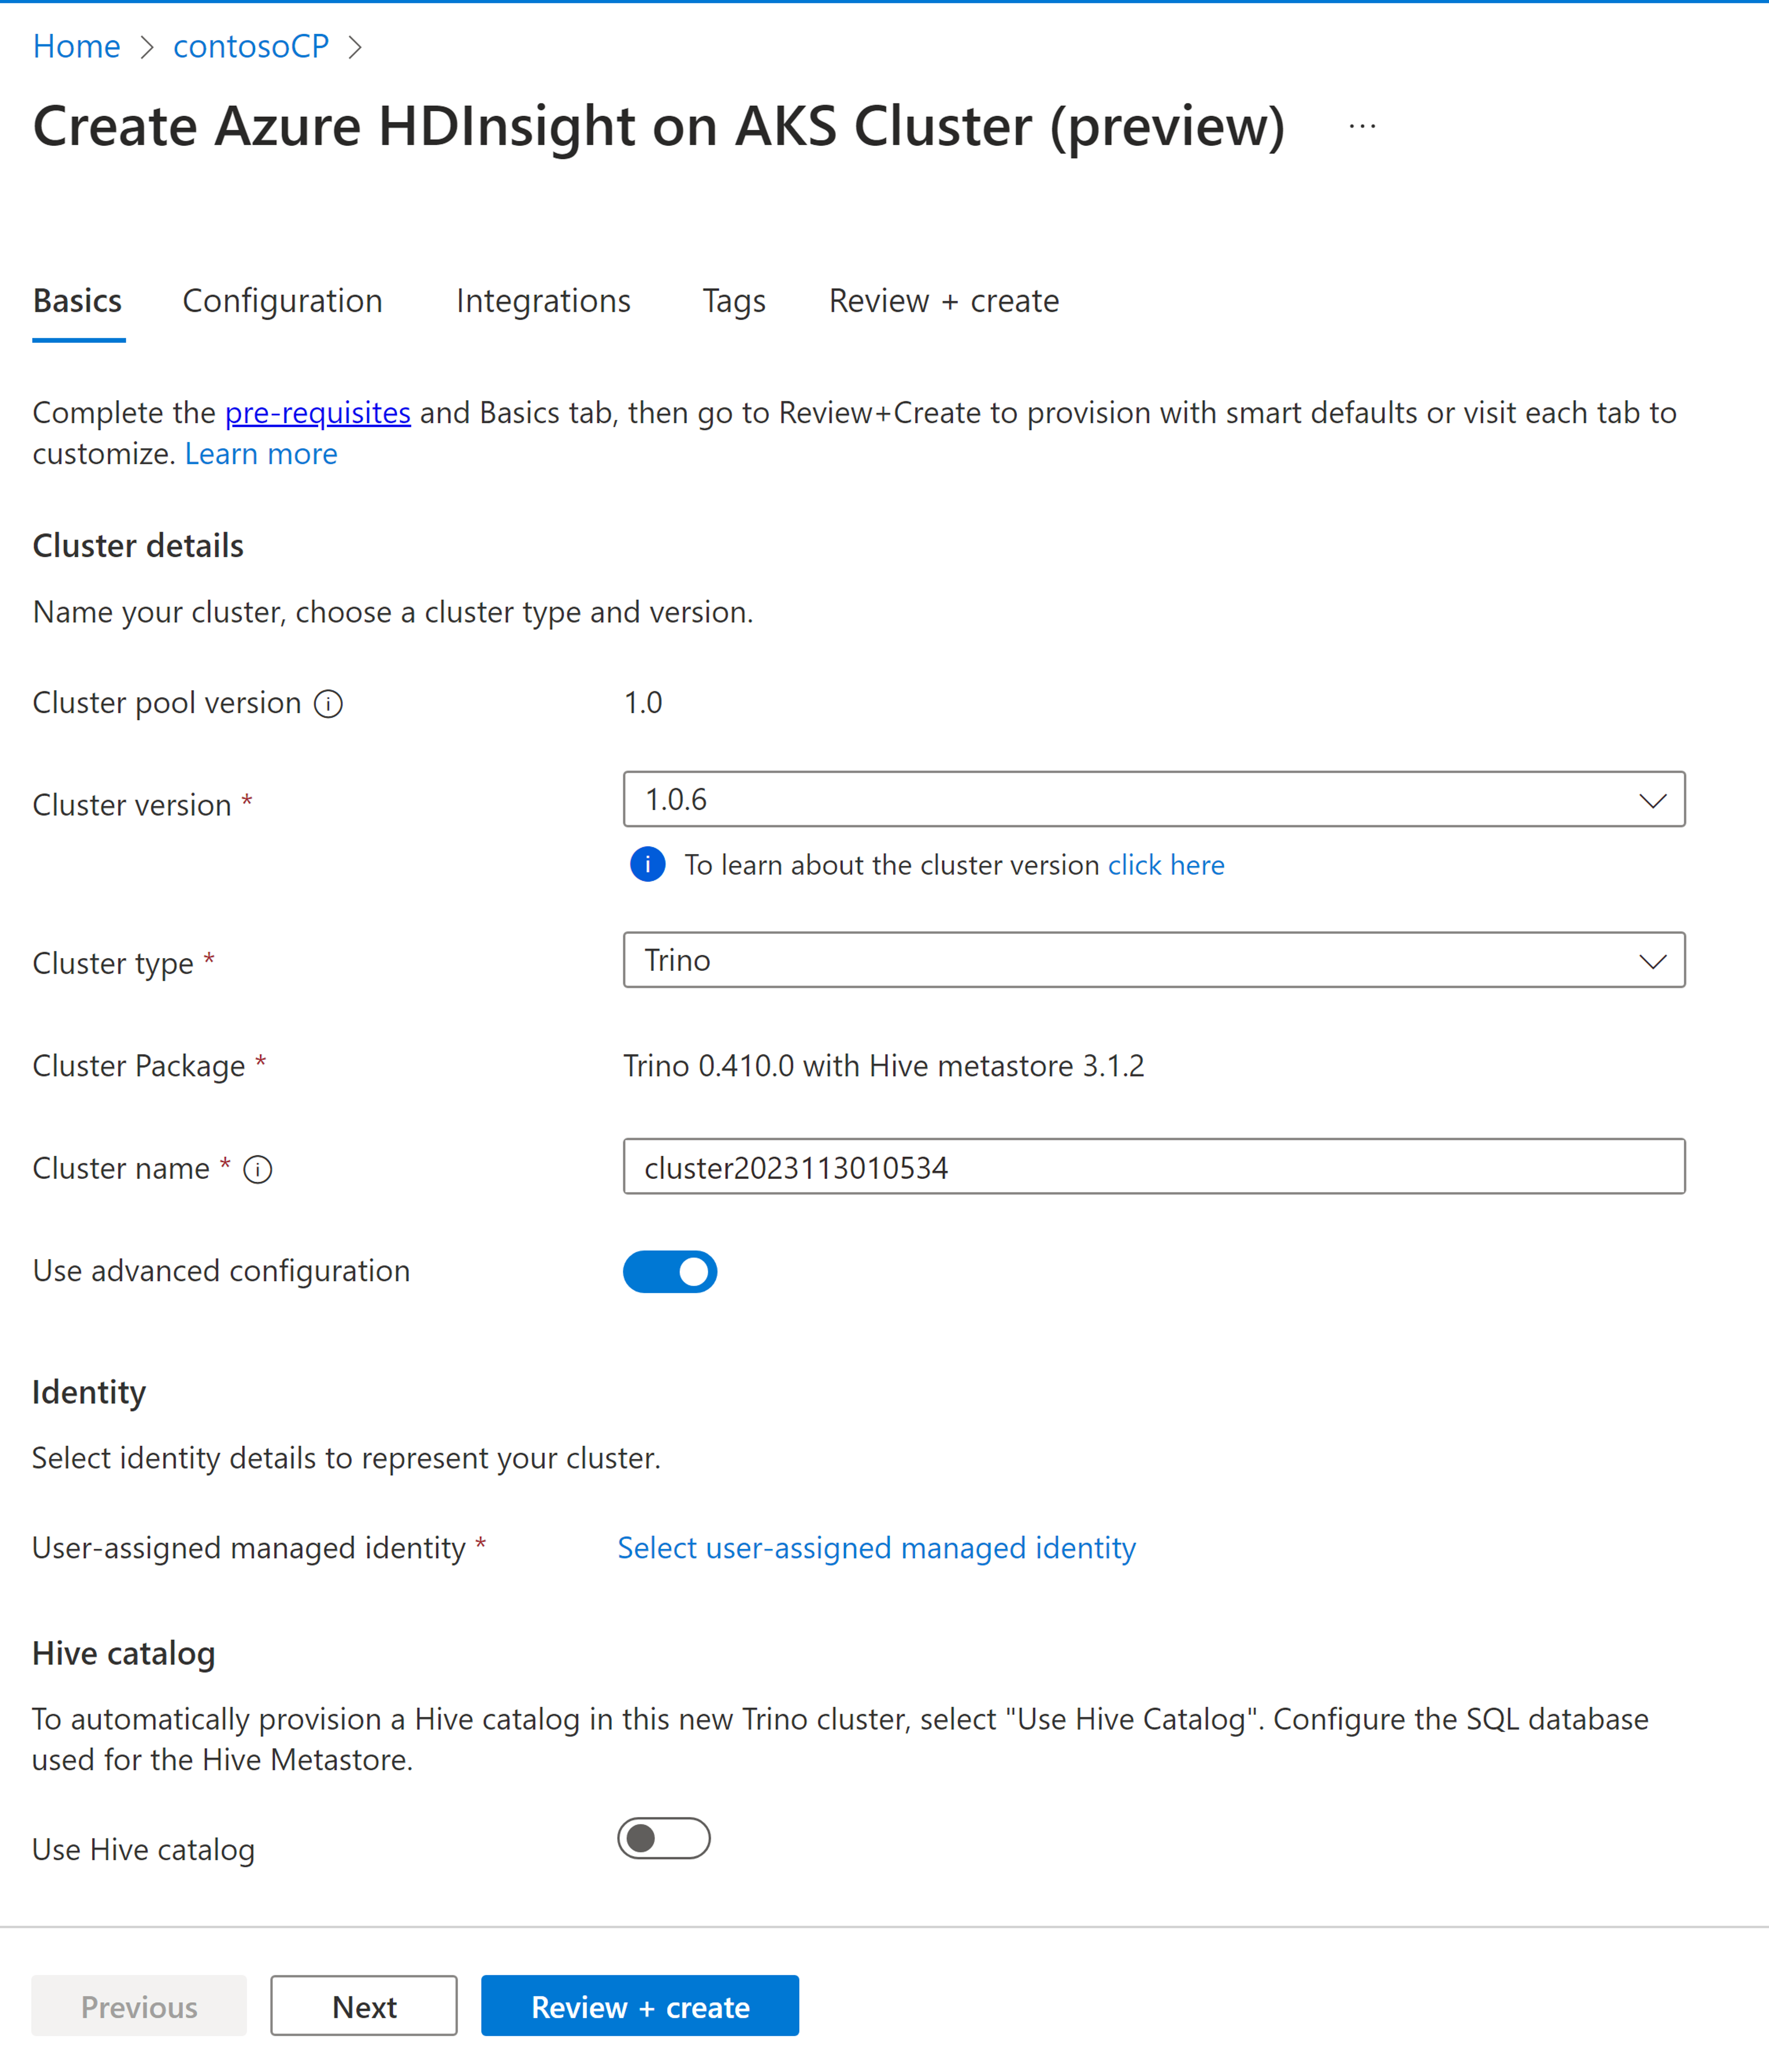
Property Description Subscription This field is autopopulated with the Azure subscription that was registered for the cluster pool. Resource group This field is autopopulated and shows the resource group on the cluster pool. Region This field is autopopulated and shows the region selected on the cluster pool. Cluster pool This field is autopopulated and shows the cluster pool name in which the cluster is now getting created. To create a cluster in a different pool, find that cluster pool in the portal and click + New cluster. Cluster pool version This field is autopopulated and shows the cluster pool version on which the cluster is now getting created. HDInsight on AKS Version Select the minor or patch version of the HDInsight on AKS of the new cluster. For more information, see versions. Cluster type From the drop-down list, select the cluster type as Trino. Cluster name Enter the name of the new cluster. User-assigned managed identity From the drop-down list, select the managed identity to use with the cluster. If you're the owner of the Managed Service Identity (MSI), and the MSI doesn't have Managed Identity Operator role on the cluster, click the link below the box to assign the permission needed from the AKS agent pool MSI. If the MSI already has the correct permissions, no link is shown. See the prerequisites for other role assignments required for the MSI. Virtual network (VNet) The virtual network for the cluster. it's derived from the cluster pool. Subnet The virtual subnet for the cluster. it's derived from the cluster pool. For Hive catalog, provide the following information:
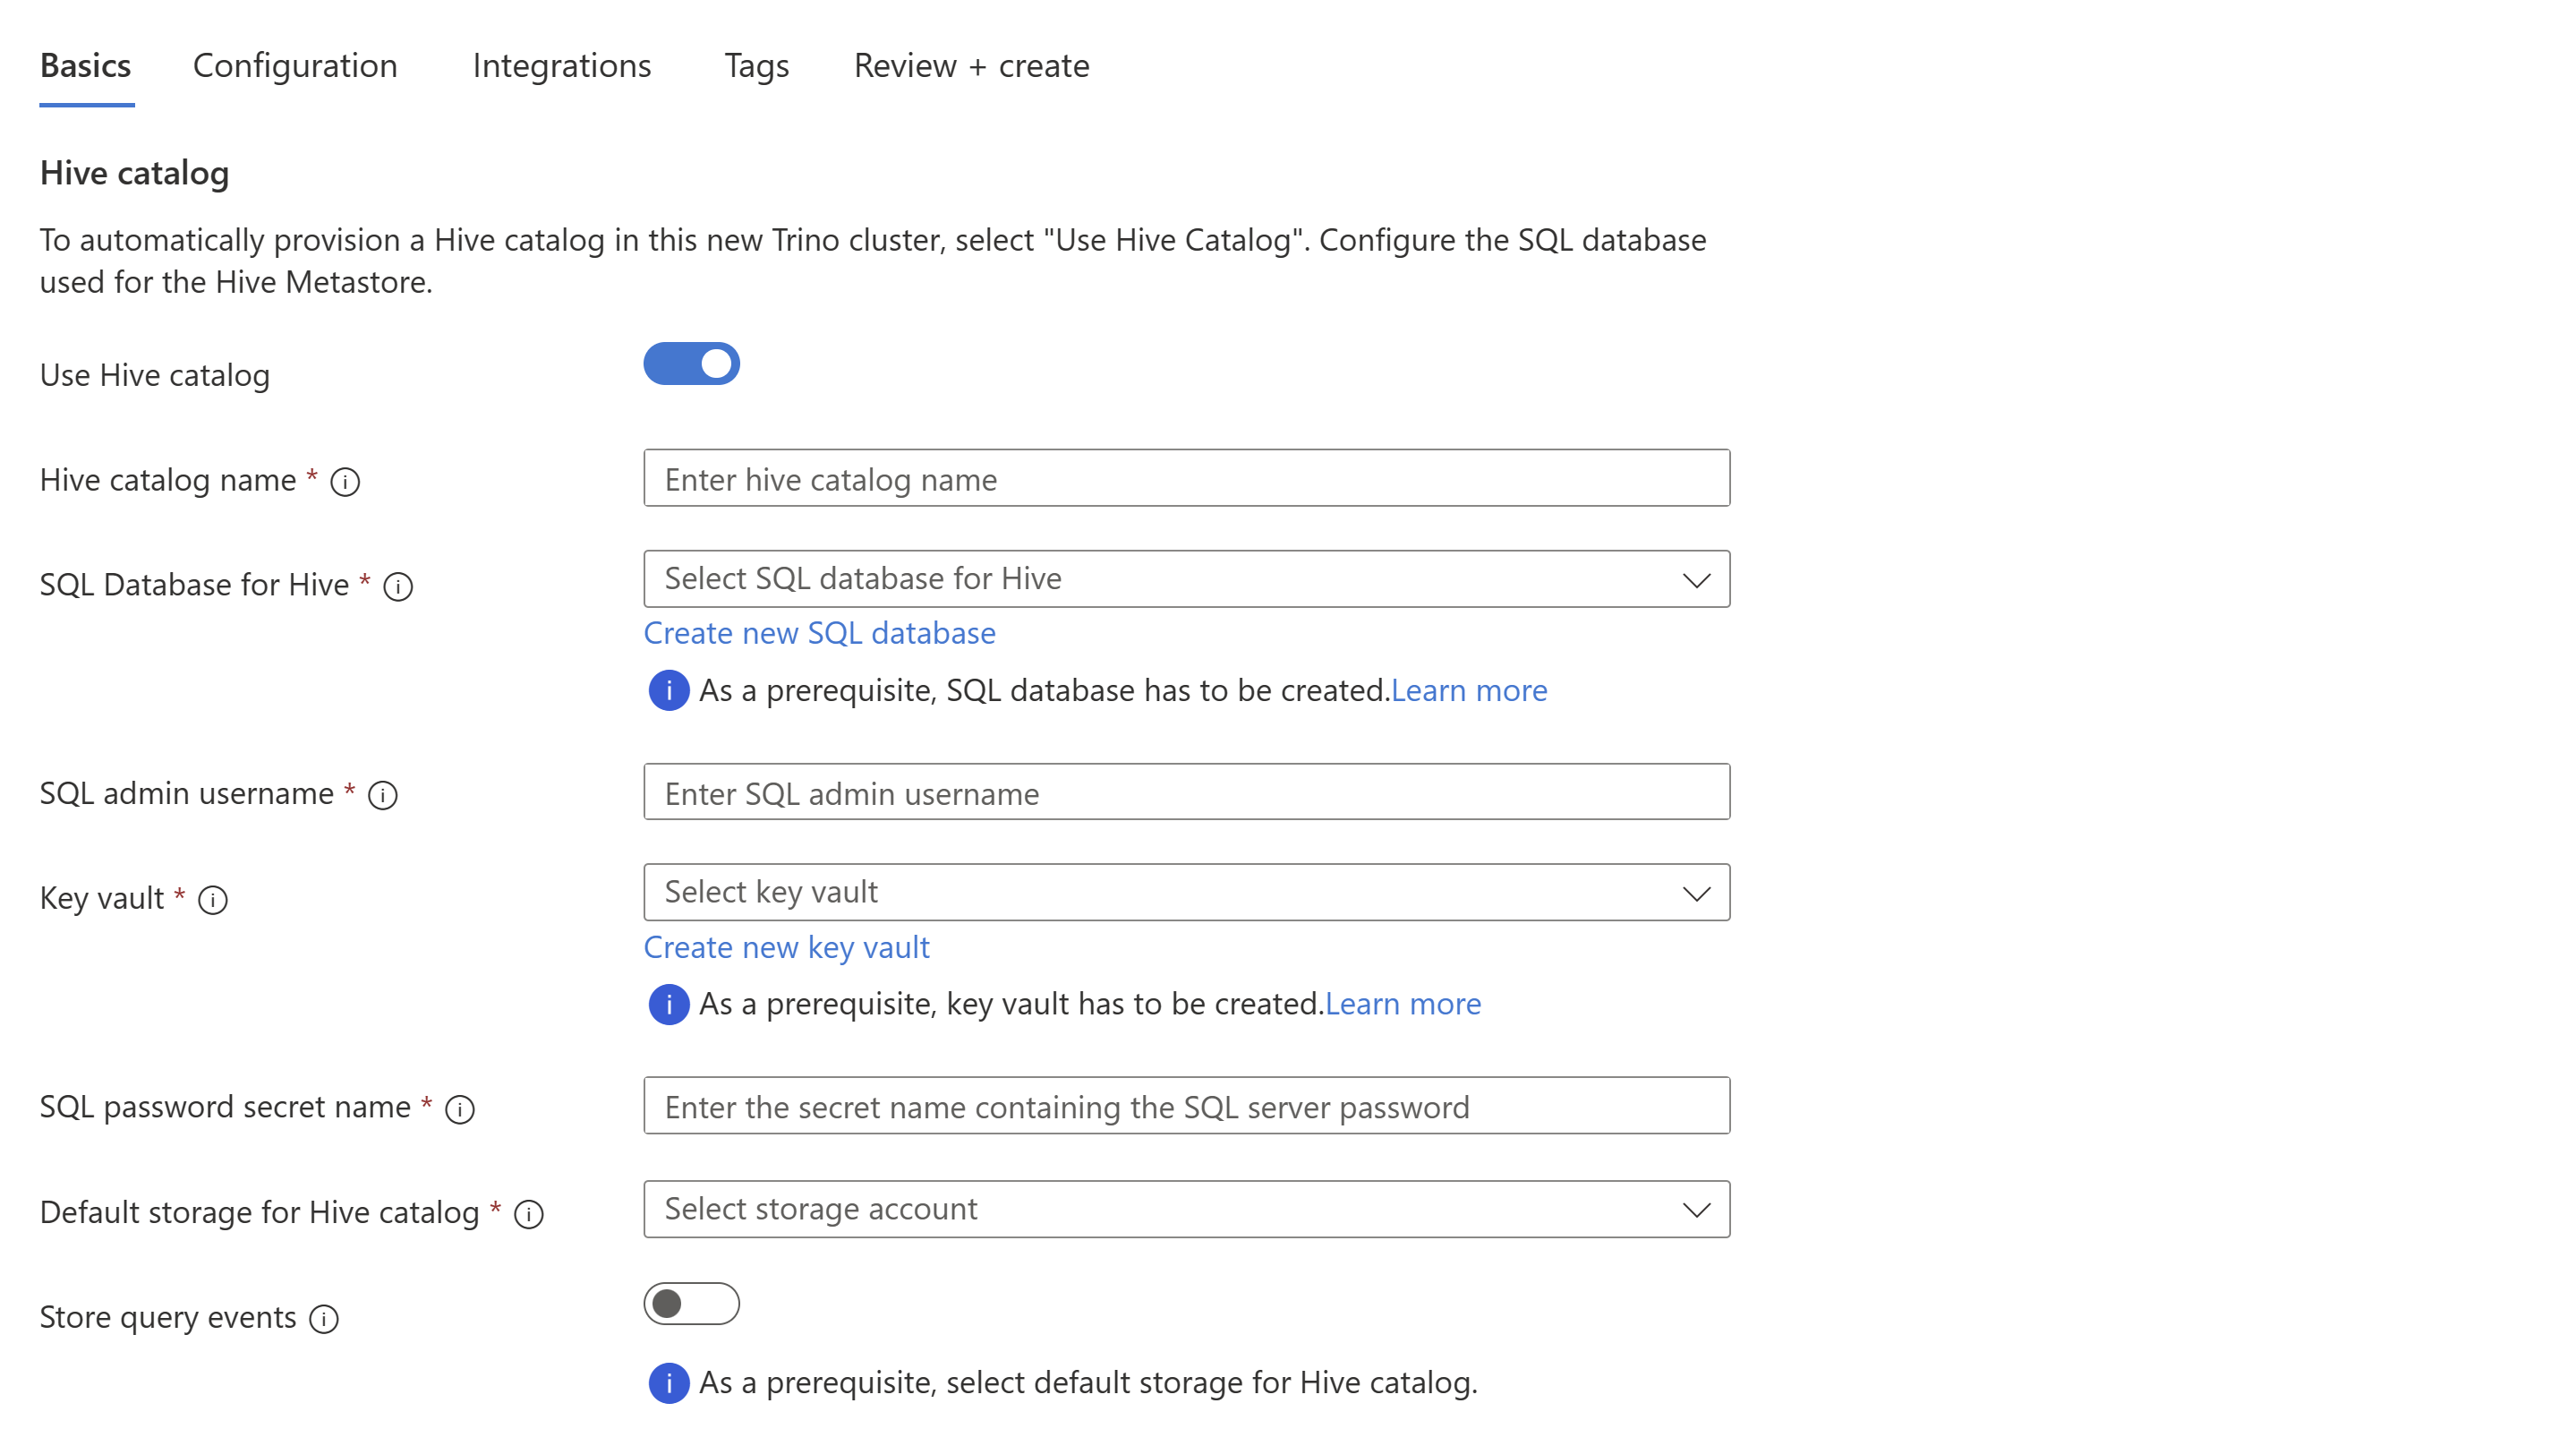
Property Description Use Hive catalog Enable this option to use an external Hive metastore. Hive catalog name Enter the name for the Hive catalog to be added to Trino catalogs. SQL Database for Hive From the drop-down list, select the SQL Database in which to add hive-metastore tables. See resource prerequisite for other requirements for SQL Database. SQL admin username Enter the SQL server admin username. This account is used by metastore to communicate to SQL database. Key vault From the drop-down list, select the Key Vault, which contains a secret with password for SQL server admin username. See resource prerequisite for other requirements for Key Vault. SQL password secret name Enter the secret name from the Key Vault where the SQL database password is stored. Default storage for Hive catalog From the drop-down list, select the default storage account to use for the Hive catalog. Container Select the existing container in the default storage account for storing data and logs or create a new container. Note
- Currently, we support Azure SQL Database as in-built metastore.
- Due to Hive limitation, "-" (hyphen) character in the metastore database name is not supported.
For more information, see hive metastore.
For Storing query events, provide the following information:
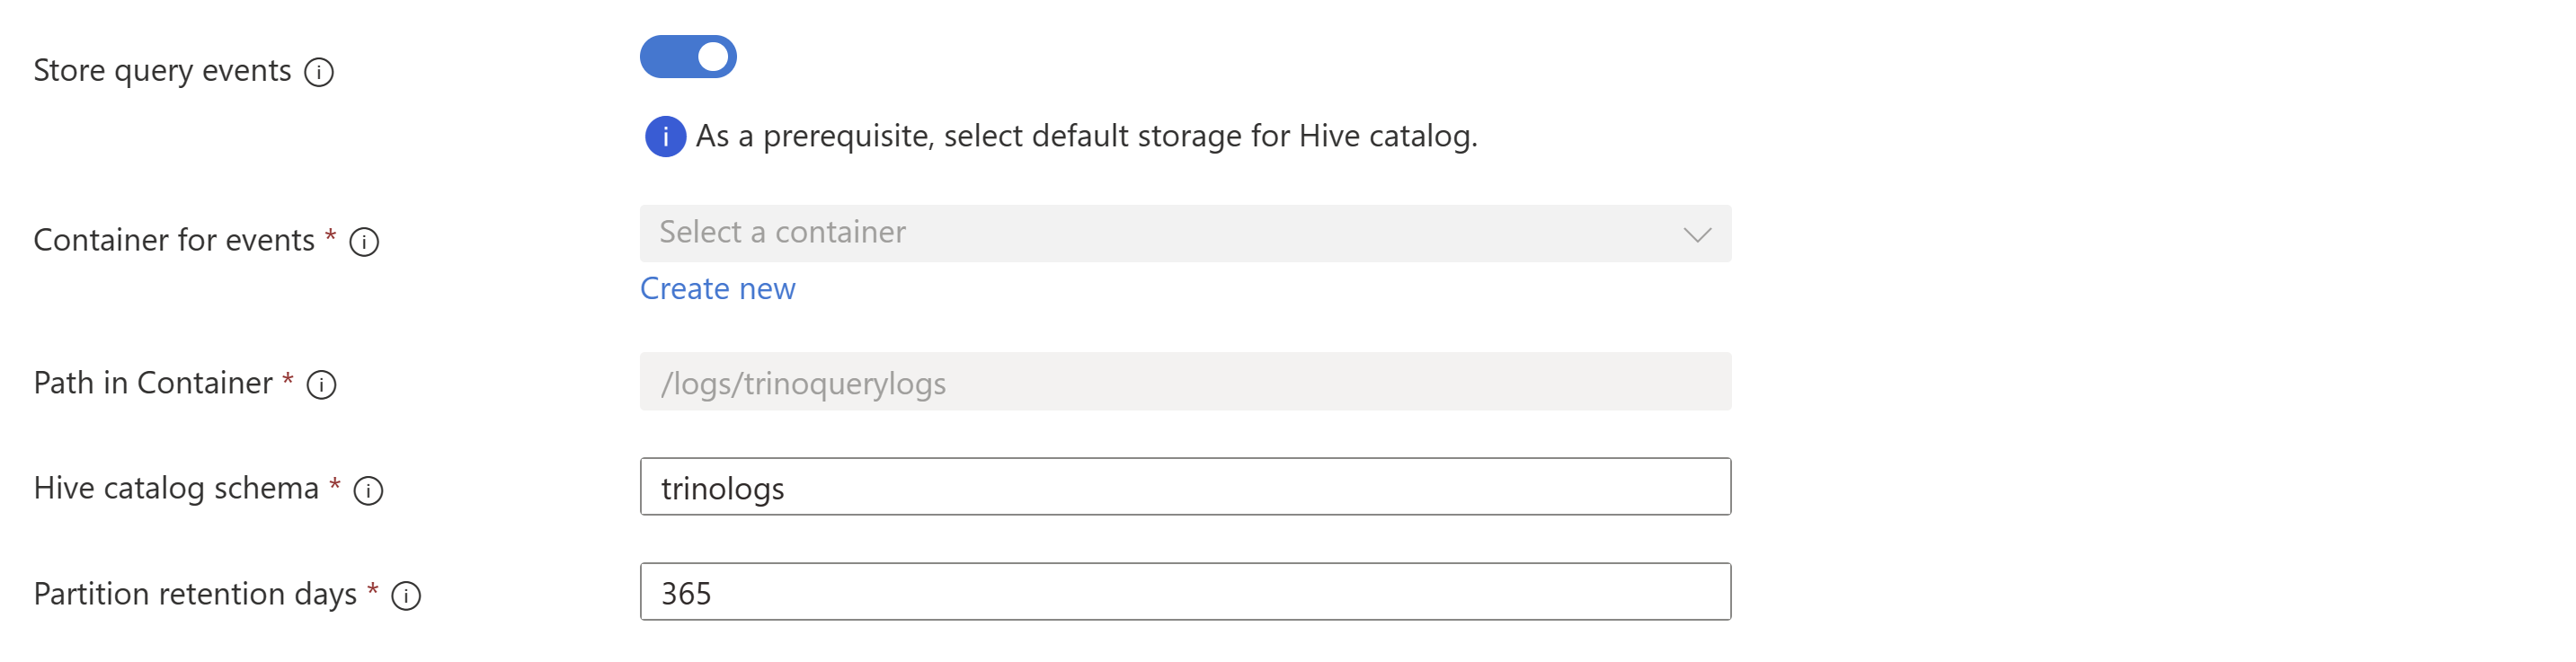
Property Description Container for events Select the name of the container in the default storage account to write the query events. Path in Container Provide fully qualified path in the container to write the query events. Hive catalog schema Enter the name of the schema to create tables and views to read query events in this hive catalog. Partition retention days Enter the retention period (in days) for query events partitions. For more information, see query events logging.
Click Next: Configuration to continue.
On the Configuration page, provide the following information:
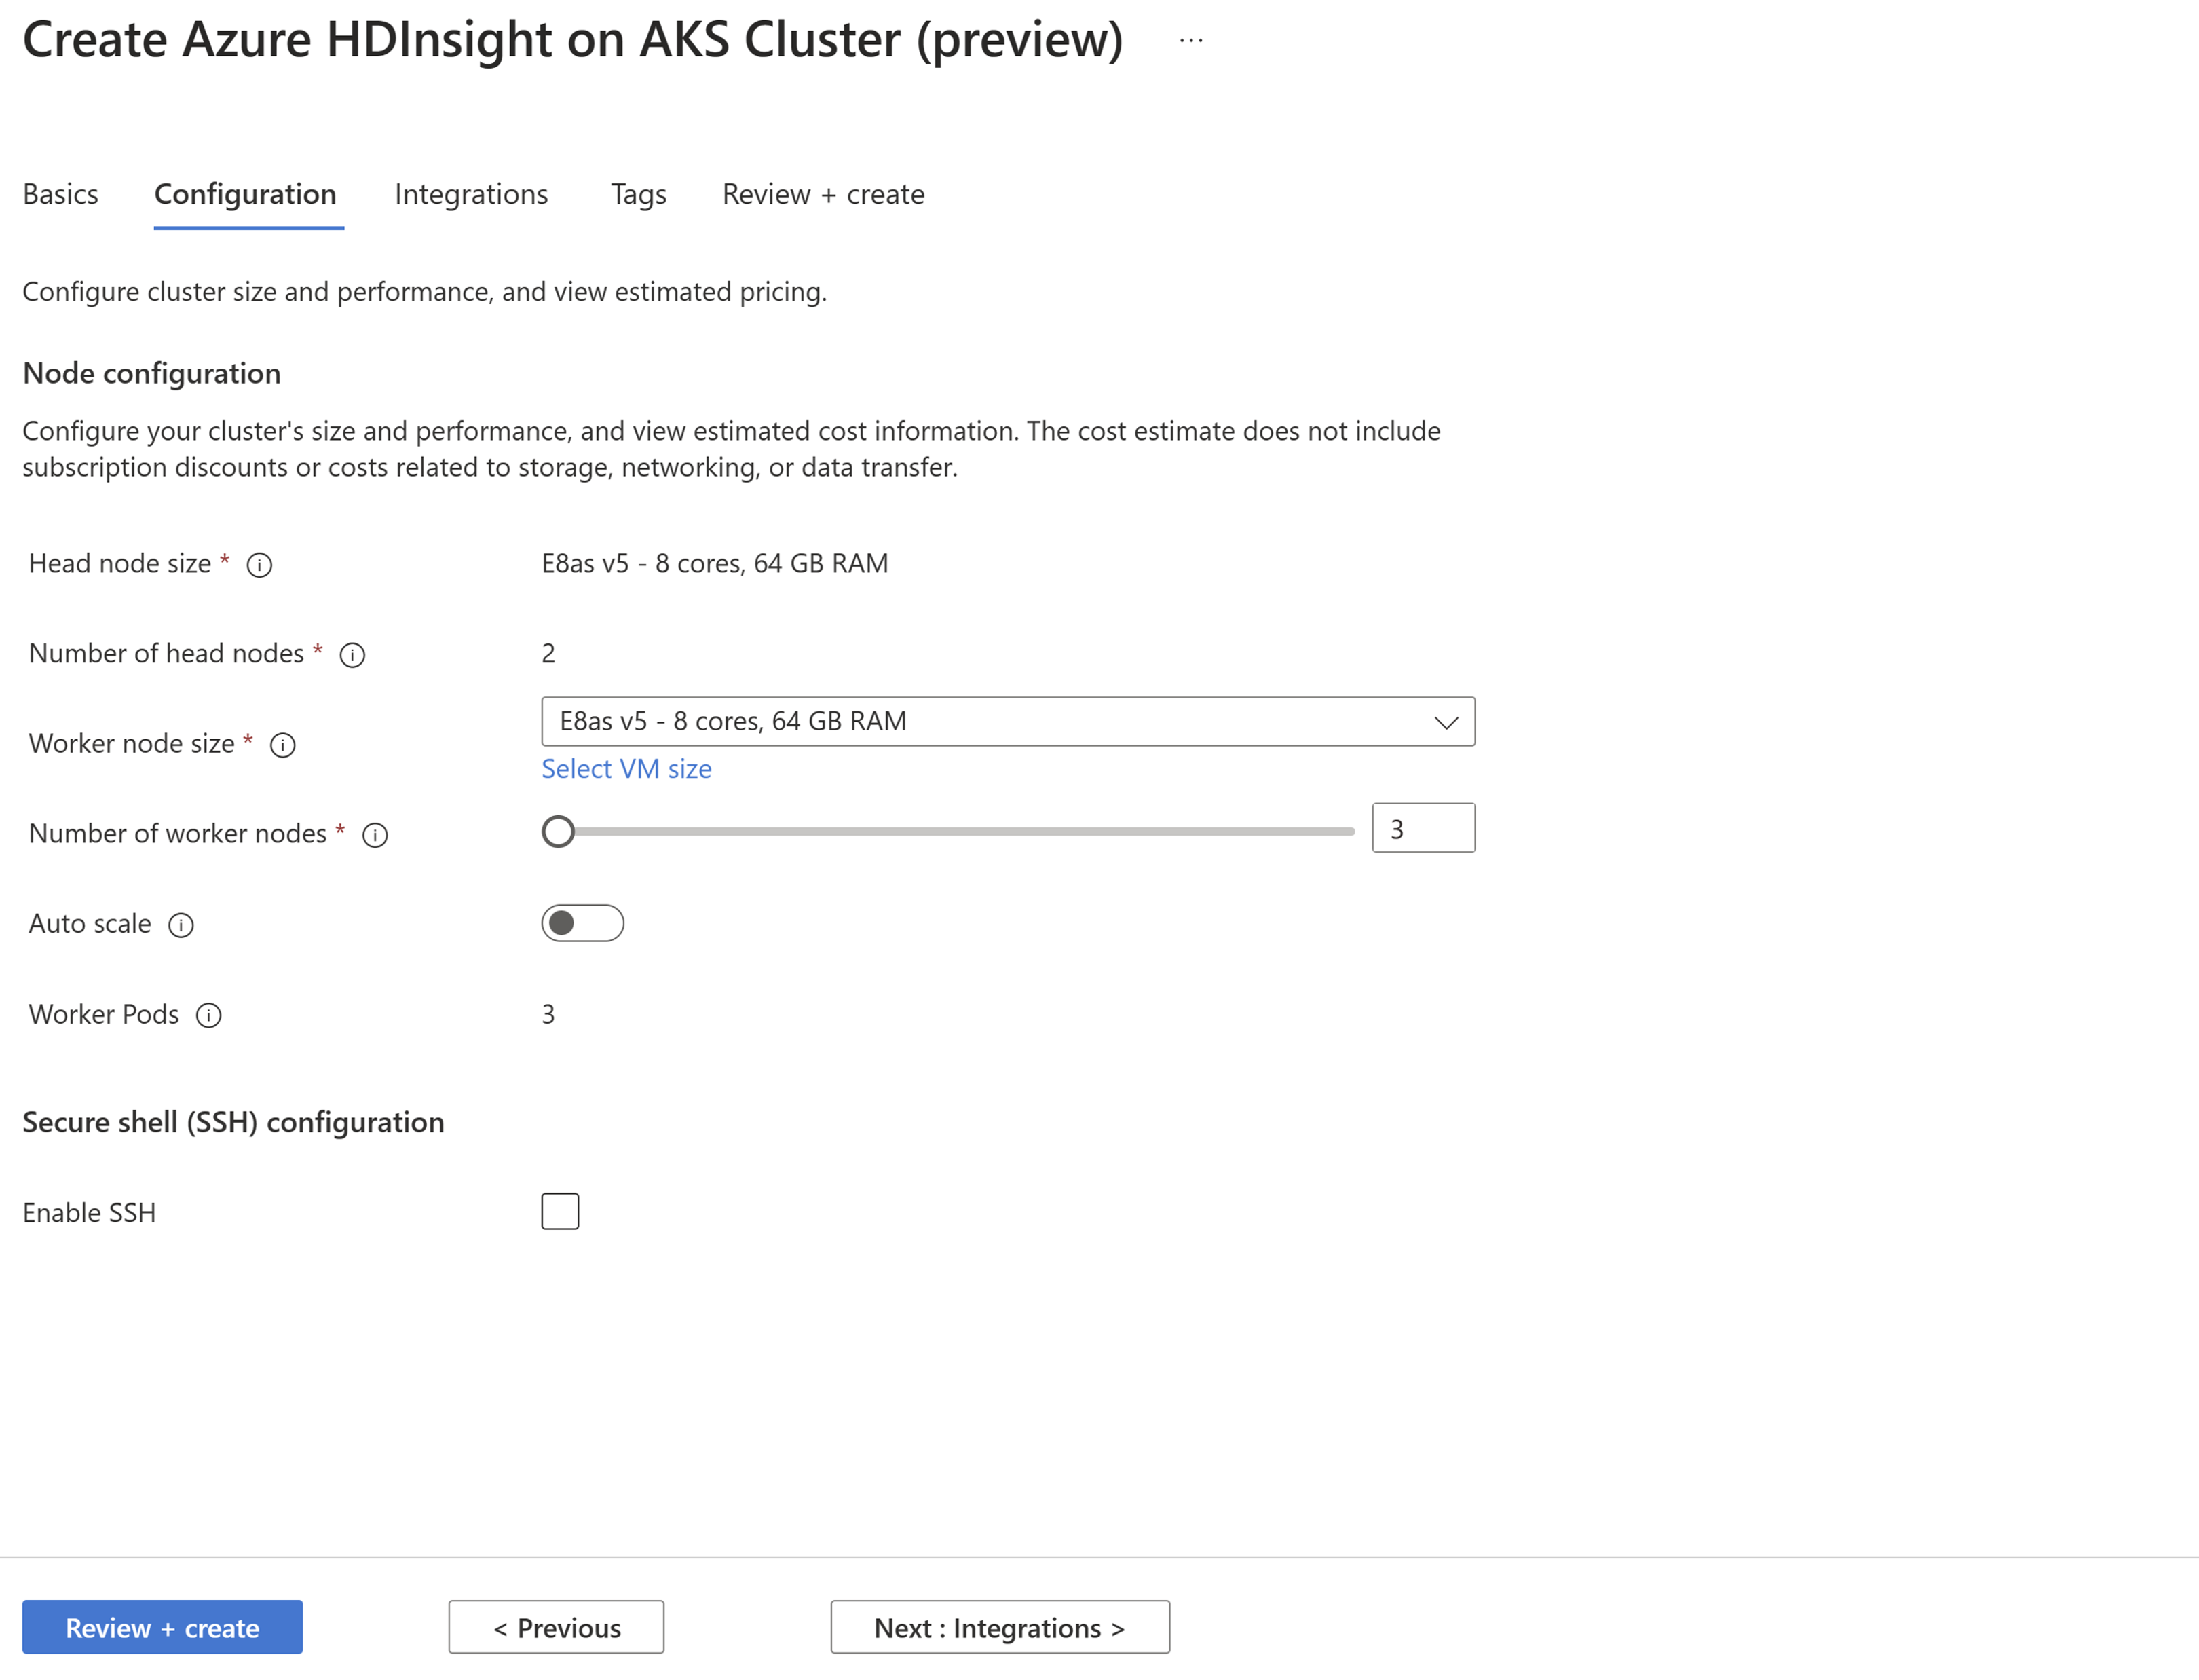
Property Description Head node size This value is same as the worker node size. Number of head nodes This value is set by default based on the cluster type. Worker node size From the drop-down list, select the recommended SKU or you can choose the SKU available in your subscription by clicking Select VM size. Number of worker nodes Select the number of worker nodes required for your cluster. For Autoscale and SSH, provide the following information:
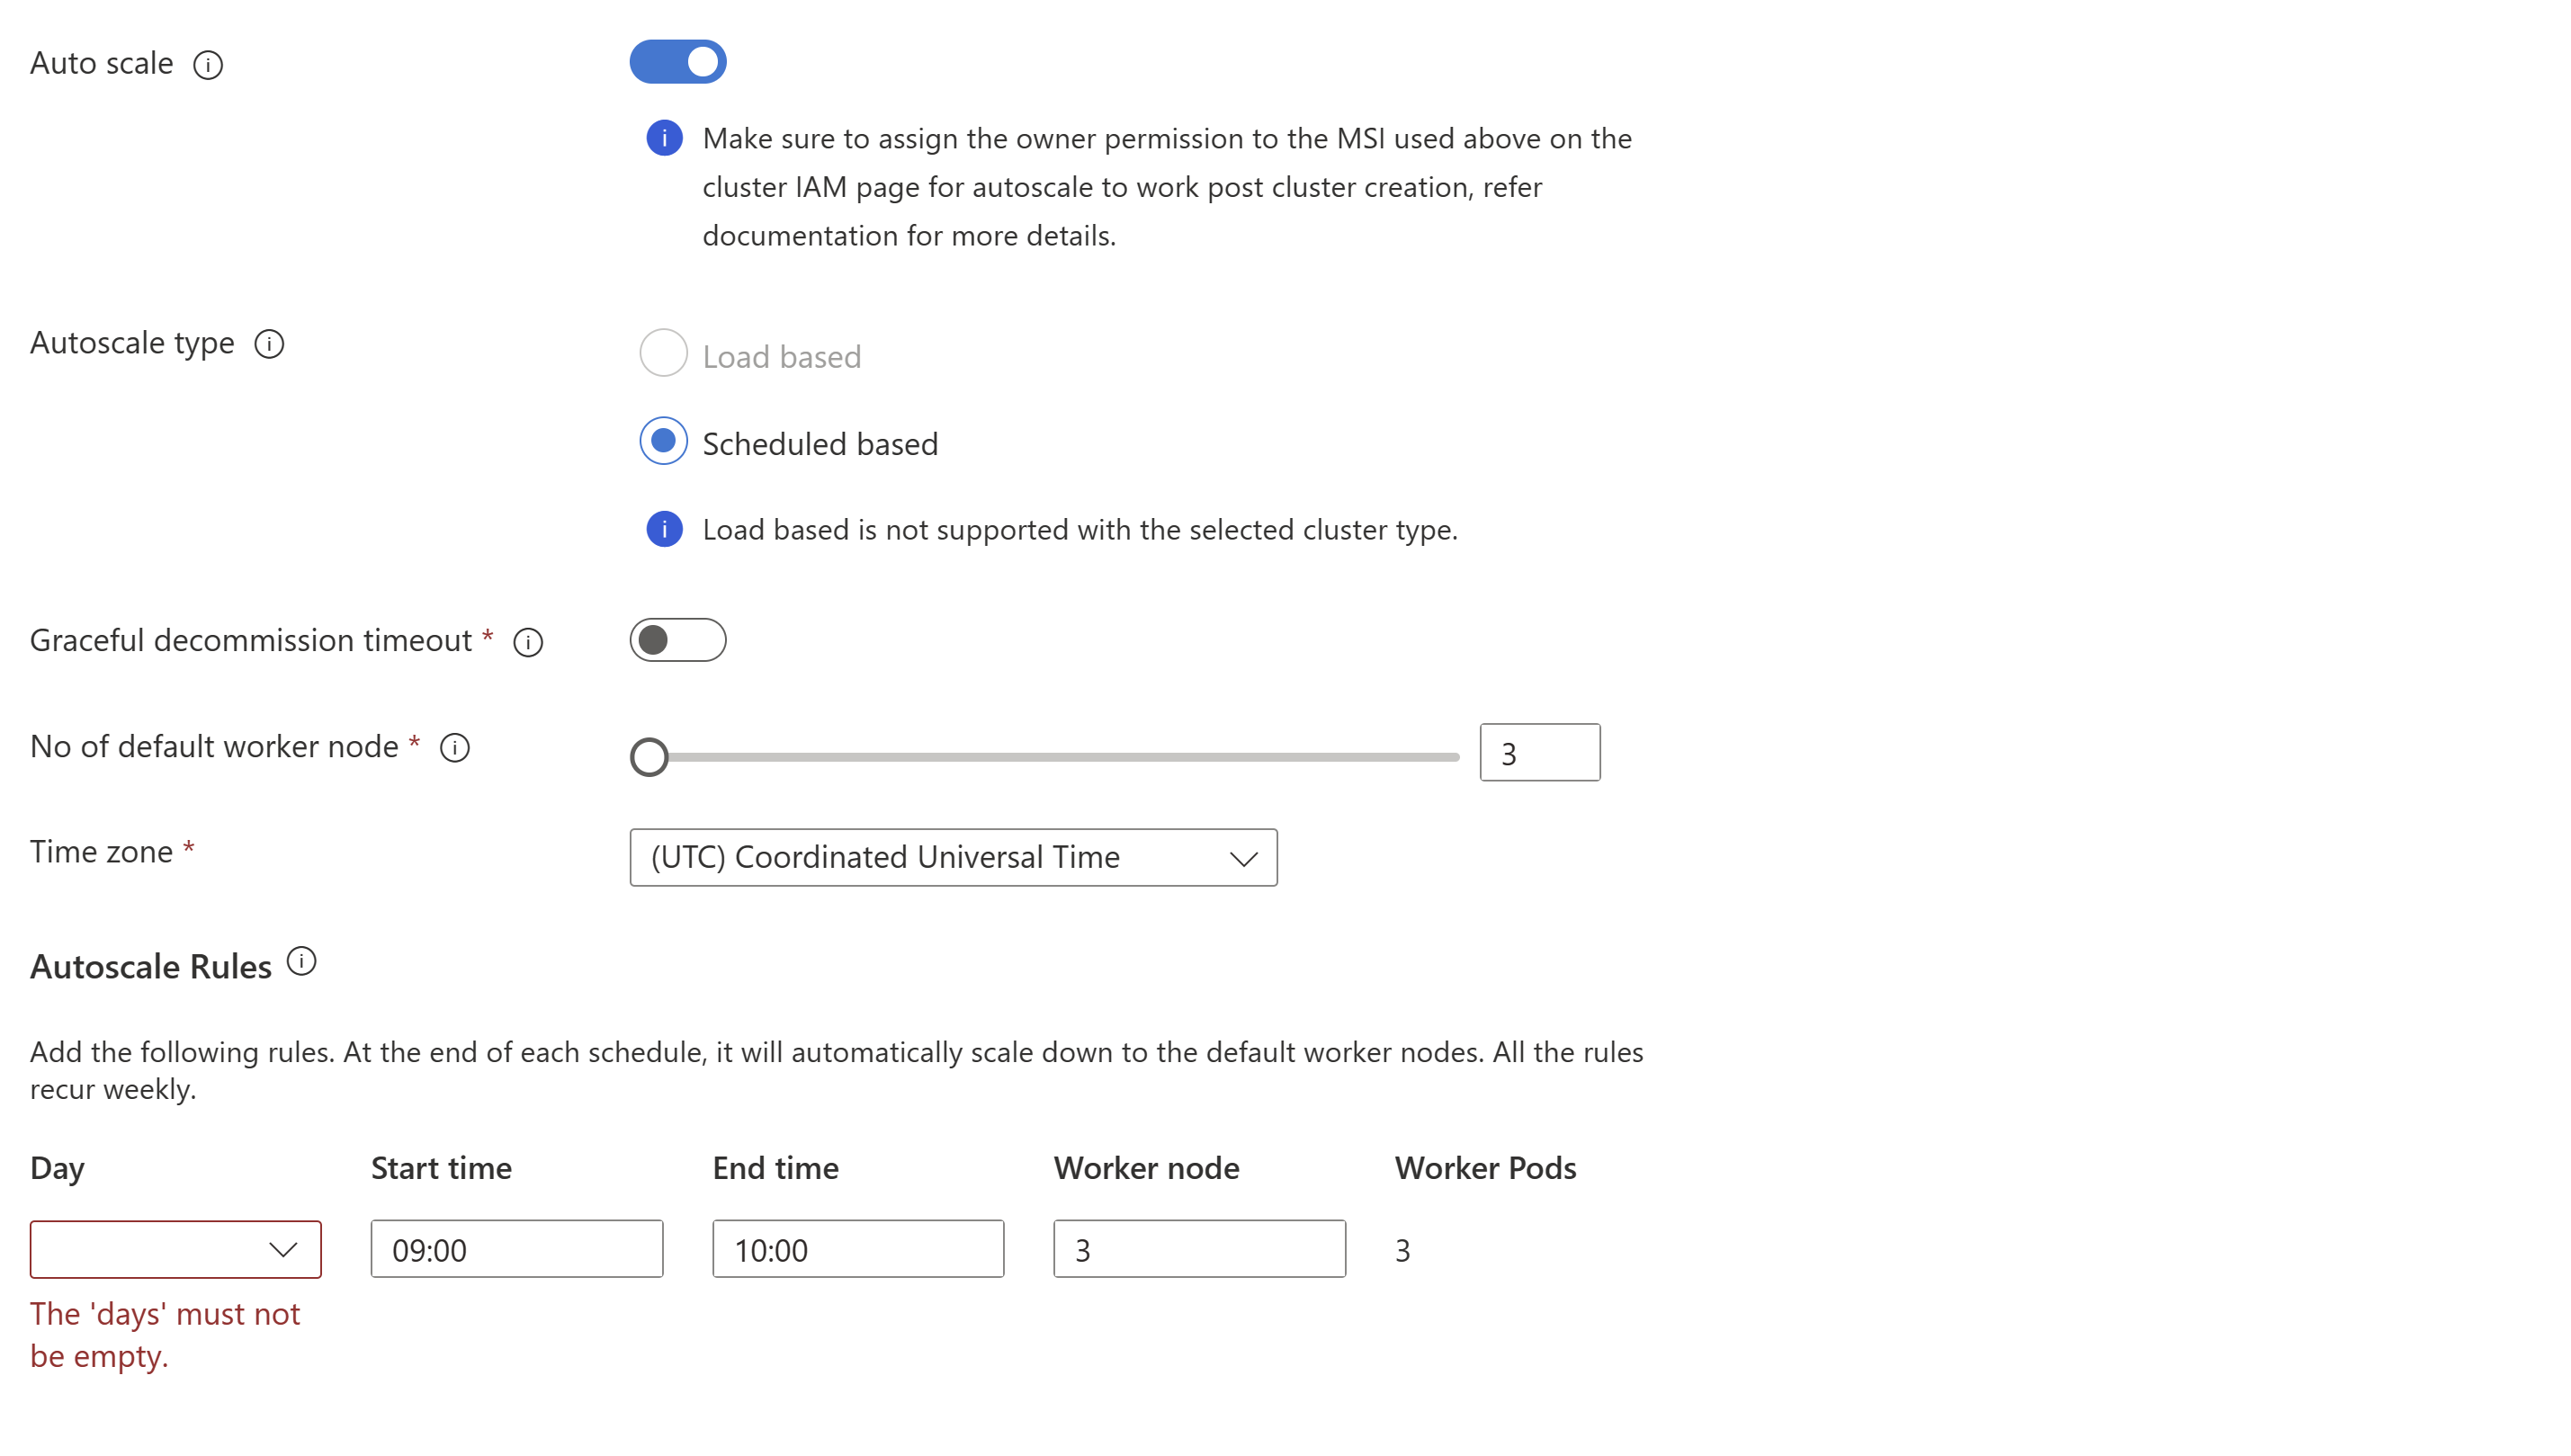

Property Description Auto Scale Upon selection, you would be able to choose the schedule based autoscale to configure the schedule for scaling operations. Enable SSH Upon selection, you can opt for total number of SSH nodes required, which are the access points for the Trino CLI using Secure Shell. The maximum SSH nodes allowed is 5. Click Next: Integrations to continue.
On the Integrations page, provide the following information:
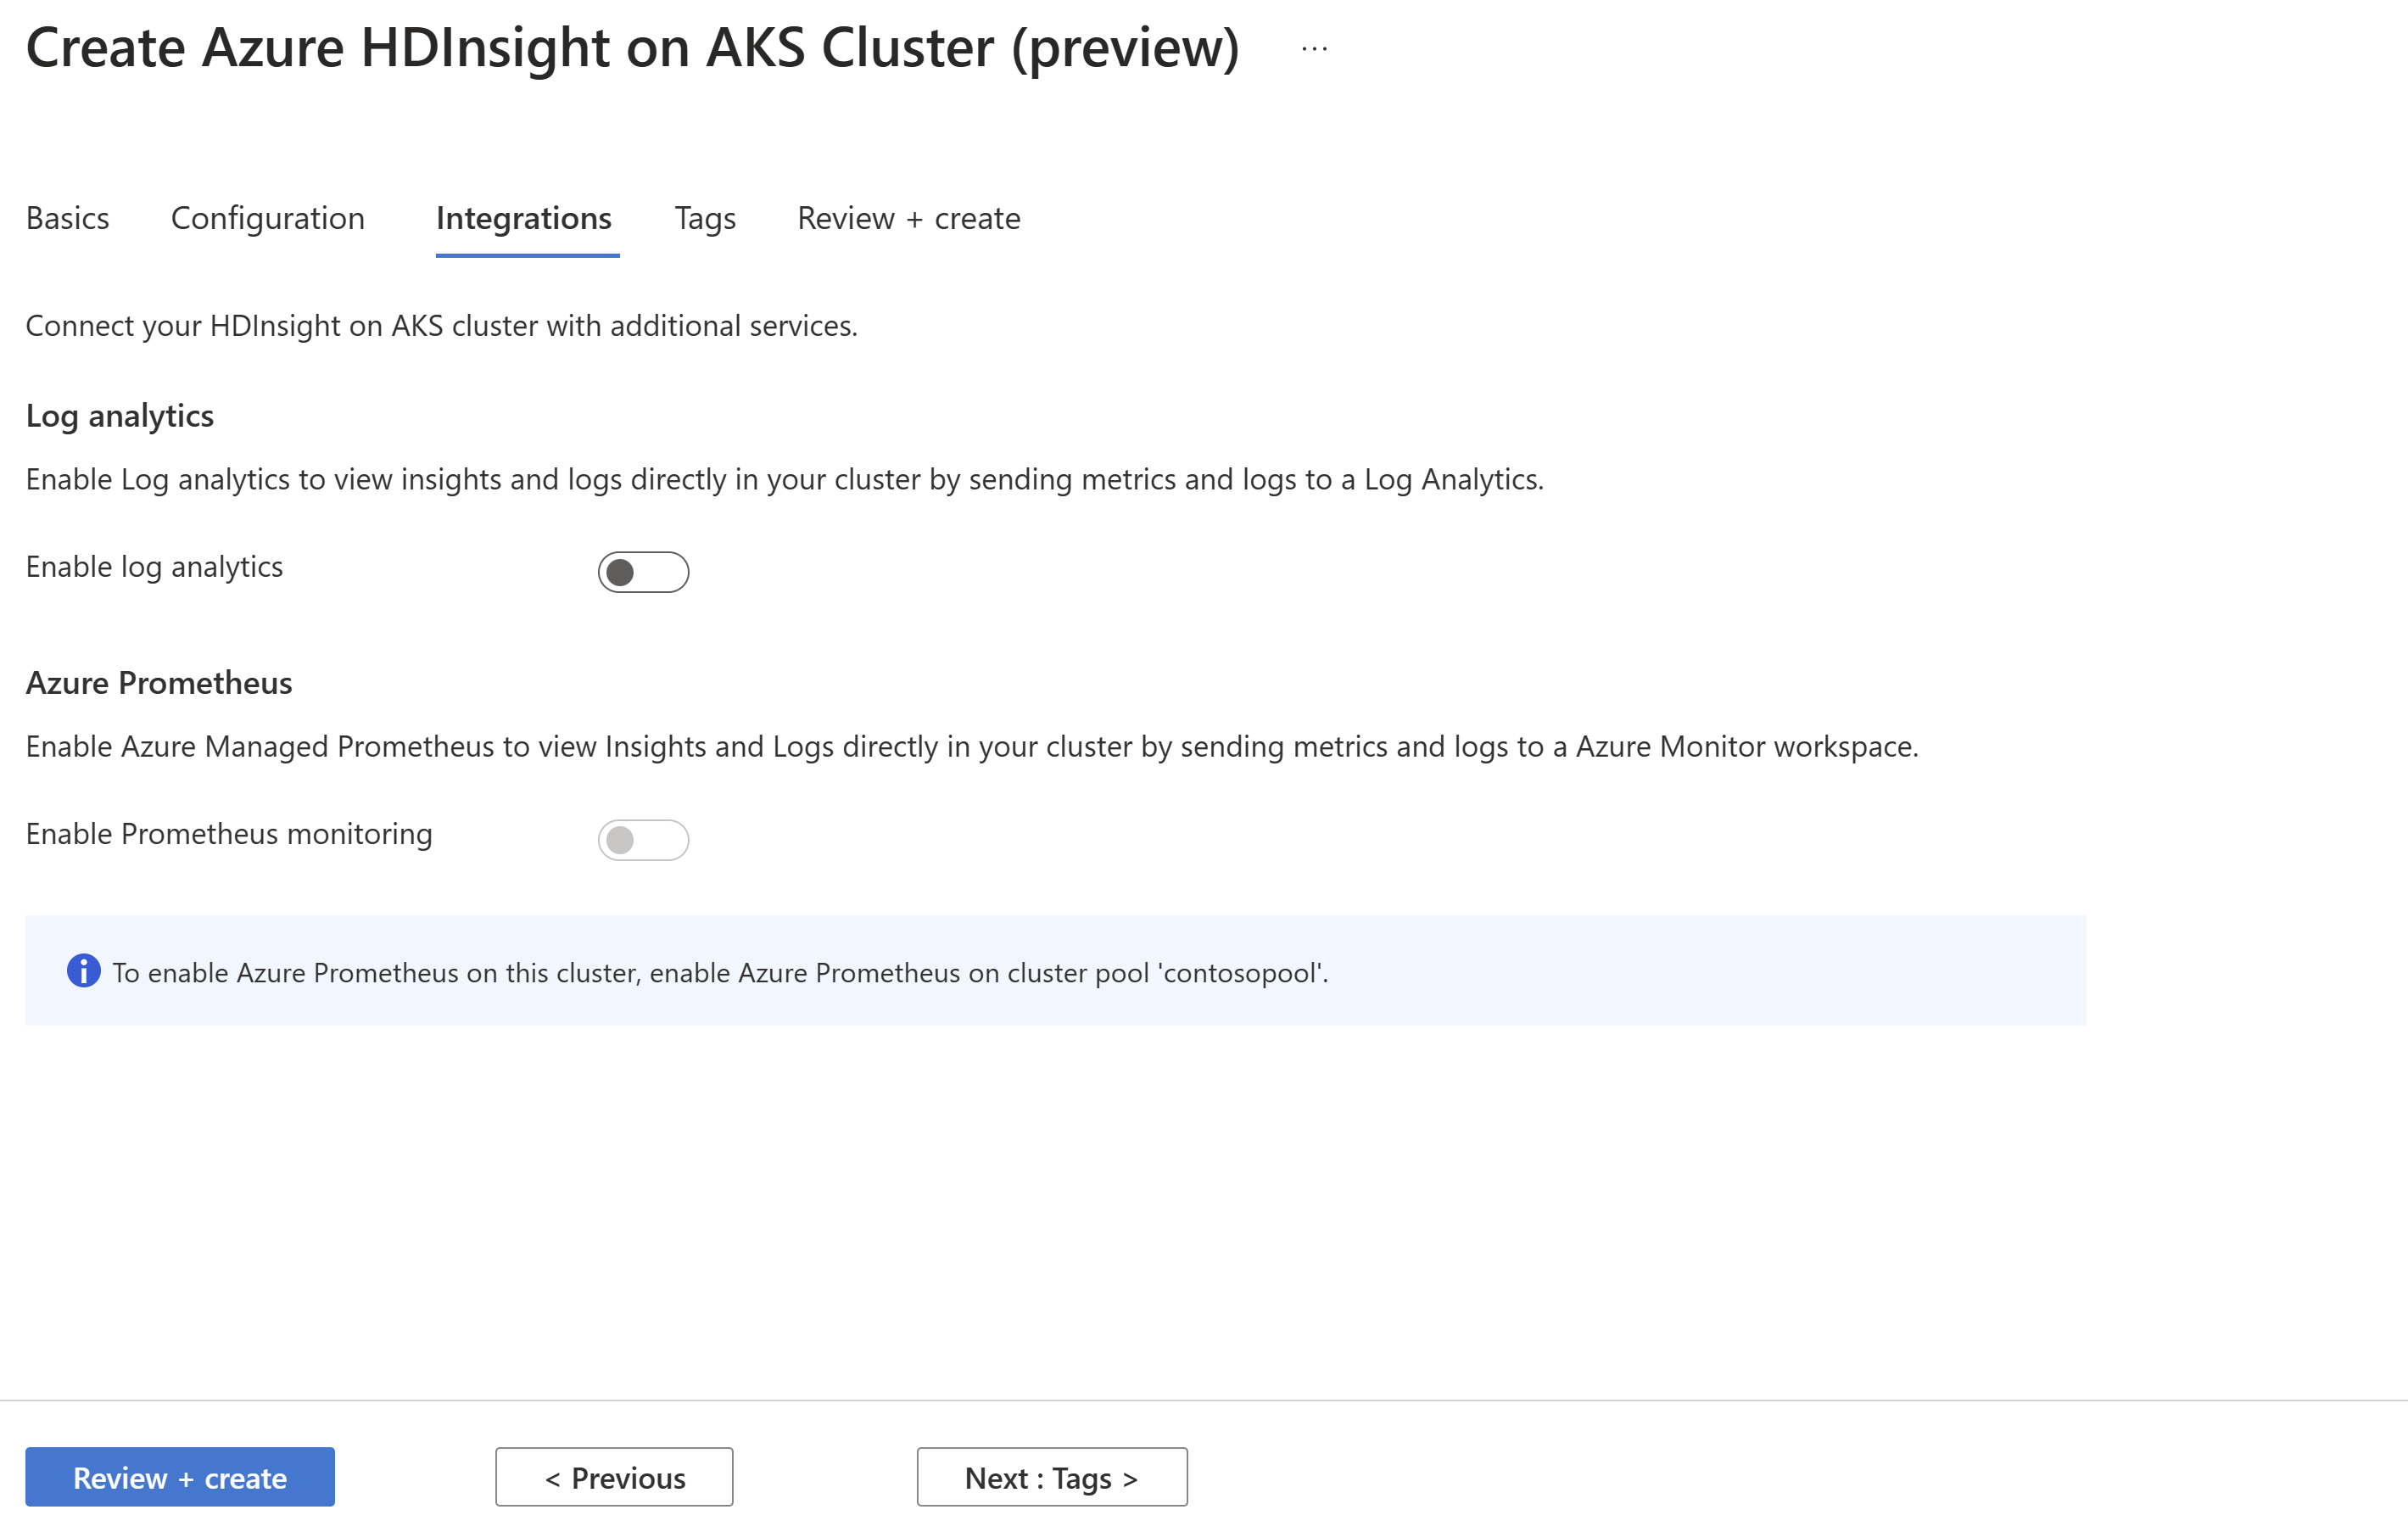
Property Description Log analytics This feature is available only if the cluster pool has associated log analytics workspace, once enabled the logs to collect can be selected. Azure Prometheus This feature is to view Insights and Logs directly in your cluster by sending metrics and logs to Azure Monitor workspace. Click Next: Tags to continue.
On the Tags page, enter tags (optional) you’d like to assign to the cluster.
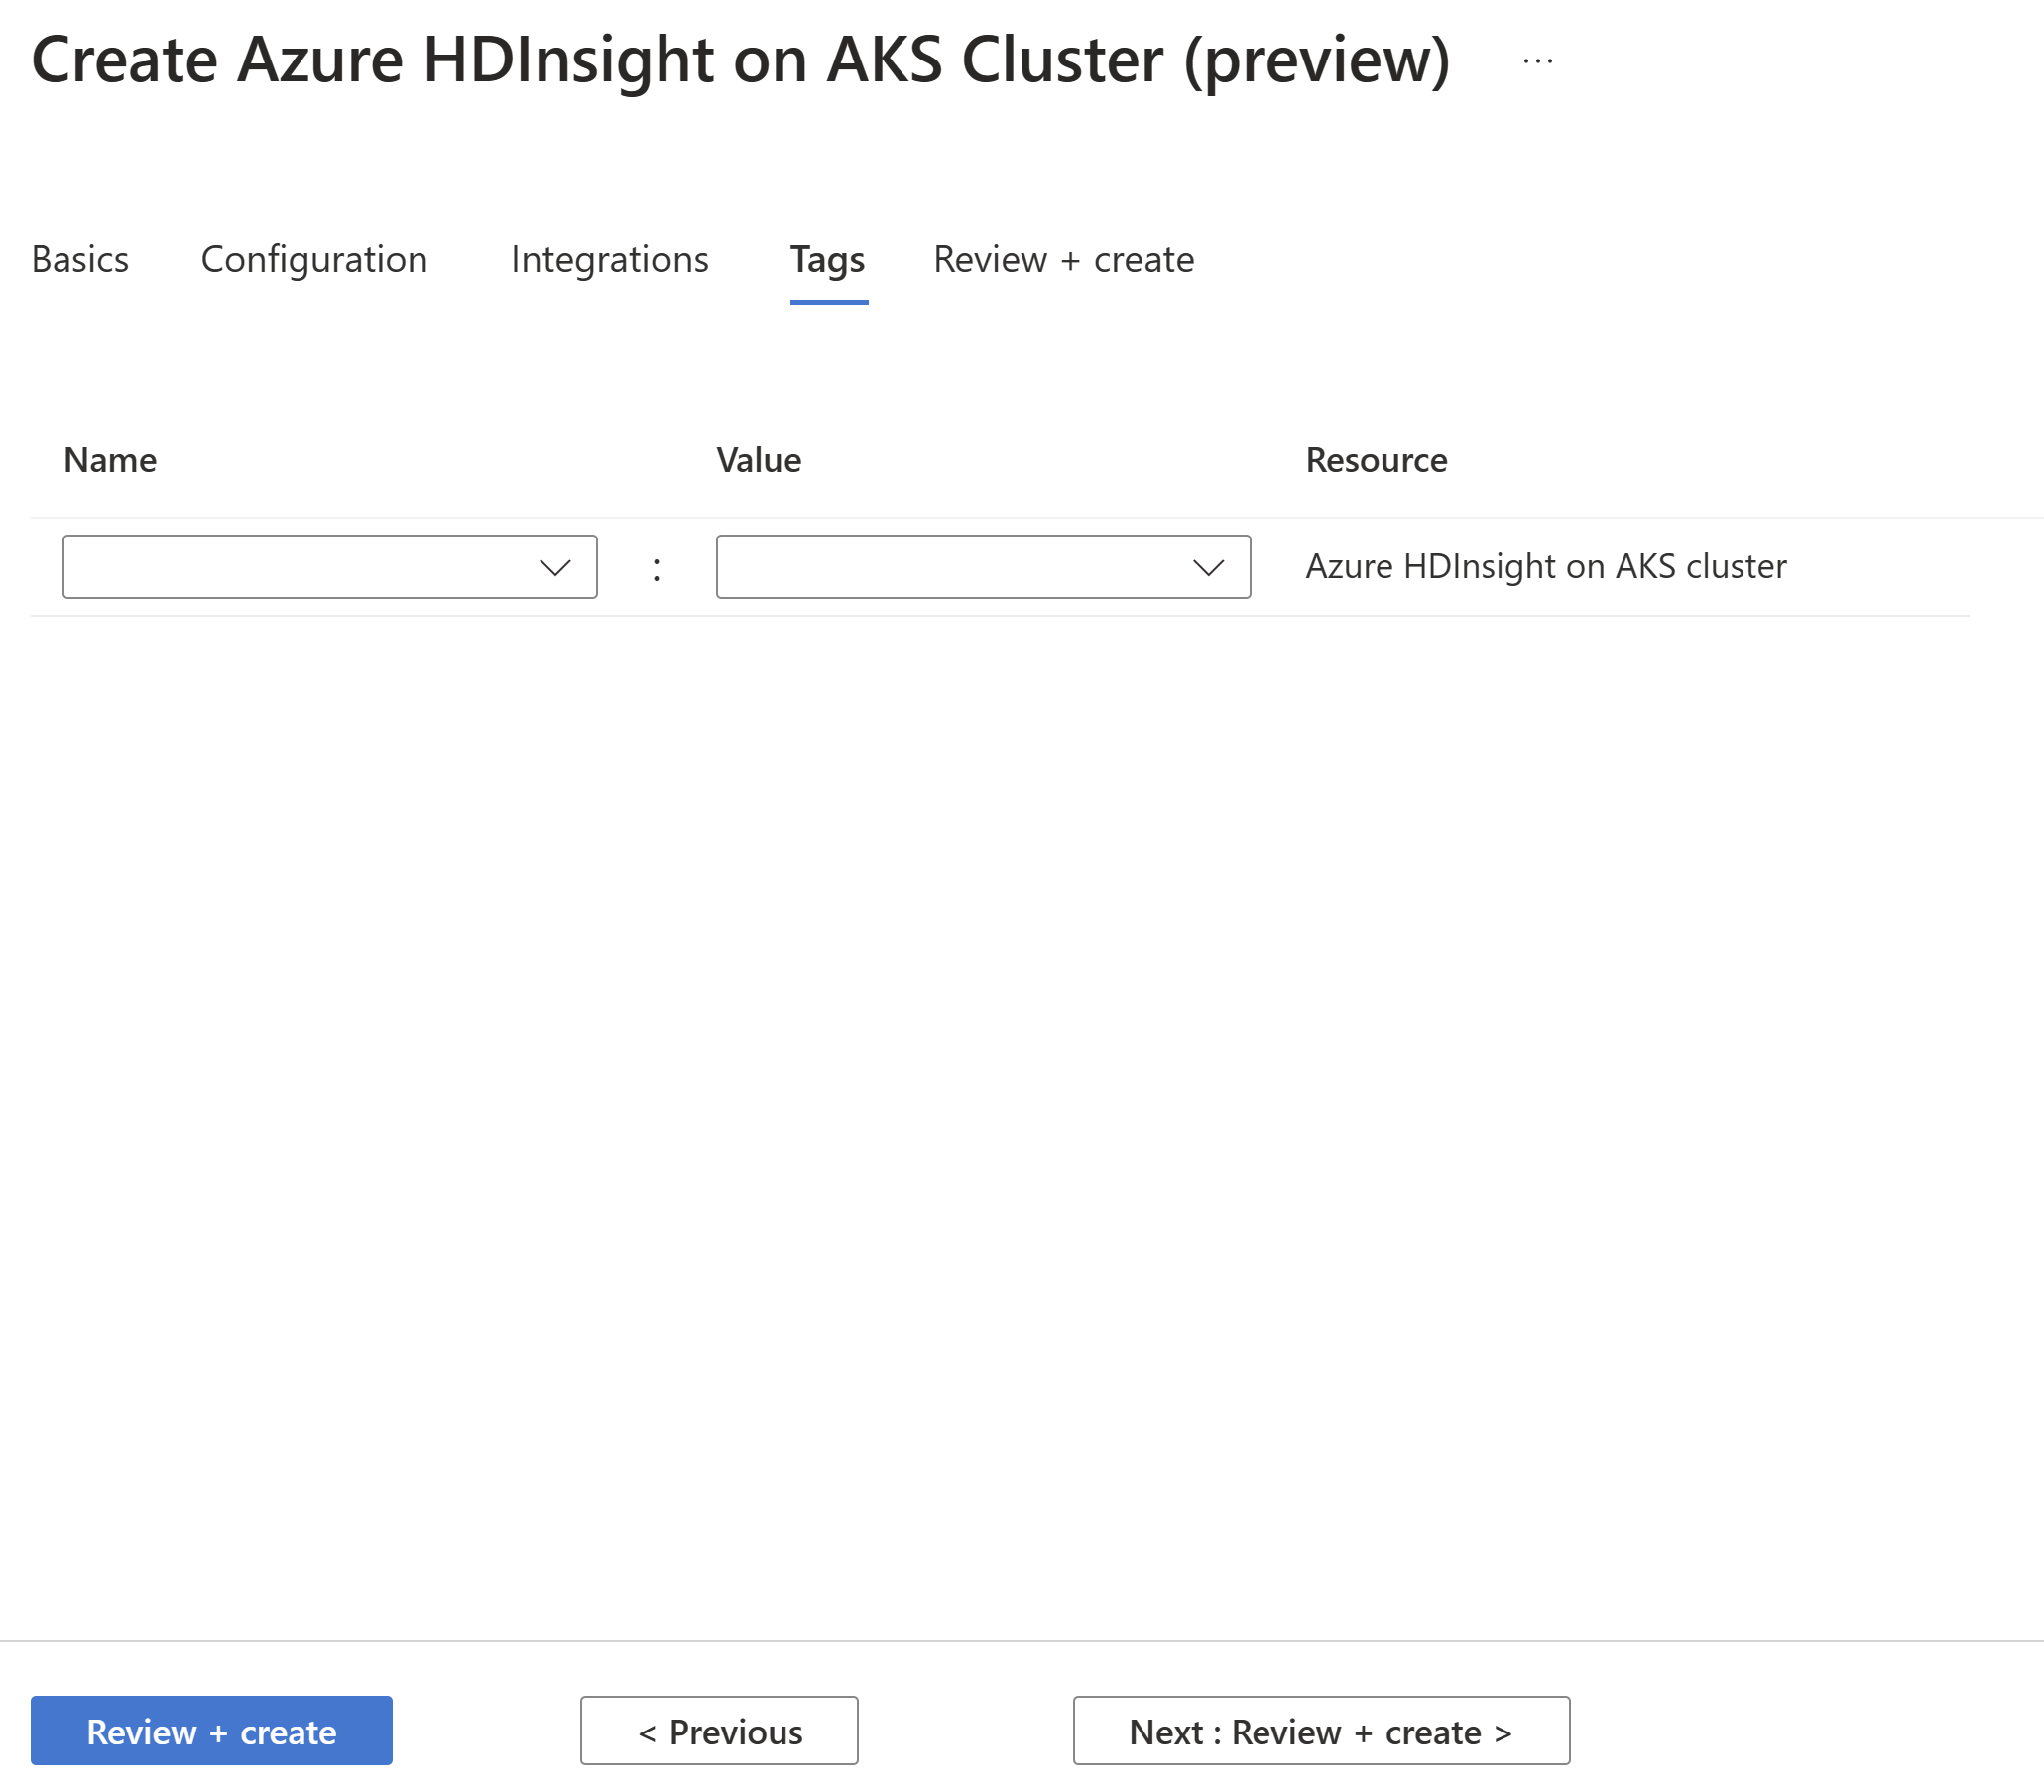
Property Description Name Enter a name (key) that helps you identify resources based on settings that are relevant to your organization. For example, "Environment" to track the deployment environment for your resources. Value Enter the value that helps to relate to the resources. For example, "Production" to identify the resources deployed to production. Resource Select the applicable resource type. Select Next: Review + create to continue.
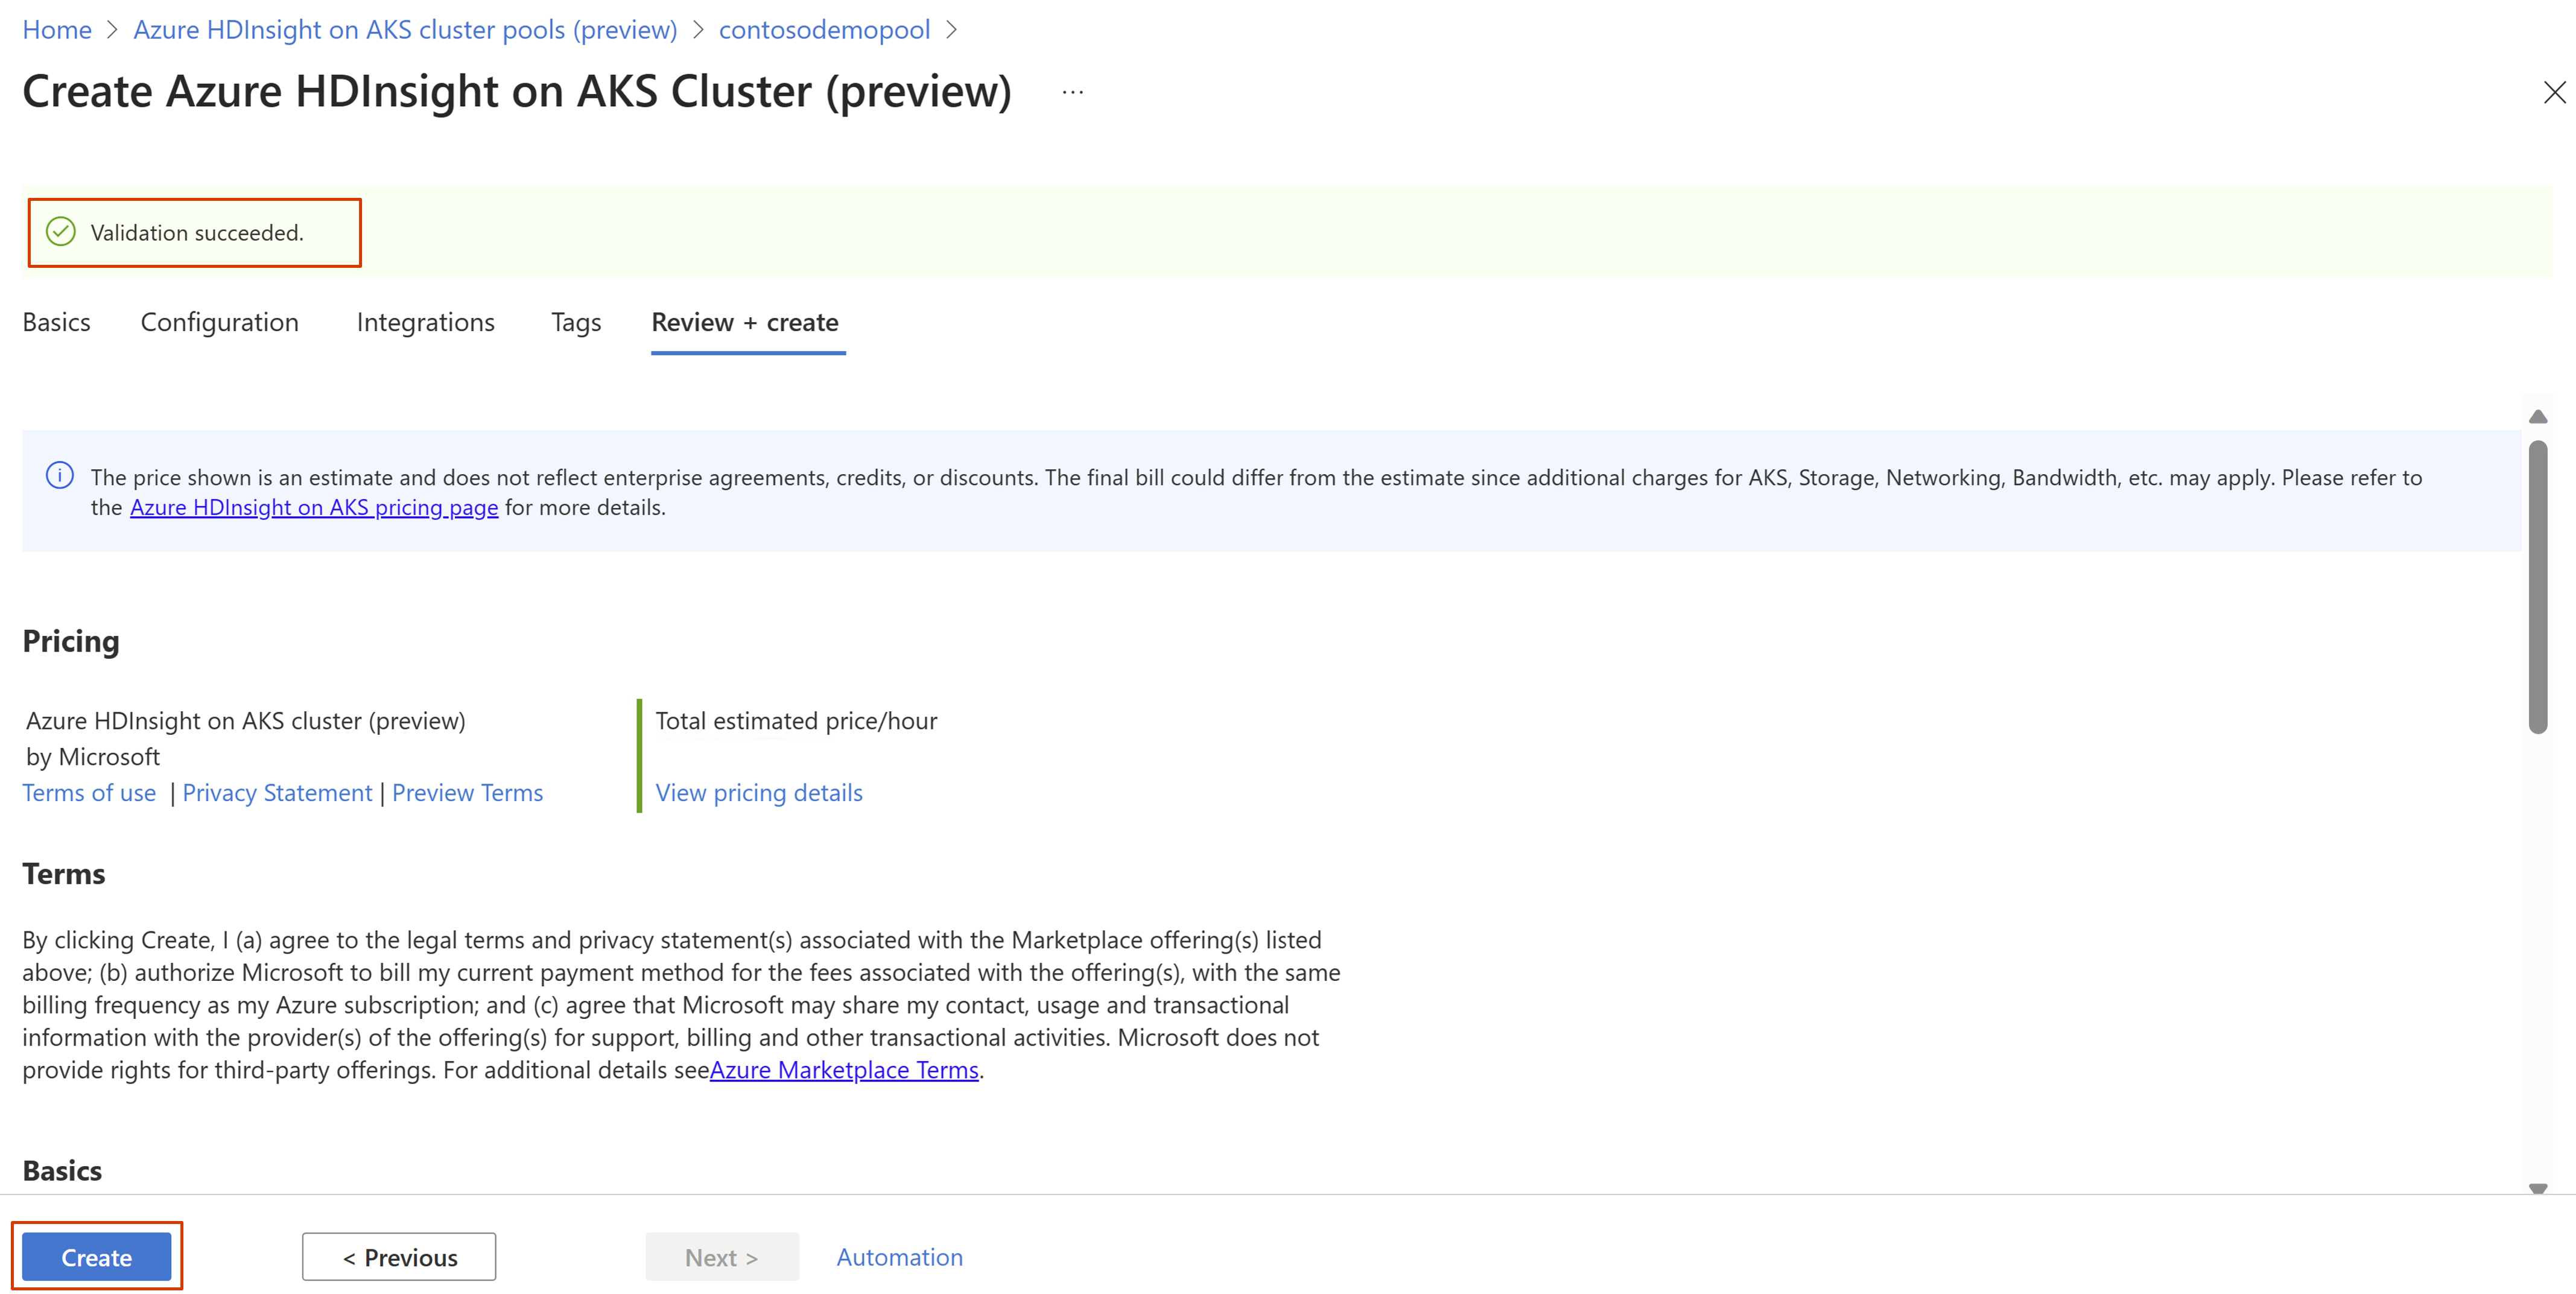
On the Review + create page, look for the Validation succeeded message at the top of the page and then click Create.
The Deployment is in process page is displayed which the cluster is created. It takes 5-10 minutes to create the cluster. Once the cluster is created the "Your deployment is complete" message is displayed.
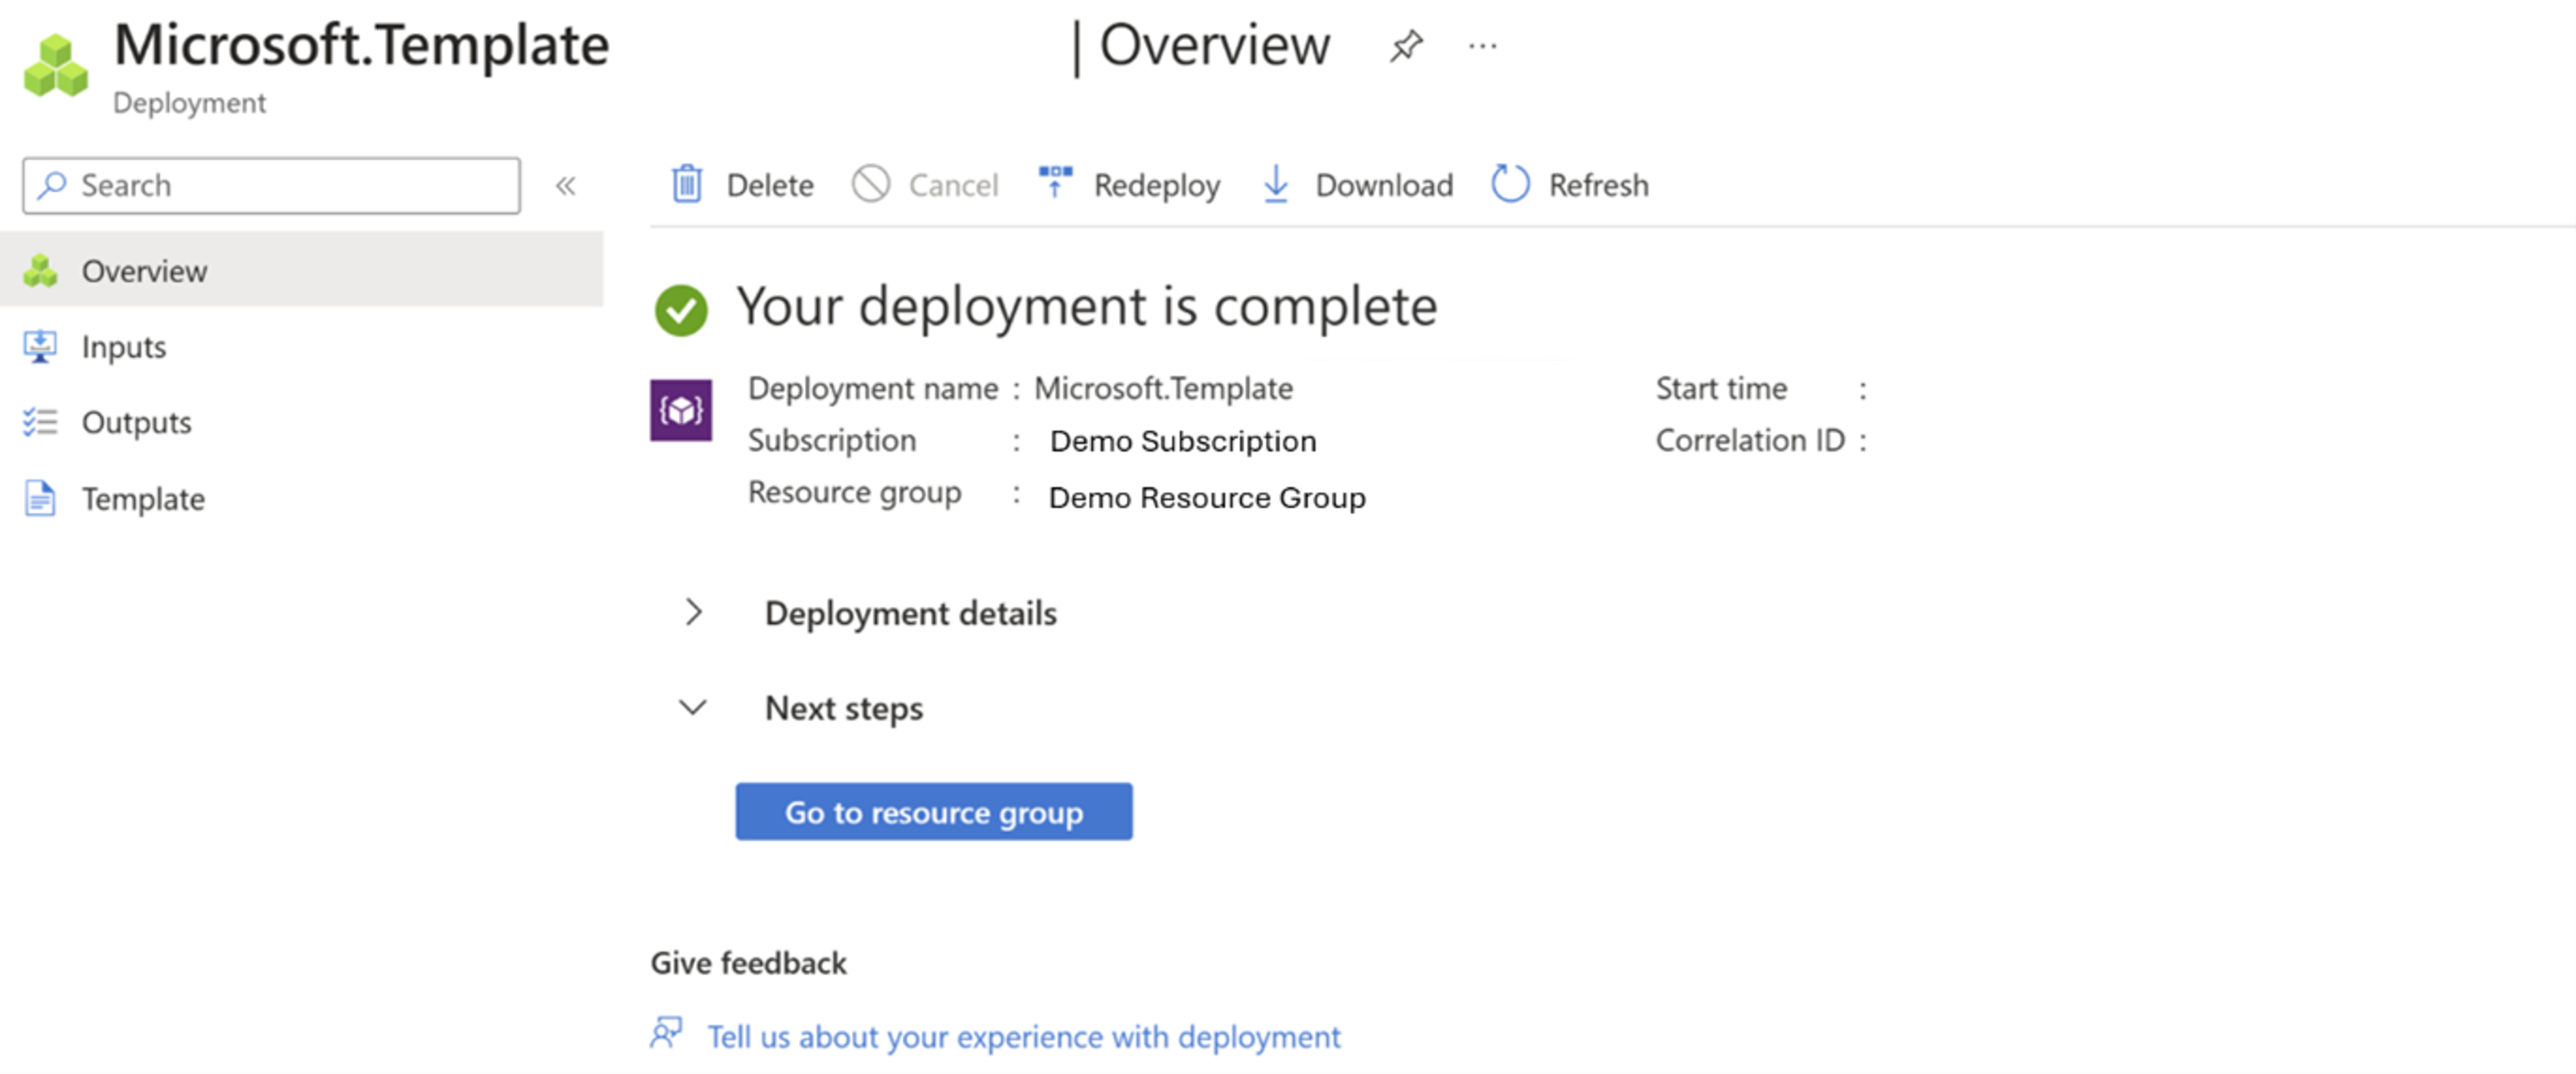
If you navigate away from the page, you can check the status of the deployment by clicking Notifications icon.
Tip
For troubleshooting any deployment errors, you can refer to this page.
Feedback
Coming soon: Throughout 2024 we will be phasing out GitHub Issues as the feedback mechanism for content and replacing it with a new feedback system. For more information see: https://aka.ms/ContentUserFeedback.
Submit and view feedback for