Send a local toast notification from C++ UWP apps
A toast notification is a message that your app can construct and deliver to your user while they are not currently inside your app.

This quickstart walks you through the steps to create, deliver, and display a Windows 10 or Windows 11 toast notification using rich content and interactive actions. This quickstart uses local notifications, which are the simplest notification to implement. All types of apps (WPF, UWP, WinForms, console) can send notifications!
Important
If you're writing a C++ non-UWP app, please see the C++ WRL documentation. If you're writing a C# app, please see the C# documentation.
Step 1: Install NuGet package
You can create toast notifications with the Windows Community Toolkit (WCT)'s builder syntax OR with XML. If you prefer the latter, please skip to Step 2 and refer to the Without builder syntax code examples.
Within your Visual Studio solution, right click your project, click "Manage NuGet Packages..." and search for and install the Microsoft.Toolkit.Uwp.Notifications NuGet package version 7.0 or greater.
Our Builder syntax code examples will use this package. This package allows you to create toast notifications without using XML.
Step 2: Add namespace declarations
using namespace Microsoft::Toolkit::Uwp::Notifications;
Step 3: Send a toast
In Windows 10 and Windows 11, your toast notification content is described using an adaptive language that allows great flexibility with how your notification looks. For more information, see the toast content documentation.
We'll start with a simple text-based notification. Construct the notification content (using the Notifications library), and show the notification! Note that the namespace is Microsoft.Toolkit.Uwp.Notifications.

If you are not using the WCT Notifications library builder syntax, you will instead construct the XML toast template, populate it with text and values, construct the notification, and show it.
// Construct the content and show the toast!
(ref new ToastContentBuilder())
    ->AddArgument("action", "viewConversation")
    ->AddArgument("conversationId", 9813)
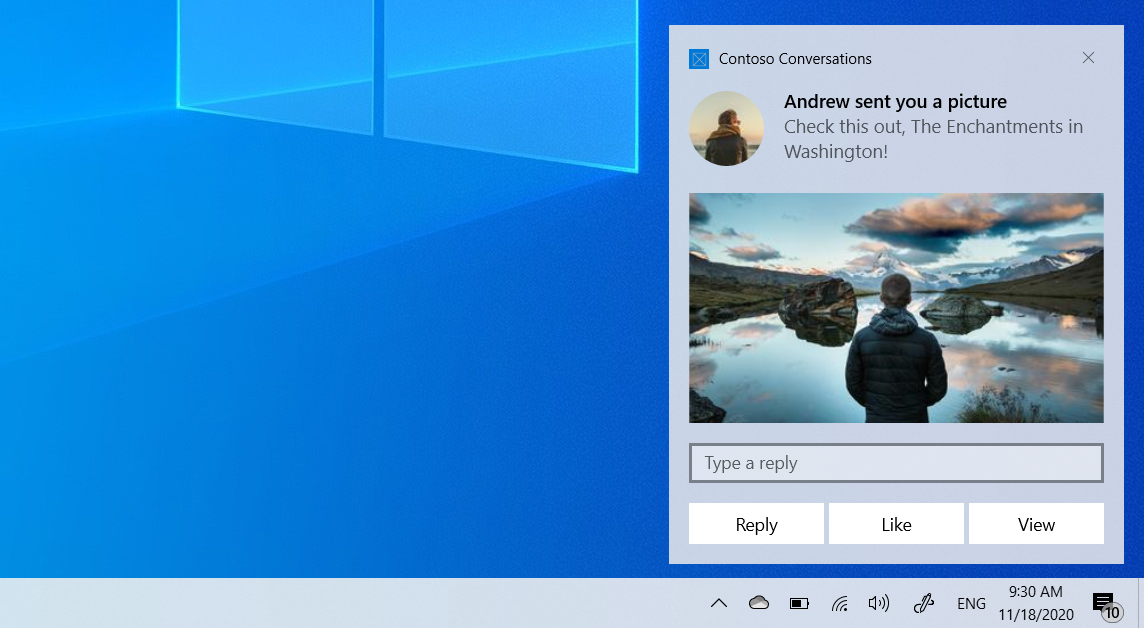
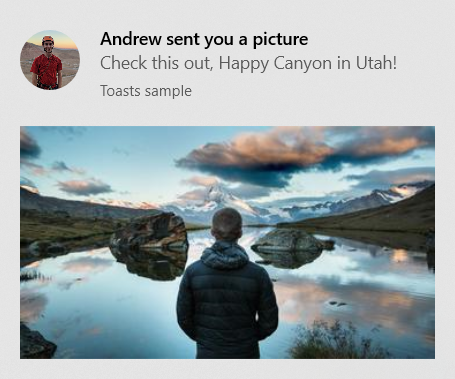
    ->AddText("Andrew sent you a picture")
    ->AddText("Check this out, The Enchantments in Washington!")
    ->Show();
Step 4: Handling activation
When the user clicks your notification (or a button on the notification with foreground activation), your app's App.xaml.cpp OnActivated will be invoked.
App.xaml.cpp
void App::OnActivated(IActivatedEventArgs^ e)
{
    // Handle notification activation
    if (e->Kind == ActivationKind::ToastNotification)
    {
        ToastNotificationActivatedEventArgs^ toastActivationArgs = (ToastNotificationActivatedEventArgs^)e;

        // Obtain the arguments from the notification
        ToastArguments^ args = ToastArguments::Parse(toastActivationArgs->Argument);

        // Obtain any user input (text boxes, menu selections) from the notification
        auto userInput = toastActivationArgs->UserInput;

        // TODO: Show the corresponding content
    }
}
Important
You must initialize your frame and activate your window just like your OnLaunched code. OnLaunched is NOT called if the user clicks on your toast, even if your app was closed and is launching for the first time. We often recommend combining OnLaunched and OnActivated into your own OnLaunchedOrActivated method since the same initialization needs to occur in both.
Activation in depth
The first step in making your notifications actionable is to add some launch args to your notification, so that your app can know what to launch when the user clicks the notification (in this case, we're including some information that later tells us we should open a conversation, and we know which specific conversation to open).
// Construct the content and show the toast!
(ref new ToastContentBuilder())

    // Arguments returned when user taps body of notification
    ->AddArgument("action", "viewConversation")
    ->AddArgument("conversationId", 9813)

    ->AddText("Andrew sent you a picture")
    ->Show();
Adding images
You can add rich content to notifications. We'll add an inline image and a profile (app logo override) image.
Note
Images can be used from the app's package, the app's local storage, or from the web. As of the Fall Creators Update, web images can be up to 3 MB on normal connections and 1 MB on metered connections. On devices not yet running the Fall Creators Update, web images must be no larger than 200 KB.

// Construct the content and show the toast!
(ref new ToastContentBuilder())
    ...

    // Inline image
    ->AddInlineImage(ref new Uri("https://picsum.photos/360/202?image=883"))

    // Profile (app logo override) image
    ->AddAppLogoOverride(ref new Uri("ms-appdata:///local/Andrew.jpg"), ToastGenericAppLogoCrop::Circle)

    ->Show();
Adding buttons and inputs
You can add buttons and inputs to make your notifications interactive. Buttons can launch your foreground app, a protocol, or your background task. We'll add a reply text box, a "Like" button, and a "View" button that opens the image.

// Construct the content
(ref new ToastContentBuilder())
    ->AddArgument("conversationId", 9813)
    ...

    // Text box for replying
    ->AddInputTextBox("tbReply", "Type a response")

    // Buttons
    ->AddButton((ref new ToastButton())
        ->SetContent("Reply")
        ->AddArgument("action", "reply")
        ->SetBackgroundActivation())

    ->AddButton((ref new ToastButton())
        ->SetContent("Like")
        ->AddArgument("action", "like")
        ->SetBackgroundActivation())

    ->AddButton((ref new ToastButton())
        ->SetContent("View")
        ->AddArgument("action", "view"))

    ->Show();
The activation of foreground buttons are handled in the same way as the main toast body (your App.xaml.cpp OnActivated will be called).
Handling background activation
When you specify background activation on your toast (or on a button inside the toast), your background task will be executed instead of activating your foreground app.
For more information on background tasks, please see Support your app with background tasks.
If you are targeting build 14393 or later, you can use in-process background tasks, which greatly simplify things. Note that in-process background tasks will fail to run on older versions of Windows. We'll use an in-process background task in this code sample.
const string taskName = "ToastBackgroundTask";

// If background task is already registered, do nothing
if (BackgroundTaskRegistration.AllTasks.Any(i => i.Value.Name.Equals(taskName)))
    return;

// Otherwise request access
BackgroundAccessStatus status = await BackgroundExecutionManager.RequestAccessAsync();

// Create the background task
BackgroundTaskBuilder builder = new BackgroundTaskBuilder()
{
    Name = taskName
};

// Assign the toast action trigger
builder.SetTrigger(new ToastNotificationActionTrigger());

// And register the task
BackgroundTaskRegistration registration = builder.Register();
Then in your App.xaml.cs, override the OnBackgroundActivated method. You can then retrieve the pre-defined arguments and user input, similar to the foreground activation.
App.xaml.cs
protected override async void OnBackgroundActivated(BackgroundActivatedEventArgs args)
{
    var deferral = args.TaskInstance.GetDeferral();

    switch (args.TaskInstance.Task.Name)
    {
        case "ToastBackgroundTask":
            var details = args.TaskInstance.TriggerDetails as ToastNotificationActionTriggerDetail;
            if (details != null)
            {
                string arguments = details.Argument;
                var userInput = details.UserInput;

                // Perform tasks
            }
            break;
    }

    deferral.Complete();
}
Set an expiration time
In Windows 10 and 11, all toast notifications go in Action Center after they are dismissed or ignored by the user, so users can look at your notification after the popup is gone.
However, if the message in your notification is only relevant for a period of time, you should set an expiration time on the toast notification so the users do not see stale information from your app. For example, if a promotion is only valid for 12 hours, set the expiration time to 12 hours. In the code below, we set the expiration time to be 2 days.
Note
The default and maximum expiration time for local toast notifications is 3 days.
// Create toast content and show the toast!
(ref new ToastContentBuilder())
    ->AddText("Expires in 2 days...")
    ->Show(toast =>
    {
        toast->ExpirationTime = DateTime::Now->AddDays(2);
    });
Provide a primary key for your toast
If you want to programmatically remove or replace the notification you send, you need to use the Tag property (and optionally the Group property) to provide a primary key for your notification. Then, you can use this primary key in the future to remove or replace the notification.
To see more details on replacing/removing already delivered toast notifications, please see Quickstart: Managing toast notifications in action center (XAML).
Tag and Group combined act as a composite primary key. Group is the more generic identifier, where you can assign groups like "wallPosts", "messages", "friendRequests", etc. And then Tag should uniquely identify the notification itself from within the group. By using a generic group, you can then remove all notifications from that group by using the RemoveGroup API.
// Create toast content and show the toast!
(ref new ToastContentBuilder())
    ->AddText("New post on your wall!")
    ->Show(toast =>
    {
        toast.Tag = "18365";
        toast.Group = "wallPosts";
    });
Clear your notifications
Apps are responsible for removing and clearing their own notifications. When your app is launched, we do NOT automatically clear your notifications.
Windows will only automatically remove a notification if the user explicitly clicks the notification.
Here's an example of what a messaging app should do…
- User receives multiple toasts about new messages in a conversation
- User taps one of those toasts to open the conversation
- The app opens the conversation and then clears all toasts for that conversation (by using RemoveGroup on the app-supplied group for that conversation)
- User's Action Center now properly reflects the notification state, since there are no stale notifications for that conversation left in Action Center.
To learn about clearing all notifications or removing specific notifications, see Quickstart: Managing toast notifications in action center (XAML).
ToastNotificationManagerCompat::History->Clear();
Resources
Windows developer
Feedback
Coming soon: Throughout 2024 we will be phasing out GitHub Issues as the feedback mechanism for content and replacing it with a new feedback system. For more information see: https://aka.ms/ContentUserFeedback.
Submit and view feedback for
