Tutorial: Unpack, connect, and unlock Azure Data Box Disk
Article
Important
Hardware encryption support for Data Box Disk is currently available for regions within the US, Europe, and Japan.
Azure Data Box disk with hardware encryption requires a SATA III connection. All other connections, including USB, are not supported.
Caution
This article references CentOS, a Linux distribution that is nearing End Of Life (EOL) status. Please consider your use and planning accordingly. For more information, see the CentOS End Of Life guidance.
This tutorial describes how to unpack, connect, and unlock your Azure Data Box Disk.
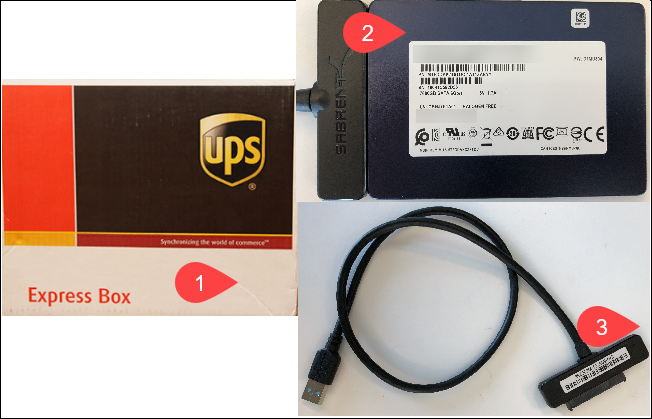
The Data Box Disks are mailed in a small shipping Box. Open the box and remove its contents. Check that the box has 1 to 5 solid-state disks (SSDs) and a USB connecting cable per disk. Inspect the box for any evidence of tampering, or any other obvious damage.
If the shipping box is tampered or severely damaged, do not open the box. Contact Microsoft Support to help you assess whether the disks are in good working order and if they need to ship you a replacement.
Verify that the box has a clear sleeve containing a shipping label (under the current label) for return shipment. If this label is lost or damaged, you can always download and print a new one from the Azure portal.
Save the box and packaging foam for return shipment of the disks.
Connect disks
Important
Azure Data Box disk with hardware encryption is only supported and tested for Linux-based operating systems. To access disks using a Windows OS-based device, download the Data Box Disk toolset and run the Data Box Disk SED Unlock tool.
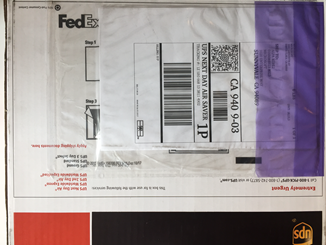
Use the included USB cable to connect the disk to a Windows or Linux machine running a supported version. For more information on supported OS versions, go to Azure Data Box Disk system requirements.
Connect the disks to an available SATA port on a Linux-based host running a supported version. For more information on supported OS versions, go to Azure Data Box Disk system requirements.
Retrieve your passkey
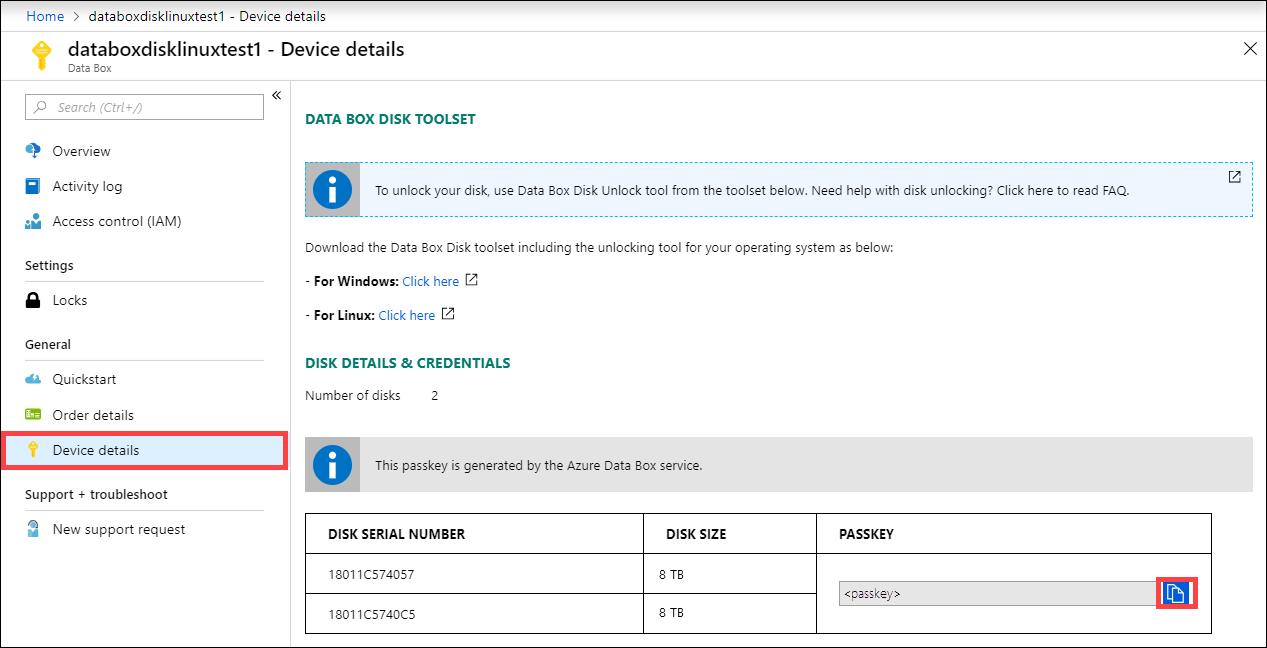
In the Azure portal, navigate to your Data Box Disk Order. Search for it by navigating to General > All resources, then select your Data Box Disk Order. Use the copy icon to copy the passkey. This passkey will be used to unlock the disks.
Perform the following steps to connect and unlock your disks.
In the Azure portal, navigate to your Data Box Disk Order. Search for it by navigating to General > All resources, then select your Data Box Disk Order.
Download the Data Box Disk toolset corresponding to the Windows client. This toolset contains 3 tools: Data Box Disk Unlock tool, Data Box Disk Validation tool, and Data Box Disk Split Copy tool.
This procedure requires only the Data Box Disk Unlock tool. The remaining tools will be used in subsequent steps.
Extract the toolset on the same computer that you will use to copy the data.
Open a Command Prompt window or run Windows PowerShell as administrator on the same computer.
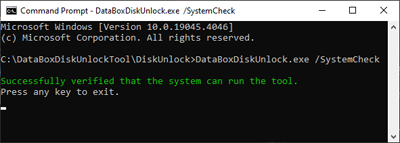
Verify that your client computer meets the operating system requirements for the Data Box Unlock tool. Run a system check in the folder containing the extracted Data Box Disk toolset as shown in the following example.
.\DataBoxDiskUnlock.exe /SystemCheck
The following sample output confirms that your client computer meets the operating system requirements.
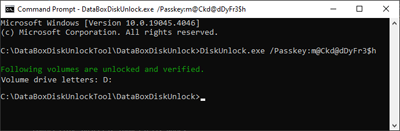
Run DataBoxDiskUnlock.exe, providing the passkey obtained in the Retrieve your passkey section. The passkey is submitted as the Passkey parameter value as shown in the following example.
.\DataBoxDiskUnlock.exe /Passkey:<testPasskey>
A successful response includes the drive letter assigned to the disk as shown in the following example output.
Repeat the unlock steps for any future disk reinserts. If you need help with the Data Box Disk unlock tool, use the help command as shown in the following sample code and example output.
.\DataBoxDiskUnlock.exe /help
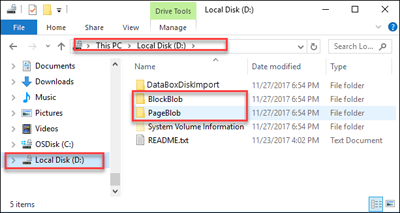
After the disk is unlocked, you can view the contents of the disk.
Note
Don't format or modify the contents or existing file structure of the disk.
Perform the following steps to connect and unlock hardware encrypted Data Box disks on a Linux-based machine.
The Trusted Platform Module (TPM) must be enabled on Linux systems for SATA-based drives. To enable TPM, set libata.allow_tpm to 1 by editing the GRUB config as shown in the following distro-specific examples. More details can be found on the Drive-Trust-Alliance public Wiki located at https://github.com/Drive-Trust-Alliance/sedutil/wiki.
Warning
Enabling the TPM on a device might require a reboot.
The following example contains the reboot command. Ensure that no data will be lost before running the script.
SEDUtil is an external utility for Self-Encrypting Drives. This is not managed by Microsoft. More information, including license information for this utility, can be found at https://sedutil.com/.
Extract SEDUtil to a local path on the machine and create a symbolic link to the utility path using the following example. Alternatively, you can add the utility path to the PATH environment variable.
chmod +x /path/to/sedutil-cli

#add a symbolic link to the extracted sedutil tool
sudo ln -s /path/to/sedutil-cli /usr/bin/sedutil-cli
The sedutil-cli –scan command lists all the drives connected to the server. The command is distro agnostic.
sudo sedutil-cli --scan
The following example output confirms that the validation completed successfully.
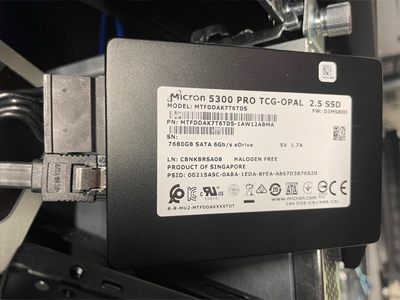
Azure disks can be identified using the following command. Disk serial numbers can be verified for a volume using the following command.
sedutil-cli --query <volume>
Run the Data Box Disk Unlock Utility from the Linux toolset extracted in a previous step. Supply the passkey from the Azure portal you obtained from the Connect to disks section. Optionally, you can specify a list of BitLocker encrypted volumes to unlock. The passkey and volume list should be specified within single quotes as shown in the following example.
chmod +x DataBoxDiskUnlock
#add a symbolic link to the downloaded DataBoxDiskUnlock tool
sudo ln -s /path/to/DataBoxDiskUnlock /usr/bin/DataBoxDiskUnlock
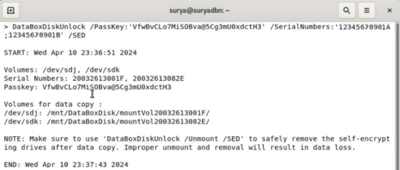
sudo ./DataBoxDiskUnlock /Passkey:<'passkey'> /SerialNumbers:<'serialNumber1,serialNumber2'> /SED
The following example output indicates that the volume was successfully unlocked. The mount point is also displayed for the volume in which your data can be copied.
Important
Repeat the steps to unlock the disk for any future disk reinserts.
You can use the help switch if you need additional assistance with the Data Box Disk Unlock Utility as shown in the following example.
sudo ./DataBoxDiskUnlock /Help
The following image shows the sample output.
After the disk is unlocked, you can go to the mount point and view the contents of the disk. You are now ready to copy the data to folders based on the desired destination data type.
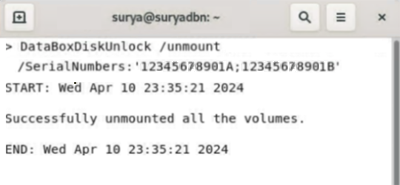
After you've finished copying your data to the disk, make sure to unmount and remove the disk safely using the following command.
The following example output confirms that the volume unmounted successfully.
You can validate the data on your disk by connecting to a Windows-based machine with a supported operating system. Be sure to review the OS requirements for Windows-based operating systems before connecting disks to your local machine.
Perform the following steps to unlock self-encrypting disks using Windows-based machines.
Download the Data Box Disk toolset for Windows clients and extract it to the same computer. Although the toolset contains four tools, only the Data Box SED Unlock tool is used for hardware-encrypted disks.
Connect your Data Box Disk to an available SATA 3 connection on your Windows-based machine.
Using a command prompt or PowerShell, run the following command to unlock self-encrypting disks.
Perform the following steps to connect and unlock software encrypted Data Box disks on a Linux-based machine.
In the Azure portal, go to General > Device details.
Download the Data Box Disk toolset. Extract and copy the Data Box Disk Unlock Utility to a local path on your machine.
Navigate to the folder containing the Data Box Disk toolset. Open a terminal window on your Linux client and change the file permissions to allow execution as shown in the following sample:
After the chmod command has been executed, verify that the file permissions are changed by running the ls command as shown in the following sample output.
    [user@localhost Downloads]$ chmod +x DataBoxDiskUnlock
    [user@localhost Downloads]$ chmod +x DataBoxDiskUnlock_Prep.sh
    [user@localhost Downloads]$ ls -l
    -rwxrwxr-x. 1 user user 1152664 Aug 10 17:26 DataBoxDiskUnlock
    -rwxrwxr-x. 1 user user 795 Aug 5 23:26 DataBoxDiskUnlock_Prep.sh
Execute the following script to install the Data Box Disk Unlock binaries. Use sudo to run the command as root. An acknowledgment is displayed in the terminal to notify you of the successful installation.
sudo ./DataBoxDiskUnlock_Prep.sh
The script validates that your client computer is running a supported operating system as shown in the sample output.
[user@localhost Documents]$ sudo ./DataBoxDiskUnlock_Prep.sh
    OS = CentOS Version = 6.9
    Release = CentOS release 6.9 (Final)
    Architecture = x64

    The script will install the following packages and dependencies.
    epel-release
    dislocker
    ntfs-3g
    fuse-dislocker
    Do you wish to continue? y|n :|
Type y to continue the install. The script installs the following packages:
epel-release - The repository containing the following three packages.
dislocker and fuse-dislocker - Utilities to decrypt BitLocker encrypted disks.
ntfs-3g - The package that helps mount NTFS volumes.
The notification is displayed in the terminal to inform you that the packages are successfully installed.
Dependency Installed: compat-readline5.x86 64 0:5.2-17.I.el6 dislocker-libs.x86 64 0:0.7.1-8.el6 mbedtls.x86 64 0:2.7.4-l.el6        ruby.x86 64 0:1.8.7.374-5.el6
ruby-libs.x86 64 0:1.8.7.374-5.el6
Complete!
Loaded plugins: fastestmirror, refresh-packagekit, security
Setting up Remove Process
Resolving Dependencies

Running transaction check
Package epel-release.noarch 0:6-8 will be erased  Finished Dependency Resolution

Dependencies Resolved
Package        Architecture        Version        Repository        Size
Removing:  epel-release        noarch         6-8        @extras        22 k
Transaction Summary
Remove        1 Package(s)
Installed size: 22 k
Downloading Packages:
Running rpmcheckdebug
Running Transaction Test
Transaction Test Succeeded
Running Transaction
Erasing : epel-release-6-8.noarch
Verifying : epel-release-6-8.noarch
Removed:
epel-release.noarch 0:6-8
Complete!
Dislocker is installed by the script.
OpenSSL is already installed.
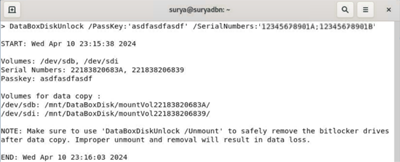
Run the Data Box Disk Unlock tool, supplying the passkey retrieved from the Azure portal. Optionally, specify a list of BitLocker encrypted serial numbers to unlock. The passkey and serial numbers should be contained within single quotes as shown.
sudo ./DataBoxDiskUnlock /PassKey:'<Passkey from Azure portal>'
    /SerialNumbers: '22183820683A;221838206839'
The following sample output confirms that the volume was successfully unlocked. The mount point is also displayed for the volume in which your data can be copied.
Repeat the unlock steps for any future disk reinserts. Use the help command for additional assistance with the Data Box Disk unlock tool.
sudo //DataBoxDiskUnlock /Help
Sample output is shown below.
[user@localhost Downloads]$ DataBoxDiskUnlock /Help

START: Wed Apr 10 12:35:21 2024
DataBoxDiskUnlock is an utility managed by Microsoft which provides a convenient way to unlock BitLocker
and self-encrypted Data Box disks ordered through Azure portal.

More details available at https://learn.microsoft.com/en-us/azure/databox/data-box-disk-deploy-set-up
-----------------------------------------------------
USAGE:

Example: sudo DataBoxDiskUnlock /PassKey:'passkey'
Example: sudo DataBoxDiskUnlock /PassKey:'passkey' /Volumes:'/dev/sdb;/dev/sdc'
Example: sudo DataBoxDiskUnlock /PassKey:'passkey' /SerialNumbers:'20032613084B'
Example: sudo DataBoxDiskUnlock /PassKey:'passkey' /Volumes:'/dev/sdb' /SED
Example: sudo DataBoxDiskUnlock /PassKey:'passkey' /SerialNumbers:'20032613084B;214633033214' /SED
Example: sudo DataBoxDiskUnlock /Help
Example: sudo DataBoxDiskUnlock /Unmount
Example: sudo DataBoxDiskUnlock /Rescan  /Volumes:'/dev/sdb;/dev/sdc'

/PassKey       : This option takes a passkey as input and unlocks all of your disks.
                Get the passkey from your Data Box Disk order in Azure portal.
/Volumes       : This option is used to input a list of volumes.
/SerialNumbers : This option is used to input a list of serial numbers.
/Sed           : This option is used to unlock or unmount Self-Encrypted drives (hardware encryption).
                Volumes or Serial Numbers is a mandatory field when /SED flag is used.
/Help          : This option provides help on the tool usage and examples.
/Unmount       : This option unmounts all the volumes mounted by this tool.
/Rescan        : Perform SATA controller reset to repair the SATA link speed for specific volumes.
-----------------------------------------------------
After the disk is unlocked, you can go to the mount point and view the contents of the disk. You are now ready to copy the data to BlockBlob or PageBlob folders.
Note
Don't format or modify the contents or existing file structure of the disk.
After the required data is copied to the disk, make sure to unmount and remove the disk safely using the following command.
To unlock the disks on a Windows client, open a Command Prompt window or run Windows PowerShell as administrator on the same computer:
Type the following command in the same folder where Data Box Disk Unlock tool is installed.
.\DataBoxDiskUnlock.exe
Get the passkey from General > Device details in the Azure portal and provide it here. The drive letter assigned to the disk is displayed.
To unlock the disks on a Linux client, open a terminal. Go to the folder where you downloaded the software. Type the following commands to change the file permissions so that you can execute these files:
Execute the script to install all the required binaries.
sudo ./DataBoxDiskUnlock_Prep.sh
Run the Data Box Disk Unlock tool. Get the passkey from General > Device details in the Azure portal and provide it here. Optionally specify a list of BitLocker encrypted volumes within single quotes to unlock.
sudo ./DataBoxDiskUnlock /PassKey:'<passkey>'
Repeat the unlock steps for any future disk reinserts. Use the help command if you need help with the Data Box Disk unlock tool.
After the disk is unlocked, you can view the contents of the disk.
For more information on how to set up and unlock disks, go to Set up Data Box Disk.
Next steps
In this tutorial, you learned about Azure Data Box Disk topics such as:
Unpack your Data Box Disk
Connect to disks and get the passkey
Unlock disks on Windows client
Unlock disks on Linux client
Advance to the next tutorial to learn how to copy data on your Data Box Disk.
Coming soon: Throughout 2024 we will be phasing out GitHub Issues as the feedback mechanism for content and replacing it with a new feedback system. For more information see: https://aka.ms/ContentUserFeedback.


