Exercise - Clone a repository and gain context
Let's see how you can use Visual Studio Code to start a new project by cloning the project from an existing repository on GitHub.
Step 1: Clone a new repository from GitHub
Open a new Visual Studio Code window. From the Explorer view, you can select Clone Repository. You should see an option to clone from GitHub.
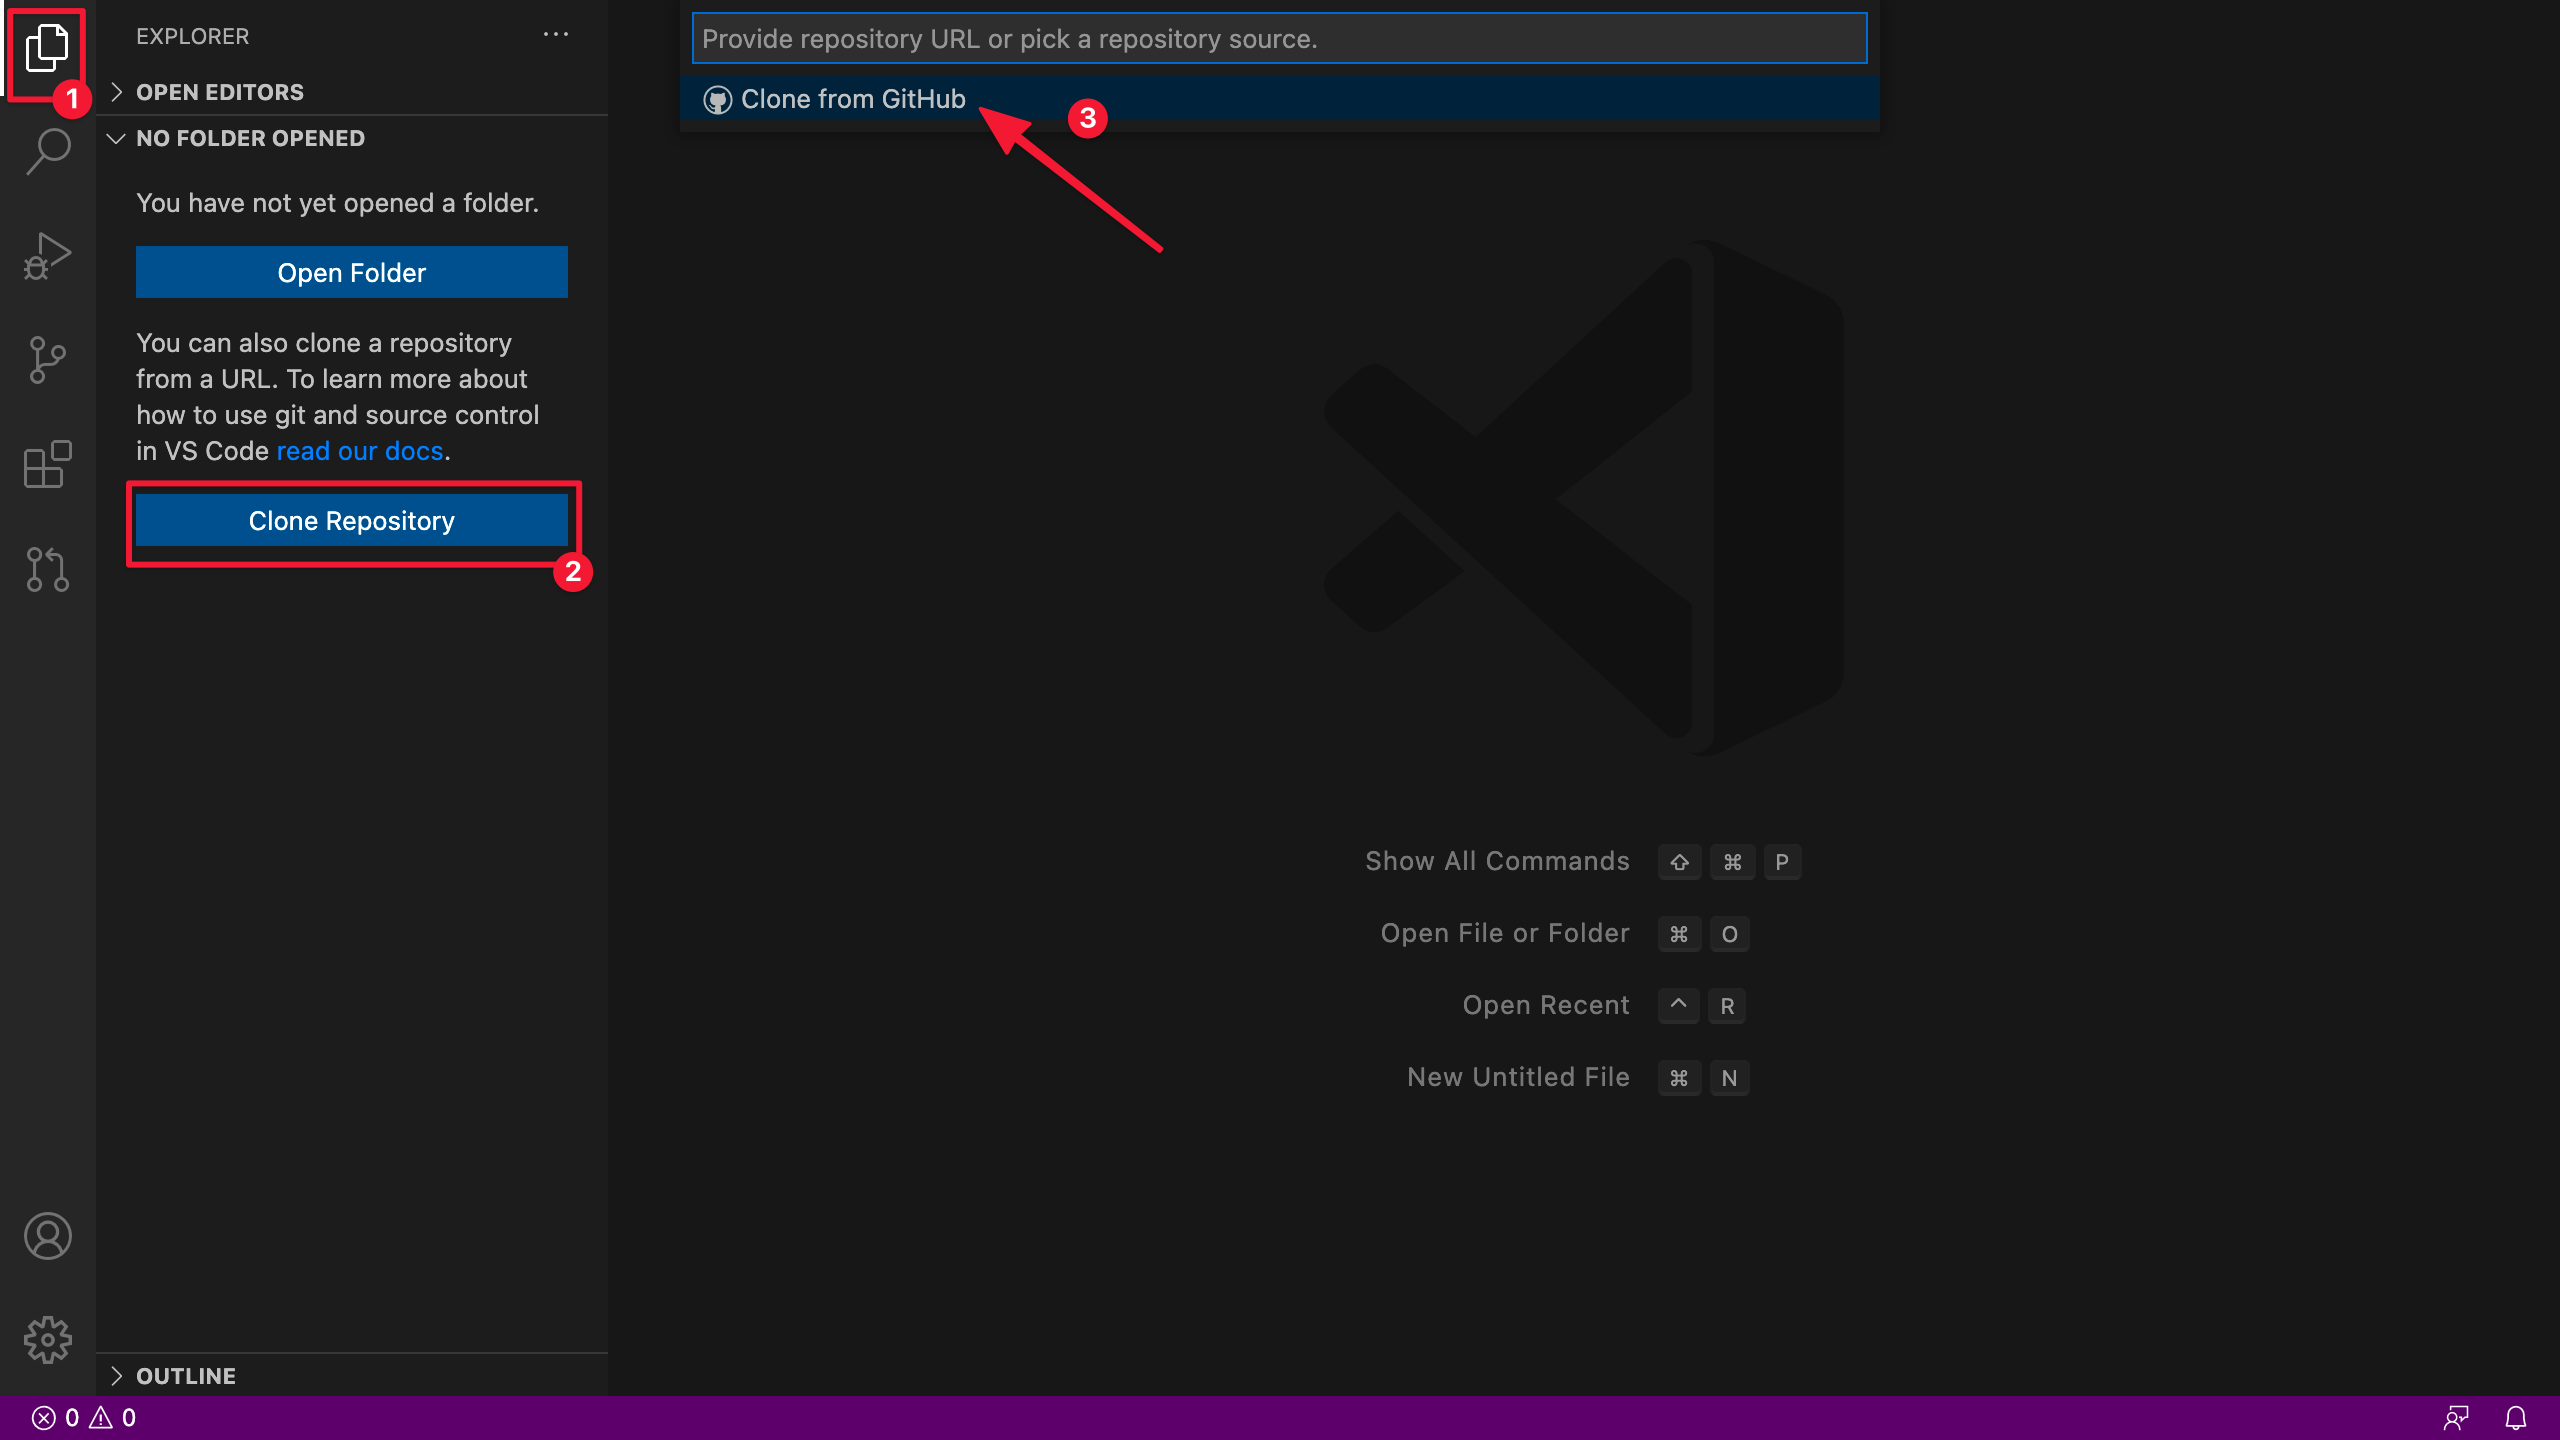
Select the Clone from GitHub option from the dropdown list, and you'll find a list of your repositories. You can also search for other repositories on GitHub. Search for a repository by using the path
MicrosoftDocs/mslearn-python-productsand select the first option.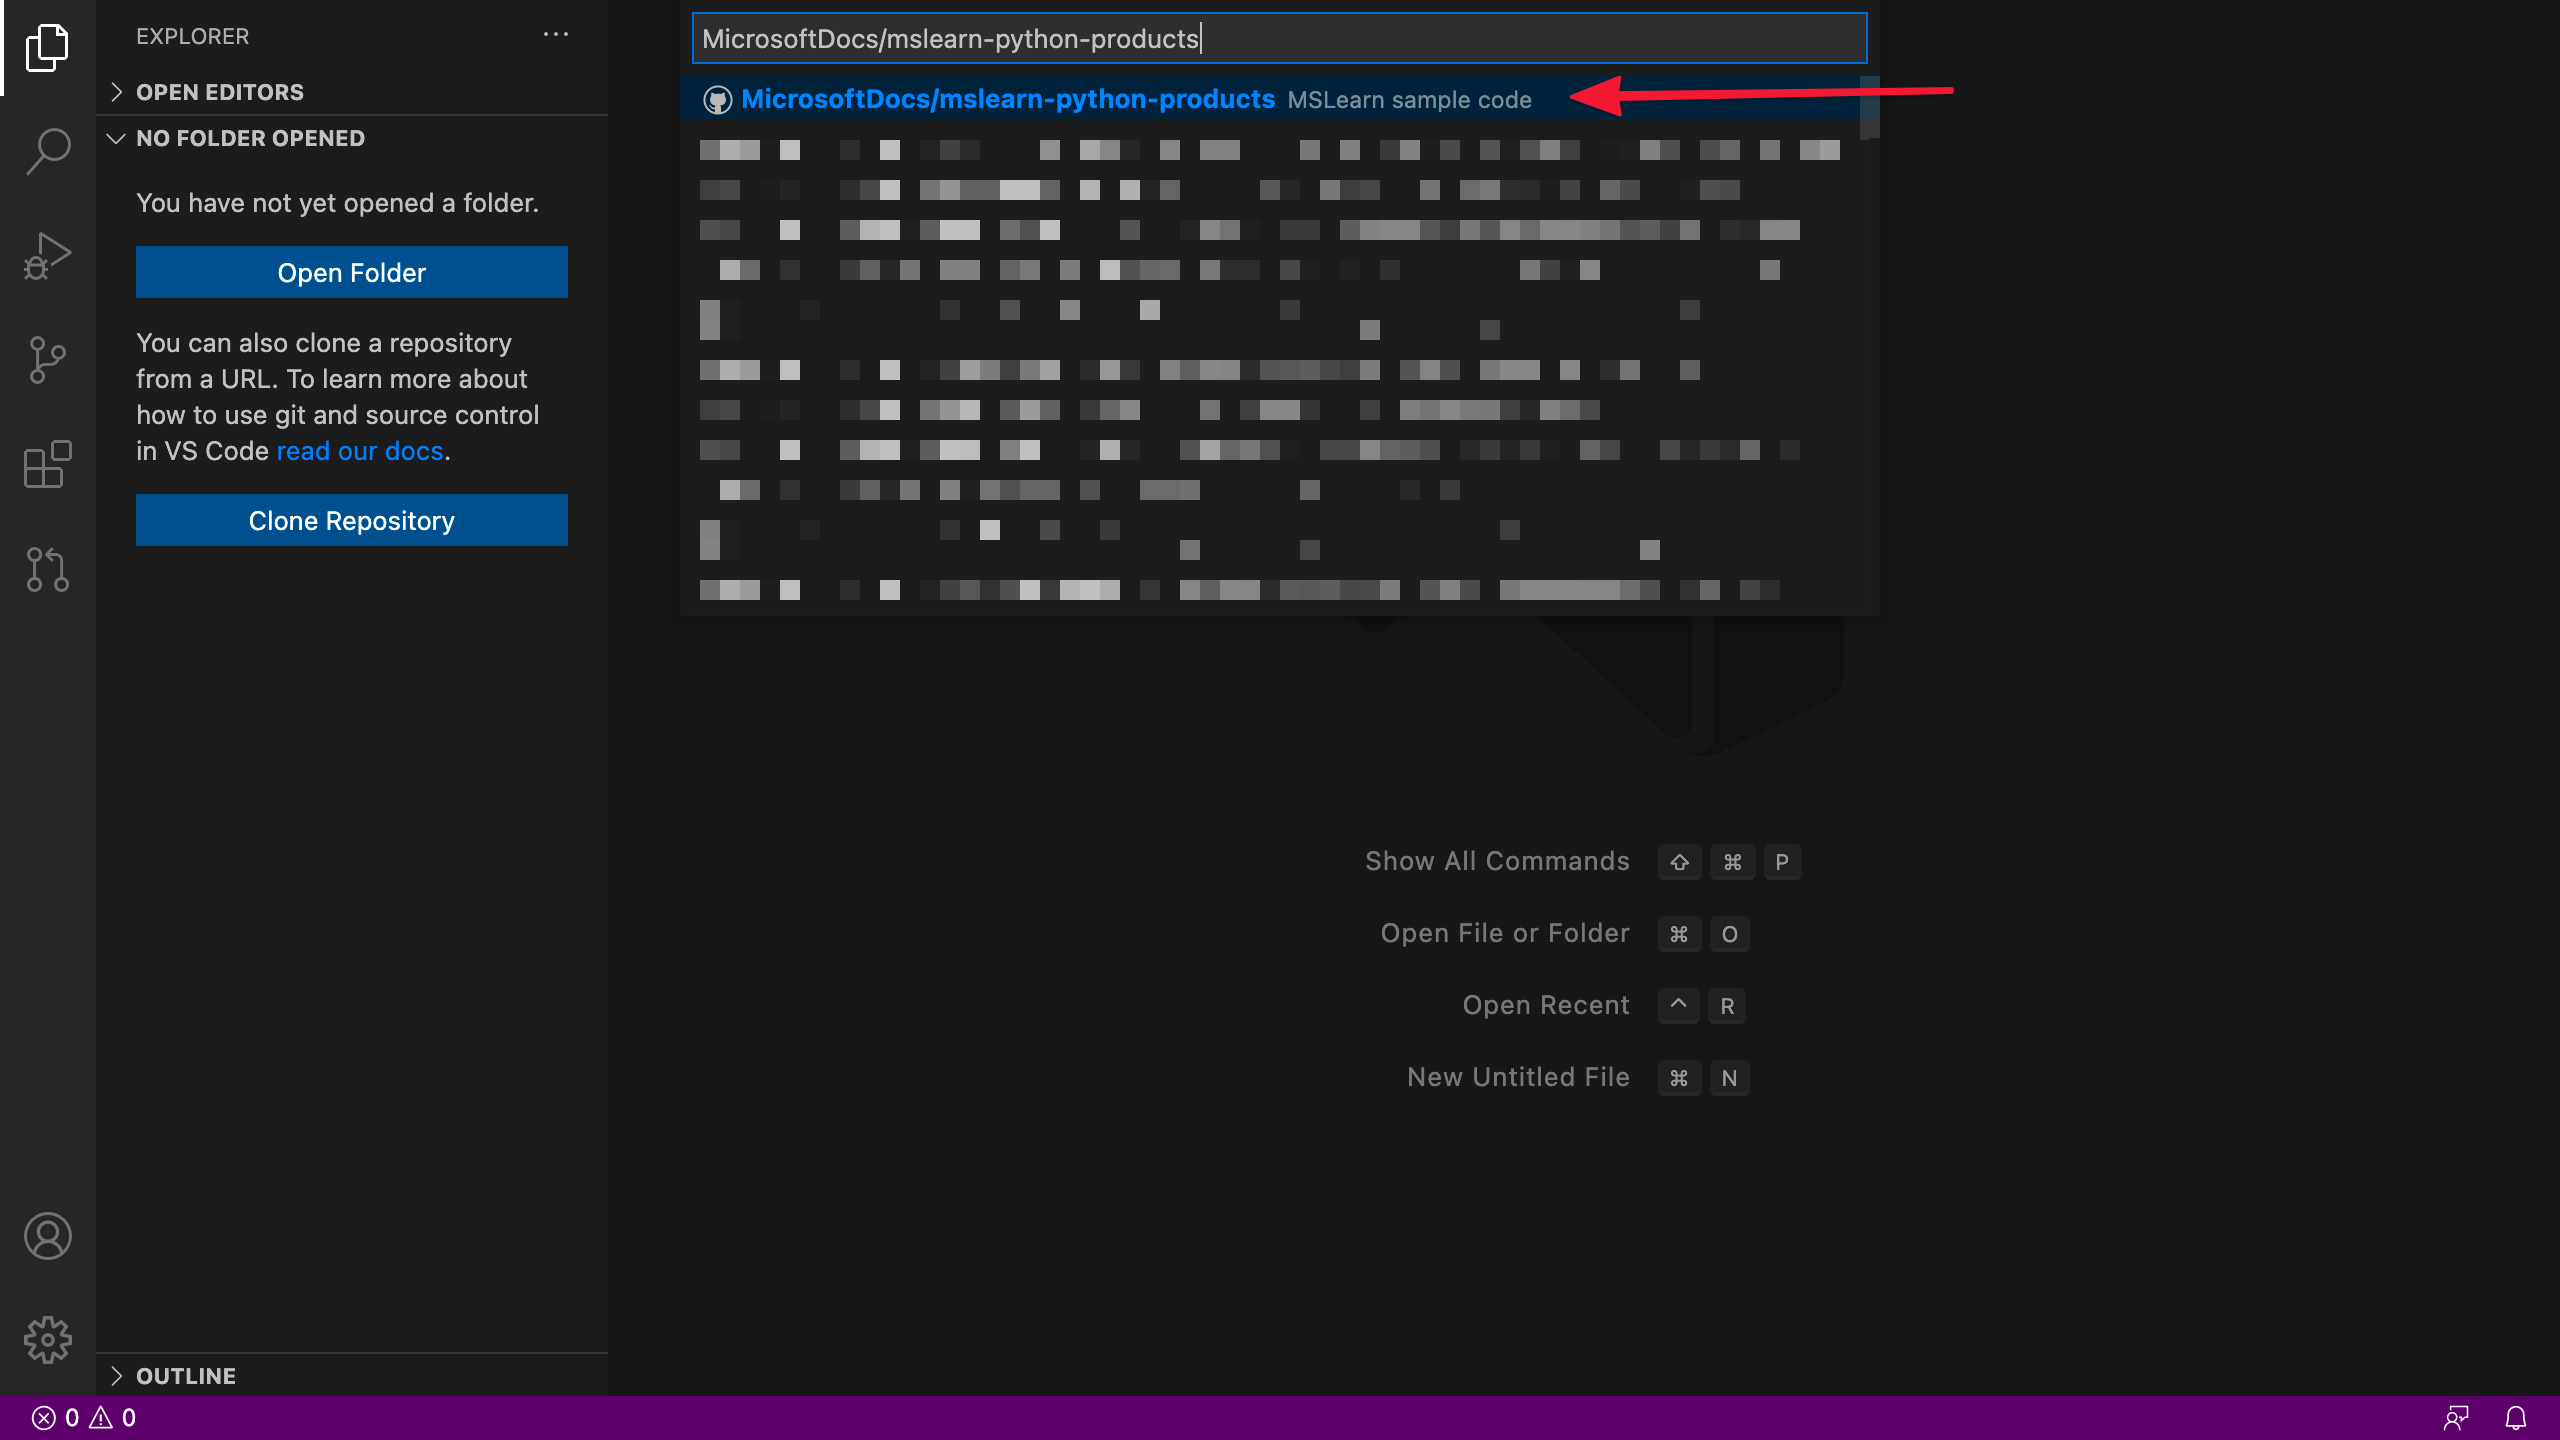
Choose a location on your computer where you want the repository to be cloned.
Select Open from the pop-up that appears after Visual Studio Code has cloned the repository.

Step 2: Compare changes in the commit history to gain context
Open the README.md file from the Explorer. After you have the file in the editor, expand the Timeline pane.
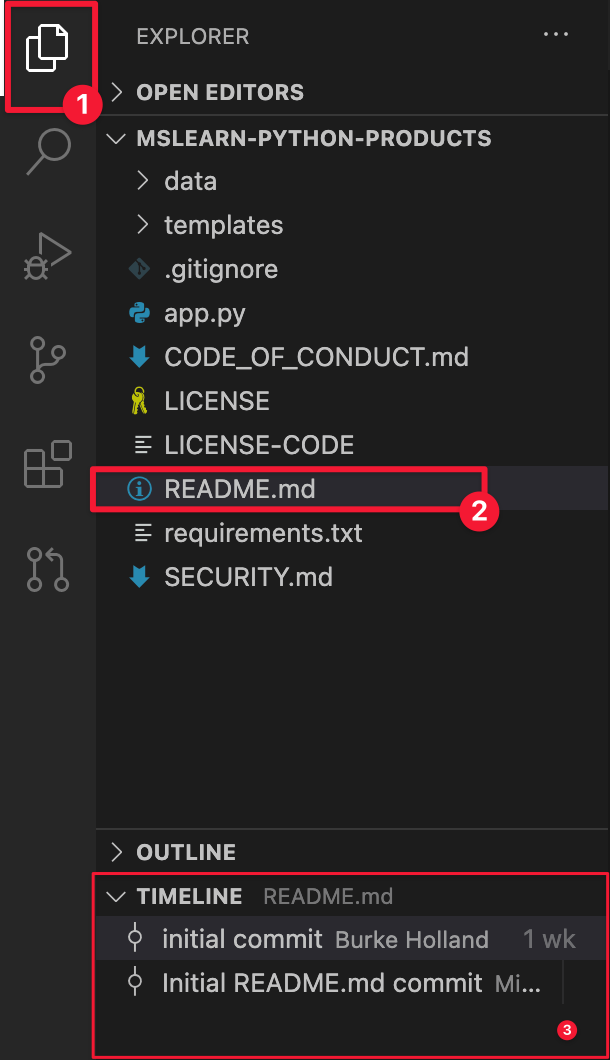
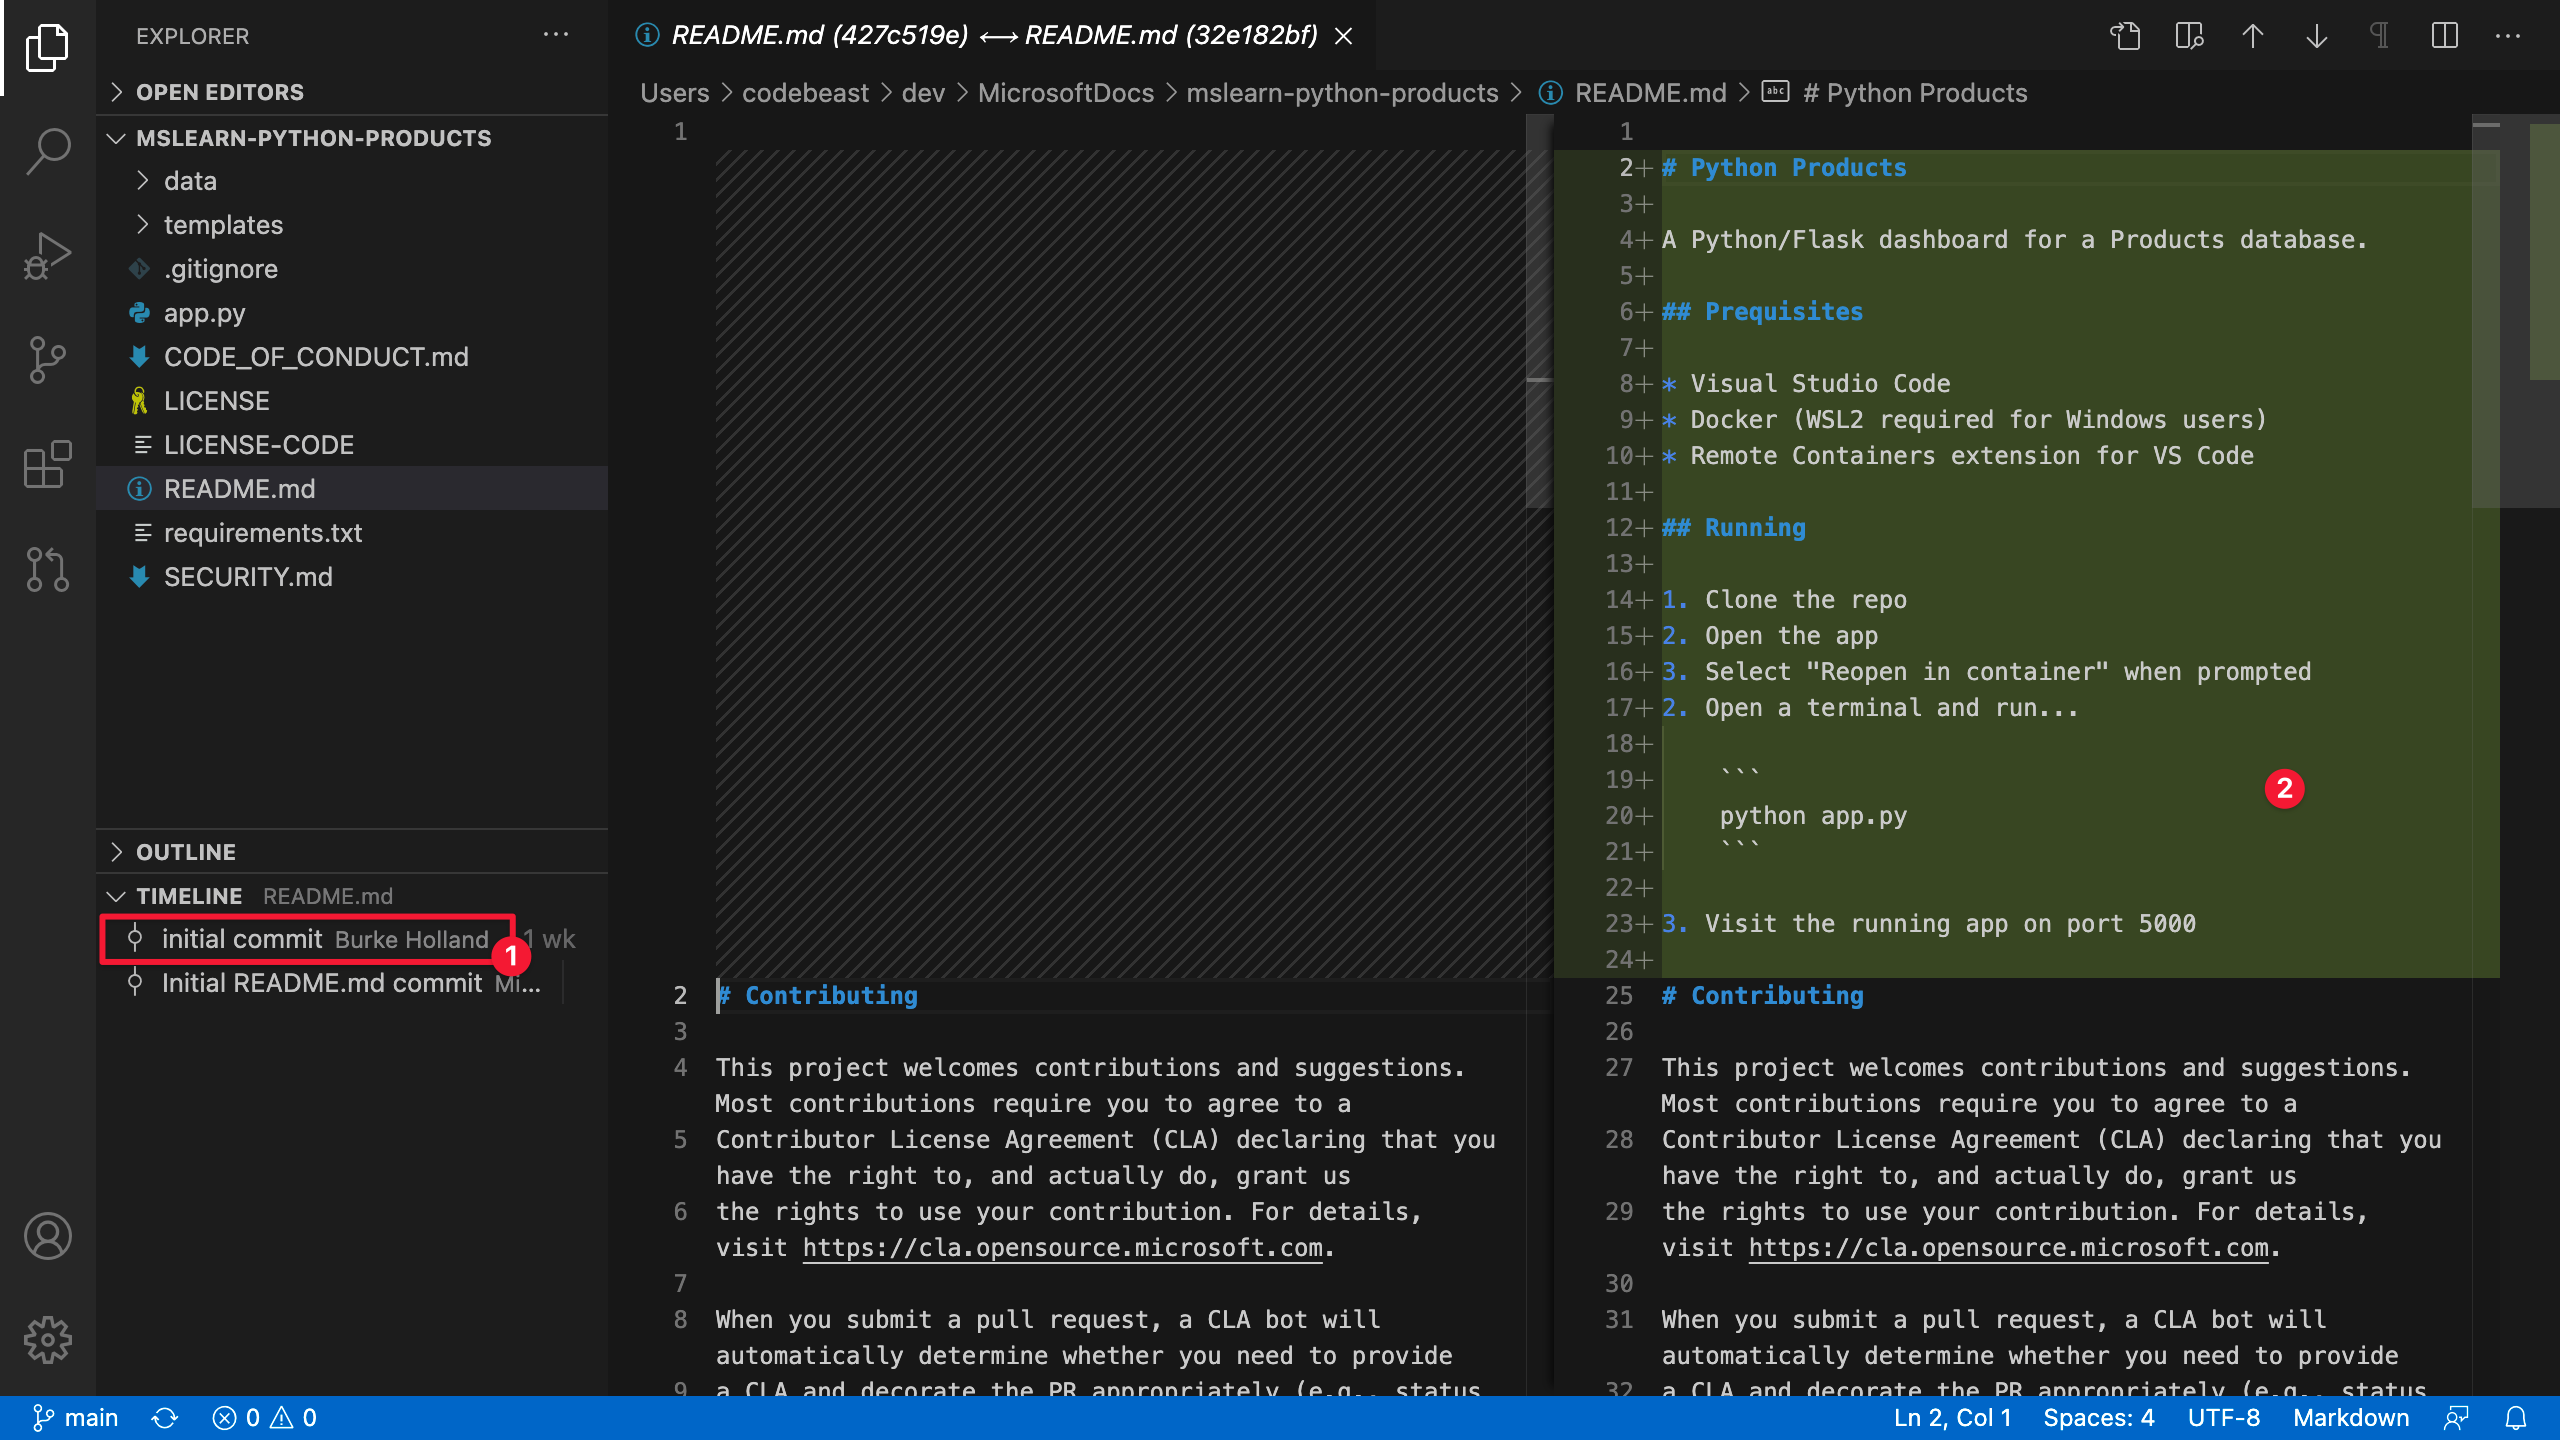
Select the commit made by the user Burke Holland. This step opens a read-only diff view so you can see all the changes associated with the commit. The green highlight shows that Burke has added those lines to the original content.
What you just did
Let's recap what you did in this section:
- Cloned a GitHub repo to your computer using Visual Studio Code
- Reviewed changes made to a file using the Timeline pane in Visual Studio Code