Exercise: Add behavior to your XAML page
You previously modified the Notes app to move the UI layout from C# code to XAML. You're now ready to add the following features to the page:
Support customizing the label's font color and background color, buttons, and editor control. In this way, it's easy to adjust the app to make it more accessible for users that require a high-contrast UI.
Adjust the Editor control's height on Android and iOS. When running on Windows, this control has sufficient width to allow the user to enter reasonable amount of text before it scrolls. On an Android phone or an iPhone, the narrower width results in scrolling occurring more quickly, so it's beneficial to provide more vertical space.
Use a static resource in XAML
You'll create a static class to hold the app's font color and background color values. You'll then use the x:Static markup extension to read these values from the class and apply them to the XAML markup for the controls on the page.
In Visual Studio, return to the Notes app you edited in the previous exercise.
Note
A working copy of the app is available in the exercise2 folder in exercise repository you cloned at the start of the previous exercise.
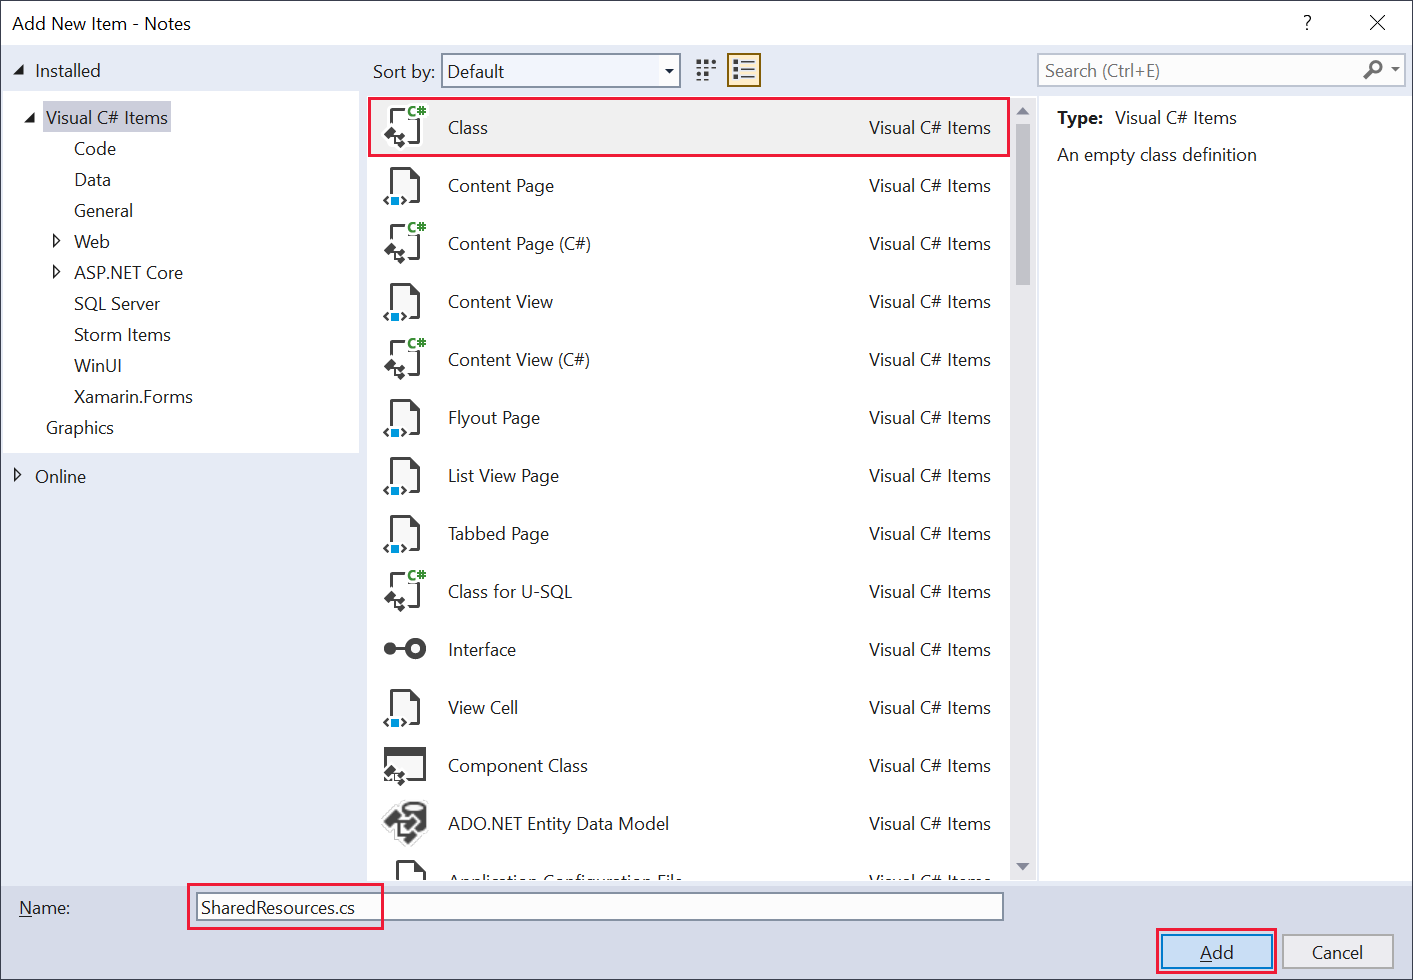
In the Solution Explorer window, right-click the Notes project, select Add, then select Class.
In the Add New Item dialog box, make sure the Class template is selected. Name the new class file SharedResources.cs, and then select Add:
In the SharedResources.cs file, replace the
usingdirectives with the following code, and mark the SharedResources class asstatic:namespace Notes; static class SharedResources { }Add the
static readonlyfield FontColor to the SharedResources class. This field currently provides a value that corresponds to blue, but you can modify it using any valid combination of RGB values:static class SharedResources { public static readonly Color FontColor = Color.FromRgb(0, 0, 0xFF); }Add a second
static readonlyfield named BackgroundColor, and set it to a color of your choice:static class SharedResources { ... public static readonly Color BackgroundColor = Color.FromRgb(0xFF, 0xF0, 0xAD); }Open the MainPage.xaml file.
Add the XML following namespace declaration to the
ContentPageelement, before thex:Classattribute. This declaration brings the classes in the C# Notes namespace into scope in the XAML page:<ContentPage ... xmlns:notes="clr-namespace:Notes" x:Class="Notes.MainPage" ...>Add the
TextColorattribute shown in the following code to theLabelcontrol. This markup uses thex:Staticmarkup extension to retrieve the values stored in thestaticfields in the SharedResources class:<Label Text="Notes" HorizontalOptions="Center" FontAttributes="Bold" TextColor="{x:Static Member=notes:SharedResources.FontColor}" />Use the
x:Staticmark-up extension to set theTextColorandBackgroundColorattributes for theEditorandButtoncontrols. The completed markup for your MainPage.xaml file should look like this:<ContentPage xmlns="http://schemas.microsoft.com/dotnet/2021/maui" xmlns:x="http://schemas.microsoft.com/winfx/2009/xaml" xmlns:notes="clr-namespace:Notes" x:Class="Notes.UIPage"> <VerticalStackLayout Padding="30,60,30,30"> <Label Text="Notes" HorizontalOptions="Center" FontAttributes="Bold" TextColor="{x:Static Member=notes:SharedResources.FontColor}" /> <Editor x:Name="editor" Placeholder="Enter your note" HeightRequest="100" TextColor="{x:Static Member=notes:SharedResources.FontColor}"/> <Grid Grid.Row="2" ColumnDefinitions="Auto,30,Auto"> <Button Grid.Column="0" Text="Save" WidthRequest="100" TextColor="{x:Static Member=notes:SharedResources.FontColor}" BackgroundColor="{x:Static Member=notes:SharedResources.BackgroundColor}" Clicked="OnSaveButtonClicked" /> <Button Grid.Column="2" Text="Delete" WidthRequest="100" TextColor="{x:Static Member=notes:SharedResources.FontColor}" BackgroundColor="{x:Static Member=notes:SharedResources.BackgroundColor}" Clicked="OnDeleteButtonClicked" /> </Grid> </VerticalStackLayout> </ContentPage>Note
This XAML code contains repetition of the markup that sets the
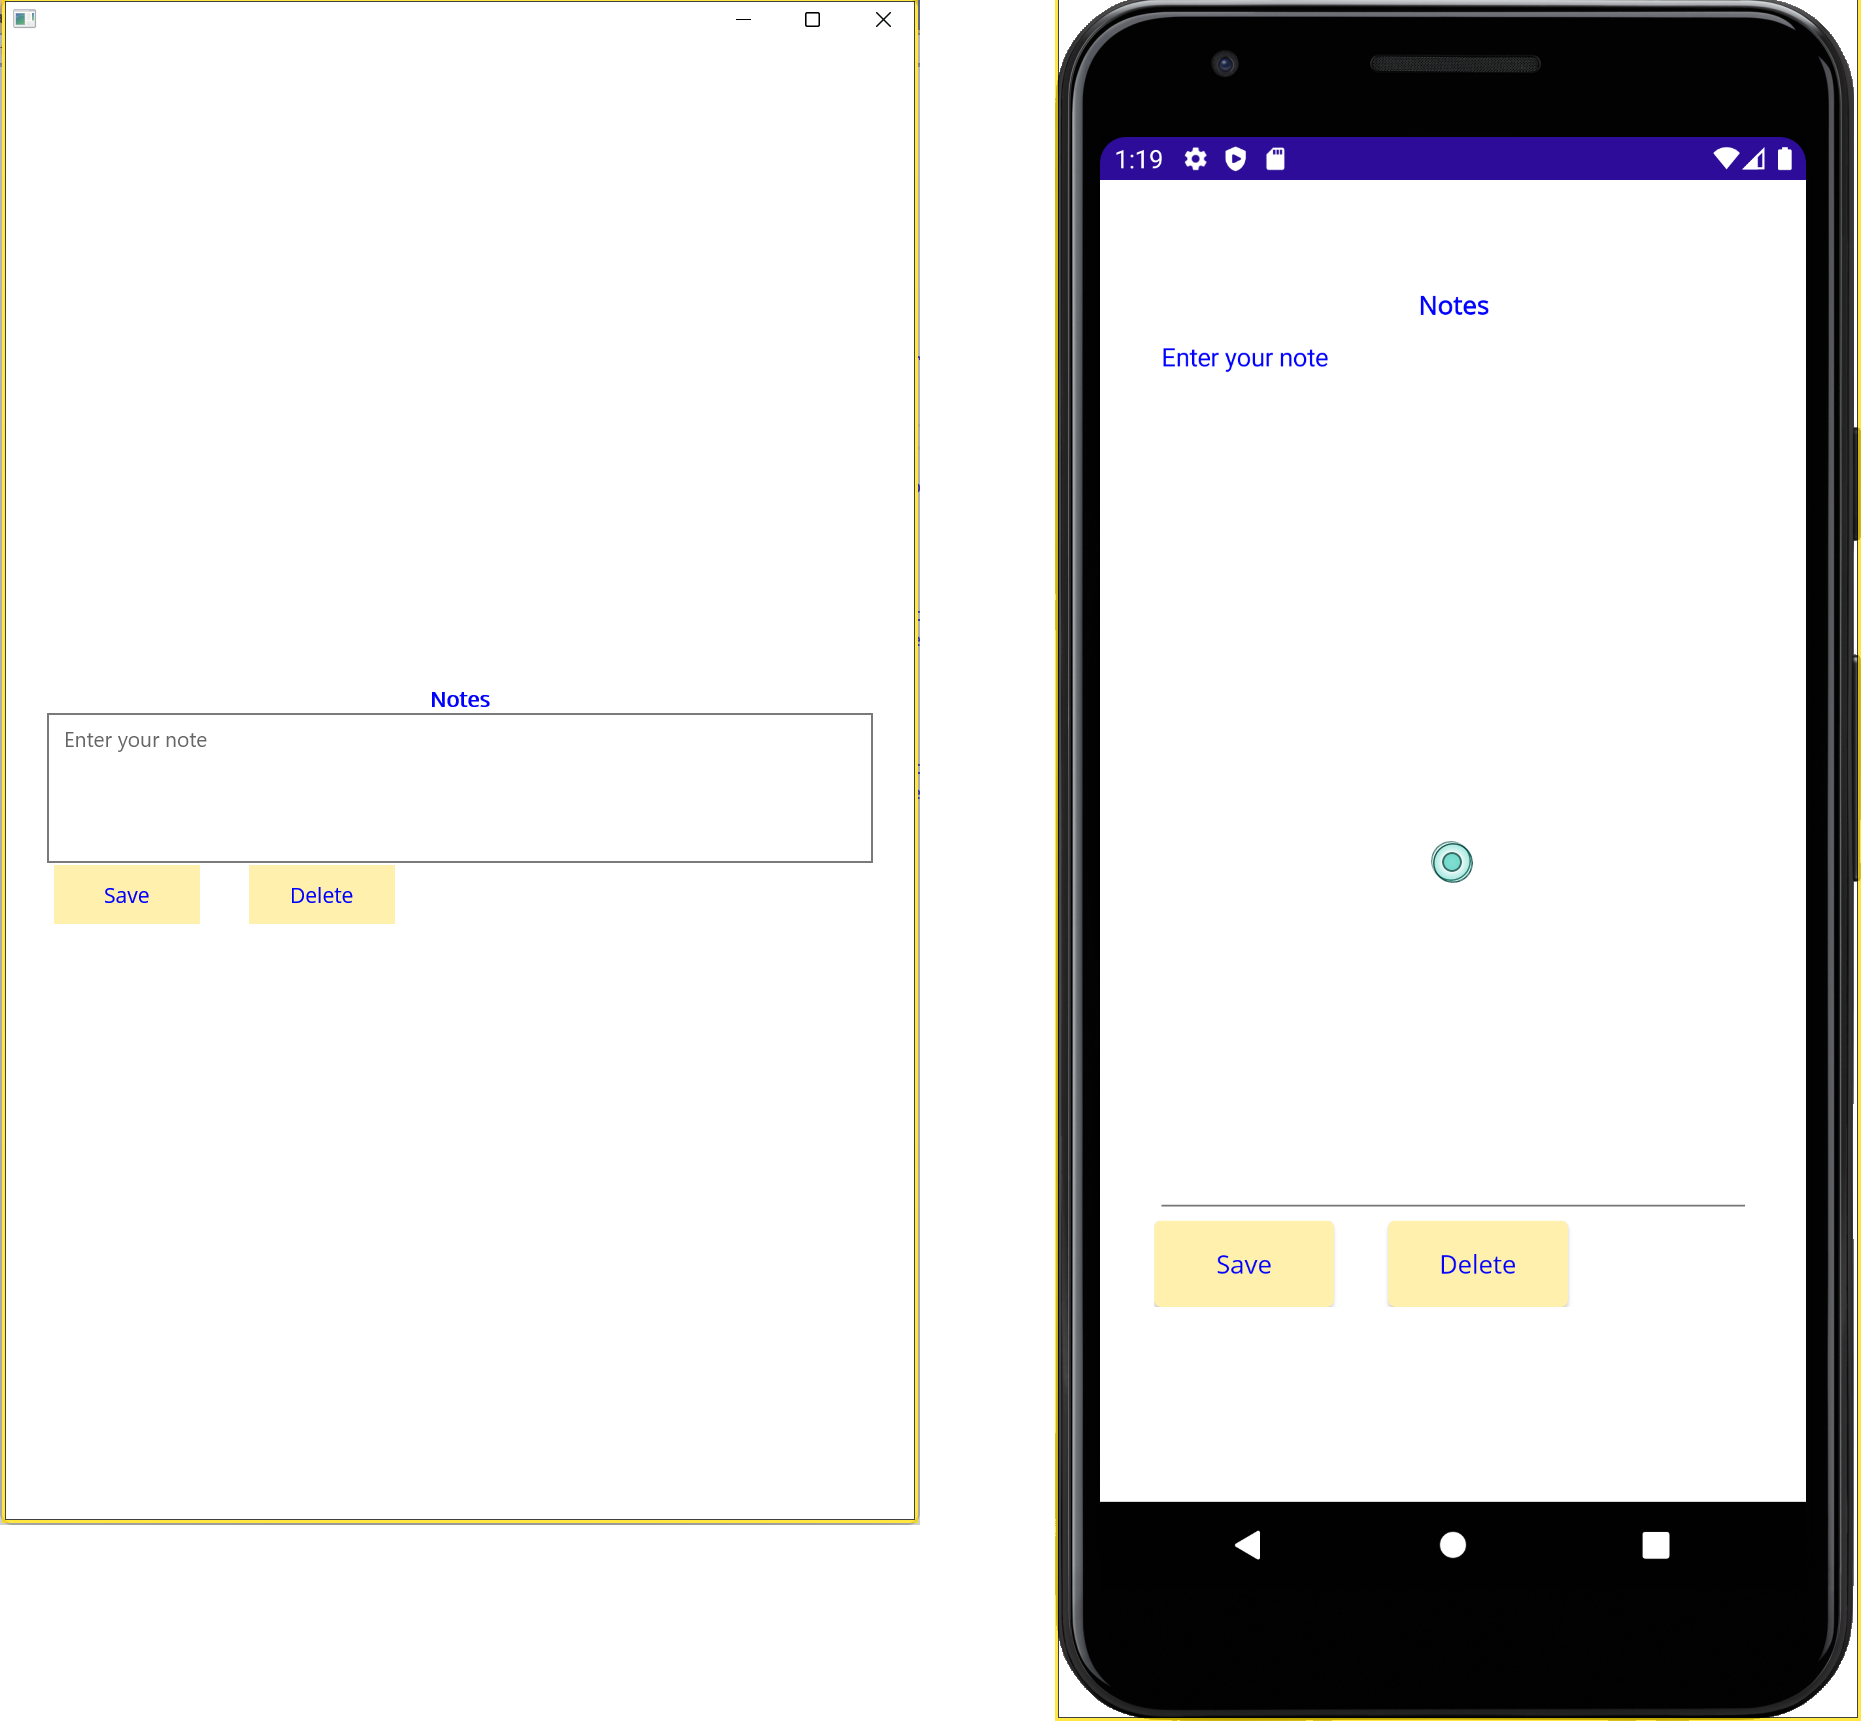
TextColorandBackgroundColorproperties. XAML lets you define resources that can be applied globally across an app by using a resource dictionary in the App.xaml file. We describe this technique in a later module.Rebuild the app and run it using Windows. Verify that the colors match those you specified in the SharedResources class. If you have time, also try running the app using the Android emulator:
Return to Visual Studio when you're done.
Add platform-specific customization
Open the MainPage.xaml file in Visual Studio.
Locate the definition of the
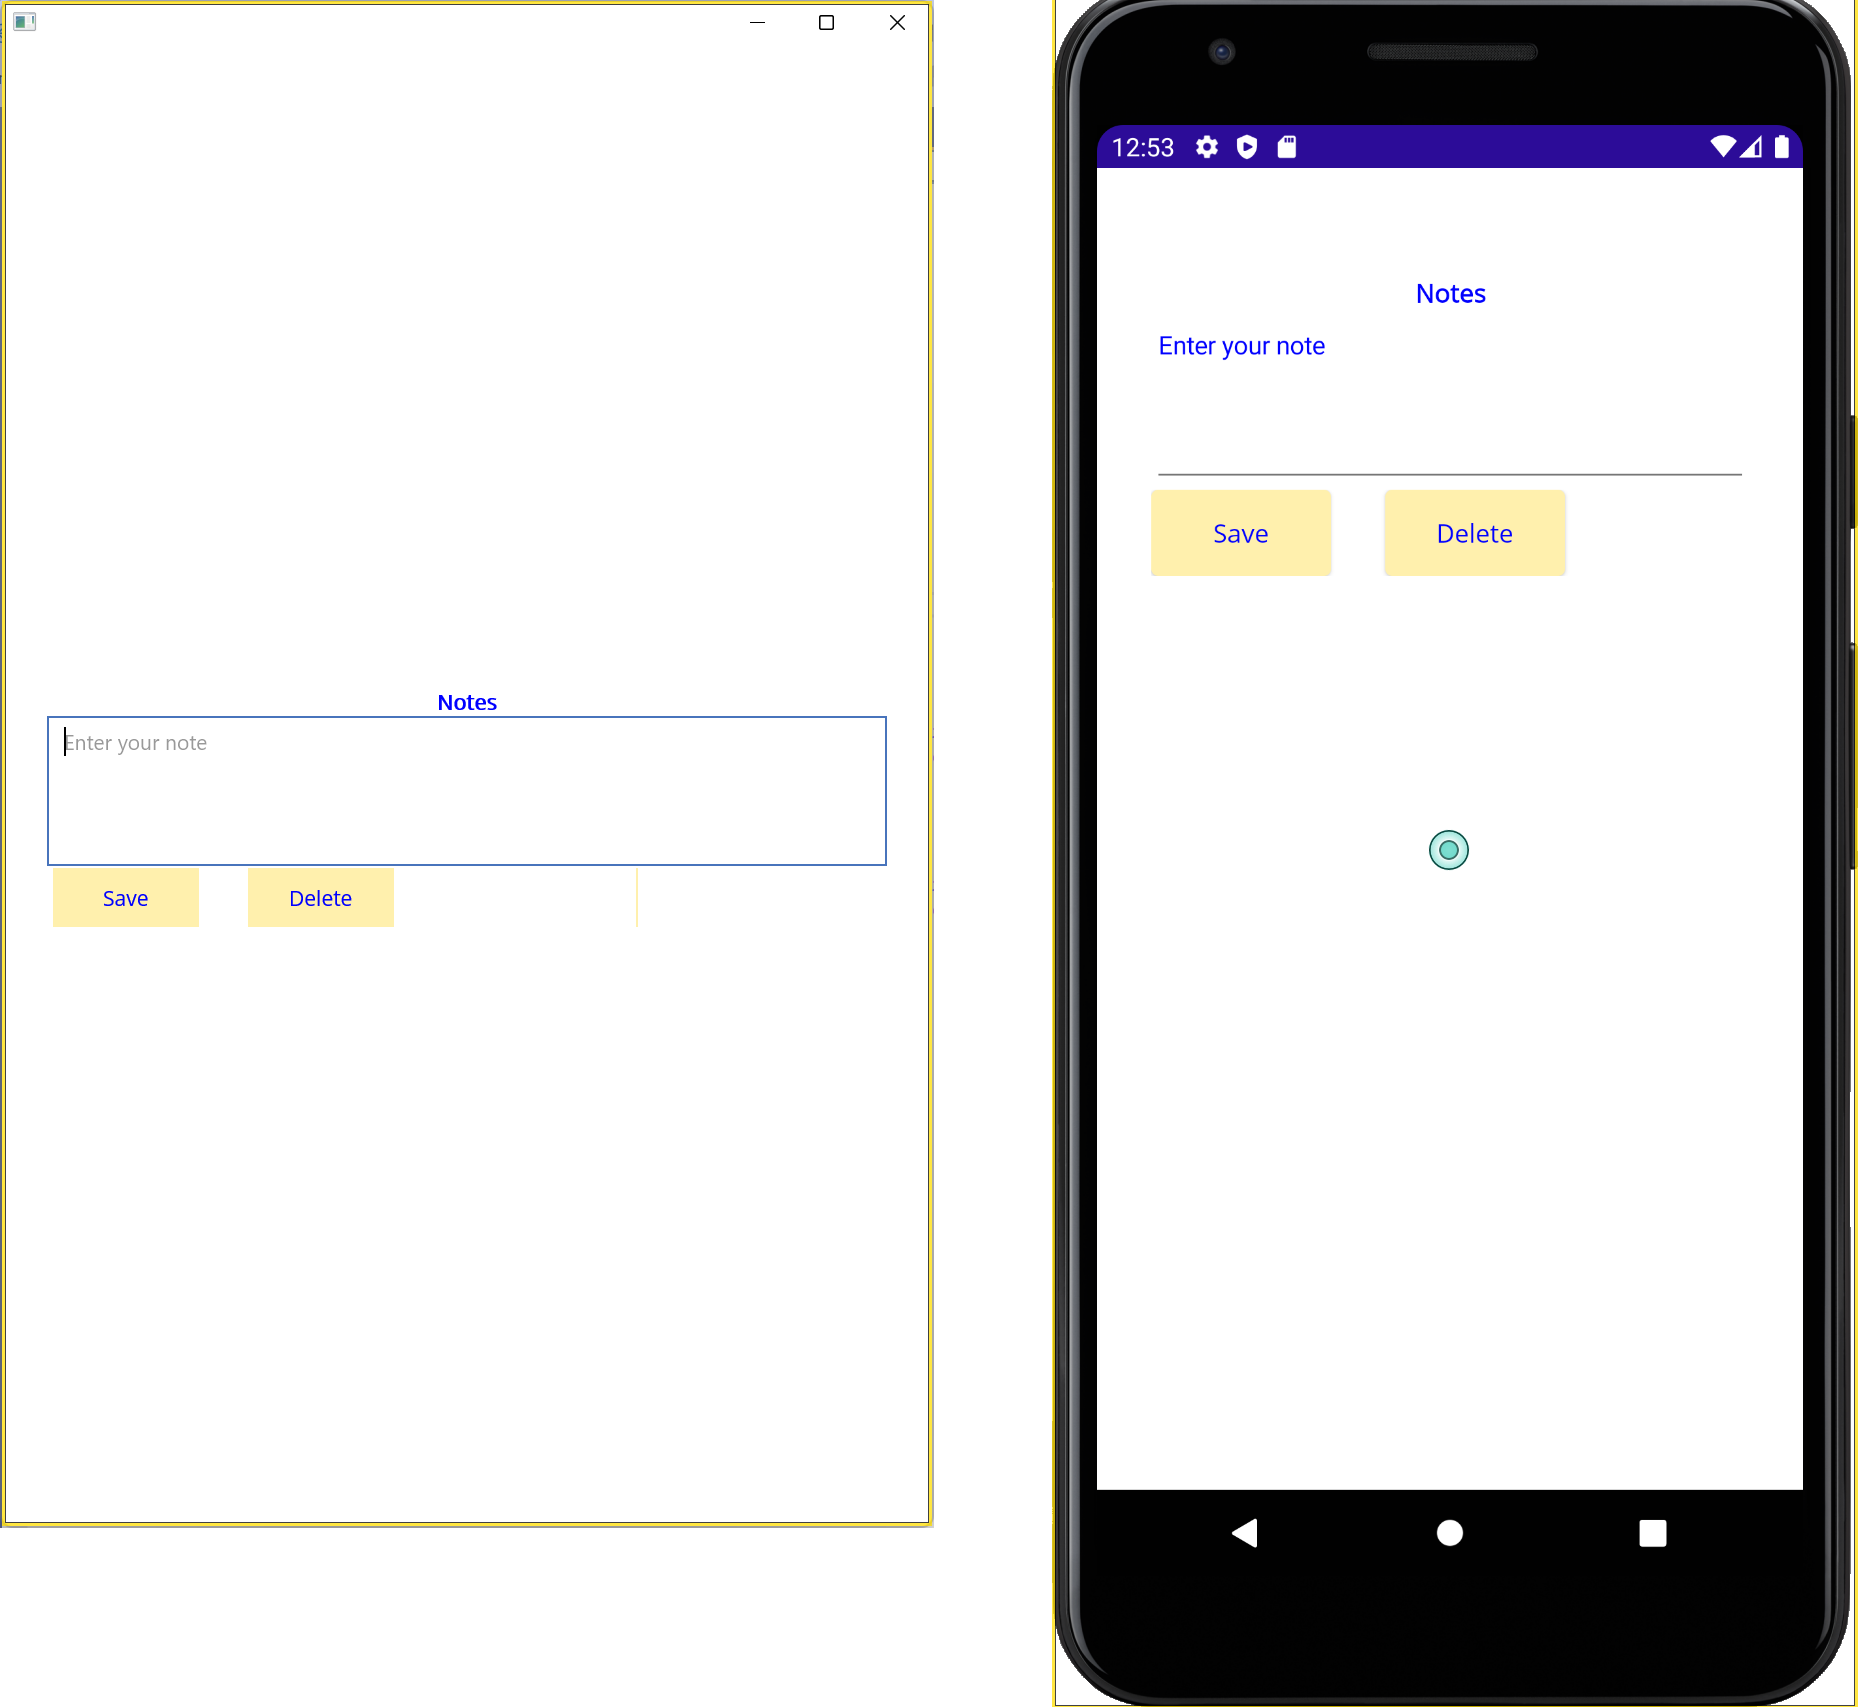
Editorcontrol, and modify the value for the HeightRequest property as shown in the following example:<Editor x:Name="editor" ... HeightRequest="{OnPlatform 100, Android=500, iOS=500}" .../>This markup sets the default control height to 100 units, but increases it to 500 on Android.
Rebuild the app and run it using Windows, then Android. The app should look like this on each platform: