Use your model
Learn how to use your Document processing model in Power Apps.
Quick test
After your model completes training, you can view important details about your newly trained model on a details page.

To see your model in action, select Quick test.
Drag and drop or upload an image from your device to test. From the previous sample data, use the files from the Test folders that we didn’t use for training (either from AI Builder Document processing Sample Data\Adatum\Test or AI Builder Document processing Sample Data\Contoso\Test).
You can now view the detected fields that you chose and the associated confidence scores for retrieving the individual fields compared to the trained model.
Publish your model
Your model can't be used until you publish it. If you're satisfied with your model, select Publish to make it available for use.
Use your model in Power Automate
Now that your model is published, you can use your Document processing model to process documents using Power Automate. A special AI Builder action can be used to ingest documents from emails, document libraries, and other sources, and output the processed data.
Select Use model.
Select Build intelligent automations and select one of the triggers proposed. For this module, we use the Microsoft 365 Outlook work account.
Make sure that you're signed into the flow and then select Continue to confirm the creation of the flow.
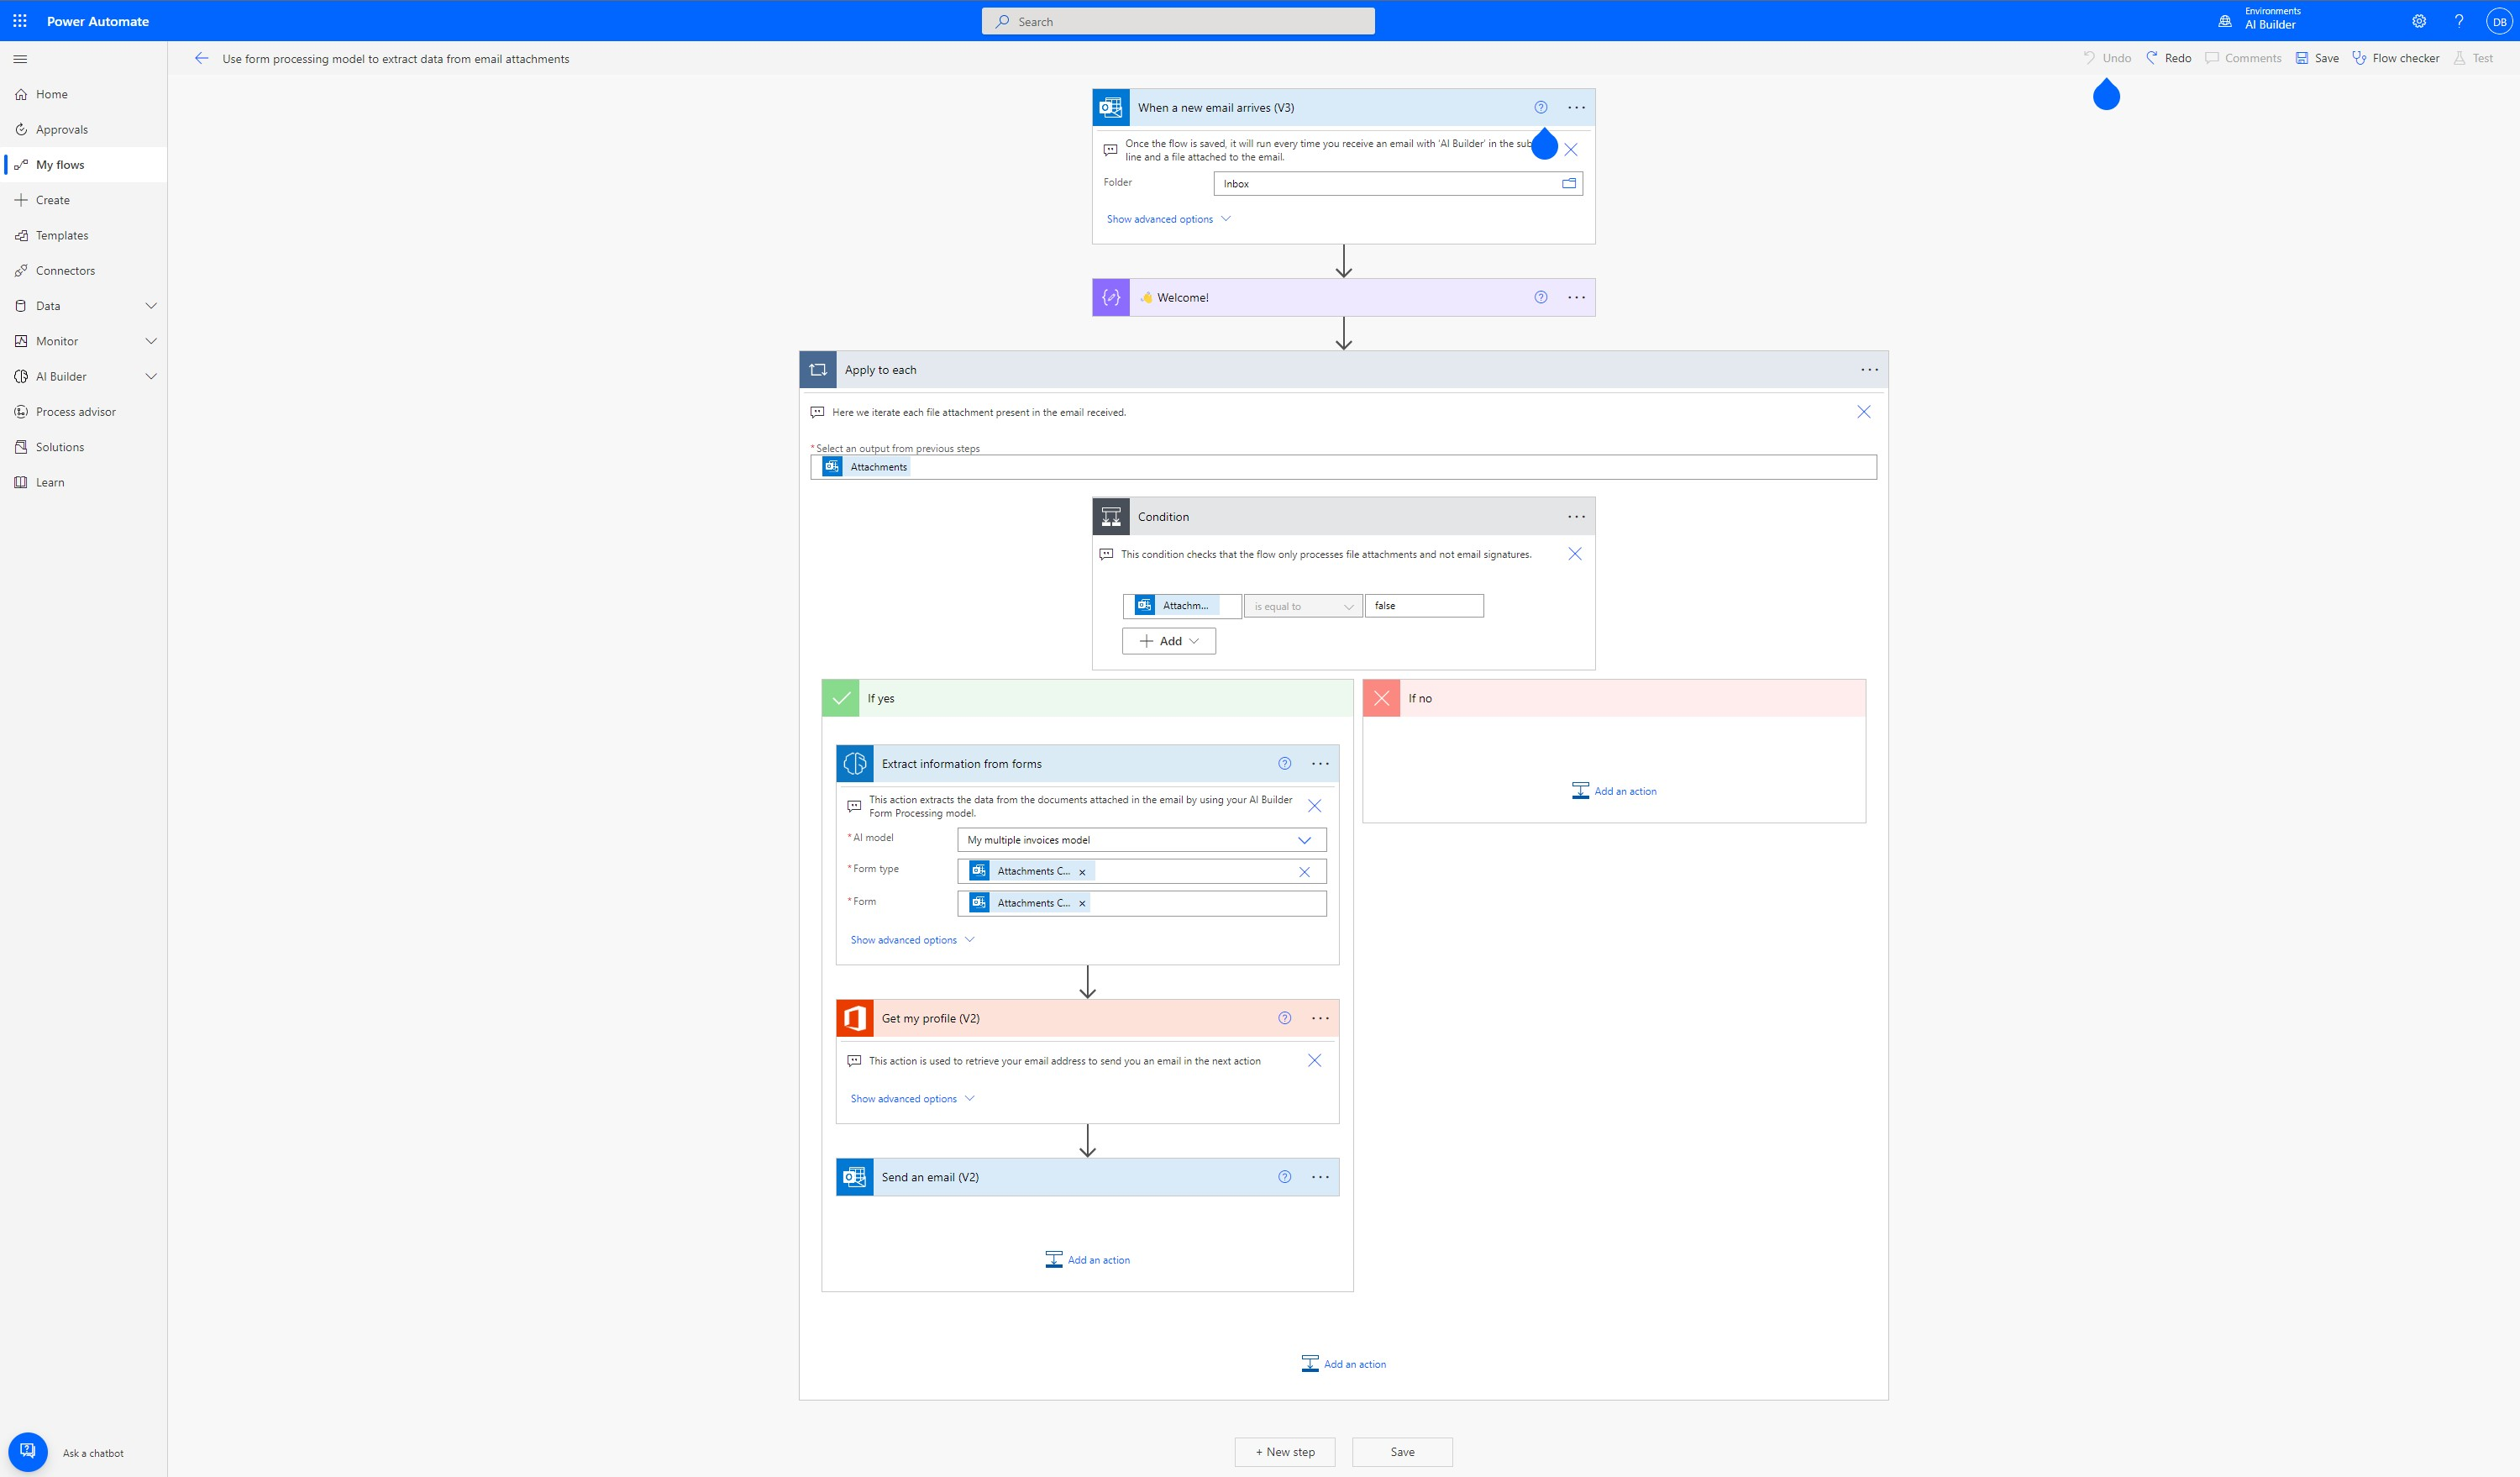
The flow is already configured to run when you receive an email with an attachment and the email subject is: AI Builder. Let's see it in action!
Select Save on the top right to test the flow.
Select Test.
Select Manually and then select Test.
Now send yourself an email with the subject AI Builder and attach the document you used for quick test previously.
After a few seconds, you see the flow running. The flow extracts the data from the attachment and sends you back an email with the results.

Congratulations! You built an intelligent automation flow. You can then customize the flow to your needs to perform any other action you might want.
Use your model in Power Apps
Now that your model is published, you can use your Document processing model in a canvas app. A special component is available for you to add that analyzes any image and extracts the text based on your trained Document processing mode.
From the Power Automate home page, select AI Hub, and select your model under Recently Created.

Select Use model.

Select Build intelligent apps to begin the canvas app creation experience.

Within your canvas app, a Form processor component is automatically added and linked to your published Document processing model.
Note
If you want to add additional AI models to the app, select Insert and then select Form processor to add a Form processor component. Next, select the AI model property from the right hand properties panel. A list of AI models appears to select. Only published models appear in the drop-down list.

Next, we select which field from the invoice to display. Select Insert and then add a Label component.
With the label selected, make sure that Text property is selected in the top left hand corner. In the formula bar, write
FormProcessor1.Fields.This code gives you access to the other properties from the model as well. For this exercise, we choose Invoice Number. The result looks similar to this image.
Note
Notice how 'Invoice Number' is in single quotes in the previous image. This is because when the Invoice Number column was created, the column name was created with a space in between the words. If your columns weren't created with spaces, you don't need the single quotes and your code may look like this image instead.

Next we add a gallery so we can see the data from the items of the invoice. Select Insert and then Vertical Gallery.
In the Items property of the gallery, write:
FormProcessor1.Tables.Items
Select Play on the upper right of the Power Apps studio to preview the app.
Select Analyze and then select the image that you used to quick test previously.

A preview of your document shows the Invoice Number and the items from the invoice.


