How do I use GitHub Actions to create workflows for CI?
Here, you learn about GitHub Actions and workflows for CI.
You learn how to:
- Create a workflow from a template
- Understand the GitHub Actions logs
- Test against multiple targets
- Separate build and test jobs
- Save and access build artifacts
- Automate labeling a PR on review
Create a workflow from a template
To create a workflow, you start by using a template. A template has common jobs and steps preconfigured for the particular type of automation you're implementing. If you're not familiar with workflows, jobs, and steps, check out the Automate development tasks by using GitHub Actions module.
On the main page of your repository, select the Actions tab and then select New workflow.
On the Choose a workflow page, you can choose from many different templates. One example is the Node.js template, which does a clean install of node dependencies, builds the source code, and runs tests for different versions of Node. Another example is the Python package template, which installs Python dependencies, and runs tests, including lint, across different versions of Python.
In the search box, enter Node.js.
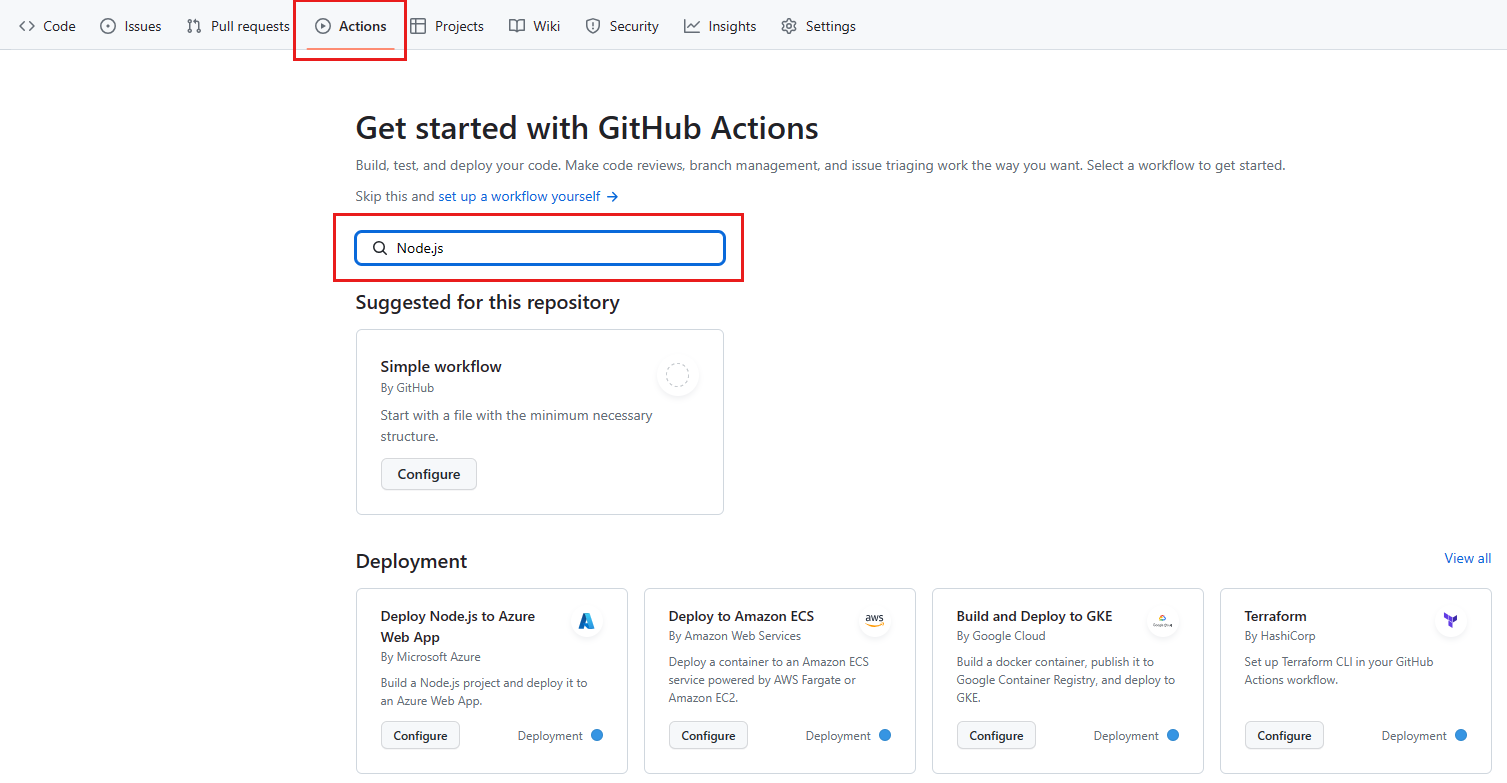
In the search results, in the Node.js pane, select Configure.
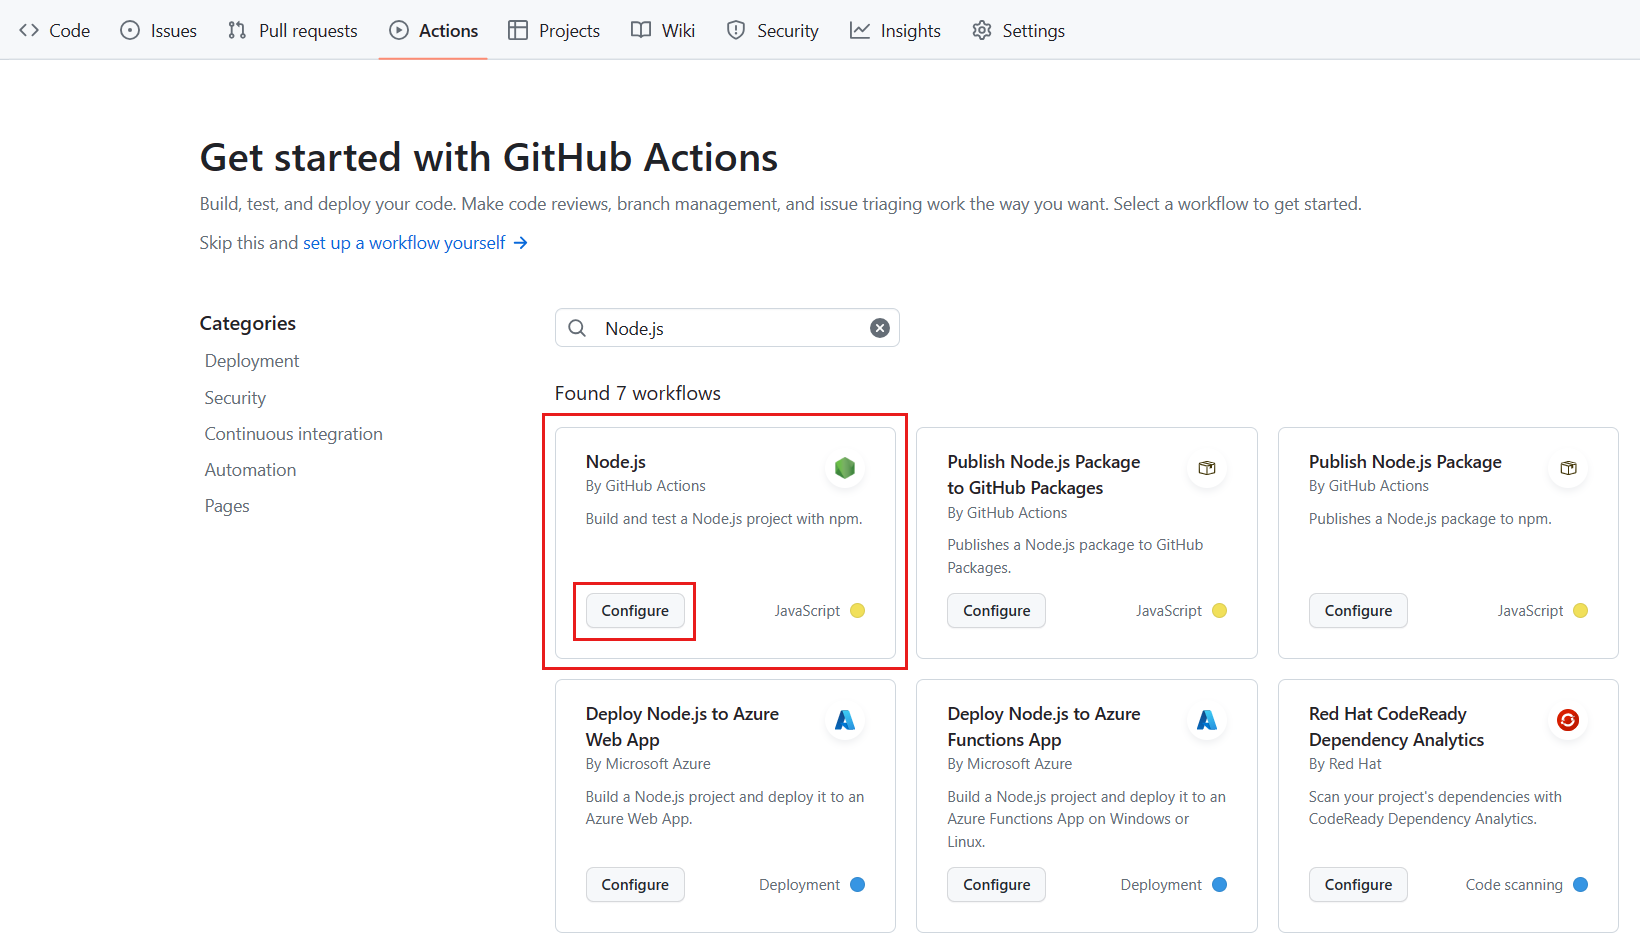
You see this default Node.js template workflow, in the newly created file node.js.yml.
name: Node.js CI

on:
  push:
    branches: [ "main" ]
  pull_request:
    branches: [ "main" ]

jobs:
  build:

    runs-on: ubuntu-latest

    strategy:
      matrix:
        node-version: [14.x, 16.x, 18.x]

    steps:
    - uses: actions/checkout@v3
    - name: Use Node.js ${{ matrix.node-version }}
      uses: actions/setup-node@v3
      with:
        node-version: ${{ matrix.node-version }}
        cache: 'npm'
    - run: npm ci
    - run: npm run build --if-present
    - run: npm test
Notice the on: attribute. This workflow is triggered on a push to the repository, and when a pull request is made against the main branch.
There's one job in this workflow. Let's review what it does.
The runs-on: attribute specifies that, for the operating system, the workflow runs on ubuntu-latest. The node-version: attribute specifies that there are three builds, one each for Node version 14.x, 16.x, and 18.x. We describe the matrix portion in depth later, when we customize the workflow.
The steps in the job use the GitHub Actions actions/checkout@v3 action to get the code from your repository into the VM, and the actions/setup-node@v3 action to set up the right version of Node.js. We specify that we're going to test three versions of Node.js with the ${{ matrix.node-version }} attribute. This attribute references the matrix we previously defined. The cache attribute specifies a package manager for caching in the default directory.
The last part of this step executes commands used by Node.js projects. The npm ci command installs dependencies from the package-lock.json file, npm run build --if-present runs a build script if it exists, and npm test runs the testing framework. Notice that this template includes both the build and test steps in the same job.
To learn more about npm, check out the npm documentation:
Action Logs for the build
When a workflow runs, it produces a log that includes the details of what happened and any errors or test failures.
If there's an error or if a test fails, you see a red ✖ rather than a green check mark ✔ in the logs. You can examine the details of the error or failure to investigate what happened.
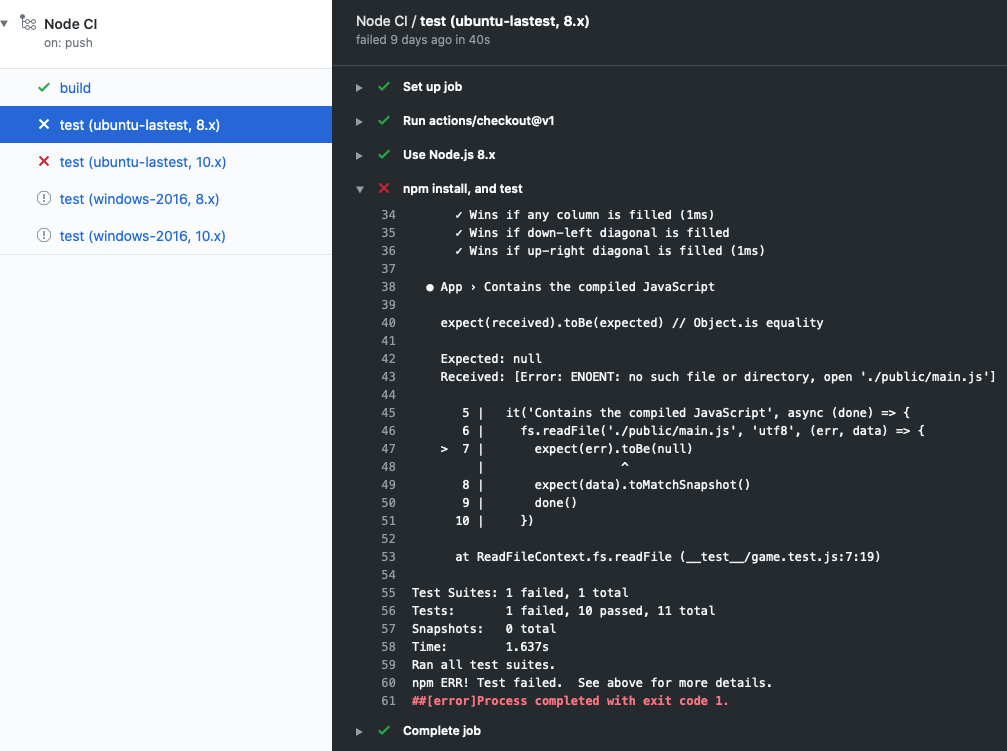
In the exercise, you identify failed tests by examining the details in the logs. You can access the logs from the Actions tab.
Customize workflow templates
At the beginning of this module, we described a scenario where you need to set up CI for your team. The Node.js template is a great start, but you want to customize it to better suit your own team's requirements. You want to target different versions of Node and different operating systems. You also want the build and test steps to be separate jobs.
Let's take a look at how you customize a workflow.
strategy:
  matrix:
    os: [ubuntu-latest, windows-latest]
    node-version: [16.x, 18.x]
Here, we configured a build matrix for testing across multiple operating systems and language versions. This matrix produces four builds, one for each operating system paired with each version of Node.
Four builds, along with all their tests, produce quite a bit of log information. It might be difficult to sort through it all. In the following sample, we show you how to move the test step to a dedicated test job. This job tests against multiple targets. Separating the build and test steps makes it easier to understand the log.
test:
  runs-on: ${{ matrix.os }}
  strategy:
    matrix:
      os: [ubuntu-latest, windows-latest]
      node-version: [16.x, 18.x]
  steps:
  - uses: actions/checkout@v3
  - name: Use Node.js ${{ matrix.node-version }}
    uses: actions/setup-node@v3
    with:
      node-version: ${{ matrix.node-version }}
  - name: npm install, and test
    run: |
      npm install
      npm test
    env:
      CI: true
What are artifacts?
When a workflow produces something other than a log entry, the product is called an artifact. For example, the Node.js build produces a Docker container that can be deployed. This artifact, the container, can be uploaded to storage by using the action actions/upload-artifact and later downloaded from storage by using the action actions/download-artifact.
Storing an artifact preserves it between jobs. Each job uses a fresh instance of a virtual machine (VM), so you can't reuse the artifact by saving it on the VM. If you need your artifact in a different job, you can upload the artifact to storage in one job and download it for the other job.
Artifact storage
Artifacts are stored in storage space on GitHub. The space is free for public repositories and some amount is free for private repositories, depending on the account. GitHub stores your artifacts for 90 days.
In the following workflow snippet, notice that in the actions/upload-artifact@main action there's a path: attribute. The value of this attribute is the path to store the artifact. Here, we specify public/ to upload everything to a directory. If we just wanted to upload a single file, we use something like public/mytext.txt.
  build:
    runs-on: ubuntu-latest
    steps:
      - uses: actions/checkout@v3
      - name: npm install and build webpack
        run: |
          npm install
          npm run build
      - uses: actions/upload-artifact@main
        with:
          name: webpack artifacts
          path: public/
To download the artifact for testing, the build must complete successfully and uploaded the artifact. In the following code, we specify that the test job depends on the build job.
test:
    needs: build
    runs-on: ubuntu-latest
In the following workflow snippet, we download the artifact. Now the test job can use the artifact for testing.
steps:
    - uses: actions/checkout@v3
    - uses: actions/download-artifact@main
      with:
        name: webpack artifacts
        path: public
For more information about using artifacts in workflows, see Storing workflow data as artifacts in the GitHub documentation.
Automate reviews in GitHub using workflows
So far, we described starting the workflow with GitHub events such as push or pull-request. We could also run a workflow on a schedule, or on some event outside of GitHub.
Sometimes, we want to run the workflow only after a person performs an action. For example, we might only want to run a workflow after a reviewer approves the pull request. For this scenario, we can trigger on pull-request-review.
Another action we could take is to add a label to the pull request. In this case, we use the pullreminders/label-when-approved-action action.
    steps:
     - name: Label when approved
       uses: pullreminders/label-when-approved-action@main
       env:
         APPROVALS: "1"
         GITHUB_TOKEN: ${{ secrets.GITHUB_TOKEN }}
         ADD_LABEL: "approved"
Notice the block called env:. This block is where you set the environment variables for this action. For example, you can set the number of approvers needed. Here, it's one. The secrets.GITHUB_TOKEN authentication variable is required because the action must make changes to your repository by adding a label. Finally, you supply the name of the label to add.
Adding a label could be an event that starts another workflow, such as a merge. We cover this event in the next module on continuous delivery with GitHub Actions.