Exercise - Write the expense report details
Adding expense details, or the individual transactions that add to the expense report, is more complex because you're writing many different lines at once.
Instead of connecting directly to the data source, as you would with Gal_ExpenseReports_AllExpenses, you'll store the information in a collection. A collection is a special type of variable that stores a table of data instead of a single record or value. It stores this table for later use in the app.
To implement this functionality, follow these steps:
From the Tree view, go to the Scr_EditExpense screen and select the OnVisible property.
Add the following code to the existing code:
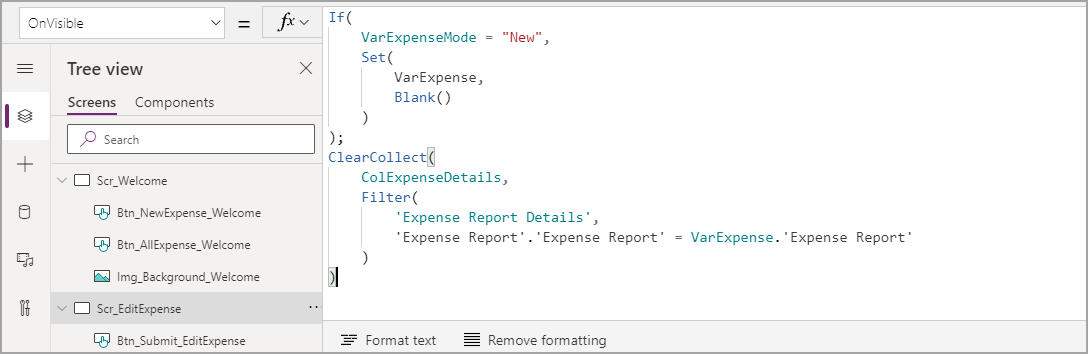
; ClearCollect(
    ColExpenseDetails,
    Filter(
        'Expense Report Details',
        'Expense Report'.'Expense Report' = VarExpense.'Expense Report'
    )
)
ClearCollect() is a function to clear out previous records and begin a new collection. This function is important so that you don't add new expense details from other expense reports.
ColExpenseDetails is the name of your collection. As with variables, this name can be anything that you choose. However, it's a good idea to have a pattern and name it something that you can easily recall.
The last portion shows what is being collected, a filtered version of Expense Report Details. The filter logic uses the Expense Report lookup field in the details table and explores further the globally unique identifier (GUID), which is also called Expense Report.
The Expense Report lookup field is being compared against the expense report that is held in the VarExpense variable, which you can use to uncover the GUID or the Expense Report field. The fact that the GUID has the same name as the table in Dataverse can get confusing. When in doubt, look at your columns in Dataverse.
Your completed OnVisible code should look like the following image.
You can use this new collection that you've created to populate your Gal_ExpenseDetails_EditExpense gallery.
Change the Items property of Gal_ExpenseDetails_EditExpense to
ColExpenseDetails.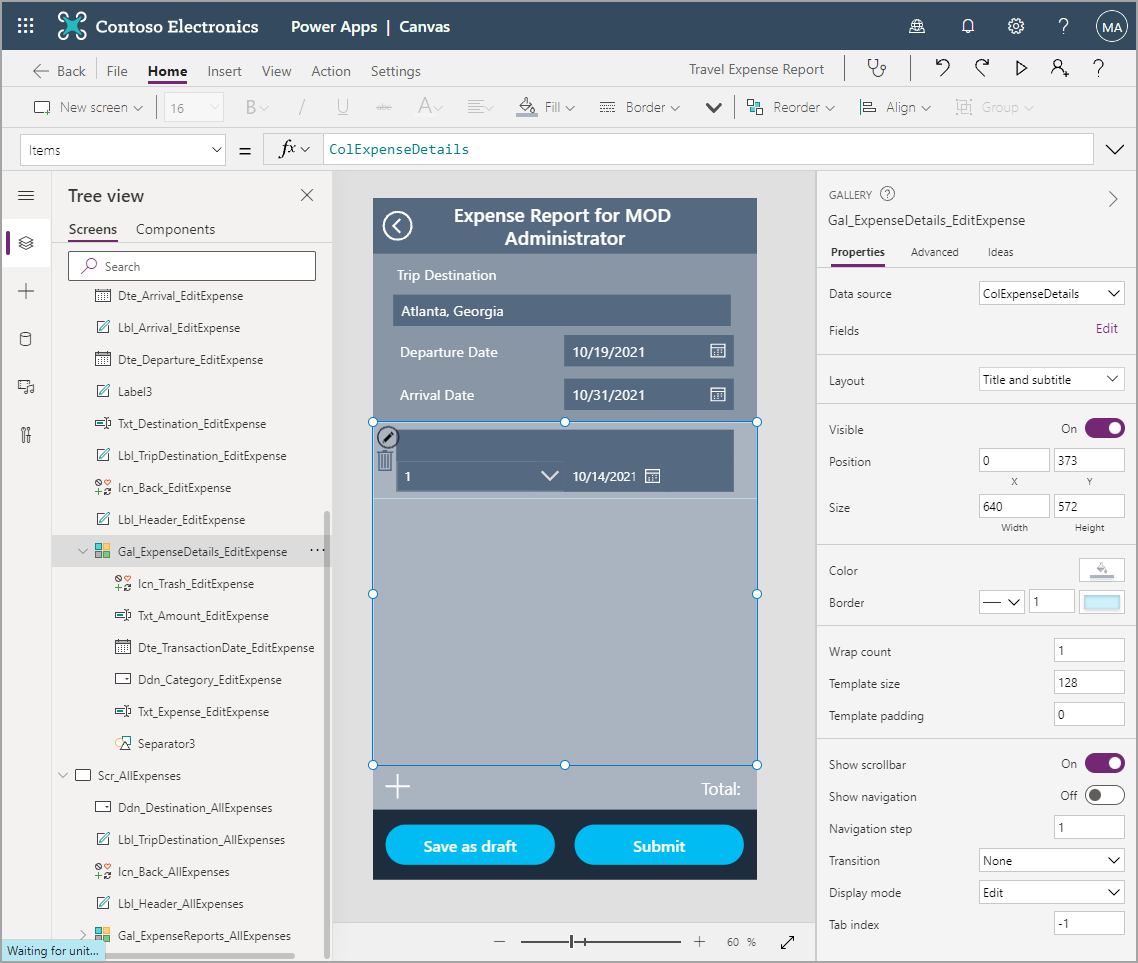
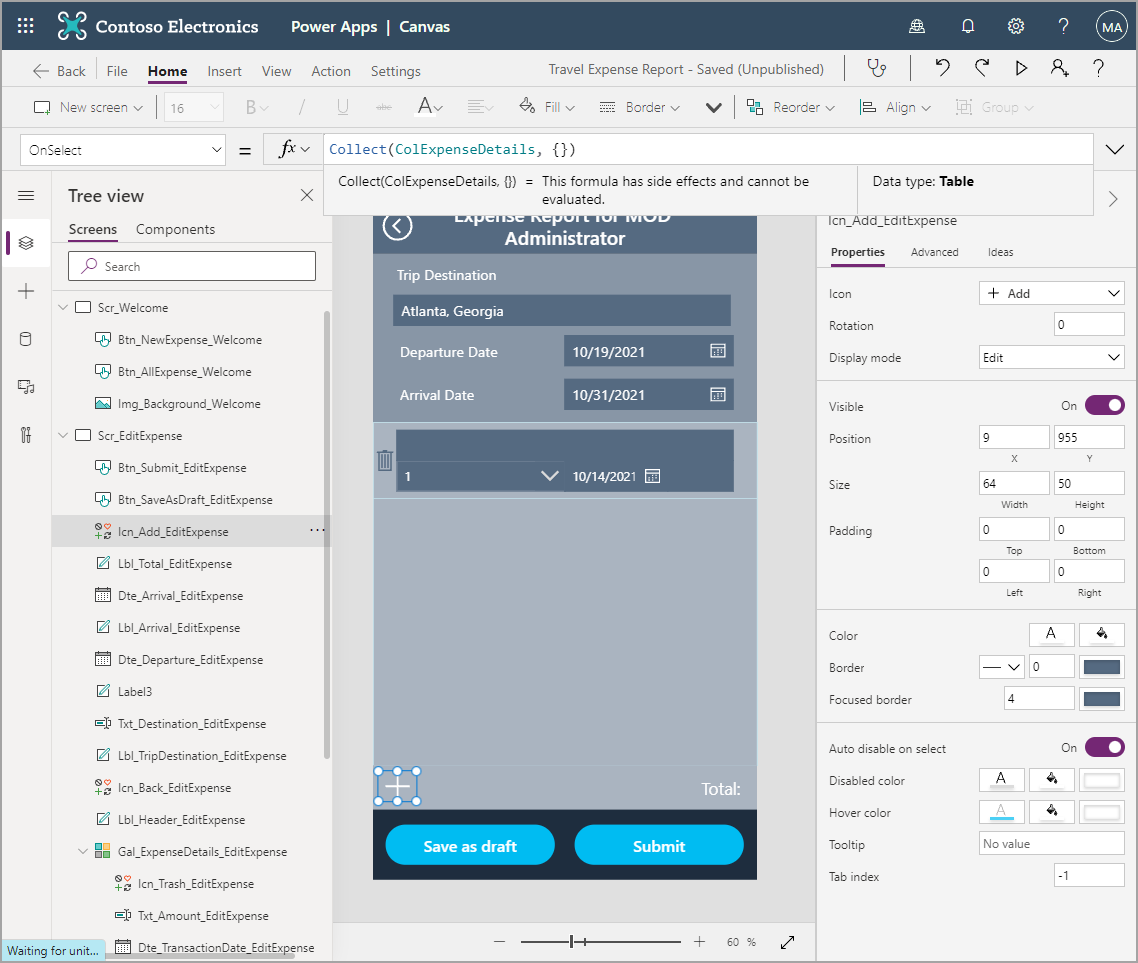
Though you don't have details yet, you can add them with Icn_Add_EditExpense.
Set the OnSelect property for the Add icon to
Collect(ColExpenseDetails, {}).As previously mentioned, Collect() adds on to an existing collection, so this setting will add a new line. The braces {} denote a blank item.
Hold down the Alt key or open the app in Play mode to add a couple of blank lines to your collection.
Now, you need to point to the correct fields in the gallery, as you did in the gallery in the All Expenses screen.
Start with Txt_Expense_EditExpense and change the Default property to
ThisItem.Expense.Update the Items property of Ddn_Category_EditExpense to
["Meals","Lodging","Transportation","Other"].As mentioned in the previous unit, brackets [] define a table. This approach allows you to hard code choices, another way to handle options in a canvas app with Dataverse as the database. This field was defined as text and not a choice field, so you'll write the selected value from the dropdown list.
Update the Default property of Ddn_Category_EditExpense to
ThisItem.Category.Update the DefaultDate property of Dte_TransactionDate_EditExpense to
ThisItem.'Transaction Date'.Update the Default property of Txt_Amount_EditExpense to
ThisItem.Amount.Change the OnSelect property of Icn_Trash_EditExpense to
Remove(ColExpenseDetails, ThisItem).The Remove() function can remove items from collections or data sources. Make sure that you specify the correct record if you're using Remove() with a data source.
After you've finished the logic for the gallery, take a few minutes to test the functionality by adding, deleting, and editing the lines in your gallery.
After you've completed testing the latest updates and functionality, you need to complete a couple more tasks before rolling out this app to your users.
Next, you'll explore and set up the Total field.
On Lbl_Total_EditExpense, add onto the Text property so that it reads:
"Total: " & Text(Sum(Gal_ExpenseDetails_EditExpense.AllItems, Value(Txt_Amount_EditExpense.Text)), "$#,###.00")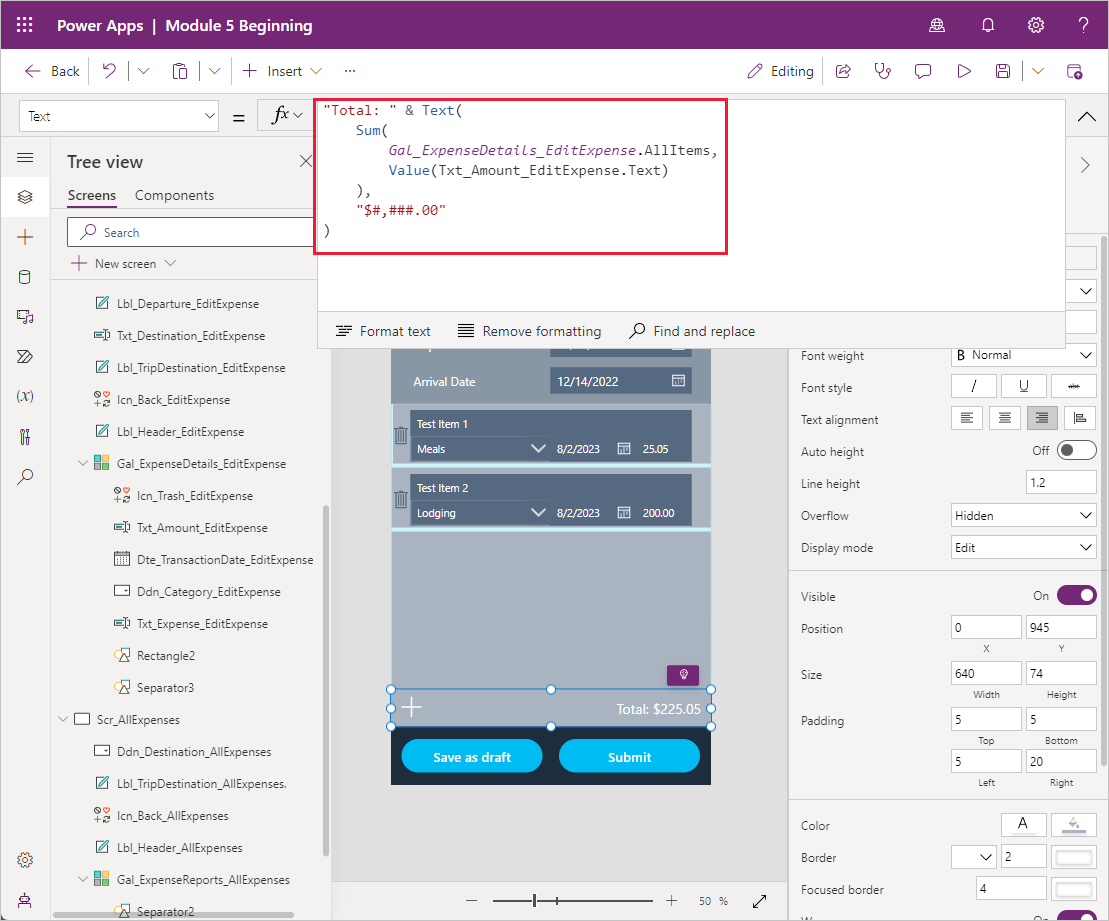
Notice how Text() is used again to format your field the way that you wanted it to display. The new function that you would use is Sum().
The Sum() function captures several numbers (or a table of data) and a specific field in that table and then sums (or adds) each line of the field together. Sum() will only accept a number, so you'll need to wrap the text field in the Value() function, which will convert a text format to a number value.
As long as your collection isn't empty, a new Total value should display in the Lbl_Total_EditExpense label. When you add, edit, or remove items from the collection, the Total value will recalculate in real time.
Your next task is to write to the data source. You can begin with your Save as draft button.
On the Btn_SaveAsDraft_EditExpense button, add the following code to the OnSelect property (after existing code):
; RemoveIf(
    'Expense Report Details',
    'Expense Report'.'Expense Report' = VarExpense.'Expense Report'
);
ForAll(
    Gal_ExpenseDetails_EditExpense.AllItems,
    Patch(
        'Expense Report Details',
        Defaults('Expense Report Details'),
        {
            Expense: Txt_Expense_EditExpense.Text,
            Category: Ddn_Category_EditExpense.Selected.Value,
            'Transaction Date': Dte_TransactionDate_EditExpense.SelectedDate,
            Amount: Value(Txt_Amount_EditExpense.Text),
            'Expense Report': LookUp(
                'Expense Reports',
                'Expense Report' = VarExpense.'Expense Report'
            )
        }
    )
)


The following screenshots show the entire formula bar code. Take a moment to review and confirm that your code matches.


The new RemoveIf() function is similar to the Remove() function, except that it deletes all records that follow a condition rather than a single record.
Make sure that you specify a condition or you might unintentionally delete all of your records from a table. In this scenario, you're deleting and recreating all the expense details, so you don't need to add logic about lines that are edits versus lines that are new. You might notice this condition is similar to the filter that you used to create the expense details collection.
The ForAll() function loops through a table of data, in this case Gal_ExpenseDetails_EditExpense.AllItems, and runs code on each line in the table. The code that's being run for this table is the Patch() statement.
The following example shows the Patch() statement isolated from the rest of the code:
Patch(
        'Expense Report Details',
        Defaults('Expense Report Details'),
        {
            Expense: Txt_Expense_EditExpense.Text,
            Category: Ddn_Category_EditExpense.Selected.Value,
            'Transaction Date': Dte_TransactionDate_EditExpense.SelectedDate,
            Amount: Value(Txt_Amount_EditExpense.Text),
            'Expense Report': LookUp(
                'Expense Reports',
                'Expense Report' = VarExpense.'Expense Report'
            )
        }
    )
The Patch() function writes directly to a data source. Therefore, the first entity that you need to define is the data source that you want to edit, which in this case is 'Expense Report Details'.
The next line defines the specific record in the data source that you're editing. If you're creating a new line, which is what you're doing in this exercise, you'll use the Defaults() function and the name of the data source.
Everything within the braces {} specifies which fields that you're editing and what you're writing to those fields. The following example shows that the field that's being edited is Expense and you're writing Txt_Expense_EditExpense.Text, that is, the text from the text input named Txt_Expense_EditExpense.
Expense: Txt_Expense_EditExpense.Text
The scenario is the same on the next three lines, with minor changes depending on the control that's referenced. On the Amount line, the text is wrapped in a Value() function that converts the text to a number for Dataverse.
The final field that is being written to is 'Expense Report'. This field is a lookup to maintain the relationship between the Expense Report and Expense Report Details tables. As with the Users table, you need to find the correct record in the parent table (Expense Reports). To complete this task, use the LookUp() function.

Now that we've created the ability to save as draft, we'll work on our Submit button in the next unit.